
Several years ago, during a wintertime visit to Zion National Park, we experienced a failure of our HWH hydraulic leveling jacks. It was a self-inflicted wound caused by our lack of attention to a potential cold-weather camping situation. As a result, we needed to figure out how to reinstall/replace RV jack springs.
We learned several lessons in the process, and in this post, we’re sharing them with you. After reading about our mistake and what we did to correct it, you’ll know the tricks we figured out for re-installing RV jack springs. Even if you don’t have the same kind of failure we did, this info will show you how to install new springs on HWH jacks should you ever want or need to replace yours.
Why Would You Have to Replace RV Jack Springs?
There are two main reasons why you might need to replace your RV’s jack springs.
Time and Wear
The springs on hydraulic RV leveling jacks can become worn and/or rusted over time, requiring replacement. If they aren’t retracting completely, or taking an excessive amount of time to stow, sluggish jack springs that have begun to stretch over time may need to be removed and replaced with new ones. But they might also just need a little bit of free TLC.
A few years after we re-installed our springs, as shown below, we noticed that our jacks sometimes seemed a little slow to retract. We happened to be headed through the Midwest, so we made an appointment to stop by the HWH factory in Moscow, Iowa to have them inspected.
HWH took a look and gave our jack system, including the springs, a clean bill of health. While that meant we didn’t need to replace the springs, they did show us a little trick:
PRO TIP: We extended the jacks as far as they could go, stretching the springs to their maximum. We then used a short length of two-by-four to rap/bang along the length of each stretched spring. Whacking all of our jack springs this way loosened and broke up a lot of the surface rust that builds up over time. This immediately improved the speed at which (and how completely) our jacks retracted, making spring replacement unnecessary.
RV Jack Spring Failure Or Disconnect
It’s also possible for jack springs to require re-installation due to a failure caused by a specific event rather than from age. Our self-inflicted problem was a great example of how RV jack springs can become disconnected in unexpected ways. Our old mantra comes to mind here: “We learned the hard way so that you don’t have to!” Because, trust us, you don’t want to do what we did. 🤦♂️
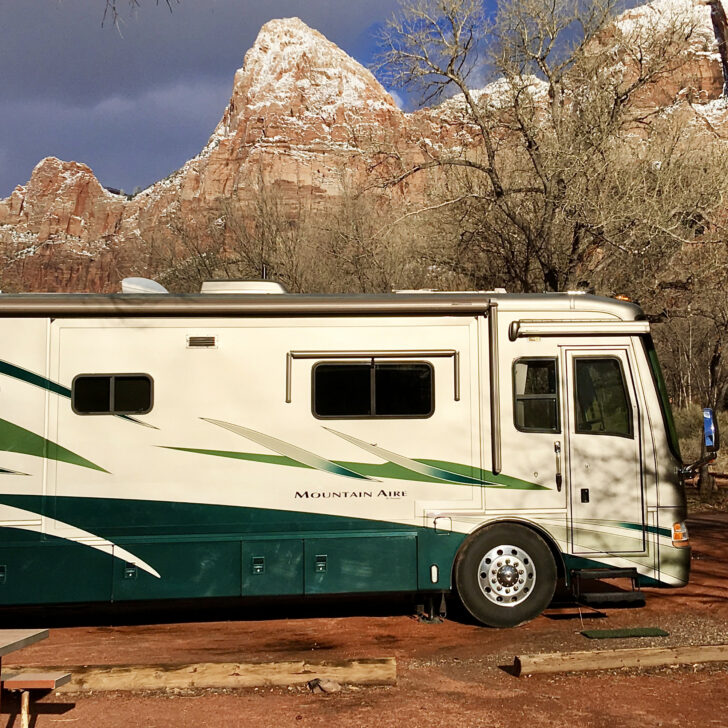
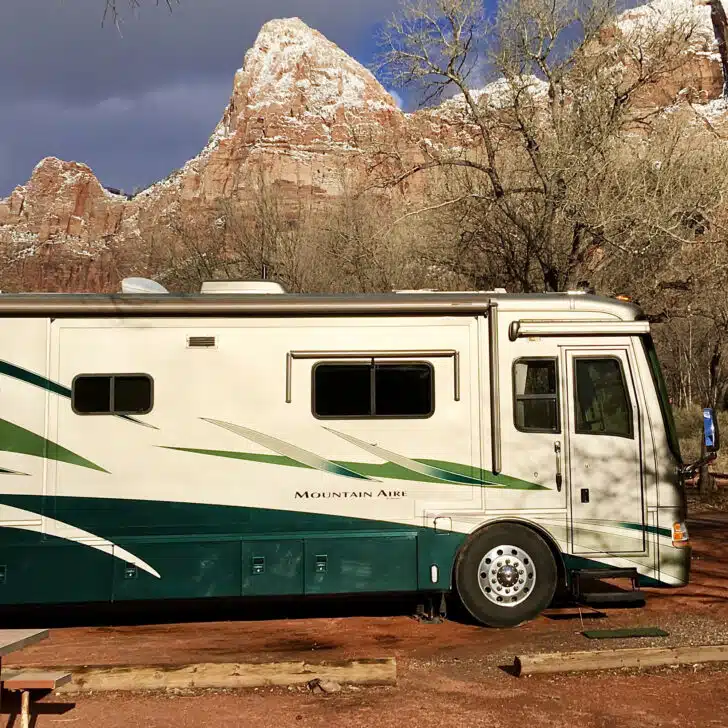
This is our Mountain Aire in a Zion National Park campsite during our very first wintertime visit. The snow in the red-rock mountains is stunning, but can you tell that we’re parked on soil that’s still wet from recent rain? We didn’t think much about that, but the forecast was for overnight lows in the mid-teens (F), and we were planning to leave the following morning. Can you see where this is going? 😬
Our jack failure was a direct result of our failure to plan for an extreme drop in the overnight temperature. We left our jacks down on the wet sandy/muddy campsite surface, which they’d pressed down into pretty firmly. When the temperature dropped to 15°F during our last night in the park, the ground froze solid, of course.
On our departure morning, we fired up our rig in the bitter cold and pressed the “retract” button on the jack controller. As usual, the springs began retracting the jacks as the airbags inflated, initially lowering the RV off the jacks, then slowly raising it again as the suspension aired up for travel.
Shortly after the airbags finished filling, we heard a loud Bang! from underneath the RV. It sounded as though someone had taken a sledgehammer and swung for the fences against our RV’s steel chassis — kind of like a cannon shot.
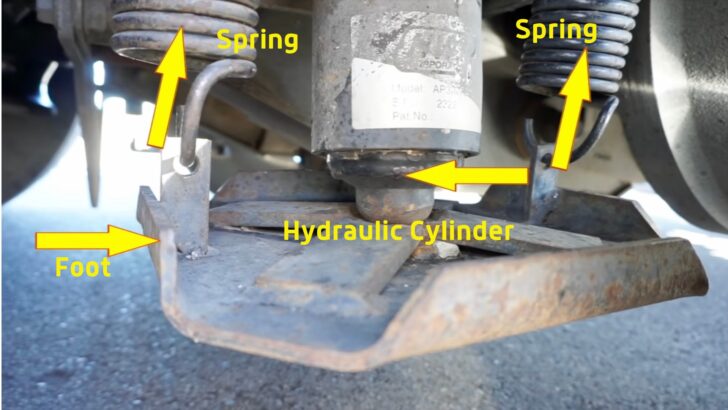
Three of our four jacks had retracted normally. But the left-rear jack’s landing gear, which was firmly pressed into the soil in the dampest part of the campsite, had frozen solid into the ground. This is when we found out that the landing gear at the base of the jack is held onto the hydraulic strut by the springs alone. As the RV lifted up onto the air bags, the landing gear, now frozen to the ground, stretched the springs like pulling back a slingshot.
Considering how powerful the jack springs are, it’s not surprising that it didn’t take long for the tension to overpower the frozen ground as they stretched. The heavy steel jack foot/landing gear broke away from the ground suddenly, slamming into the bottom of the jack piston. That caused the huge bang we’d heard and left the foot dangling by one spring.

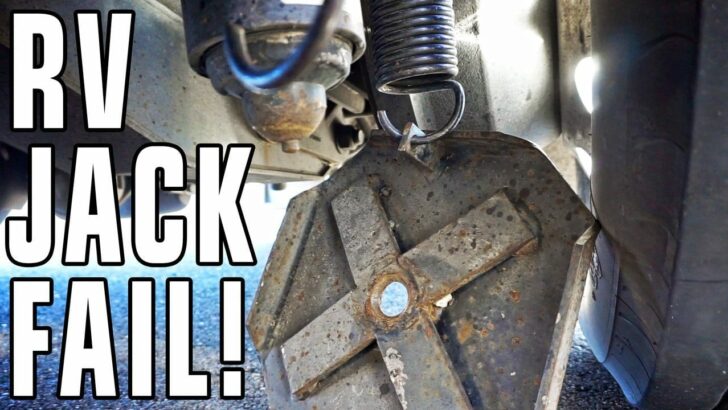
Here’s the foot of one of our HWH hydraulic jacks hanging loose. This was the result of the foot getting stuck into the frozen ground, leaving us with an unattached jack foot, two loose springs, and inoperable jacks. The piston was also left partially extended, preventing us from driving safely. In this photo, we had already pressed it back up into its retracted position for travel (details below).
We had to figure out a way to retract the piston, which was left mostly extended because it’s the springs that pull HWH hydraulic jacks back into the stored position. We completely removed the dangling springs and landing gear until we could get to a good place to repair the jack.
How to Replace RV Jack Springs
The following technique is the method we used to reattach the springs on the HWH hydraulic jacks on our diesel pusher. This technique applies to just about any RV leveling jacks that use external springs to aid in retraction.
The method we used for re-attaching the springs works whether you have a failure like we did or if you need to remove old springs to install new ones.
Note that the jack feet/landing gear aren’t actually connected directly to the hydraulic piston, but are only held in place by the spring tension.

The jack foot/landing gear isn’t actually connected to the hydraulic piston/cylinder. The springs are the only thing keeping it in place. We’d never given that fact a thought until our sub-freezing experience in Zion Nat’l Park.
Press Any Unretracted Jack Pistons Back Up Into Place
This step won’t be necessary if you’re simply doing a planned jack spring replacement. However, if you have an unretracted jack from a situation like we experienced, you’ll need to get the jack piston stowed before driving. Leaving the cylinder extended while driving could lead to serious damage.
You can use a two-by-four as a lever for this purpose, or simply press the piston back into the stowed position using a car jack. We used the weight of our RV and our Utility Blocks to get the job done by lowering the rig down off the airbags.
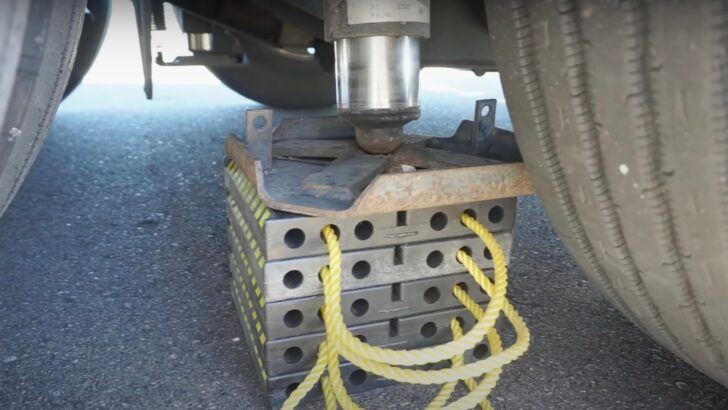

Several Utility Blocks under the foot of our jack enabled us to retract the cylinder before driving the RV.

Next, you’ll need to refer to your hydraulic jack owner’s manual. Our HWH manual showed us which solenoid valve corresponded to the left rear jack. We opened the T-handle release on that solenoid, which allowed the piston to be pressed back into the stowed position as hydraulic fluid returned to the reservoir.
Pressing the “Dump” button on the hydraulic jack controller dumped our airbags. The weight of the RV pressed the jack into the stowed position. We then closed the solenoid T-handle, and we were safe to drive.
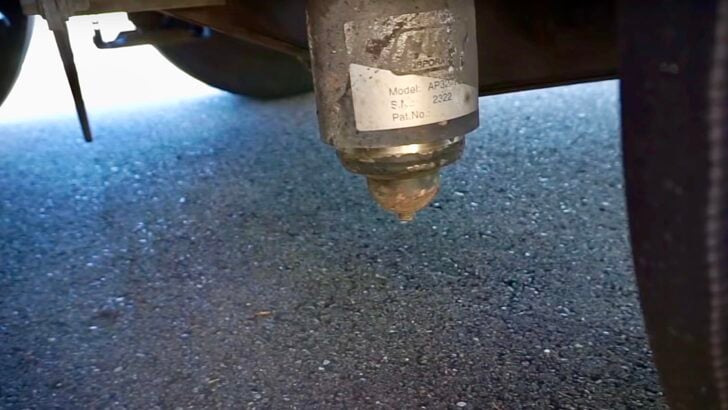
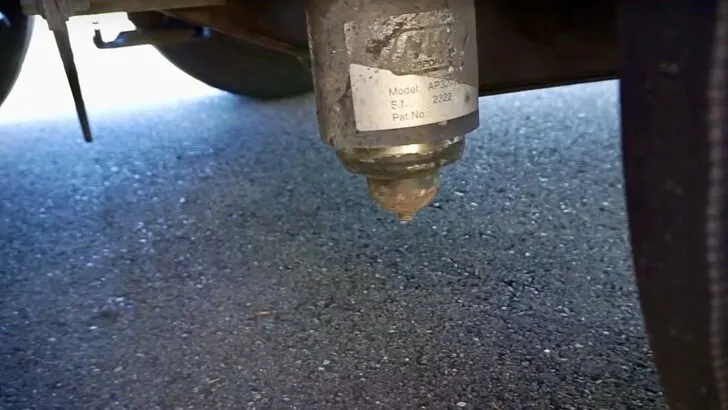
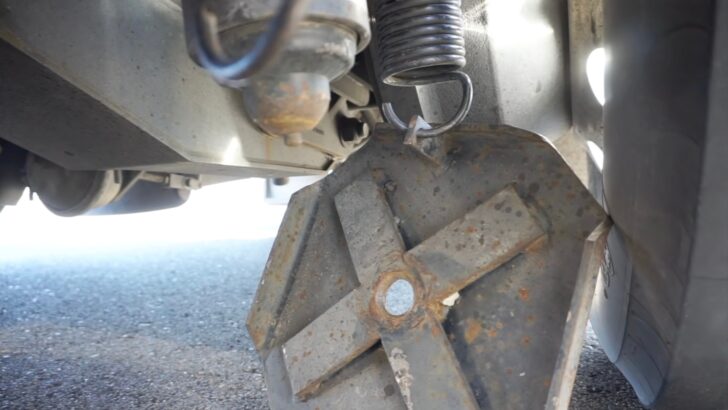
This is our left rear jack, with the piston retracted/stowed. Without the springs and landing gear in place, we couldn’t use our jacks. But we could drive safely until we reached a suitable location to finish the repair.
We drove about 1,200 miles before we arrived at a location where we were able to take the time to repair our jack by reinstalling the springs. We had no problem driving because the cylinder was adequately retracted and not close to the ground. We just couldn’t use the jacks.
For Routine Jack Spring Replacement, Extend the Jacks
If you’re in the situation we were, with the springs already off, leave the jacks fully retracted and jump right to Step #3, below.
If you’re simply replacing your jack springs, and aren’t in a repair situation with the springs already removed, you’ll begin by extending your jacks fully. That stretches/extends the springs and opens the coils. This step is pretty effortless when the jacks are fully in place since the RV does it for you.
However, as you’ll see in the next step, manually opening the spring coils does take some strength and effort.
Shim the Springs to Hold The Coils Open
Getting the springs back into place requires extending their length so that the hooks on each end will reach their mounts on the RV and the landing gear foot. These springs are strong, so working with them while they’re off the RV can take some muscle.
For this step, we used paint stir sticks that we picked up at a home improvement store. The larger size sticks work best because they’re thicker. Any type of shim will do the trick, but as you’ll see below, you’ll need quite a lot of them.

- 【Size and Quantity】You will receive 30 wooden paint sticks, length 12 inch, width 1 inch, thickness 0.12 inch. The paint stick is long enough to...
- 【Sturdy and Smooth Mixing Sticks】These 0.12-inch thick Paint Sticks Bulk have a sturdy quality and can easily mix thick liquids like epoxy resin...
Cut the stir sticks or wooden shims into small sections, roughly a couple of inches long.
If your springs are attached to your jacks and you’re just replacing them, with your jacks fully extended, place your wooden shims between the coils while the springs are extended. Retracting the jacks will then allow the coils to pinch down on the shims, preventing the spring from fully closing down to its shortest length.
In our case, the springs weren’t in place on the RV. So we couldn’t open the spring coils by simply extending our jacks. Here’s how we did it.
While one of us flexed one of the springs, the other inserted sections of paint stir sticks into the spaces between the coils. This required a strong hand and a good grip to ensure the spring didn’t kick out and injure one of us.
Opening up the spring as straight as possible requires shimming the opposite side as well, which can be a little trickier. What worked well for us was using the loose landing gear as a platform to hold the spring more securely. We inserted the hook at the end of the spring into the mounting hole on one side while standing on the other side. We also stuck a tire iron down into the end of the spring to provide additional leverage.
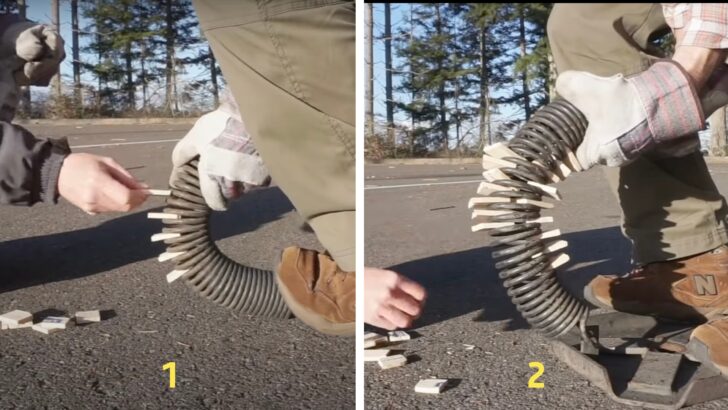

On the left, we inserted the first row of shims between the coils on one side of the spring. On the right, we needed more leverage/grip to insert the shims into the other side of the spring. So we used the loose jack foot as a platform and stuck a tire iron down the top of the spring for more leverage.
We installed enough shims to extend the length of each spring by about three inches, which allowed us to easily slip the springs back into place on the RV.
Another way to expand and shim the springs is to use a vehicle, a couple of tow/ratchet straps, and a sturdy fixed object like a tree or a parked vehicle. Securely attach a tow strap to each end of the spring. Then connect the other end of one strap to the fixed object, and the loose end of the other strap to the vehicle (a trailer hitch makes for a good mounting point).
Then carefully drive slightly forward, just enough to extend the spring and open the coils up for the shims. This same method can also be used to release the shims from the old springs if you’re doing a routine replacement. We learned this trick from our friend Brian of RV With Tito after we’d already completed our repair and think it’s a great idea.
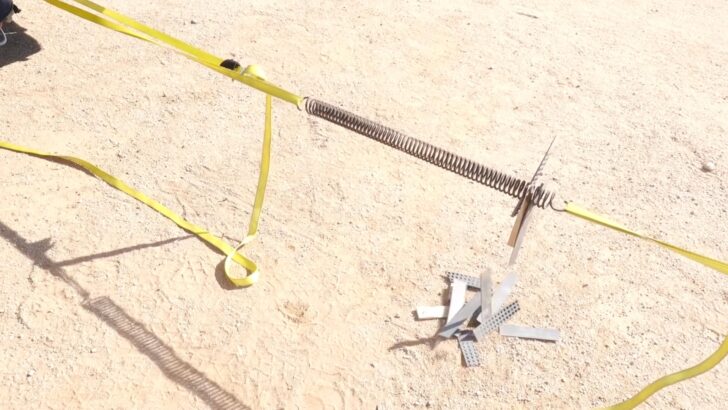
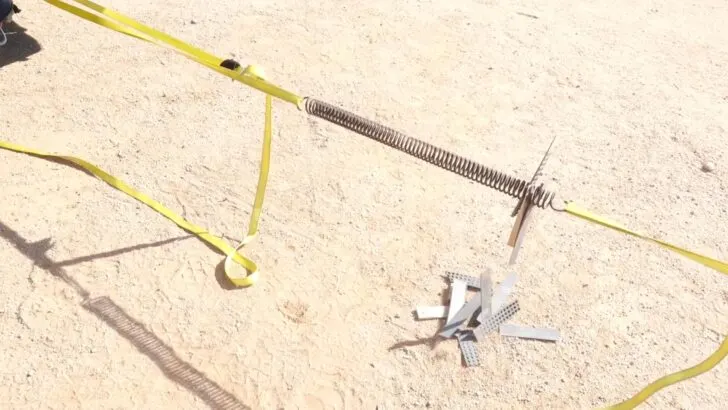
You can also use straps and a vehicle to expand the coils on the springs. Be extremely careful when using this technique, since the powerful spring will be under considerable tension. (Photo source: RV With Tito)
If you decide to use this technique, we’d caution you to be extremely careful. These springs are incredibly strong and can cause serious injury or damage if they let loose unexpectedly.
Install the Shimmed Springs and Replace the Foot
Next, you’ll be installing the springs you’ve shimmed, along with the jack foot/landing gear. In our case, we were reinstalling our old springs in a repair situation. If you’re replacing your old springs, you’ll be installing your brand-new springs in this step.
Again, the purpose of shimming the springs is to lengthen them so that they extend below the hydraulic cylinder/piston. That extra length will allow the hooks at the end of each spring to be easily inserted into the mounting points on the foot.
Simply hang the springs from their mounts on the RV, then replace the jack foot by hanging it at the bottom of each spring.
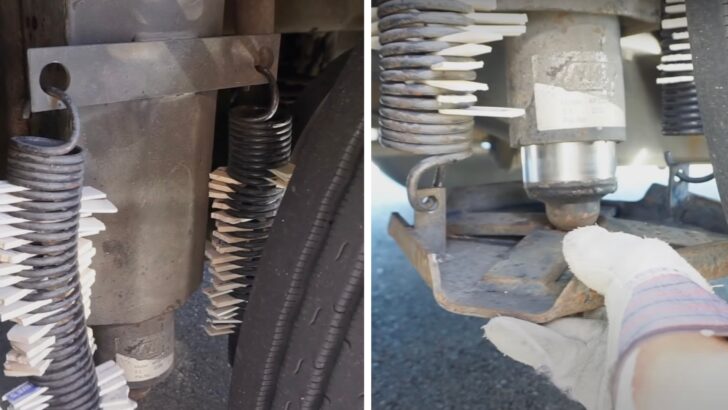

On the left, we’ve hung the shimmed springs in place. On the right, we’ve then hung the foot from the bottom of the springs, and we’re now pressing the button on the jack controller to extend the piston into the foot. Once the piston extends the spring and spreads the coils open, we can easily remove the shims.
Extend the Jacks and Remove the Shims
This step is easiest with two people. While one holds the foot positioned correctly (centered directly under the piston), the other uses the jack controller to begin extending the jacks. As the piston presses down into the foot, the spring coils will expand to allow easy removal of the shims.
For a detailed look at this job, check out our video showing us completing the entire process:
If you find yourself wondering how to replace RV jack springs on your own rig, we hope our experience helps you have an easier time doing the job. For another example of a self-inflicted problem that we had to figure out the hard way, check out our post on having no hot water in the RV.
Free RVing Tips, Tricks, Reviews & Giveaways
As 20-year full-timers, we share everything we’ve learned about RVing over the years. Join our online community to receive a wealth of great RVing knowledge delivered daily to your inbox.
Whether you’re a new RVer or a seasoned full-timer, you’ll love the wide range of RVing topics we cover. Don’t miss a single article or any of our famous Giveaways. Subscribe to our newsletter today!