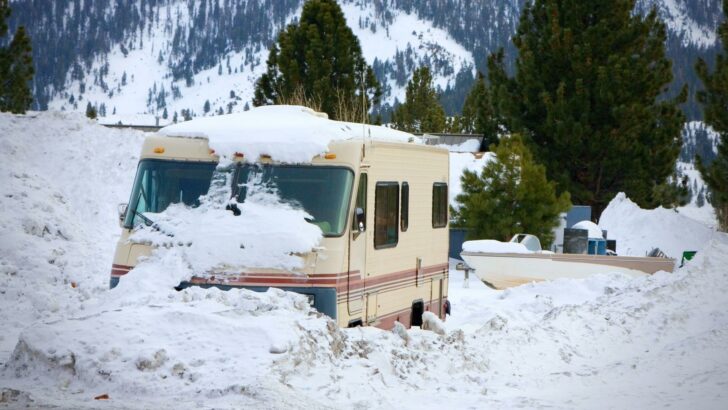

The weather is warming up, the snow is melting fast, the birds are chirping even in the northeast, and here we are – spring is just around the corner! It seems as though we were just sharing our RV winterizing tips when lo and behold it’s almost time to de-winterize your RV!
Spring is an exciting time for RVers. For many, their rig has been winterized and stored for months, and signs of springtime herald thoughts and plans for the upcoming camping season. While winterizing the RV is a dreaded chore because it signals the END of the season for some, the process of de-winterizing is a more joyful, hopeful task. But it’s important to do this task well.
So, in honor of the coming of spring, here are our top 11 things to do to de-winterize your RV.
- 1) Check All Safety Devices and Change Batteries or Devices as Necessary
- 2) Drain Antifreeze From Your Plumbing (If You Used It)
- 3) Sanitize Your RV Water System
- 4) Check for Leaks
- 5) Check Tire Pressures (Including Spare) and Inflate as Necessary
- 6) Check Your Chassis Battery and House Battery System
- 7) Check Inside and Outside the RV for Potential Rodent Damage
- 8) Fill Propane and Fuel Tanks
- 9) Tend to Any Maintenance Tasks
- 10) Test/Run Systems and Appliances
- 11) Clean the Interior
- 12) Now That Your RV’s All De-Winterized…
Check All Safety Devices and Change Batteries or Devices as Necessary
This is our #1 tip for good reason. Your RV has (or should have) three safety devices that are either battery-powered or hard-wired. These would include your carbon monoxide detector, propane detector, and smoke detector. You should also have a fire extinguisher.
Checking the dates on all of your detectors and putting fresh batteries in any battery-operated devices should be at the top of your priority list, as should checking the date on your rig’s fire extinguisher(s). If the date is close to expiring, replace it. Keep in mind that those various detectors, even the hard-wired ones, likely have an expiration date as well. Check ALL of them!
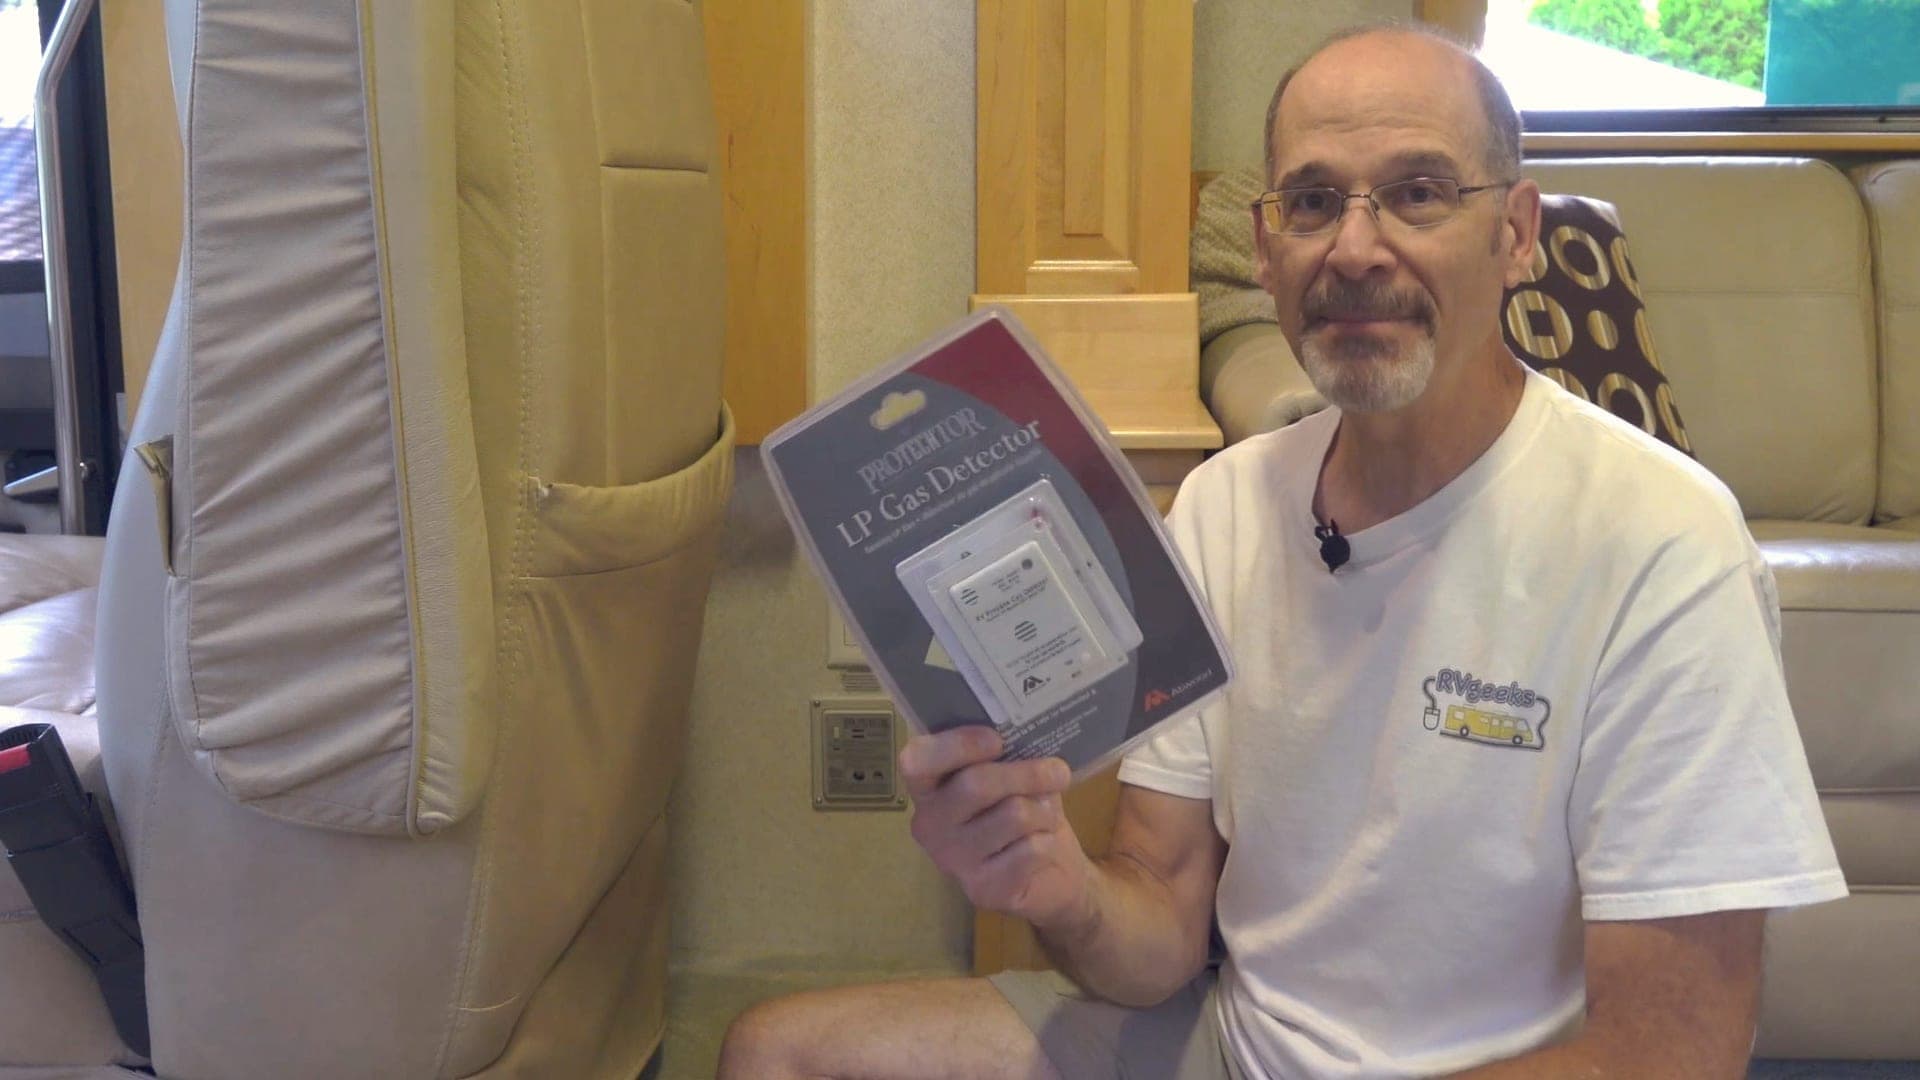
Your safety detectors and fire extinguisher are critical to your safety and that of your family. This is one area where you never want to cut corners. If your safety devices are anywhere near their replacement date, replace them now! And be sure to replace the batteries in your smoke alarm and any other battery-operated safety device as well.
This is important enough to reiterate in bullet form. Check these devices and tend to each one to ensure that you have working safety devices throughout your RV PRIOR to your first trip of the season.
- Smoke detector
- Carbon monoxide detector
- Propane detector
- Fire extinguisher
Important Note: A carbon monoxide detector does NOT detect propane leaks. If you have propane onboard your RV, you need a working propane detector, without question. Carbon monoxide alarms only detect carbon monoxide (typically a byproduct of combustion). They do NOT detect propane, methane, or natural gas leaks.
Drain Antifreeze From Your Plumbing (If You Used It)
If you used antifreeze to winterize your RV’s water lines, now’s the time to drain the pink stuff!
Please remember that it’s important to dispose of your RV antifreeze properly. We’ve noted the details in our post asking “Is RV antifreeze toxic?”, and while it isn’t toxic to humans, it can be toxic to animals… which is made worse because of its sweet smell and taste.
If you winterize your RV water lines with an air compressor as shown below, remember that you poured a few cups of antifreeze down your drains and into your toilet to protect your p-traps.
Sanitize Your RV Water System
Next, you’ll want to thoroughly sanitize your RV’s water system. You’ll want to do this whether you used RV antifreeze to winterize your plumbing system or not. Sanitizing your water system isn’t difficult or expensive, or even all that time-consuming. But it’s important since it helps to ensure you have a safe supply of water on board.
You can follow the steps laid out clearly in our post on how to sanitize your RV water system. And here’s our step-by-step video if you’d prefer to follow along with that.
While we’re on the subject, if you’ve ever wondered how long you can keep fresh water in your RV tank, we’ve got a post on that as well.
Check for Leaks
Water leaks. The arch-enemy of RVers across the globe. Nobody likes a leak, and no leak is harmless.
In spring, after your rig has been stored for the winter (either inside or outside), covered or uncovered, it’s important to check for leaks, especially in the most common places where leaks occur. So as you de-winterize your RV, be sure to check:
Plumbing
Depending on the climate where your RV spends the winter months, there’s a possibility that you’ve got a cracked or broken pipe, valve, or fitting somewhere along the line. When you’re sanitizing your water system it’s a great time to make sure there isn’t a leak anywhere in the system.
Check your pipes, valves, fittings, water pump (yes, these can leak, too!), and don’t forget your outdoor shower if you have one.
Pro Tip: If you turn on your 12V water pump and open a faucet, you’ll hear the pump running. Repeat the process with all faucets/outlets to run the air out of the lines. But if after doing that (and waiting for the water heater to completely fill if you drained it and replaced the plug/anode rod), and after closing all the faucets, you continue hearing the pump running (even just a little or occasionally), then you likely have a leak somewhere in the system. It could be anywhere – from the water pump itself to a valve, fitting, or pipe inside the RV or in your water bay.
Don’t ignore a pump that continues to run once you’ve turned all faucets off. It’s telling you something important, and you want to fix it before a leak can cause damage to your RV.
If you’ve got a problem with your RV water flow pulsing when using the water pump, we’ve got a post dedicated to that problem with all the details. If it turns out that you need to do a DIY RV water pump replacement, we’ve got you covered there as well (including a list of five of the best RV water pumps, should you need that information).
Holding Tanks
You’ll also want to check your holding tanks for leaks. The last thing you want is to find out on your first trip of the new camping season that your RV black water tank is leaking! Or your RV gray water tank for that matter. The contents of gray tanks stink, and can even attract animals to your campsite.
It’s also unlawful for your holding tanks to be leaking onto the roadway or in camping areas, so for many reasons, you’ll want to know if you’ve got a leak to deal with before you hit the road.
Meanwhile, if you’re getting gray water odor in your RV, check out our post about how we solved that mystery when it happened to us. If you prefer to watch us solve that mystery video style, here you go:
Black & Gray Tank Valves
If your black and gray tank valves are leaking or aren’t operating smoothly, then it’s probably time to replace them. Yes, you can do this as a DIY project, but here’s the thing:
If you find that your holding tank drain valves are sticking or are “stiff” and not moving in and out smoothly, you might be tempted to just lubricate them. In order to do this properly, you’d need to lube the blade valve seals and O-rings, which requires removing and disassembling the valve. And if you’re going to take the time to do that, it’s really best to just replace them. They aren’t expensive!
- Bladex waste valve.Fit Type: Universal Fit
- Use with GrenTec, Bladex, Valterra, Bristol, and Anonda valves
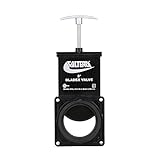
- NO MESS: At-home RV body valve repair is mess-free for your convenience
- VERSATILE: Bladex valve is compatible with GrenTec, Blade, Valterra, Bristol, and Anonda valves
There’s really not much more work required in replacing the valves than there is in lubing them. Check out our video and you’ll see why:
RV Roof
There’s no more insidious damage than a slow leak in your RV’s roof. That’s because you won’t know about it until the damage to your RV’s roof is already done. You’ll want to be sure to inspect and touch up the sealant every year… or twice a year.
Check Tire Pressures (Including Spare) and Inflate as Necessary
Even if your RV hasn’t been driven for months, it’s very likely that your tires have lost air either due to sitting over time, fluctuating temperatures, or extreme cold.
Before you even fire up your RV’s engine to drive to a dump station or to fill the fuel and propane tanks, you’ll need to check your tire pressures. Here’s how to do so properly:
Once you’ve checked the pressure in all of your tires (don’t forget the spare if you have one) with your tire pressure gauge, you’ll want to inflate them all to their proper pressures. Here’s how to inflate your RV tires the easy way.
And if you’re in need of a good compressor for inflating your RV’s tires to their correct pressure, we’re big fans of Viair compressors… available at MobileMustHave.com at 5% off using the following discount code:
Thanks to the latest additions to our RV internet arsenal from MobileMustHave, we're able to stay connected more reliably... and more remotely... than we ever could before. We couldn't be happier...Show More
Thanks to the latest additions to our RV internet arsenal from MobileMustHave, we're able to stay connected more reliably... and more remotely... than we ever could before. We couldn't be happier with the equipment we now have!
Upgrade your RV internet connectivity with great products from Peplink, WeBoost, Parsec, Poynting, Mobile Mark, and more. And while you're there, look at other great products like Viair Compressors!
Watch our video about our RV internet connectivity solutions for 2021
Save 5% on your equipment order at MobileMustHave.com when you click the button on this deal or use discount code "RVGEEKS" at checkout!
Show LessCheck Your Chassis Battery and House Battery System
You always want to check your electrical system prior to heading out on your first trip of the season, and during the process of de-winterizing your RV is a great time to do it.
If you have an RV battery disconnect switch, the first thing you’ll want to do trigger that and turn off power to your RV. From there, the process involved in checking your batteries will depend on the type of batteries you have.
If you have a motorhome, you’ll want to check the condition of your house and engine battery(ies). You certainly don’t want to be stranded on your first trip of the season (or any trip thereafter).
If you have flooded lead-acid batteries, you’ll need to check the fluid in the battery cells and, if necessary, use distilled water to add fluid to the appropriate level. And if you want to ensure that your batteries provide you with their maximum capacity, consider equalizing them while you’re at it.
In this video from way back in 2011, we demonstrate how to maintain and equalize your deep-cycle lead-acid batteries. The process hasn’t changed over time, so feel free to follow along if you’d like to learn how to properly service your batteries:
If a battery hasn’t been cared for at all throughout the winter and you find yourself with a plate or plates that aren’t covered with fluid, you may find yourself in need of a new battery. And we all know that batteries don’t last forever – they do have a lifespan.
So, if for any reason you find yourself in need of replacing house or chassis batteries, feel free to follow along when we upgraded to the Lifeline AGM batteries we had before we upgraded to our current Xantrex lithium system.
Check Inside and Outside the RV for Potential Rodent Damage
It’s no secret to experienced RVers that when the weather gets cold, rodents and other critters look for warm places to take shelter. In doing so, they not only leave some nasty messes behind, but they have the potential to chew on wires and cause some serious, even dangerous damage.
As part of the process of de-winterizing your RV, carefully investigate everywhere throughout your RV to check for droppings, nests, and damage. Be sure to check under the hood throughout the engine bay, under the RV, in every bay and storage compartment, and of course throughout the RV’s living space.
Despite having done everything you can to learn how to keep invasive mice out of your RV for good, they only need the tiniest of spaces to enter, and it’s possible that some may evade all preventive measures.
So, use a flashlight to conduct a good, thorough investigation.
Fill Propane and Fuel Tanks
The de-winterizing process is a good time to top off your fuel and propane tanks if they’re not already full. Refilling your motorhome propane tank isn’t difficult, but it’s something you definitely don’t want to forget to do.
For instance, if you happen to check your appliances (see below) only to find your RV furnace not working, it could be due to an empty propane tank, and you could potentially have a problem to deal with as a result. (So don’t let your propane tank run dry.)
It’s also time to top off that fuel tank so that you’re ready for your first trip as soon as the daffodils appear. Adding even a partial tank will help freshen up the fuel that sat all winter. Since we know that gas prices are affecting RVers’ travel plans, so here are our five best apps to find cheap gas.
Tend to Any Maintenance Tasks
Now’s also the time to tend to a number of important maintenance tasks to keep your RV in top condition. You may be able to tackle most (or even all) of these on your own. These would include such tasks as washing and waxing the RV’s exterior, changing filters, preventing roof leaks with Dicor maintenance and more. Feel free to follow along with us as we conduct our annual RV maintenance and spring cleaning tasks:
This is also a good time to conduct your annual generator maintenance. We do our Onan RV generator maintenance ourselves, and you may either choose to do the same or take it to the pros.
Test/Run Systems and Appliances
We touched on this earlier, but you’ll want to be sure to test and run all of your systems and appliances to make sure they’re all in good working order before heading out on your first trip. If anything requires repair, now’s the time to find out – not when you’re trying to enjoy your first camping trip of the season.
Fire up and run that generator, check the water heater, furnace, air conditioners/heat pumps, check the operation of your slide-outs and leveling jacks, your refrigerator, stovetop/oven, etc. And take your RV for a good shake-down run to exercise everything!
Clean the Interior
Surely you cleaned your rig before putting it in storage, but after it’s been sitting all winter with dust accumulating, now’s a great time to vacuum, dust, wash windows and mirrors, and get the rig all ready for this season’s maiden voyage!
Now That Your RV’s All De-Winterized…
Get out there and have a great summer! We’ll hope to see you out on the road! But, did we leave something out? Do you have a tip for de-winterizing your RV? Leave us a comment below, we’d love to hear it!
Geek Out With Us Every Week
Join our newsletter to learn about all things RV-related. Every week we offer free tips, tricks, product reviews, and more to our online community of RVers. So, whether this is your first time on the road or you’re a seasoned expert, we’d love for you to geek out with us!
Deborah A
Monday 16th of May 2022
Hi John and Peter. Love your site and all the wonderful tips for taking care of our RVs!! I used the blow out method last fall and left the hot water tank in my 2002 Skyline Layton on bypass over the winter with a little RV antifreeze in it. I don't use the fresh water tank since the camper is on blocks and has city water (well water) hook up in the campgrounds. I have a 40 lb regulator on the city line to prevent over pressuring the lines and I replaced it with a new one last fall because the pressure was slowly dwindling at the faucets. This spring, I hooked the city water line back up, and ran the faucets to get the air out, took the water heater off bypass and heard it slowly fill up. But now the water is only dribbling out of the faucets. I tried taking the pressure regulator off the line and it still dribbled, so I don't think that is the issue. I'm concerned that the stop valve in the city water inlet has failed and not letting water into the camper. Would replacing that be your first recommendation to triaging this issue?
TheRVgeeks
Tuesday 17th of May 2022
Hi Deborah. Sorry to hear about your problem. Before doing any replacements, we'd test to see what the water pressure was like when running the water pump (i.e. NOT on city water). Knowing if the pressure/flow was normal using the pump might help you to identify the source of the obstruction.
James Roantworthy
Monday 28th of March 2022
"if you then close the faucet (and ALL faucets are closed) and you’ve purged any air bubbles from the system… but you continue hearing the pump running (even just a little or occasionally), then you likely have a leak somewhere in the system."
If the city water connection has not been used to fill the water heater, the pump will run for quite a while to fill it. It will take 6 gallons minimum up to 10 in some units.
TheRVgeeks
Monday 28th of March 2022
Good point, James! Thanks for adding this!