
Your RV door is an important component of your home-on-wheels. Not only does it secure all of the belongings you carry with you in your home/travel vehicle, but it plays a significant role in keeping you and your family safe as well.
The RV door is also one of the most-used components of an RV, making it quite susceptible to the effects of wear and tear. When you factor in the impact of travel over miles, bumps, dirt, gravel, and potholes, you’ve got a component that can easily degrade over time.
In addition to securing you and your belongings as you travel, a properly functioning RV door protects your RV from such enemies as water damage and small but mighty critters that can rob you of a happy RVing experience.
While your RV door may seem like an afterthought, keeping it in good repair is important for your security and a satisfying RV ownership experience. So, today we’re ringing your RV’s doorbell and inviting you to join us for an in-depth investigation of your RV door, and how to repair or replace it as needed. It’s a natural follow-up to our recent post about RV door latches.
What Are RV Doors Made Of?
Depending on the age of your RV, your RV door is likely made of some combination of wood, metal, and fiberglass.


Depending on how old an RV is, the RV door is likely made of some combination of metal, wood, and fiberglass. Most modern RV doors are composed of aluminum and fiberglass.
Many older RV doors have a wooden frame with some metal components and a fiberglass skin with plastic and rubber seals, while more modern RV doors have an aluminum frame and a fiberglass skin. Gone are the days when RVs were made with all-metal doors with heavy-gauge metal skins and solid locks, which is why we’re talking about repairing and replacing RV doors today.
What Are the Most Frequent RV Door Repairs?
RV doors can sustain various types of damage, but there are a few issues that happen most commonly over time and use. RV doors can leak due to aged or damaged seals, door screens can easily be damaged, and RV door locks can require repair or replacement due to worn or damaged parts or poor alignment.
Let’s take a brief look at each of these common RV door repair issues:
Sealing A Leaking RV Door
Over time, RV door seals can become dry, brittle, or damaged. Seals may need to be repaired or replaced to prevent water from entering the RV or from infiltrating the fiberglass exterior, causing bubbling, rotting wood, or rust, depending on the type of RV door you have.
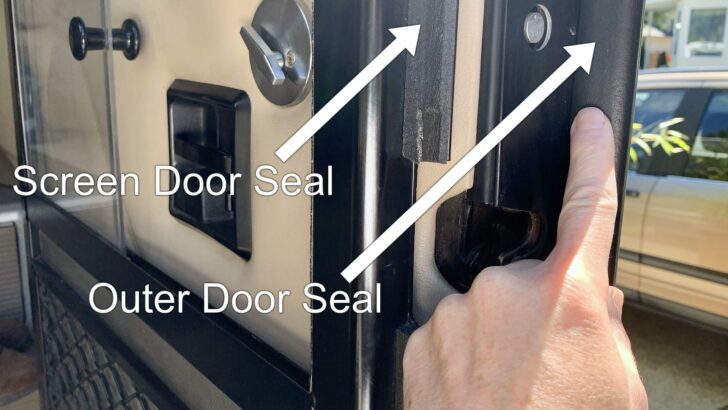

Your RV door may have two seals for helping keep drafts and bugs out. Be sure to inspect them for signs of aging/cracking.
Sealing a leaking door is an incredibly important maintenance item and not one to delay. While water may seem harmless at first glance, it’s anything but – and it can create headaches and costly repairs for RV owners.
RV doors can leak around the door itself requiring repair or replacement of the entire door seal, or they can leak in the area of the window when the window seals become weathered and dry, preventing them from completely sealing the window glass to the frame.
In the latter instance, RV door window seals can be replaced, and windows can be re-seated to reestablish a tight, weatherproof seal.
When the seal around the door frame is leaking, it’s generally best to replace the seal rather than repair it, unless the area in question is very small.
- Once you’ve identified the proper seal for your RV’s door, you’ll need to remove the old seal using a plastic scraper, and thoroughly clean the area. Using a product such as 3M Adhesive Remover is helpful in removing all the adhesive left behind by the previous seal.
- To install the new seal, start on one side of the inside of the door frame and carefully work your way around the door, removing the paper from the adhesive only a few inches at a time as you go.
- Depending on your door, when going around corners, you may want to cut the corners of the seal at a 45-degree angle. You can use cardboard to create a template to make the process easier. If you cut 45-degree angles in the seal, you’ll want to secure the sides of the cut. Superglue works well for this purpose.
- Using the same steps noted above, remove the old outside door seal, clean the area thoroughly, and replace the outside seal.
- Enjoy your new leak-free RV door!
This seal replacement process not only will keep water from leaking into your RV, but also will prevent drafts.
Pro Tip: Maintain your rubber door seals (and window seals and slide seals, etc.) by regularly using a rubber seal conditioner.
- 303 Rubber Seal Protectant provides protection against drying and cracking in extreme temperatures for weather seals
- Restores seal elasticity and conditions weather seals for doors, windows, hoods and trunks
Screen Replacement
We’ve been on the road for nearly two decades now, and we’ve never met an RVer who enjoyed sharing the inside of their RV with bugs! We all understand the importance of a hole-free door screen.
The replacement of your RV door’s screen is another important repair that you can do yourself with a little time and a few tools. You’ll need:
- Replacement screen
- The appropriate size spline (Tip: remove the old spline and take it to the store.)
- Masking tape
- Scissors
- Box cutter
- Spline tool like this one:

- MUST HAVE TOOL – The strong and sturdy screen rolling tool is a must have for replacing window and door screens. It’s extremely economical and...
- DURABLE CONSTRUCTION – With a wooden handle and steel convex and concave roller wheels, the screen spline tool is highly durable. The metal wheels...
We’ll provide the steps to replace the screen – you’ll need to provide the time and patience:
- Remove the spline and the old screen.
- Measure the screen and cut to size using scissors, leaving an extra inch or so around the sides.
- Set the screen frame on a flat surface with the groove side facing up.
- Lay the screen over the frame.
- Use masking tape to adhere three of the sides to the frame to hold the frame and screen steady during the splining process.
- Use the flat-wheel side of your spline roller to press the screen into the groove on the side that is free of masking tape. You’ll want to roll the screen several times to create a clear indentation in the screen.
- Place the spline over the indented screen and use the grooved side of the spline roller to press the spline into the screen and frame’s groove.
- Continue this process all around the frame, removing the masking tape as you approach it.
- Once the spline is well secured in the groove, use your box cutter to cut the excess screen all around the edges.
- If your screen is too tight or too loose, simply remove the spline on one side, adjust the screen, and reinsert the spline.
Lock Replacement
If your RV door lock/latch is not working properly, replacing it will boost your security and that of your family and possessions significantly.
If you want to tackle this one yourself, here’s our full step-by-step guide on how to repair, replace, and install an RV door latch. Just click that link and you’ll be well on your way to replacing your RV door lock.
When Would You Need to Replace Your RV Door?
We’ve already discussed the fact that wear and tear on the door of a home-on-wheels can be significant over time, and seals, screens, and locks may need repair or replacement.

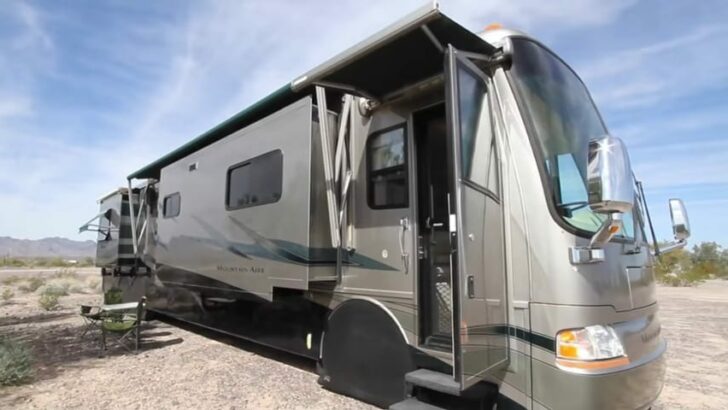
When you travel frequently in your home-on-wheels as we do over bumpy desert roads, potholes, and gravel, a number of issues can occur with your RV door over time.
Hinges on aging RV doors can also degrade, and doors can sag or slip out of alignment for various reasons. RV doors that have degraded over time or sustained physical damage or water damage significant enough to cause rot or rust should be replaced.
The money you’ll spend trying to patch up an old door time and again may be better spent on a new door. More importantly, your security is paramount, and a new door will keep you safer than a patched door.
Can you DIY an RV door replacement? Well, of course, you can! (Yeah, we know – we say that about almost everything.) Stick around, though – and we’ll walk you through the task so that you can decide whether or not it’s one you’d be interested in undertaking.
How Do You Replace Your Exterior RV Door?
Replacing your exterior RV door requires basic tools most relatively handy folks have on hand. There are various types of RV doors on the market, but these are the tools you’ll be most likely to need to replace your exterior RV door:
- New door with frame
- Socket wrench or screwdriver (Powered screwdrivers save time and elbow grease.)
- Nuts, bolts, and screws if they didn’t come as part of a kit with your new door
- Plastic scraper
- Butyl tape or closed-cell foam
Measure and Buy a New Door
The first thing you’ll want to grab is a tape measure. Measure the door opening carefully to purchase the proper replacement door.

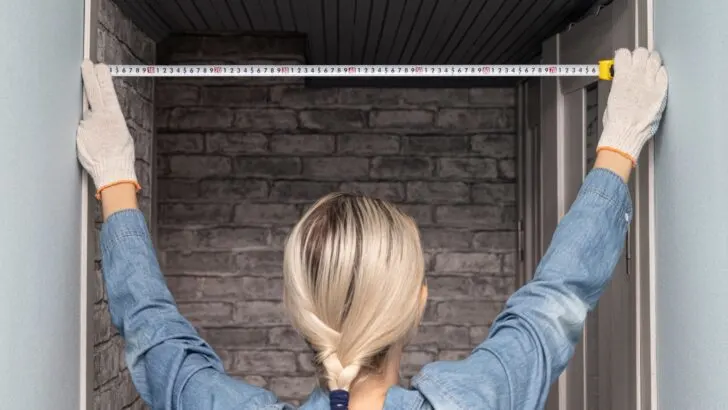
The first step to replacing your RV’s door is to measure carefully so the new one will fit properly.
In addition to measuring from side-to-side and top-to-bottom, be sure that your existing door opening is square by measuring diagonally from the top left corner down to the bottom right corner… and vice versa. If those two measurements match up, you know your door opening is square and a new door will fit correctly.
And check with the manufacturer for your NEW door to see if they need any other, more specific measurements. If your door has rounded corners, you’ll need to establish the radius… and the manufacturer should be able to provide instructions.
Remove the Old Door
Make sure the bolt holes on your replacement door frame match those on the door and frame you’ll be removing prior to disassembling the old door and frame. It’s imperative that the holes on the new frame line up with those on the RV.
Remove the old door and frame using your socket wrench or screwdriver.
Secure the Door Frame to the Wall
Apply butyl tape or closed-cell foam to the outside edges of the opening where the door hinges will attach. This will help to seal your new door frame to the wall. The best choice is usually whatever the manufacturer used during construction.
Bolt or screw the new door into the frame using your socket wrench or screwdriver.
Check the Door’s Swing & Latching
Check to make sure the door swings properly and latches closed securely. If you used it, check for any excess putty from the butyl tape emerging from the sides of your new frame and use a putty knife to carefully scrape it off.
Where Can You Buy a New RV Door?
RV doors can be purchased from many retailers. Your local RV center will either have doors in stock or can order them for you. Retailers such as Camping World sell RV exterior doors, as do many other retailers that sell RV parts. Of course, your RV’s manufacturer can sometimes be the best, or only, source of a replacement RV door. So you may want to check with them, first.
Remember that a quality RV door is important to your security and to the overall health of your RV. The constant use of an RV’s exterior door as well as weather elements and the continuous jarring and rumbling during travel all demand a good quality RV door.
Can You Replace Interior RV Doors?
Of course you can!
Now that we’ve issued our “Of Course You Can!” mantra, we’ll include the caveat that not everyone is interested in or physically capable of handling large items like doors, and there are professionals who will come in and do projects like these for you.
With that said, replacing an interior RV door isn’t any more difficult than replacing the exterior door, as long as you have a few tools, the appropriate measurements, and the right replacement door. (And it helps a lot to have a door-hanging partner because it can be a bit awkward to hang a door alone.)
Interior RV doors are somewhat easier to replace than exterior RV doors, and often far less costly as well.
Conclusion
Your RV door is a critical component of your RV that requires maintenance and monitoring for damage. Regularly treating plastic and rubber seals and avoiding slamming it too hard are two things you can do to treat your RV door with care.
You’re likely to know when some part of your RV door breaks but keeping an eye on the condition of the front door of your home-on-wheels is helpful in maintaining things in good working condition for as long as possible, thus keeping you, your family, and your possessions secure in your traveling home.
Geek Out with Us Every Week
Join our newsletter to learn about all things RV-related. Every week we offer free tips, tricks, product reviews, and more to our online community of RVers. Whether this is your first time on the road or you’re a seasoned expert, we’d love for you to geek out with us!
Deborah Allen
Monday 4th of September 2023
I have a 2004 Skyline Layton park model camper with a sliding glass door that doesn’t roll well anymore. I’ve worked on house sliders before and have been able to screw up/lift up the rollers and lift the door out of the track to clean and powder with graphite to get a smoother roll. (I was told by that home door manufacturer to never use a liquid based spray such as WD40 or it will attract the dirt and ruin the rollers very quickly.) Sometimes I’ve had to replace the rollers but being able to lift the door out to get the right rollers is key to getting either approach completed. Is there a trick to getting the door out? Are the any videos on how to maintain or replace the door if needed?
TheRVgeeks
Monday 4th of September 2023
Oh boy, Deborah. Good questions. We've never dealt with a sliding glass door in a park model before... but we'd think they'd be pretty much the same (and be installed the same) as on a sticks-and-bricks house. You may just have to dig a bit and see if you can find a sticker anywhere indicating the make and/or model of your slider door and see what you can find (an owners/installation manual would be good).
Mark
Sunday 7th of May 2023
Greetings, I need to replace the outer skin on an RV door. Where can I find the material?
TheRVgeeks
Tuesday 9th of May 2023
Oh boy, Mark. That varies by RV. Could be metal. Could be fiberglass. And, we'd guess (could be wrong) that it may end up costing almost as much to buy and replace just the outer skin as it would to just replace the entire door.
jon
Tuesday 11th of January 2022
I'm removing my entrance door the replace the inside vinyl which is pulling away from the door. This needs to be done with the door laying flat. One thing not mentioned here is how much an entrance door weighs. I suppose the weight can vary quite a bit over the range of motorhomes. My 2019 class A has 2 large hinges with 14 bolts in each hinge. To me that says it is very heavy. I'm still researching this project but the weight of the door may be a limiting factor for a DIY job.
TheRVgeeks
Tuesday 11th of January 2022
That's a great point, Jon. Planning to handle the weight of the door is definitely a consideration. Weight will definitely vary by the size & construction techniques for the RV, but even so... a door is a bit unwieldy at any weight. So plan accordingly.
Karen
Saturday 14th of August 2021
We are looking to replace our RV door with a sliding glass door. The camper is permanently parked on our lot, and is a 2004 Franklin park model. Any suggestions? Thanks!
Linda
Monday 8th of May 2023
@Karen, I’m wanting to do the same on my coach. Did you cut and install slider? I’d really appreciate how it went and suggestions for me. Did you YouTube it? My coach is also on land to live in full time. I’d love to hear from you . Pictures would me appreciated too. Thanks so much! Linda
TheRVgeeks
Saturday 14th of August 2021
Hi Karen. Sounds like quite an undertaking! We're guessing you're going to need to widen the opening in order to accommodate a slider, which means you're going to need to cut out a section of the wall (the process for which will vary depending on the construction techniques used for your Franklin). Be sure to check for any power or plumbing lines that might be routed through that area (shouldn't be much since there's already a door there). But this isn't a task we've undertaken, so don't have much more than that to offer. We'd check YouTube to see if anyone has posted a video about their process. Good luck!!!
Rita
Saturday 26th of June 2021
Great article Geeks! Keep them coming! Rita
TheRVgeeks
Sunday 27th of June 2021
Thanks, Rita! Glad you enjoyed it!