
RV skylights are great and most RVs have at least one. But over time and exposure to the elements, RV skylights can crack, allowing leaks that could potentially damage your RV. Even if your skylight isn’t cracked, it may be old and cloudy. As many of you know, we love a good DIY project, and RV skylight replacement is an easy one… and one we’re confident you can accomplish, as long as you’re comfortable getting up on your RV’s roof.
If you’re not able to climb up onto your RV’s roof and work up there, you may have a friend or relative who can help. This DIY RV skylight replacement tutorial is sure to get the job done, one way or another. So, let’s get started.
How Do You Measure an RV Skylight for Replacement?
Prior to RV skylight replacement, you need to buy a new skylight. The most accurate way to measure your RV skylight, of course, is to remove it from your roof and measure the dome/skylight piece itself. But then you’d need to either reinstall it or cover the opening incredibly well until your new skylight arrives.
This might not be a problem if you’re in a location where you can simply go to the store and pick up a new skylight, but for many of us, the easiest way (or the only way) to obtain a new skylight is to order one online. And you don’t want to keep your skylight opening uncovered/exposed for too long.
First, check your RV owner’s manual. You may find the exact measurements you need right there.
Buf if you don’t, and if your skylight dome sits directly on your RV roof like ours, simply measure around the exterior (which you should be able to see under the existing sealant). You’ll also want to measure around the bubble/dome itself, because depending on where you’re buying your new skylight, they may ask for both measurements.
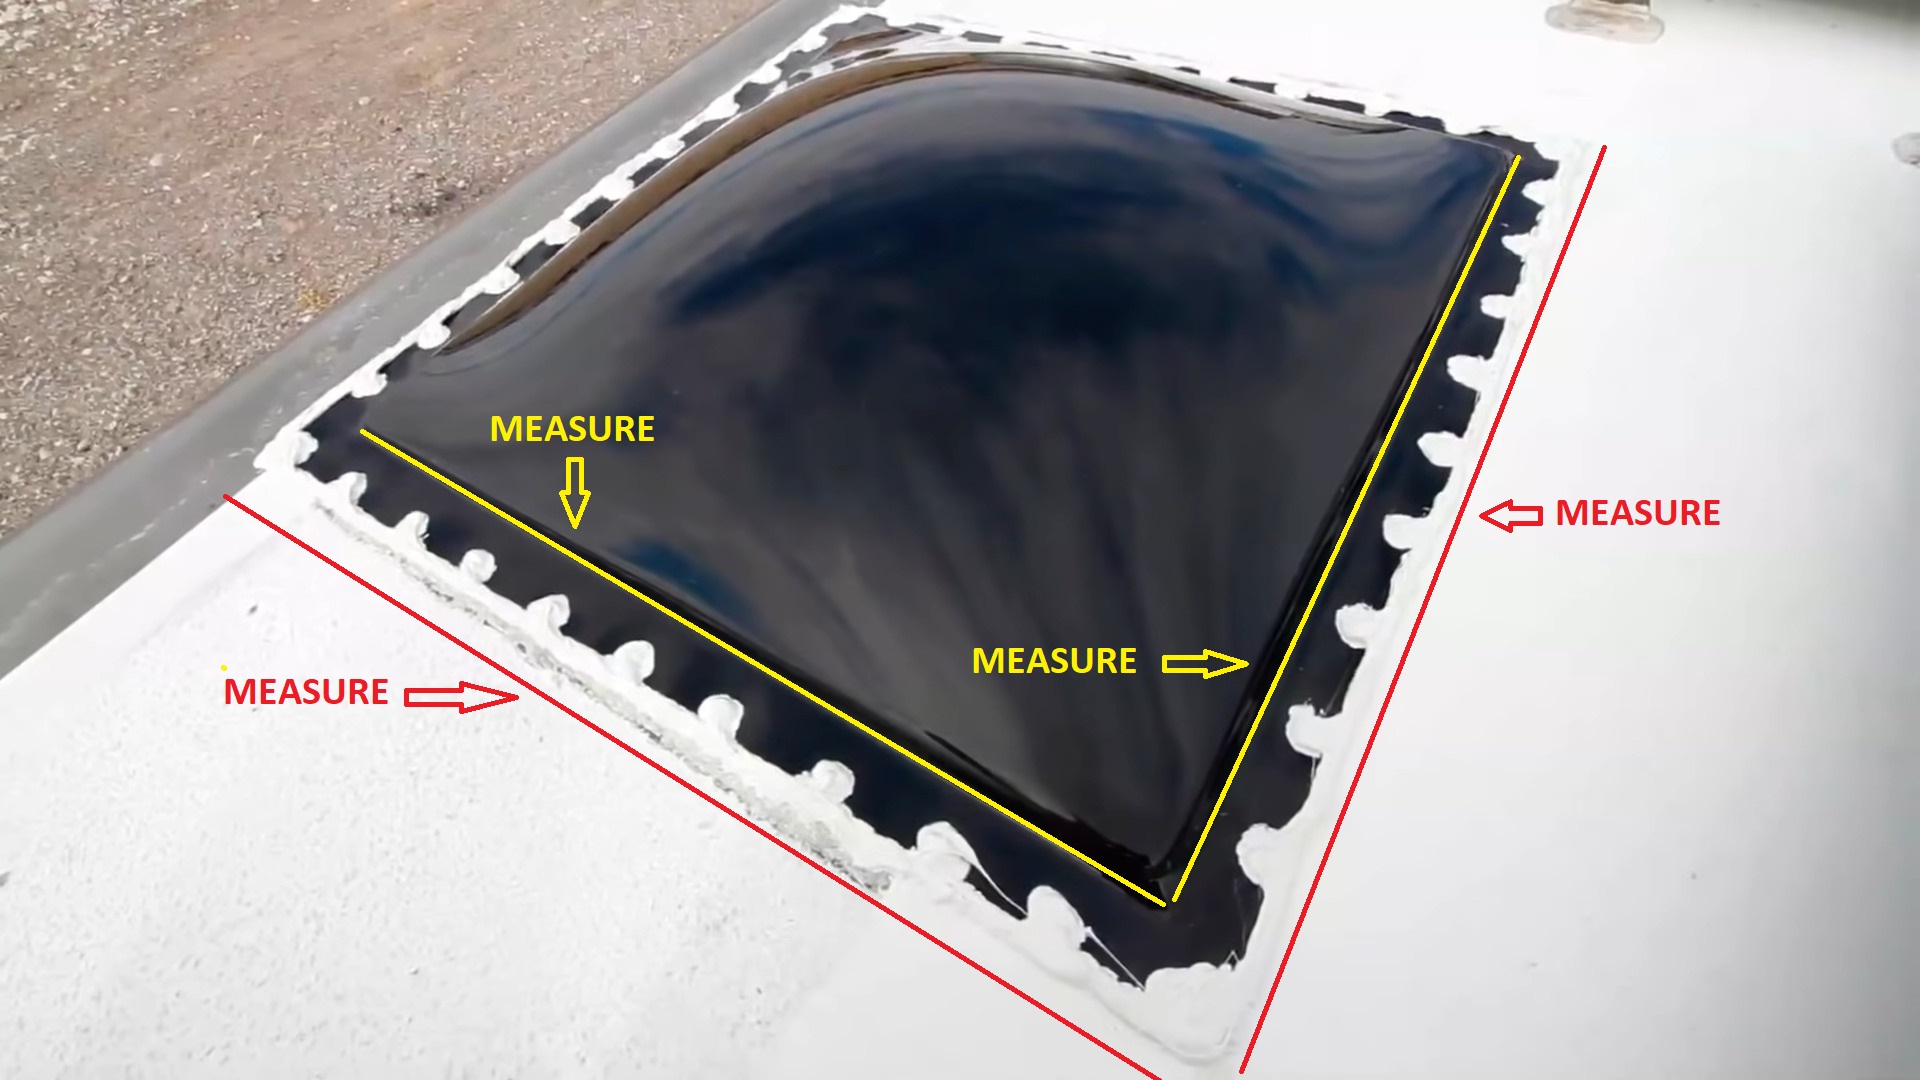

Take the outside and inside dimensions of your old skylight so you’ll know what size to buy prior to removing the old skylight from your RV roof.
Some skylight manufacturers ask for the bubble height as well. This can be taken from inside the RV but may not be necessary.
With these measurements in hand, you should be able to determine the accurate size skylight to buy. (For reassurance, you can call the manufacturer of the skylight you intend to buy or the manufacturer of your RV.)
Where To Buy a Replacement RV Skylight?
First, we recommend checking with your local dealer, who is the most likely source of a direct replacement for your original skylight that was installed by your manufacturer. If they’re unable to help, you can also try contacting your RV manufacturer directly. Not all of them are able to sell parts directly to customers (the way Newmar can & does), but it’s worth a shot.
If you’re still coming up empty, you can check with the following RV skylight manufacturers to see if they have what you need:
How Do You Replace an RV Skylight?
Once you’ve located, ordered, and received your new part, RV skylight replacement is a project that requires a bare minimum of tools, a couple of hours, and the ability to work on your RV’s rooftop.
What You’ll Need:
- Putty knife (we recommend plastic, as it’s safer for rubber/EPDM/TPO roof material)
- Can of mineral spirits
- Caulk gun
- SureBond SB140 sealant (We recommend having two tubes on hand for this job. One tube just barely did the job for us, and we’ve heard from others that they couldn’t complete the job with a single tube.)
- Drill/Screw gun (or screwdriver, but fair warning, there are a lot of screws involved)
- Rag
- Nitrile gloves (mostly to protect your hands from the mineral spirits)
- Some self-drilling screws (We recommend removing one screw from your old skylight to determine the length you need for your RV. You may be able to use the old screws, but your new skylight could require more screws than your old one, and it’s good to have some extras on hand in case you need them.)
RV Skylight Replacement Step-by-Step
- Use your putty knife to scrape away enough sealant to expose the screw heads and remove all screws.

Carefully scrape the old sealant away with a putty knife, exposing the screws.
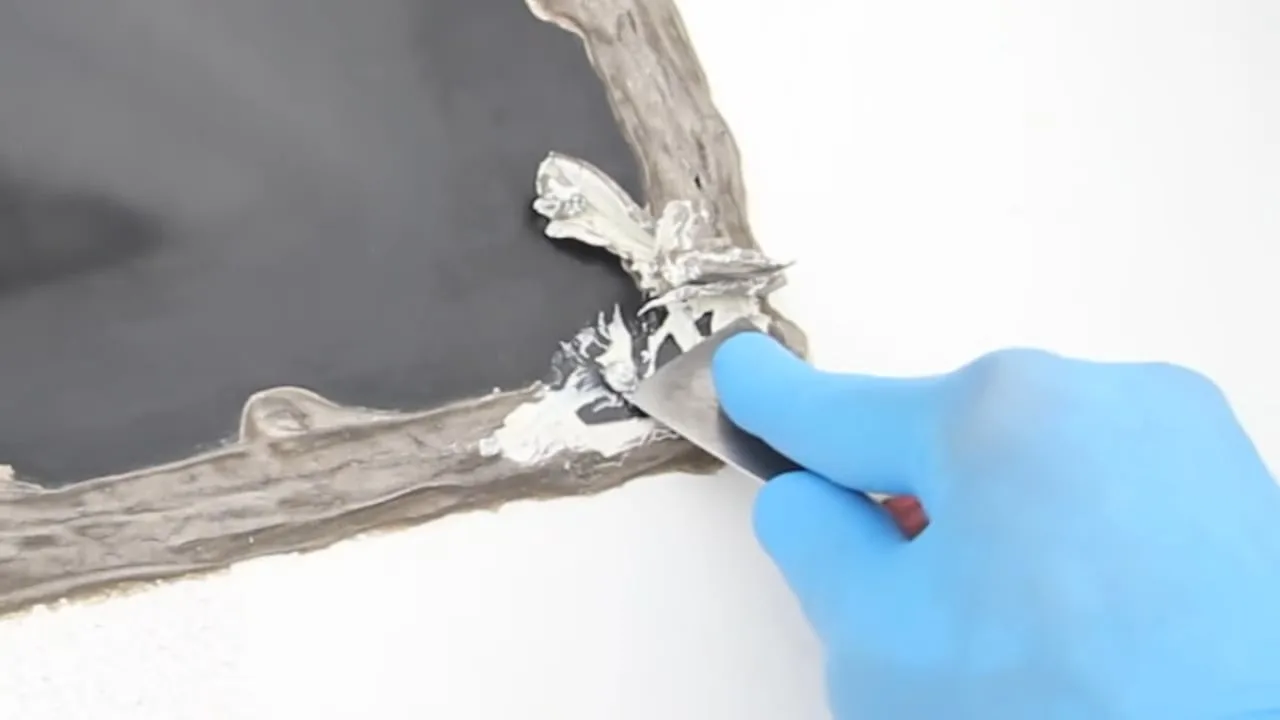
2. Use your putty knife to cut the sealant holding the old skylight to the roof. Note: If you have a rubber/EPDM roof, be extra careful not to accidentally cut into it. Break away the old sealant from around the perimeter of the skylight, lift the old skylight off the roof, and then continue using your putty knife to scrape away excess sealant.
3. Use mineral spirits on a rag to clean off any remaining sealant or debris. If your roof is rubber/EPDM, use mineral spirits very sparingly, making sure not to soak the roof material, as this could cause it to separate from its backing. Note that if you have a roughened roof surface, you may not be able to get all of the old sealant off. As long as you remove the excess, don’t worry about getting it all. Cleaning it with the mineral spirits will ensure the new sealant will properly adhere.

If you have a rubber/EPDM roof, use mineral spirits very sparingly so as not to damage your roof. Our roof, shown here, is fiberglass.
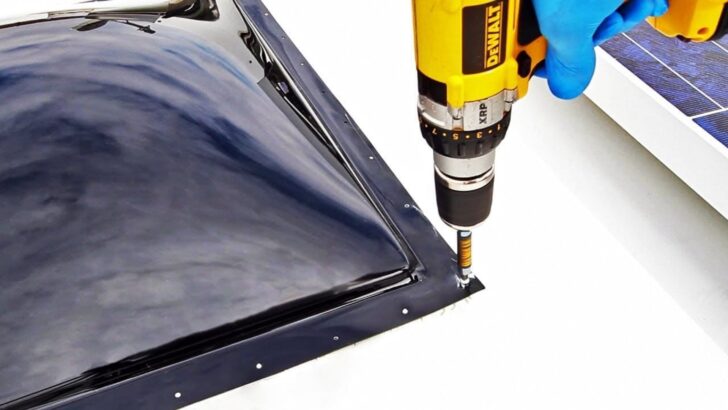
4. Apply a thick bead of SureBond SB-140 on top of the old screw holes all the way around, and place your new skylight down, wiggling it slightly to spread the new sealant.
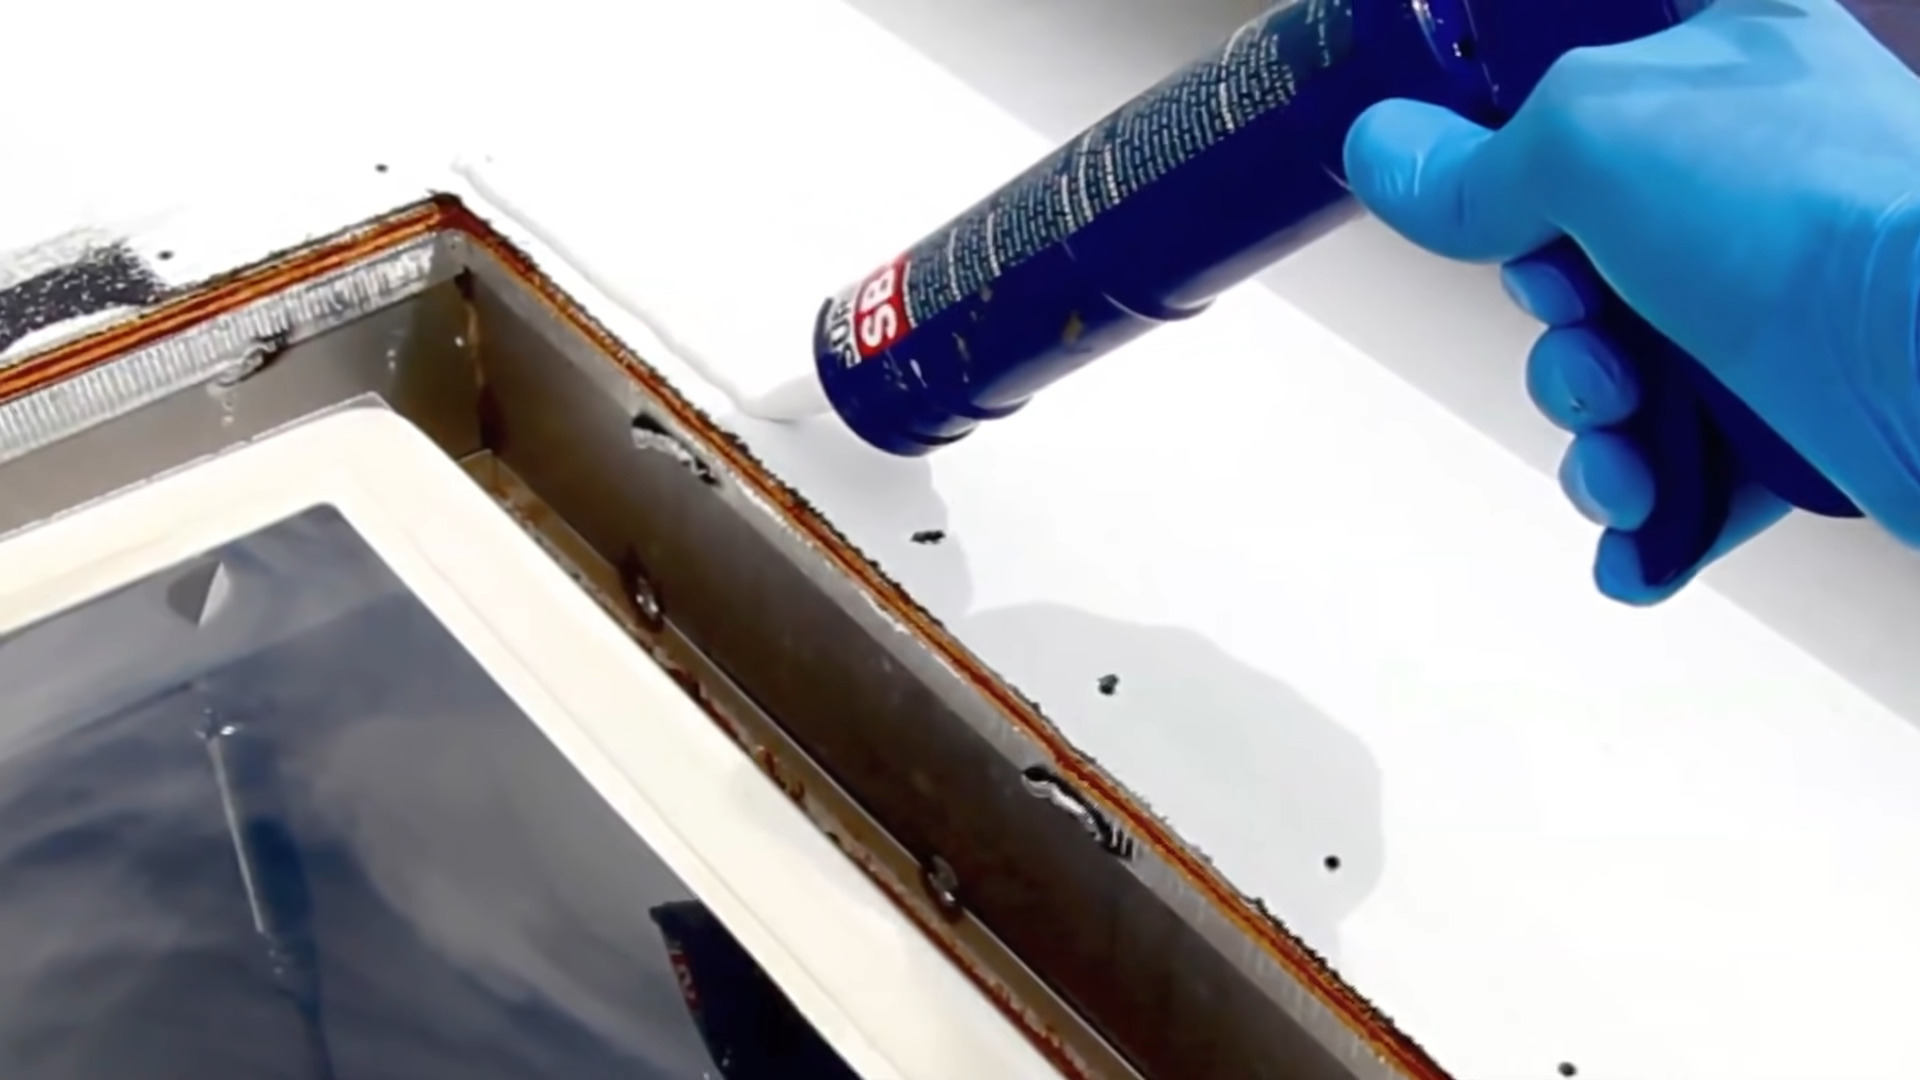
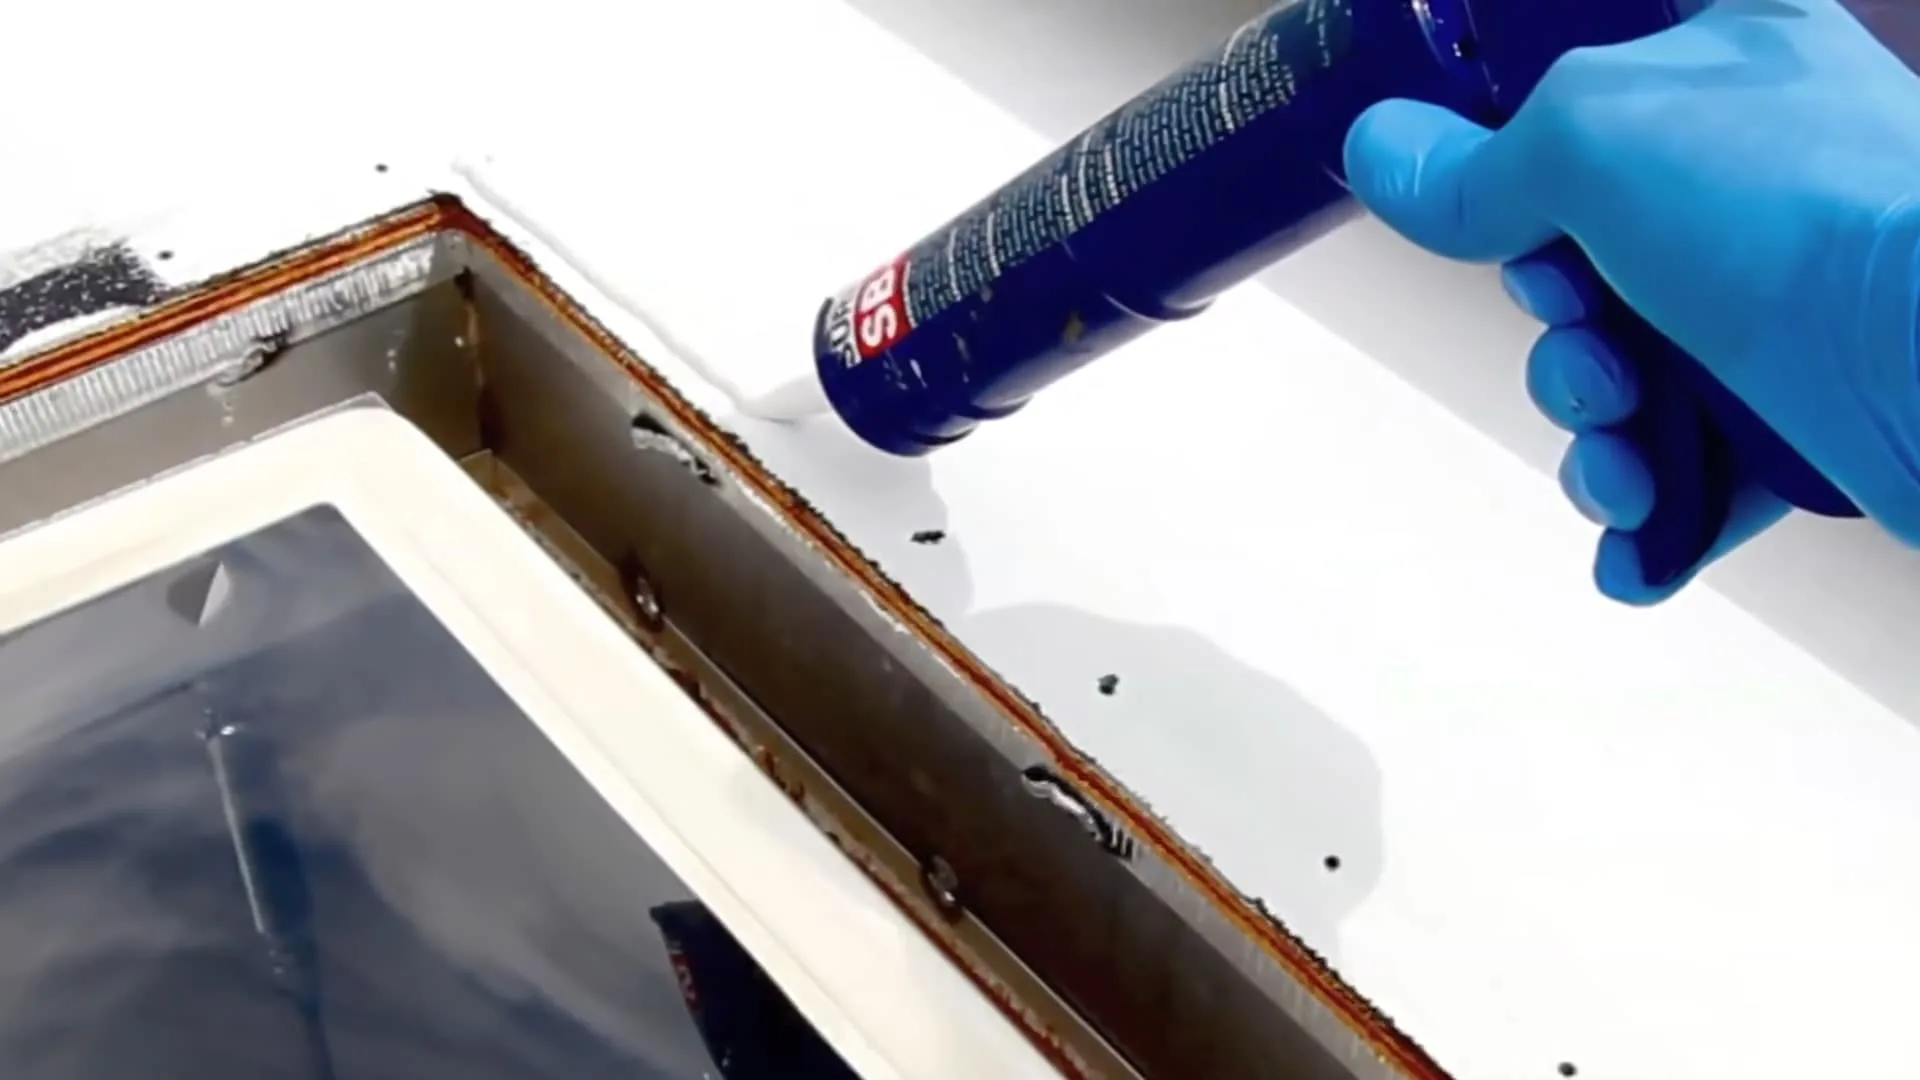
Covering the screw holes with SB-140 is very important because it will ensure a good seal under each of the screws.
5. Install all of the screws. It is unlikely that many (or any) of the screws will go back into the original holes. Not to worry. The old holes will be sealed, and the self-drilling screws will create new holes. IMPORTANT: To avoid cracking the plastic, don’t over-tighten the screws. Tighten just enough to flex the plastic without cracking it.
6. Apply a generous bead of sealant around the perimeter of the skylight and over the screw heads.

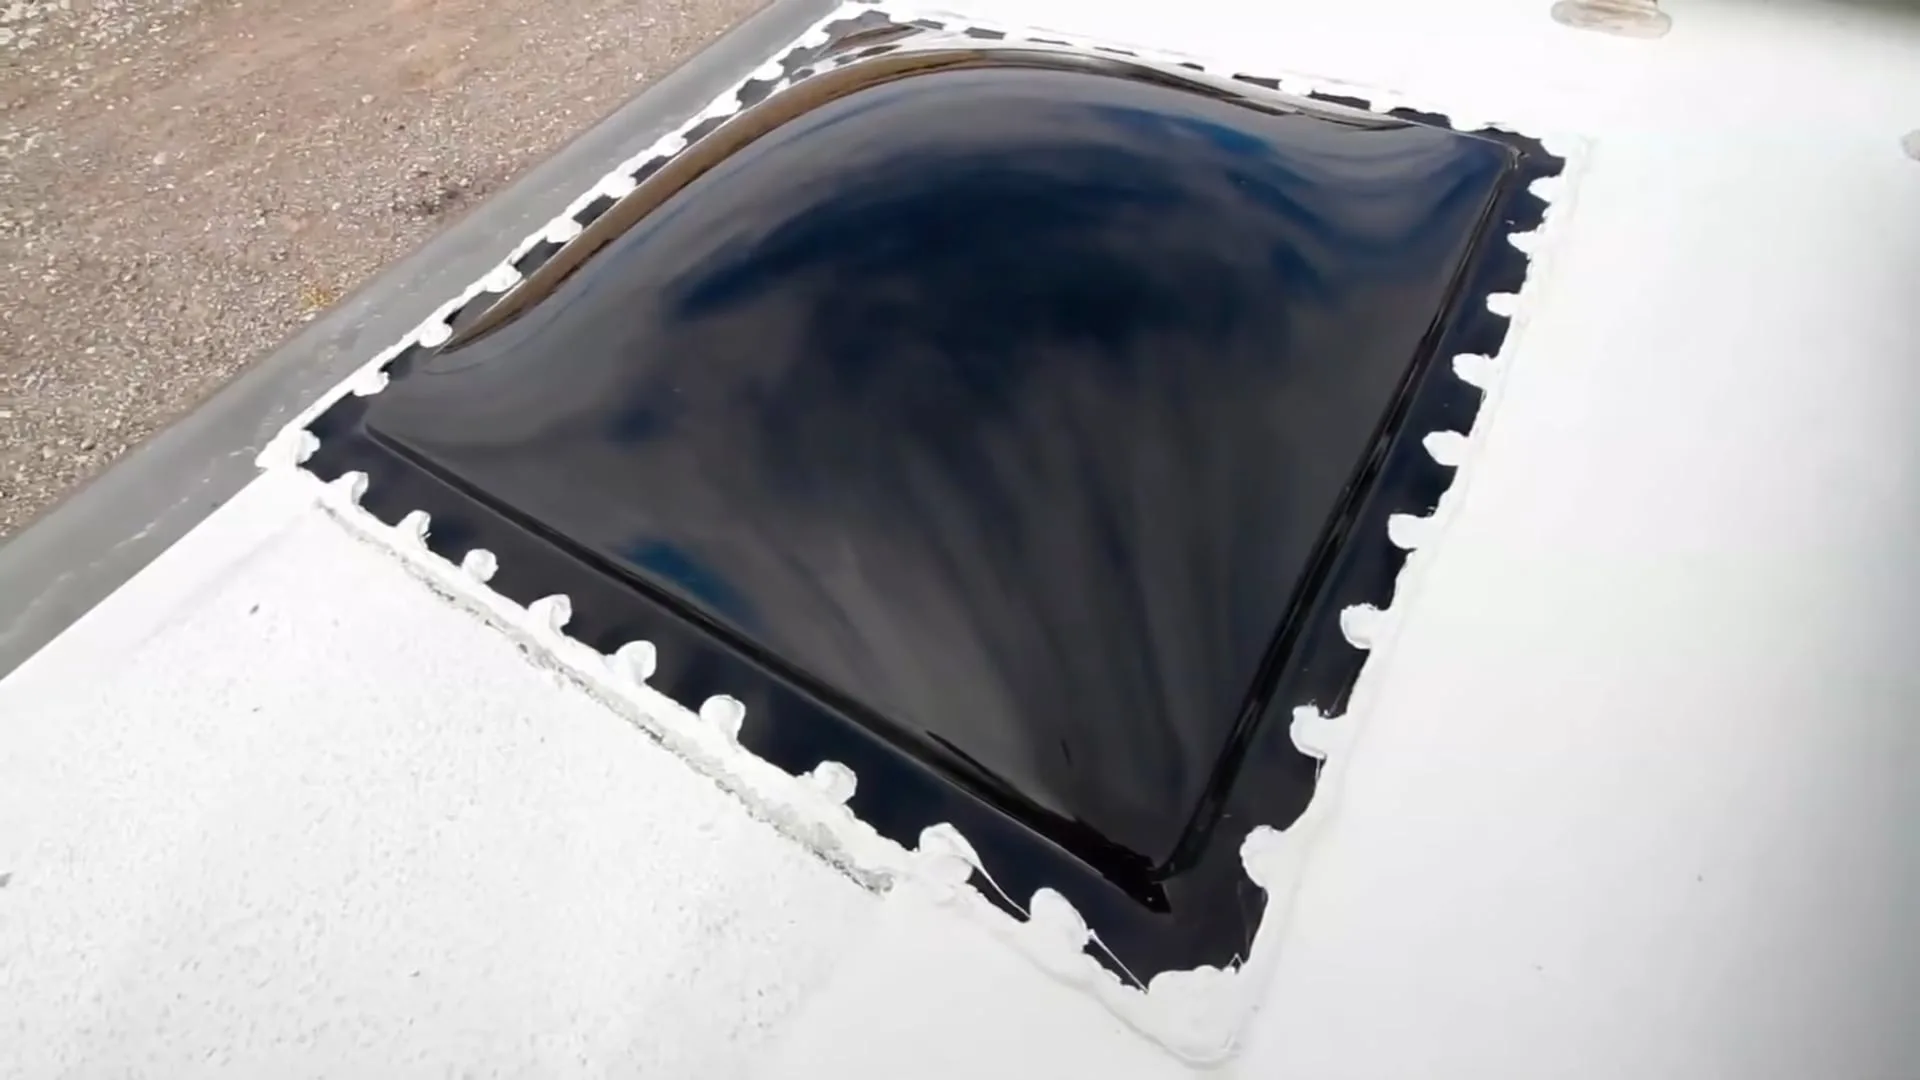
When placing a generous bead of sealant around the perimeter of the new skylight, be sure to cover each screw with sealant as well.
Your RV skylight replacement is complete, and you now have a brand new skylight!
If you’re more of a visual learner and would like to watch us as we replace our own skylight, here’s our step-by-step guide in a video:
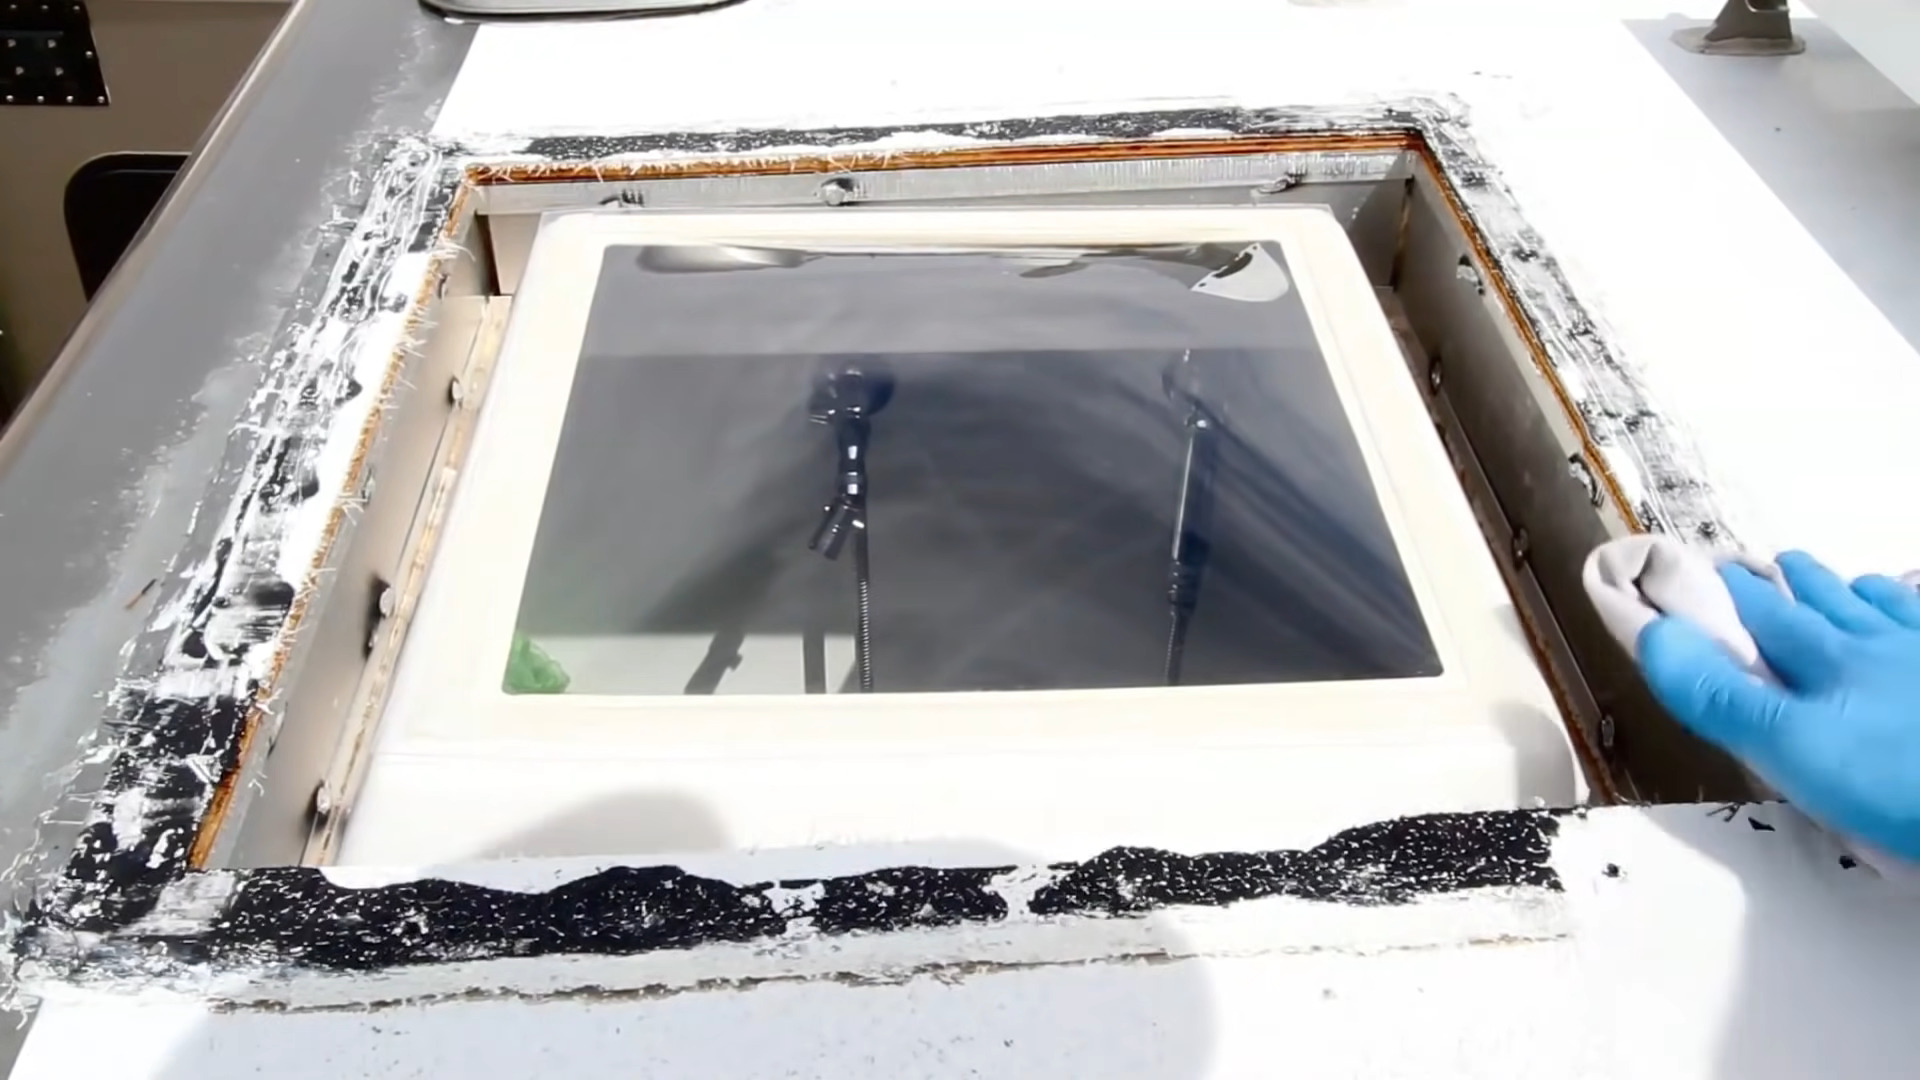
If you need to remove the inside clear plastic liner of your skylight at any point as we had to do when ours came loose on one side, follow the steps in our video entitled “Access the Inside of an RV Skylight”.
Conclusion
We hope you’ll find this RV skylight replacement tutorial helpful when your RV’s skylight is ready for replacement. Remember – if you have a cracked or damaged skylight, it’s best to replace the skylight before permanent damage from leaking can occur.
Geek Out with Us Every Week
Join our newsletter to learn about all things RV-related. Every week we offer free tips, tricks, product reviews, and more to our online community of RVers. So, whether this is your first time on the road or you’re a seasoned expert, we’d love for you to geek out with us!
John Kalichak
Sunday 12th of June 2022
I used a plastic putty knife which helped not to damage the rubber roof
TheRVgeeks
Monday 13th of June 2022
Excellent, glad that worked for you, John!
John Schretlen
Monday 11th of October 2021
Added bonus of replacing a skylight: you can see how well your RV was made. Or at least how thick the roof is and maybe how insulated it is, or isn't.