
As RVers, we all love to get out there and enjoy the benefits of this lifestyle when the weather is fine. Summer is a popular time for camping, and in winter the snowbirds hit the road in search of higher temps. Those of us who RV full-time seek the benefit of warmer weather in every season. The ability to chase the sun is one of the benefits that make the RV lifestyle so fantastic. But if your RV AC isn’t cooling well, then fantastic can turn miserable pretty quickly.
That’s why today we’re offering our 6 tips to help make your RV AC work better. Let’s dive in and cool down!
- 1) RV AC Not Cooling? It’s Time to Troubleshoot
- 2) 1. Park Your RV in the Shade if Your RV AC Isn’t Cooling
- 3) 2. Insulate Windows and Roof Vents
- 4) 3. Clean or Replace the Inside Air Filter(s)
- 5) 4. Clean the Coils or Fins if your RV AC Isn’t Cooling
- 6) 5. Make Sure You Have Enough Power
- 7) 6. Keep Your Generator Tuned Up for Running Your AC Without Hookups
- 8) No More Trouble With Your RV AC Not Cooling!
RV AC Not Cooling? It’s Time to Troubleshoot
The first order of business if your RV AC isn’t cooling is to walk through a troubleshooting process in an attempt to find out what the issue is.

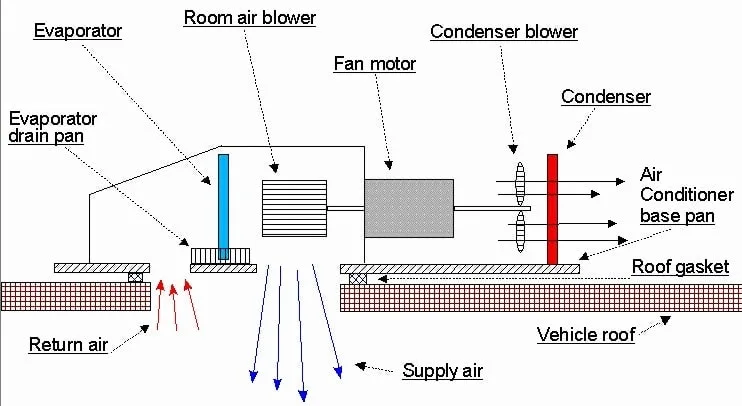
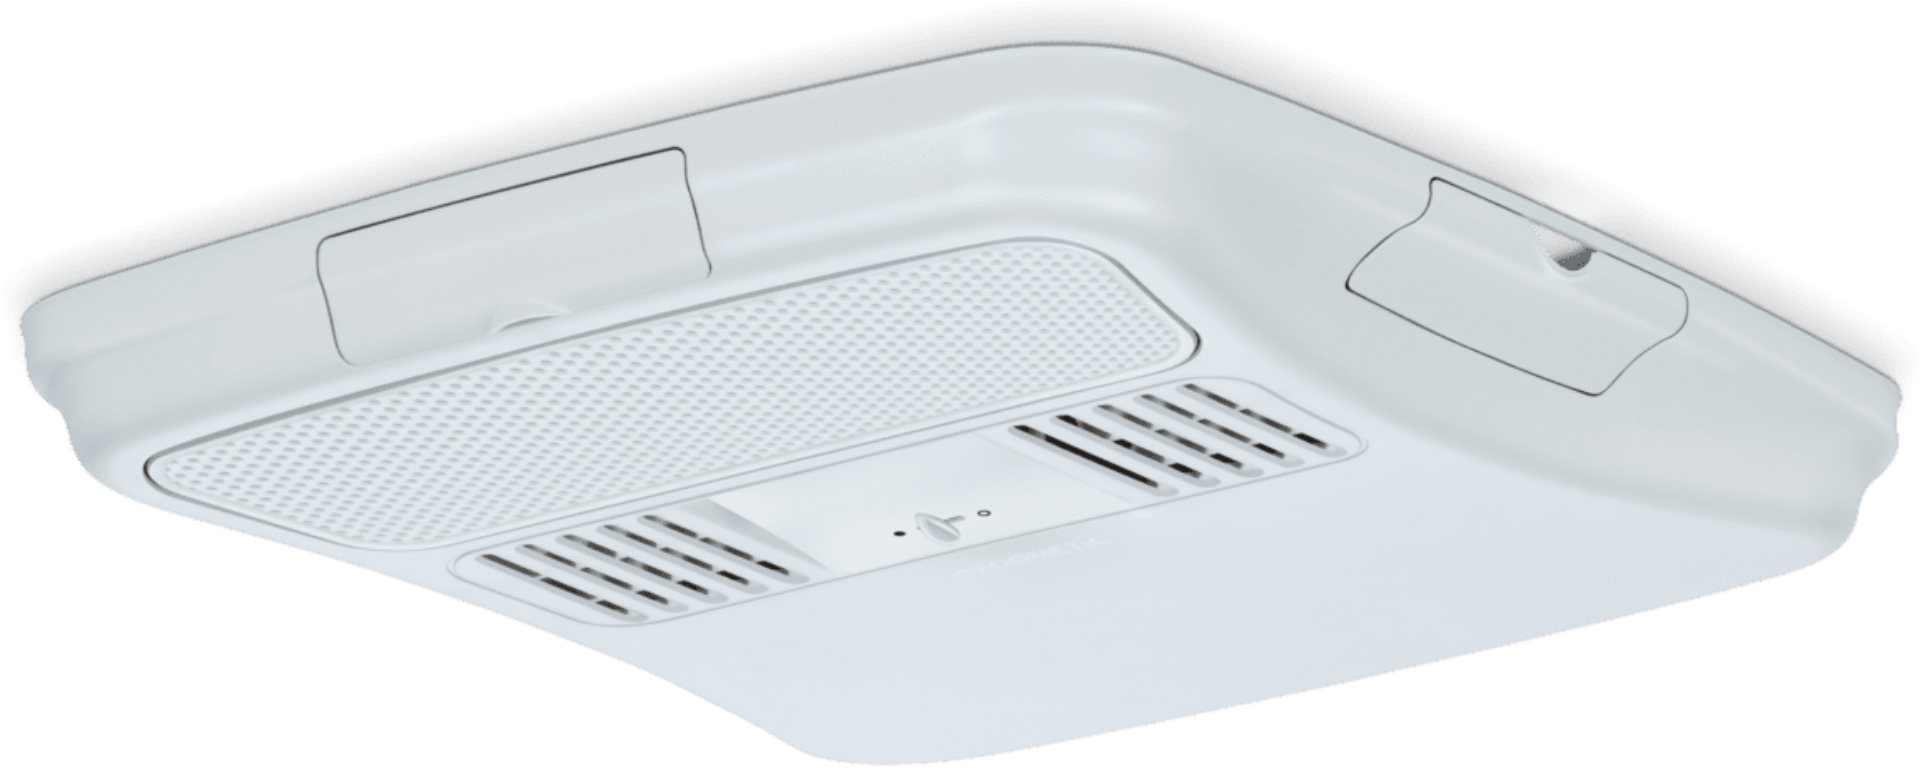
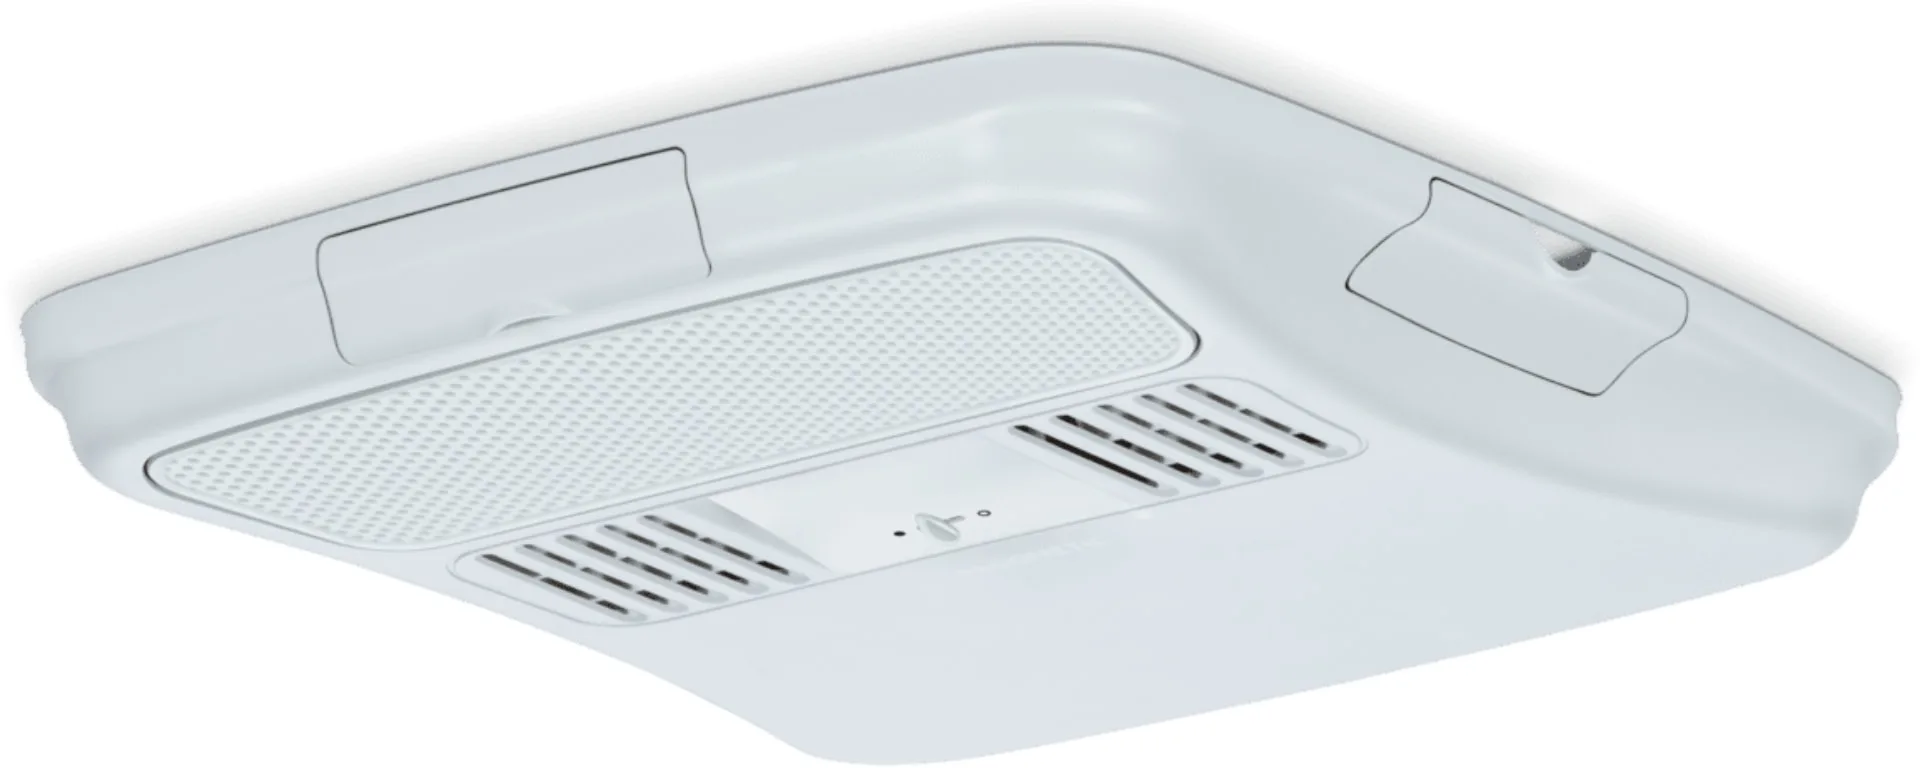
Here’s a diagram of an RV rooftop air conditioning unit that could be useful for troubleshooting if your RV AC isn’t cooling. Courtesy of Bryant RV.
If your RV AC is running, but just isn’t cooling well, we’ve got some hot tips — well, actually, we’ve got some cool tips for you!
Let’s walk through them one at a time to help you figure out why your RV AC is not cooling well… and address that issue with a DIY-able remedy.
1. Park Your RV in the Shade if Your RV AC Isn’t Cooling
OK, this tip is simple but effective: park your RV in the shade whenever possible. This takes some of the pressure off of your AC unit so that it doesn’t have as much heat to contend with when cooling your RV. Solar gain (the increase in heat/temperature caused by exposure to the sun’s radiation) is a large contributor to the increase in temperature inside an RV on a hot day.
While the walls of RVs are insulated, they’re just not thick enough to provide an adequate barrier to the heat from the sun. Parking your RV in the sun raises the level of heat inside considerably, causing your AC to work harder… and likely preventing it from being able to keep up.
So, if your RV AC isn’t cooling as well as you’d like, try this simple tip for starters.
2. Insulate Windows and Roof Vents
Another simple, yet very effective, way to lower the temperature in your RV naturally, is to insulate your windows, roof vents, and skylights from the effects of the sun. Windows and skylights let the radiant heat of the sun through, warming up interior parts and then trapping that heat inside. And roof vents are just thin plastic and aren’t designed to block much heat.
Reflectix, a product that combines what is essentially bubble wrap sandwiched between two sides of reflective film, is very easy to use and widely available at hardware and home improvement stores, or via Amazon:
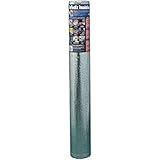
- Item Weight: 4.6 lb
- Country of Origin: China
It can be placed in a window as is (it’s flexible and self-fitting so it conforms to the window and stays in place nicely) and provides excellent insulation as it reflects the heat of the sun from your RV windows, thus keeping it from penetrating into your RV.
Insulating roof vents and skylights is important too, as they allow the sun and its heat to enter the RV, raising the interior temperature considerably. You can DIY roof vent and skylight pillows or you can buy a product like this vent and skylight insulator if the measurements work for your RV.
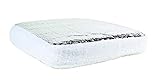
- RV VENT REFLECTIVE INSULATION: Camco’s vent insulator blocks the sun's damaging rays. It helps keep your RV cooler in the summer and warmer in the...
- SAVES ENERGY: This product reduces heat transfer and increases A/C efficiency.
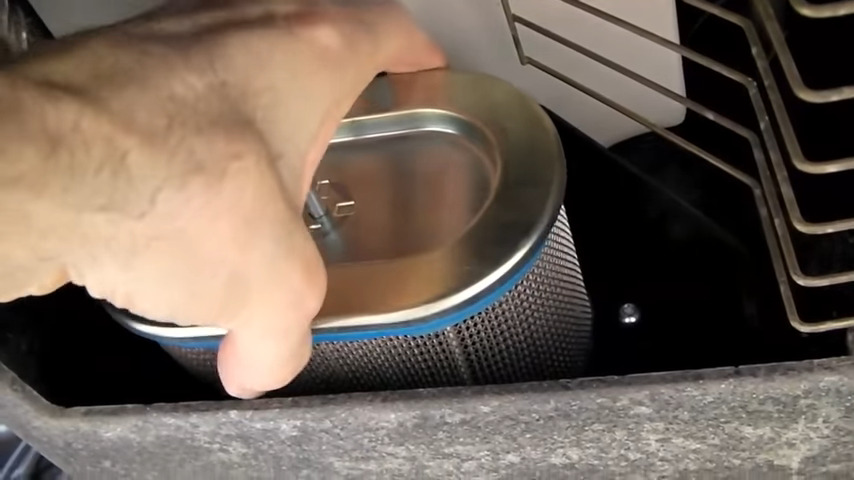
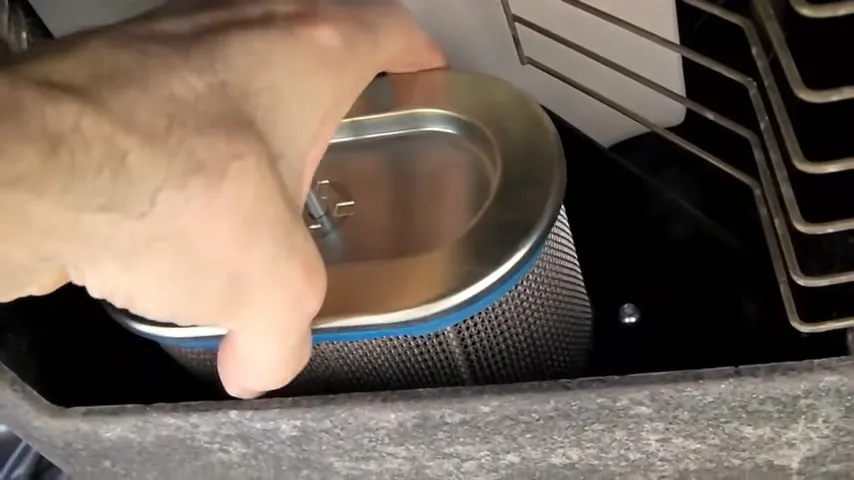
3. Clean or Replace the Inside Air Filter(s)
Some RV AC air filters are disposable and must be replaced with new filters, while others are washable. This project will vary depending on which type you have. Your filter(s) may be located in one of two places: (1) behind the panel in your RV’s ceiling where the air blows out of (and returns to) the air conditioning unit on the roof or (2) if your RV has ducted air conditioning like in our Newmar, the filters are located behind each return air duct along the length of the ceiling.
To clean the filter you’ll need to:
- Remove the filter from your AC unit and take it outside for cleaning, (or replace it with a new one if necessary).
- Vacuum the filter with a brush tip, or use a soft brush (a soft toothbrush can work well) to clean the filter manually.
- If the filter is very dirty (and washable), you’ll want to wash it with warm water and vinegar. Vinegar is a great way to address air-borne pathogens such as mold, pollen, or bacteria (don’t use bleach – you’ll damage the filter). Let it soak for at least 15 minutes – the dirtier it is, the longer you can soak it. Use your soft-bristled brush to help remove any stubborn dirt, dust, and grime remaining.
- Rinse the filter thoroughly with a gentle stream of fresh water to rinse out both the dust/dirt and the vinegar.
- Allow your filter to dry completely prior to returning it to the housing.
4. Clean the Coils or Fins if your RV AC Isn’t Cooling
There are two sets of coils built into your rooftop air conditioner that are crucial to the efficient operation of the unit, and if clogged or dirty will definitely contribute to your RV AC not cooling well. First, there’s the condenser coil on the outside (that’s usually visible at the back of the air conditioner, even with the shroud in place), which is where the heat from the refrigerant is released to the outside air. The second coil is the evaporator coil that’s deeper inside the air conditioner, where the interior air passes by in order to be cooled. Both coils may need to be cleaned, though the condenser coil (outside) is easier to access.
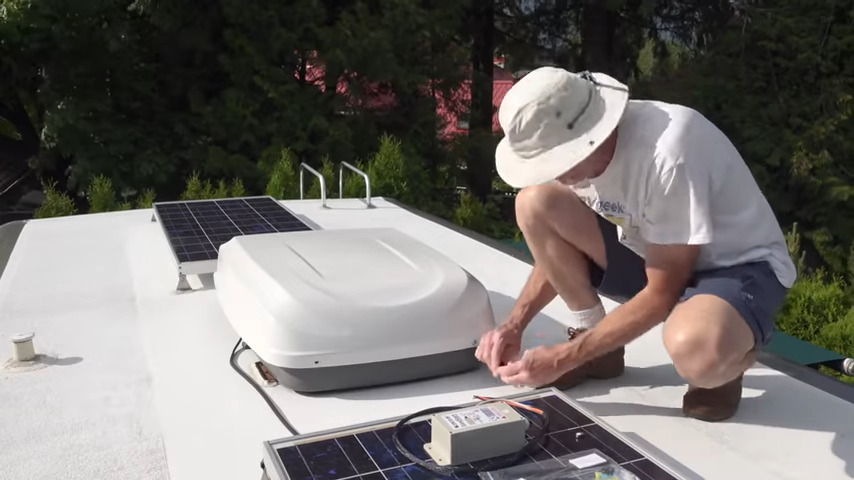
Cleaning the coils and fins is a project that should probably be done every year or two depending on how much you travel in your RV (and how often you run it in dusty environments). This requires getting up close and personal with the AC unit on your rooftop, so we’ll begin with a few words of caution as is always warranted with any type of work on your RV’s roof:
- You most likely can walk around (cautiously!) on your RV’s roof, but depending on the design of your RV, you may need to place some boards on your rooftop to distribute your weight properly for roof work. Do so with appropriate care for the roof itself and, more importantly, for your own safety.
- Also, please bear in mind that this process will get your roof wet, and a wet roof can be a slippery roof.
- Finally, if you’re not comfortable climbing up onto your RV’s roof, there’s no shame in that at all! Knowing when to ask for help from a nimble friend or even a professional is what sorts the wise from the unwise — so, take this project on in whatever way works well for you.
What you’ll need:
- Cordless or manual screwdriver (bring a Phillips and a flat blade just in case)
- Towel
- Small tarp or a couple of garbage bags
- Spray cleaning solution (we recommend either Simple Green Aircraft Cleaner, which is safe for the delicate aluminum fins, or AC coil cleaning spray)
- Soft brush
- Shop-vac (not essential, but helpful)
- Hose with spray nozzle, set to a light spray pressure
- A/C fin comb
- Small lunch baggie or another container such as a small tub with cover
What you’ll do:
- First, ensure that both 120V AC and 12V DC power for the air conditioner unit are turned off.
- Next, safely establish your position on the roof, and remove the AC shroud with caution. NOTE: AC shrouds are favorite nesting locations for wasps & hornets, and you don’t want a bunch of mad insects sending you flying off the roof. So proceed with caution!

Take care when removing the shroud of your AC or heat pump unit as hornets love to build a vacation resort under a rooftop AC shroud.
- Once you’ve removed the screws/fasteners holding the shroud on, (there will likely be four, possibly more), place them in the sandwich bag or covered tub and set them aside in a safe location so they won’t roll off your roof, never to be found again. Note that the shroud screws MAY OR MAY NOT all be the same size, so be sure to note which screws were removed from which holes.
- If you’re cleaning just the exterior condenser coil, that’s all you should need to remove for access. If you’re also concerned that the evaporator coil needs cleaning (i.e. it’s been a long time since you last cleaned/replaced the interior air filter(s), so you’re worried it may be caked with dust), you’ll need to further dismantle the interior shroud to access it. The screws to remove that shroud may be located under metallic insulating tape, so it may take a bit to locate them.
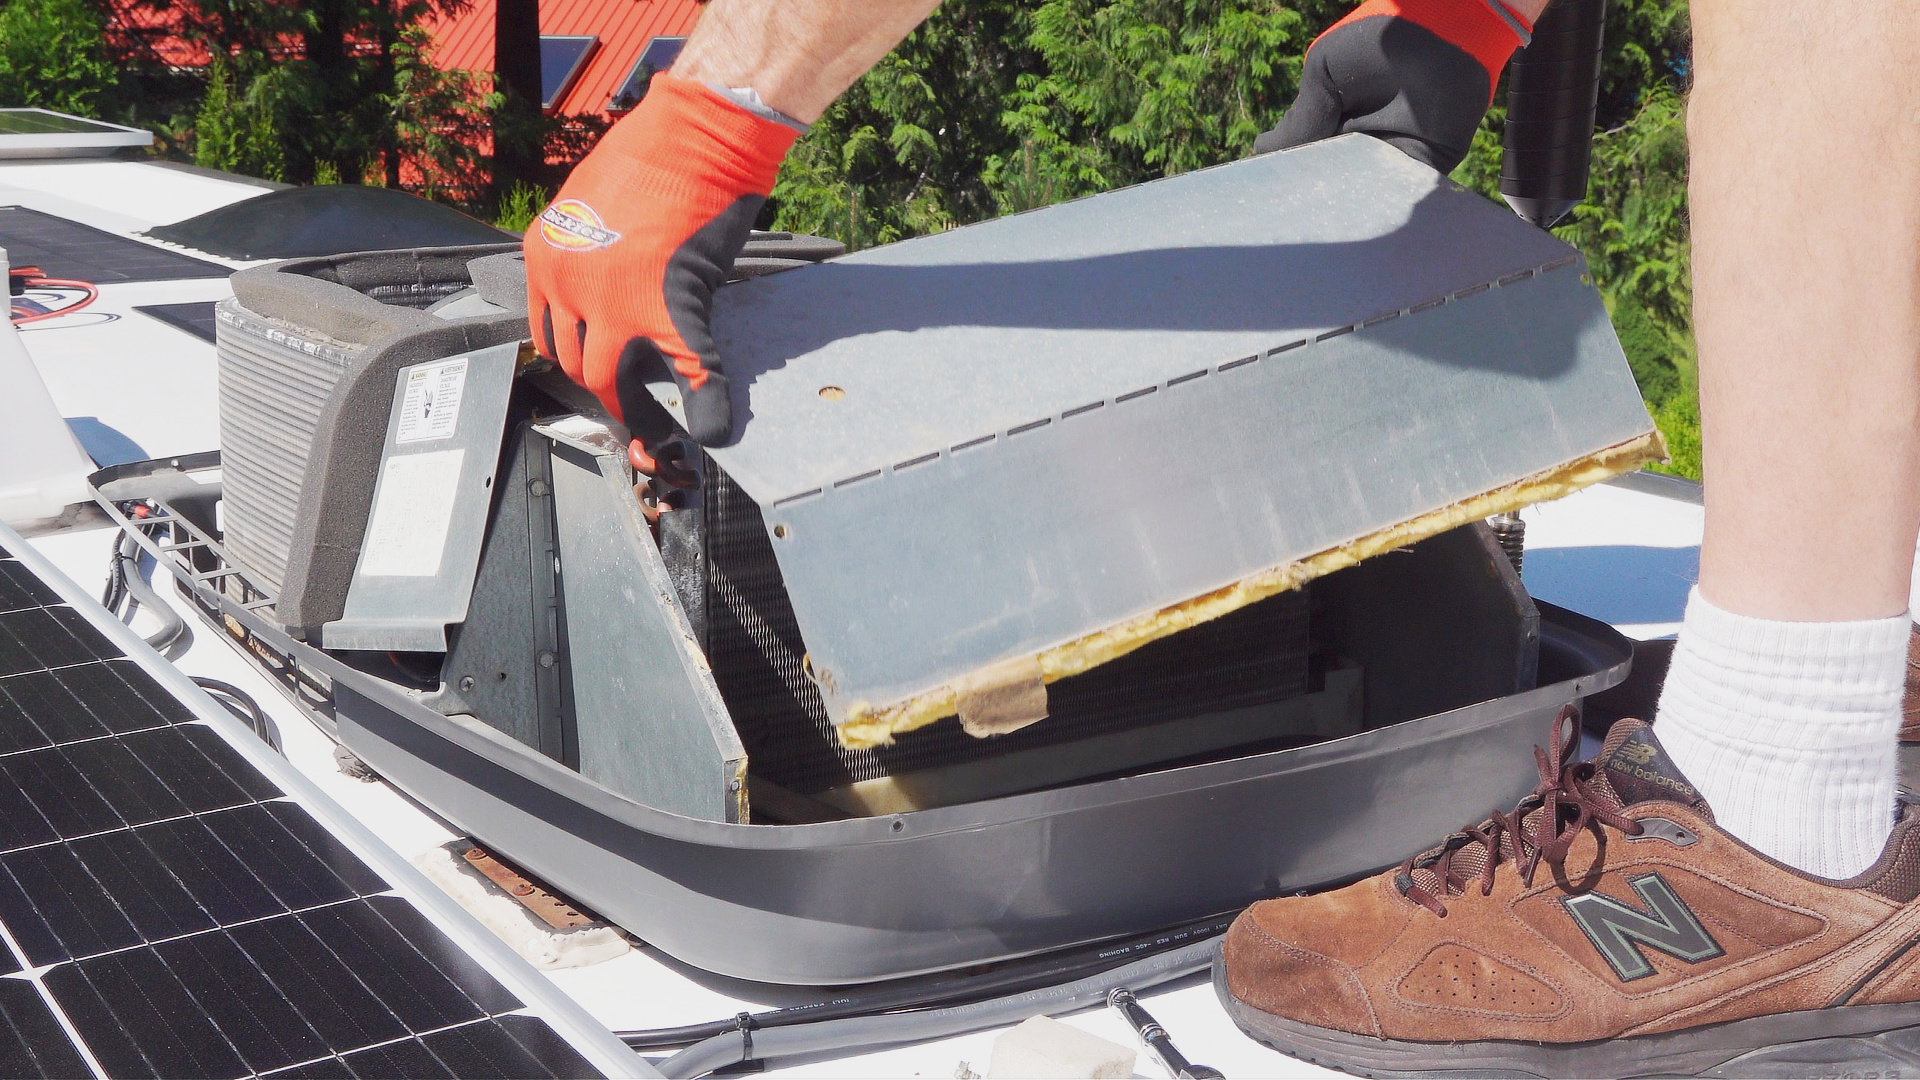

There may be multiple screws and/or other covers that have to be removed to gain access to the evaporator coil.
- Cover all electrical connections using plastic.
- Using your towel and garbage bag(s), cover the air vent leading into the interior of the RV so that dirt, debris, and water don’t enter the cabin (THIS IS VERY IMPORTANT).
- Note that the fins are somewhat fragile, so take care not to bend or damage them during the following steps.
- First, do a dry cleaning using your shop vac (if you have one handy) and your soft brush. Brush the coils to loosen dirt and debris and vacuum it up.
- Next, lay your towel down in the area and carefully spray your cleaning solution onto the coils, and allow it to sit for 15-20 minutes, or as instructed on the cleaner. (You’ll want to protect your roof from the cleaning solution, particularly if you’re using an AC coil cleaner.)
- Be sure your garden hose sprayer is set to a gentle spray, and carefully spray the coils to flush out dirt, dust, and debris. If your AC coils have not been cleaned in many years, you may have a lot of build-up to loosen and remove, and in this case, you may need to repeat the process a few times until the coils are clean and the area is free of obvious dirt and debris.
- If you brought up a shop vac, use it to remove excess water from the coils and the entire area of the AC. If you don’t have a shop vac, you can use a fan or some compressed air (from the inside out!) to dry the coils. Just be extremely careful not to damage the delicate fins.
- You can take this opportunity to straighten bent cooling fins carefully using the A/C fin comb (bent fins restrict airflow).
- Re-attach the AC shroud.
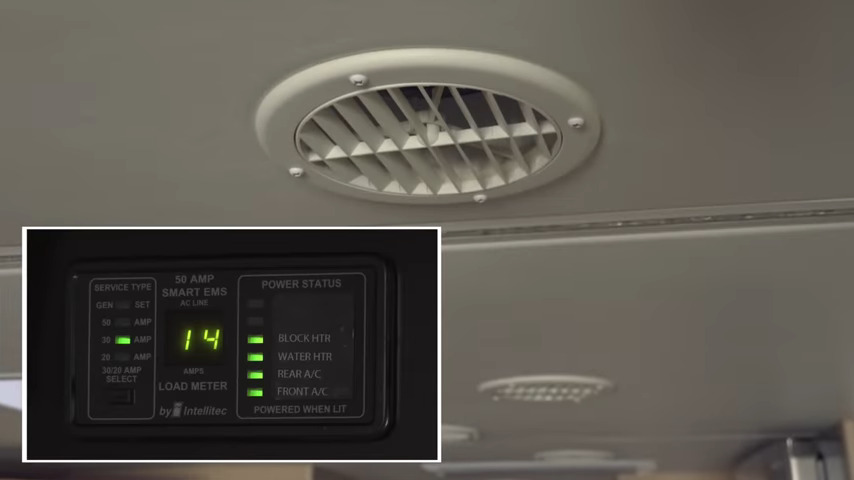
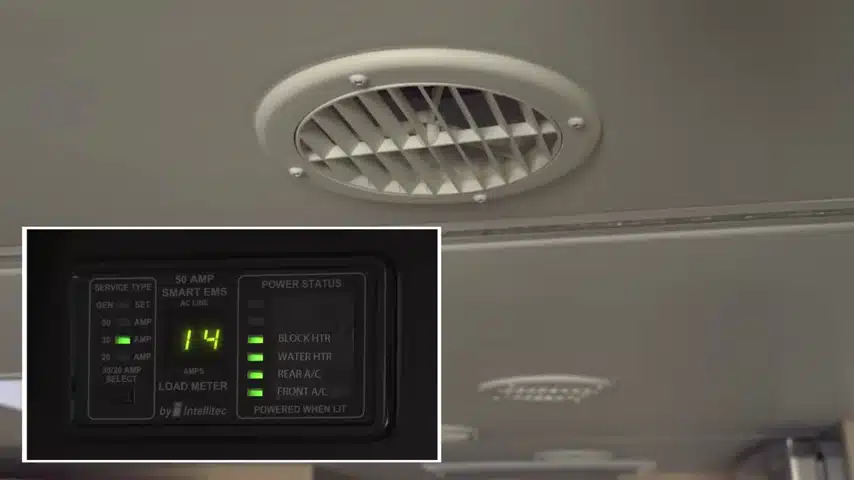
5. Make Sure You Have Enough Power
Sometimes when we think we have a major issue with our RV AC not cooling, what we really have is a low-power issue. There are actually some good ways to address this, though, so don’t despair. Let’s take a look at a couple of ways to manage an adequate power supply when your RV AC is not working well.
If your RV is lacking sufficient power to the extent that your RV AC is not cooling or is not cooling well, a Hughes Autoformer may be very helpful, as this product increases the voltage to your RV while also eliminating the potential for damage to your RV appliances. Hughes Autoformers also have surge and spike protection, which is something every RV needs.
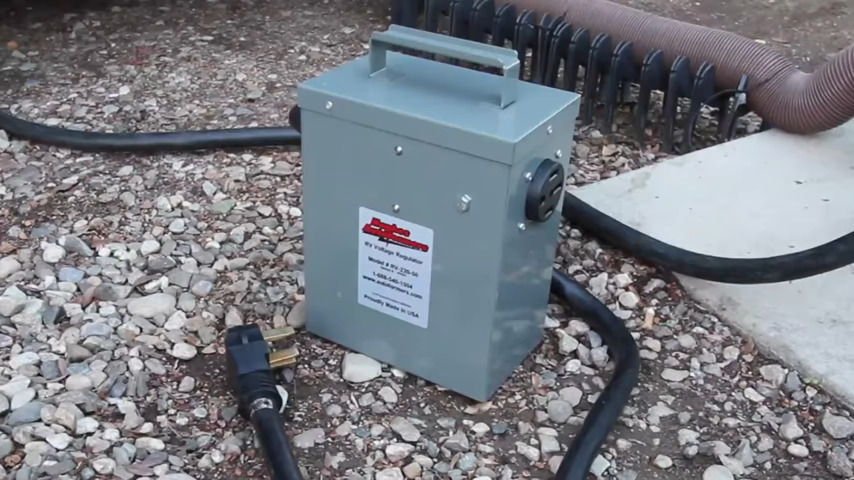
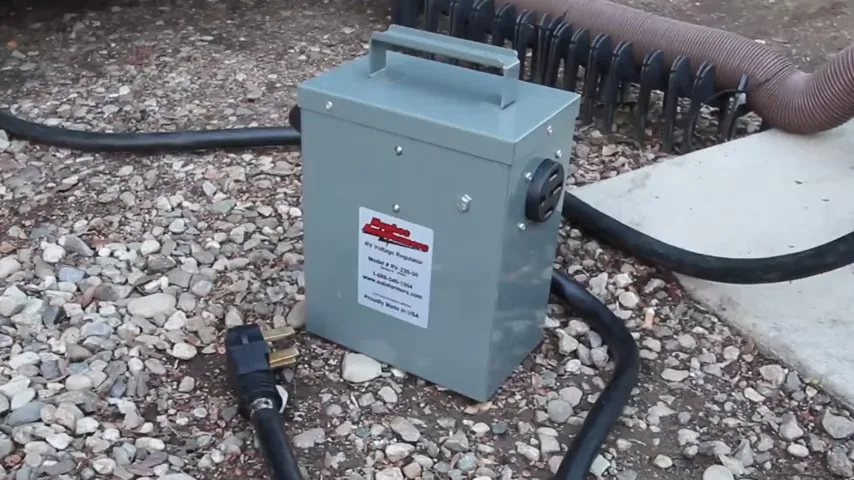
The Hughes Autoformer boosts voltage at the campground pedestal while also providing surge and spike protection.
What the Hughes Autoformer does is use a small amount of extra current (amps) in order to boost the voltage available to your RV. This is important because when the voltage at the pedestal sags (i.e. on very hot days when everyone is running their air conditioning), your air conditioner has to pull more amps in order to properly run. The lower the voltage drops, the more current your air conditioner will pull. And that increased flow of current through the wiring can slowly damage your air conditioner (and other appliances).
And if the drop in voltage is low enough, your RV air conditioner may not be cooling because it can’t get enough power to start up. You may hear the fan kick on and start blowing air, but the compressor may not be able to begin running, preventing it from cooling!
By boosting the voltage, your air conditioner can run using its rated current flow, instead of having to draw higher amperage. This will ensure that your air conditioner runs properly AND isn’t being damaged in the process.
Another way to address a low power issue that could result in your RV AC not cooling is to use a soft-start product like the Micro-Air EasyStart. Essentially what this product does is reduce the power required to get your air conditioner compressor started up.
A soft-start reduces the current requires to start your RV AC so it can be operated on lower power.
Your air conditioner (and likely your refrigerator’s compressor along with other appliances you may use) require significant power to start spinning. If that power is not available and delivered, then the appliance won’t start. A soft-start like the Micro-Air EasyStart effectively reduces the start current by 65-75% so that your AC can operate on limited power.
So, not only can you run your AC, but you can run other appliances at the same time. Or if you have a large motorhome, you can run two AC units as we do at times of extreme heat (note that each AC unit requires its own Micro-Air EasyStart unit installed).
If your RV AC isn’t cooling, make sure you have sufficient power available to run the unit, and if you don’t, consider options that lower the power requirements on start-up.
6. Keep Your Generator Tuned Up for Running Your AC Without Hookups
It’s great to have a generator to fire up whenever we need additional power when we’re off-grid. But if your generator isn’t kept in good running order and tuned up to deliver adequate power to handle your power demands, then you’ll find yourself with some appliances that won’t function optimally, including your RV’s AC.
Be sure to change your generator’s oil and keep it tuned up in accordance with the specifications of the manufacturer of your generator.
Regularly changing your generator’s oil and oil filter can keep it running in tip-top shape for adequate power delivery to your RV’s AC unit.
We like to take care of our Onan generator maintenance ourselves, and we’ve made several YouTube videos explaining how we do that. For instance, on a regular schedule, we change the oil, replace the fuel filter, and change the coolant.
But if you prefer to leave generator maintenance to the pros, that’s also a fine approach. The key is to keep your generator in top running condition so that it will continue to run appliances like your RV’s AC very well.
No More Trouble With Your RV AC Not Cooling!
As you can see, once you’ve investigated the source of your RV AC not cooling, there are many ways to address the problem. Depending on your particular situation, these suggestions will either lead you to a satisfactory solution, or to a professional if your AC unit requires repair.
Geek Out with Us Every Week
Join our newsletter to learn about all things RV-related. Every week we offer free tips, tricks, product reviews, and more to our online community of RVers. So, whether this is your first time on the road or you’re a seasoned expert, we’d love for you to geek out with us!
jerry spencer
Wednesday 5th of July 2023
I own a 35ft Salem classic RV it is equip with a 15 btu air condition. My problem is it is not cooling as it should.
I have cleaned the coils, filters and had the air flow checked
I have been told that the inside temperature, should be 10 degree less then the outside temperature. so does that mean when it is 90 degree outside, the best it should be 80 plus inside?
I have owned this RV now for the 3rd summer now and could only enjoy it when it it is 80 or less outside.
Debbi Decker
Friday 27th of August 2021
Could you please tell me how I can remove the indoor ceiling cover for my Dometic AC?. I need to clean it. I know how to remove/replace the filter. But the entire cover needs a thorough cleaning. Thank you for your help.
TheRVgeeks
Friday 27th of August 2021
Hi Debbie. Unfortunately, our RV has ducted AC and we don't have that indoor cover that most RVs have, so we haven't ever removed one for cleaning. But... we'd guess that there are likely screws (possibly hidden behind screw covers) that hold that cover to the ceiling. Your best bet would be to Google the Dometic air conditioning unit you have and look for the owners manual... that will likely have instructions for installing it, which will give you an idea of where to look for the screws to remove it.
Pat Parker
Friday 20th of August 2021
Thanks for the air conditioners tips
TheRVgeeks
Friday 20th of August 2021
Our pleasure, Pat! Hope they help you out some day!
John Schretlen
Friday 20th of August 2021
Hi John, Hi Peter,
One thing you may want to include in the AC discussion is that these RV units are NOT commercial building grade have a cooling limit. My story: A few years ago we left our coach in Coachella while we went to Europe. When we got back to pick it up the outside air temps were in the high 40's °C (115+ °F) and the whole unit was heat-soaked.
I ran all three AC units for 24 hours and the interior temperature dropped a little to 'just about berable'. I thought that all three of the AC units were toast.
When speaking with Dometic service I was fortunate enough to talk to a person who knew a lot about RV air conditioners. He told me when operating in the hot dry southern desert that I should expect that the AC air to be only about 20° cooler than the outside air.
Also: when we got back to BC the AC units indeed worked as normal and in fact cooled the air quickly and more than 20°. Humidity obviously makes a huge difference.
TheRVgeeks
Friday 20th of August 2021
Thanks for that, John. We've read that (RV AC units cool 20° cooler than ambient) before, but have always felt that ours did better than that (though we try REALLY hard to avoid being in temps that hot, LOL!). Seems counterintuitive that they would cool better in humid air (which would seem to require more defrosting and possibly impede the transfer of heat in/out of the system) than in low!
Dave Densmore
Friday 20th of August 2021
We have dual pane windows which helps, and all our windows have awnings. This plus using the day shades works well for us, as having the windows covered during the day is a no go for us.
Also, we were having trouble with our 20 year old AC unit. It would cut in and out, feeling like it was only working when it wanted to. I wasn’t looking forward to buying a new unit, expensive & poor reviews for longevity. I had tried the cleaning, filters and made sure it wasn’t “sour power” to no avail. I could barely see teem, but realized the capacitors were pretty nasty with corrosion and rust. I replaced both the start and dual run capacitors for less than $50, and woohoo, it was like a new unit again, blowing very cold air. BTW, this can be DIY- BUT, improper procedures can hurt or kill from the stored voltage in a capacitor.
TheRVgeeks
Friday 20th of August 2021
Hi Dave! Glad to hear you were able to find an easy solution to your AC problem! Good to keep in mind that the start/run capacitors could be the issue! Stay cool!