
Today’s topic is neither glamorous nor exciting, but most RVers would agree that the RV black water tank is a crucial aspect of one of the most convenient systems aboard their rigs. It must be because you usually can’t get two RVers together for more than 5 minutes before they start telling their “RV black water tank” story(ies)! ????
The owners of sticks & bricks houses rarely think about the convenience of their flush toilets, but are surely appreciative of the system that removes waste from their home and sends it to another location. This aspect of the modern plumbing system offers convenience, cleanliness, efficiency, and – some folks in other regions of the world might say – absolute luxury. Nature calls, deposits are made, and with a single flush it’s all washed away. Over and over and over again.
RV plumbing offers almost that same degree of luxury, no matter where you are, including a stop anywhere along the road less traveled! It’s a convenience we rarely think about, but it’s an amazing convenience nonetheless.
In today’s post, we’re paying homage to — okay, sorry — we went off the rails there for a minute. Let’s try that again…
In today’s post, we’re focusing on a part of the RV plumbing system that allows us to have a working flush toilet aboard a vehicle – the RV black water tank.
- 1) What is an RV Black Water Tank?
- 2) How Do I Know When My Black Water Tank Needs to Be Emptied?
- 3) What Supplies Do I Need to Empty an RV Black Water Tank?
- 4) How to Empty and Clean an RV Black Water Tank
- 5) Do All RVs Have A Black Tank?
- 6) What is a Cassette or Cartridge Toilet?
- 7) Can I Use Regular Toilet Paper in my RV Toilet?
- 8) Should I Leave Water in My RV Black Tank?
- 9) Do All RV Toilets Work the Same Way?
- 10) What Do I Do If My Black Tank Gate Valve Is Leaking?
- 11) Final Thoughts
What is an RV Black Water Tank?
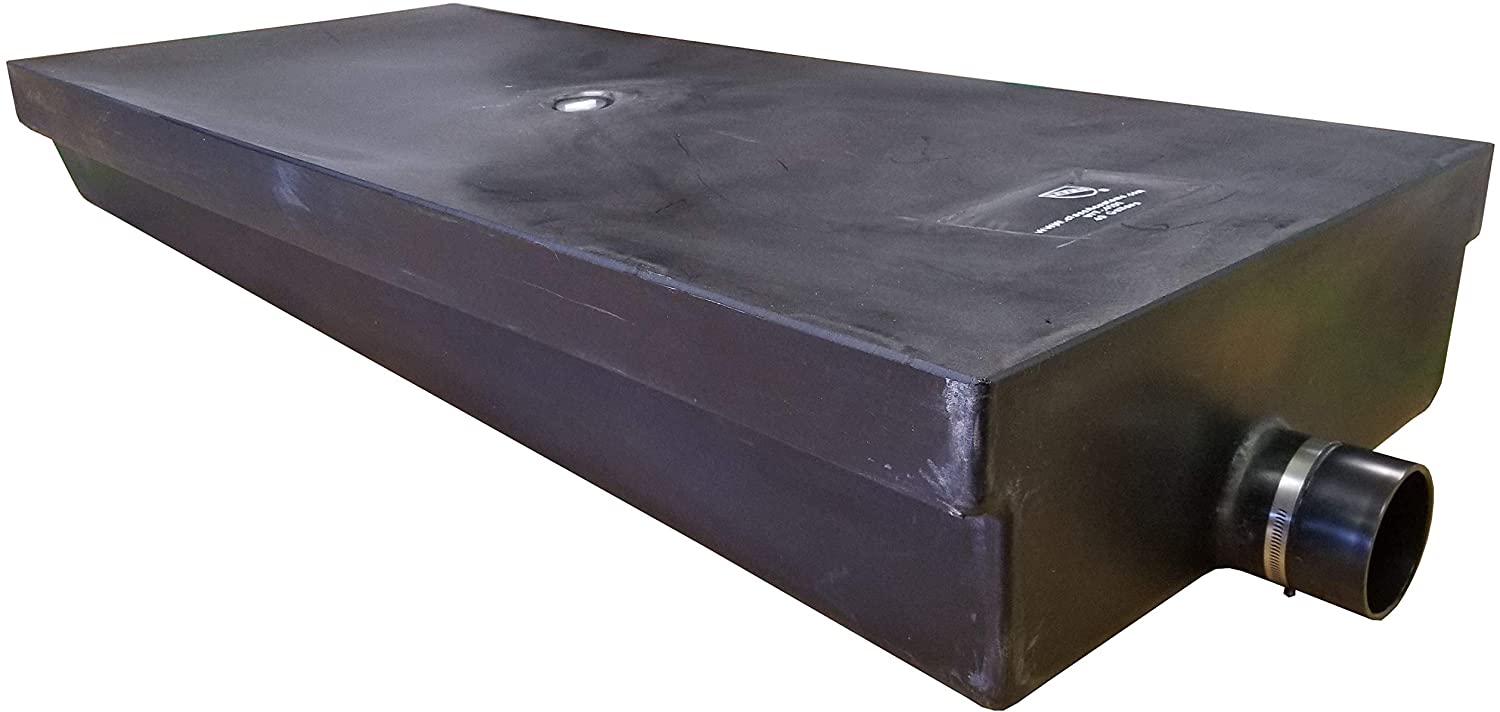
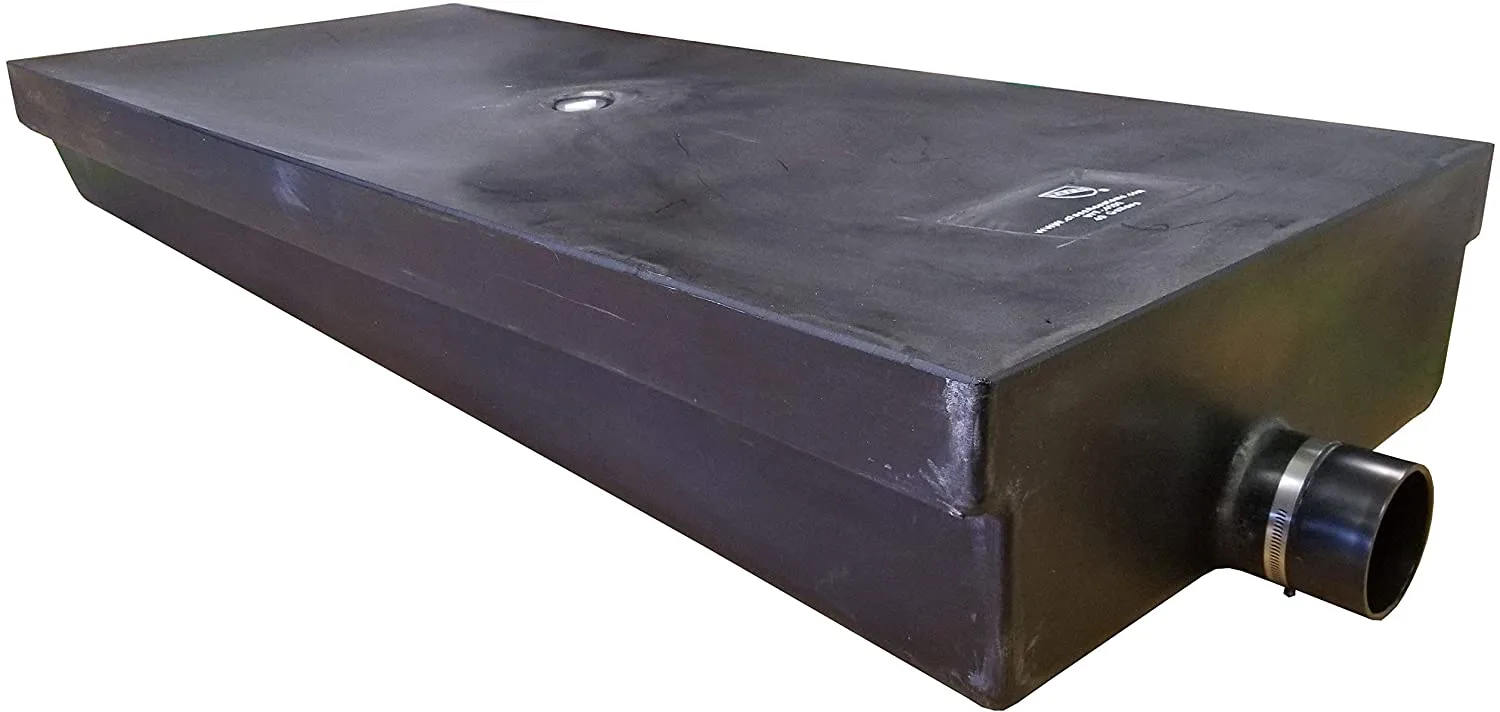
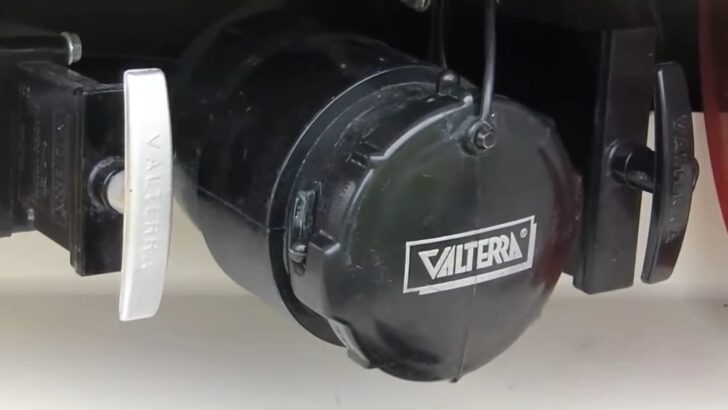
The RV black water tank is the holding tank where waste from the toilet is held until it’s dumped. If you’re trying to identify your RV’s black water tank, it’s literally black. (Your gray water tank is often, though not always, gray and your fresh water tank is likely white or clear in color.)
The RV black water tank is basically a repository – a holding tank where waste from the toilet is sent and held until it’s convenient to dump it into a sewer.
This is where the RV black water tank gets its bad reputation. Once the waste from several days or weeks of toilet use has accumulated, the tank needs to be dumped. In a static sticks & bricks house, you flush and you’re done. But when you carry a toilet with you on the road, the waste has to be flushed and held until it can be “flushed” a second time, into a sewer.
Most RVers don’t love the dumping process, but we appreciate the ability to travel with our own private bathroom so much that we really don’t mind it since we’ve become accustomed to the process.
How Do I Know When My Black Water Tank Needs to Be Emptied?
The answer to this question depends on the type of RV you have, but there are a few ways to know when your RV black water tank needs to be emptied. We’ll start with the most common.
Most RVs have a wall-mounted panel with indicators/monitors that show the level of contents in all three of the rig’s holding tanks – the fresh water tank, the gray water tank, and the black water tank. The monitors are connected to sensors in or on each tank that “sense” when the liquid in the tank rises to certain levels. These levels are displayed on the monitor’s panel.


Most RVs have a wall-mounted panel with monitors showing how full the holding tanks are.
Other RVs – some Class B RVs, smaller camper vans, and small trailers – may have cassette toilets which may have indicators right on the toilet itself, and still others are a bit more archaic, requiring a glance into the holding tanks to see how full they are at any given time. (This is more prevalent on some (but not all) self-built RVs/camper vans.)
What Supplies Do I Need to Empty an RV Black Water Tank?
Some supplies are necessary to the process of emptying your RV black water tank. You’ll want to carry/store those supplies in such a way that you’re not going to contaminate anything else stored in the general area. In larger motorhomes like ours, this may be easier than in smaller RVs, but most RVers establish a good way to carry items used in the process of tank emptying in a designated storage bin or another separate container.
Let’s run through the list of items you’ll need, and then we’ll run through the steps to empty your RV black water tank.
Sewer Hose
First, you’ll need a sewer hose. We’ve found this to be the best sewer hose for us, and that’s based on nearly two decades of full-time RVing. We can attest without hesitation to its durability, and to the fact that it’s made of strong (15 mils) HTS vinyl unlikely to crack, tear, or deliver any nasty surprises.
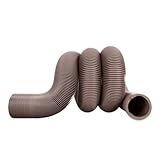
- RV heavy-duty hose is 15 mils of brown HTS vinyl
- Perfect for the seasonal RVer
Please note that the sewer hose shown above is the hose only. That brings us to one of the most important components of the tank-dumping process, the clear elbow.
Clear Elbow
A clear elbow is one of the most important pieces of equipment an RVer can own because it allows you to see when the water coming through your dump hose is running clear. Because sewer hoses are usually opaque (not see-through) brown or black, a clear elbow is necessary to this process.
While clear water running through your clear elbow doesn’t guarantee that your tank is 100% clean, that’s not the intent. A clear elbow allows you to avoid leaving easily identifiable debris in the tank. That’s a critical part of keeping sewer odors out of your RV, and your black tank as clean as a general dumping process can get it. And that’s what we strive to do with every dump of the RV black water tank.
We highly recommend a clear elbow as part of your tank dumping gear. This is the clear elbow we use, and we wouldn’t be without it.
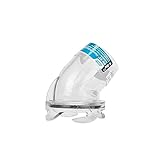
- Clear RV Sewer Hose Adapter: See-through hose adapter allows you to see when your RV sewer system is clean
- Compatibility: Fits 3-inch diameter RV sewer hoses
We should add here that the clear elbow shown above works with our sewer hose (also shown above). However, if your hose already has the ears/tabs built onto it and it attaches directly to your RV’s sewer port, that clear elbow won’t work for you. Instead, you’ll need a clear adapter like this one:
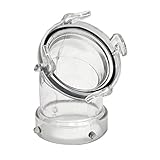
- Angles hose connections 45° to more convenient positions
- Reinforced ears for long lasting durability
Sewer Hose Connection to Sewer Outlet
While the clear sewer elbow noted above connects to the end of your sewer hose you attach to your RV’s sewer valve, you also need a connection at the other end of the hose – the end that goes into the sewer outlet at the location where you dump your tanks.
For this purpose, we recommend a connection like this four-in-one sewer adapter that will give you a nice secure connection at the dump station or campground sewer inlet:
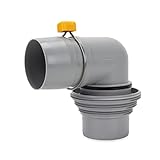
- Connects RV sewer hose to dump station
- Patented spin-lock rings for effortless hose connection
This product has spin-lock rings, allowing an easy connection to your sewer hose. It also allows for various sizes of openings which can be important since not all sewer inlets are the same.
Short Hose for Black Tank Flush
If your RV has a black tank flush, you’ll need a short span of hose that’s specifically dedicated to this purpose and only this purpose. We highly recommend choosing a hose color (like the red hose below) that’s different from any other fresh water hose you carry, so that your hoses can never be accidentally mixed up.
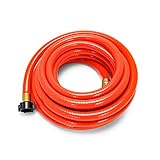
- DESIGNED FOR RV SANITATION: Keep your RV waste system clean & odor-free with Camco's reliable clean-out water hose. It can be used as an RV grey water...
- HEAVY-DUTY CONSTRUCTION: Built to last, this Camco RhinoFLEX 5/8″ internal diameter RV hose is constructed of durable PVC.
An RV black tank flush system is the part of your tank dumping system that rinses your black tank well after you’ve dumped the contents of your tank and backflushed it a bit. If you’re not familiar with the concept of flushing your black tank, we recommend that you check out our post for further details.
Your RV may or may not be equipped with a black tank flush system. If it’s not, then you’d do well to pick up a wand that will allow you to give your black tank a good rinse after dumping.

- POWERFUL ROTARY CLEANING ACTION: Enjoy superior cleaning power with this RV tank cleaner. Its powerful rotary cleaning action shifts even the toughest...
- FLEXIBLE REACH: The black tank rinser has a 34" flexible section that is perfect for hard-to-reach RV tanks. Get into those offset basement tanks with...
One of the keys to keeping black tank odors out of your RV is the ability to fully flush away stubborn waste deposits and odor-causing particles left behind after your RV black tank is emptied.
Another key is to use a holding tank treatment to break down waste in your black and gray holding tanks. This helps to keep the tanks clean and running smoothly. One scoop in the black tank and one scoop in the gray tank is usually all it takes (though in higher temperature climates, you may need a second dose).
There are a number of chemical products on the market, but after 18 years of full-timing in our motorhome, our favorite product is actually this non-chemical, organic treatment:

- Powerful Odor Control: Say goodbye to unpleasant odors with our powerful formula that neutralizes and eliminates foul smells, leaving your RV smelling...
- Effective Waste Digestion: Happy Campers breaks down waste and toilet paper quickly and efficiently, preventing clogs and ensuring smooth tank...
If you’re having issues with bad smells from your tank or with your sensors working properly, Happy Campers also makes a deep cleaning product to remove odors that persist even after dumping and rinsing your tanks.
If you’re experiencing issues with your tank sensors not giving you good information about the level of the contents of your holding tanks, we suggest you take a look at our post entitled “4 Ways to Clean your RV Tank Sensors” and, if needed, try this Happy Campers Extreme product:
- Super cleans RV holding tanks
- Sensors: Restore poor working sensors
Otherwise, the original Happy Campers used on a regular basis should help to keep more significant issues at bay.
Last but most certainly not least, one of the most important items you’ll need to empty your RV black water tank is a good set of gloves that are dedicated only to the purpose of tank dumping:
We like these Wells Lamont heavy-duty gloves for their thickness and durability. They’re PVC coated, have a textured grip, and are liquid and chemical resistant (in other words, they’re more than enough for the task at hand):

- PROTECTIVE PVC COATING: Liquid and chemical resistant gloves. Effective against adhesives, detergents, and diluted bases and acids. Gauntlet cuff...
- EXTRA DURABLE: Resistant to cuts, abrasions, punctures and heat; stays flexible even at lower temperatures
Now that we’ve got the necessary supplies, let’s get to the process of dumping that RV black water tank.
How to Empty and Clean an RV Black Water Tank
The best way to explain the processes of emptying and cleaning an RV black water tank is to point you to this post and to share the following video with you. This video of us dumping and cleaning our tanks and explaining each step as we go will give you a visual understanding of how the process works and how each item noted above is used in that process.
This video is nearly 15 minutes long, but the number of times it has been viewed (1,703,614 at the time we’re writing this post) suggests that folks appreciate seeing the dumping and cleaning process in action, to give them a better understanding of how it all works. This is entirely understandable due to the intimidating nature of the tank dumping/cleaning process, especially for those who have never done it before. Once you’ve seen it in action, we think you’ll agree that it’s far less intimidating.
If you’re short on time, or if you just need a quick primer on the subject, this video sums up just the dumping process in 2 ½ minutes. We do encourage you to watch the longer video if you have the time, especially if you’re not 100% clear on how to dump and clean your tanks, and how to operate them when you’re hooked up to a sewer at a campground or RV park.
Do All RVs Have A Black Tank?
The answer to this question is no. Smaller RVs (particularly Class B, van-based motorhomes and small travel trailers, pop-up trailers, and truck campers) may have a cassette or cartridge toilet. First, smaller RVs may not have room for three holding tanks or any holding tanks for that matter. Also, some campers appreciate a simpler plumbing setup, or no plumbing at all.
What is a Cassette or Cartridge Toilet?
A cassette or cartridge toilet is a toilet that empties into a sealed bin that can be removed from the camper for dumping.
We had a cassette/cartridge toilet in our rental RV in Australia, and we made a video about it so that our viewers would be able to see the way a cassette toilet works and how to dump it.
Can I Use Regular Toilet Paper in my RV Toilet?
Contrary to somewhat popular opinion, you absolutely can use regular toilet paper in your RV toilet. We’ve done it for darned close to 20 years, and if that ain’t proof, we don’t know what is!
With that said, however, there’s a lot of misinformation out there suggesting that special “RV toilet paper” needs to be used in an effort to preserve the integrity of the RV toilet system and the black water tank, and to keep from “gumming up” the tank sensors.
Here’s the rub, friends: Special “RV toilet paper” is more expensive than “regular” toilet paper. And if you’re using “special RV toilet paper”, you’re wasting your money.
We can understand the desire to protect a very expensive plumbing system, and to avoid nasty issues with clogged plumbing, so it makes sense that RV owners want to do what’s best for their rigs. But we’ve been living on the road for so long that we’ve actually tested “regular” toilet paper, and we made a video showing you how to test your favorite toilet paper as well. You can watch that video here, and then test your favorite home toilet paper if you wish.
Our favorite toilet paper is the Kirkland brand which is Costco’s signature toilet paper. It’s a two-ply toilet paper that’s very popular with homeowners, and we’ve been using it in our RV for so many years that we’d probably qualify as a case study on our own!
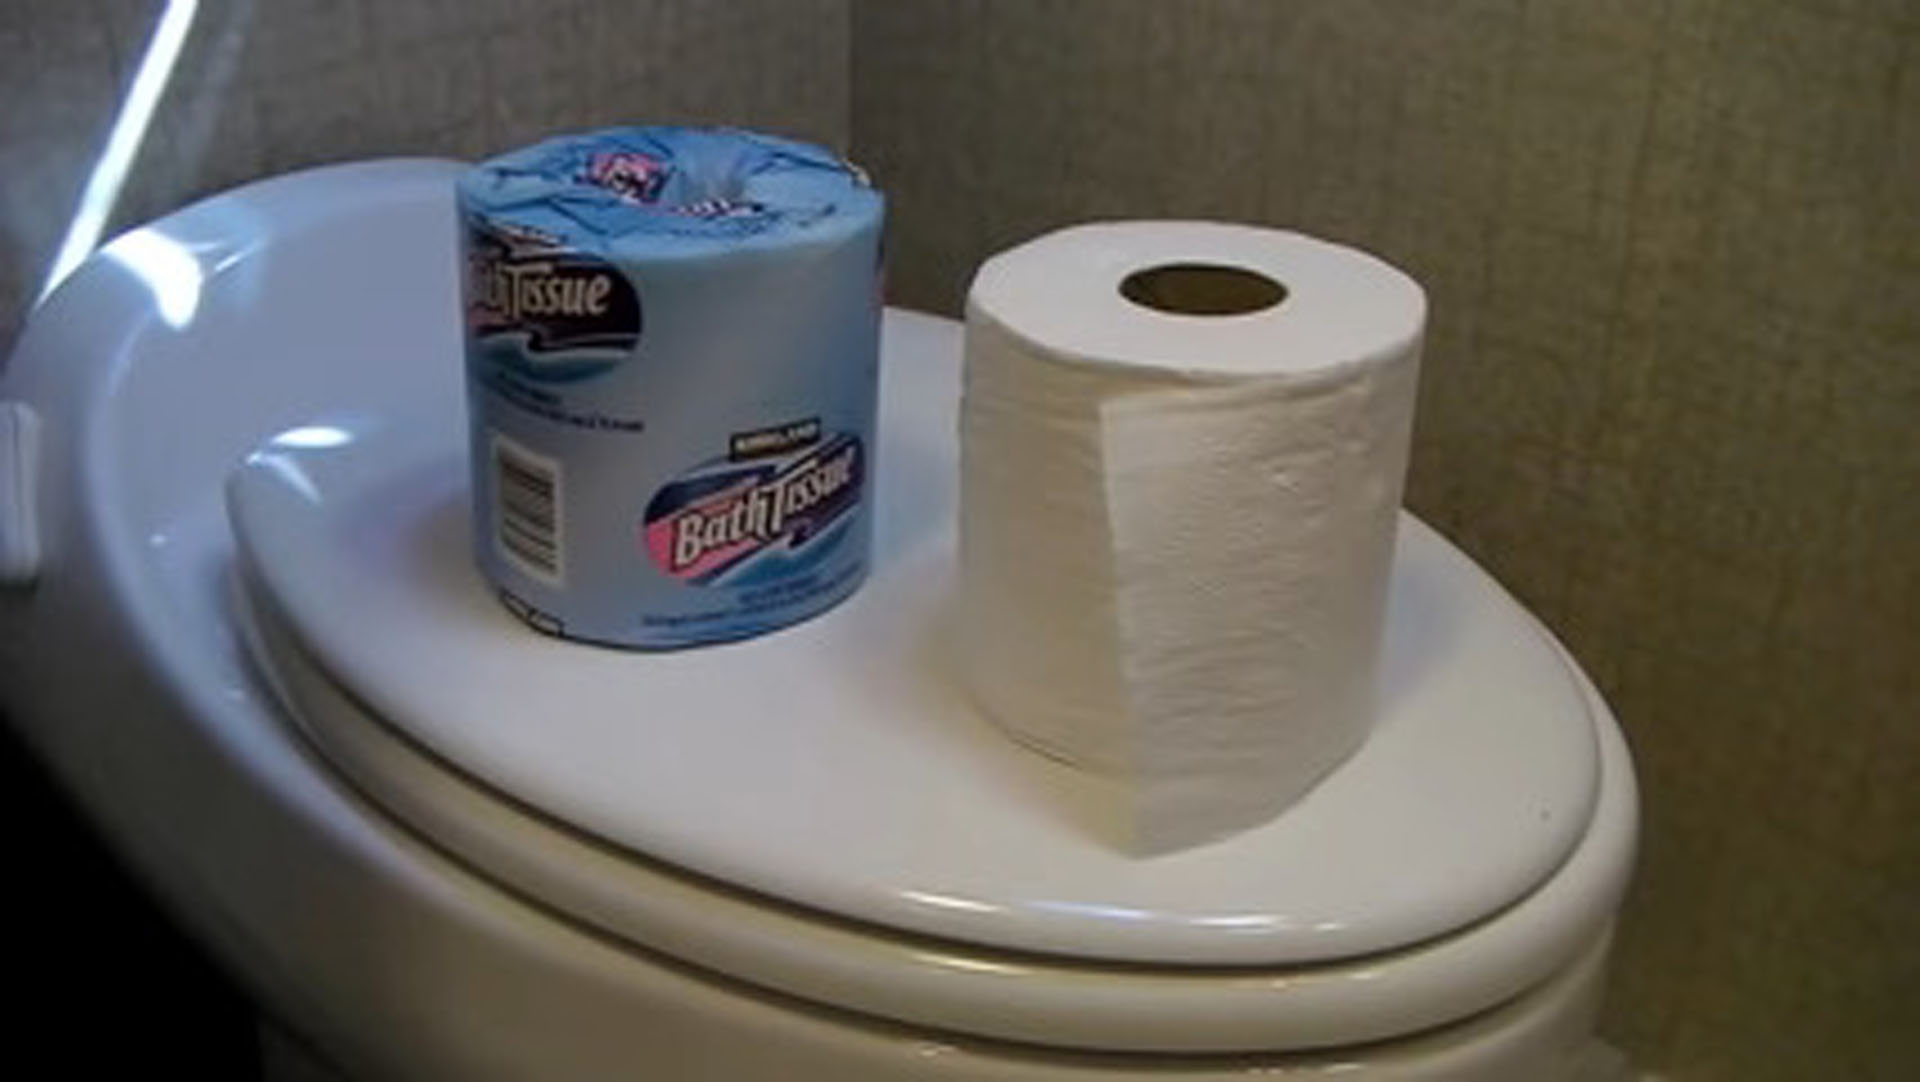

No, “special” RV toilet paper is not worth the extra money. Test your favorite toilet paper and if it passes the test, use it! Even a nice two-ply brand like Kirkland hasn’t caused us a single problem in nearly 20 years.
The plumbing system of our 2005 Newmar Mountain Aire is still in fantastic shape as we head into 2022, so we’re here to tell you that you don’t need “special” RV toilet paper. We’re so convicted on this point that we even wrote an entire post entitled “RV Toilet Paper? Don’t Waste Your Money!!”
But, one thing that you DO need to keep in mind, regardless of the brand of toilet paper you use in your RV, is that you don’t want to use massive quantities of ANY toilet paper. Even the special “RV Safe” toilet paper can cause a problem and clog up your RV’s black water tank plumbing if you constantly flush huge wads of it. Be sparing… and you’ll never have to worry about a clogged black water system.
Should I Leave Water in My RV Black Tank?
You should absolutely leave water in your RV black water tank at all times – at least just enough to cover the bottom of the tank. This is a very important point for several reasons, the most important of which is the fact that the liquid in your black tank is what keeps the solids from “pyramiding” and getting stuck (and hardening) in the tank. This is a situation that is not only difficult to remedy, but can also impact the functioning of your tank sensors which leaves you wondering when your black tank is full (and that’s never good).
During use, you never want a dry black water tank. So, even after you dump your black water tank, you want to ADD about a gallon of water to the tank (along with a scoop of Happy Campers or your favorite tank treatment) so that you avoid what is known in the RVing community as the “poop pyramid”.
The RV toilet, by design, doesn’t pour a whole lot of water into the black tank when it’s flushed. This is in an effort to conserve water and to conserve space in the holding tank. However, if you don’t have enough water in the black water tank, solids pile up (forming that pyramid!), and are very difficult to wash away during the tank dumping process.
The RV black water tank needs to have a sufficient amount of water in it at all times to help to break down toilet paper & solids and keep them afloat, so that by the time you dump your tanks, everything gets washed away in the process.
Do All RV Toilets Work the Same Way?
No. There are a variety of different types of RV toilets, and each works in a different way. An RV could have a gravity flush toilet, a macerating toilet, a composting toilet, a cassette toilet, or even a portable toilet.
For more information on the various types and styles of RV toilets and how they work, feel free to check out our post all about RV toilets.
What Do I Do If My Black Tank Gate Valve Is Leaking?
The contents of your black tank should STAY in your black tank. That’s why the outlet is closed off by a gate valve. But, over time, that valve may begin to leak… either due to age or because waste from the tank (and from improper dumping and flushing) are preventing it from closing completely. When that happens, you need to replace the valve.
We won’t go into the details here, but we do have an article that gives you all the steps. You can check it out here: How to Replace an RV Waste Valve: Either Black OR Gray!
Final Thoughts
We hope this post has helped to flush out your concerns and questions about the RV black water tank. We understand that feeling intimidated by the dumping process can really stink.
Number one, it’s important to understand how to care well for the systems in your RV. And number two, if you don’t know how to properly dump your black tank, urine trouble!
(Sorry, we couldn’t help ourselves.)
Geek Out with Us Every Week
Join our newsletter to learn about all things RV-related. Every week we offer free tips, tricks, product reviews, and more to our online community of RVers. So, whether this is your first time on the road or you’re a seasoned expert, we’d love for you to geek out with us!
rag_ftw
Saturday 20th of November 2021
How much water would you leave in your black tank if you were winterizing?
TheRVgeeks
Saturday 20th of November 2021
Hi Rag. Good question. The typical recommendation is to NOT leave your black tank empty and "dry", to avoid the issue of any residue drying out and hardening up. So you definitely want to leave enough water in the tank (and some tank chemical, while you're at it) to avoid that being a problem. Since there's still plenty of room in the tank for the water to expand IF it did freeze, you're not in any danger of that water becoming a problem (plus, the "stuff" that's dissolved/suspended in the water lowers its freezing point... but we digress). But if you're storing your RV in an area where you don't expect there to be any significant time spent below freezing, you could take the opportunity to "soak" your tank with a cleaning solution (water softener and dishwasher detergent... or a dose of Happy Camper Extreme... anything that will help soften/remove any remaining crud) so it's prepped and clean for next season. But that's really only a valid option if there WON'T be freezing temps for long enough that you'd have to worry about the tank freezing solid (and cracking).
So, long story short, there's not really a one-size fits all answer! ???? At a minimum, we'd suggest adding in enough water to cover the bottom of the tank, toss in your regular tank treatment, and enjoy the Holidays.
Gary McElroy
Saturday 20th of November 2021
Hi Peter and John,
In the section "Should I leave water in my black tank?" the fourth paragraph begins "The RV toilet needs..." Should it really be "The RV black water tank needs..."? Just trying to be helpful.
TheRVgeeks
Saturday 20th of November 2021
Hi Gary! Thanks so much for catching that editing error and looking out for us! All fixed now.
Jenny Faraschuk
Saturday 20th of November 2021
We just had our tanks all professionally cleaned because the odors were overwhelming inside, especially the black tank as it gets fuller. We were able to clean to the point that our sensors showed empty. We were users of Happy Camper tank treatment. But now, even after the professionals cleaned our tanks, the smell is still there as the tank fills up. The Pros told us not to use Happy Camper because it left a sandy substance in the bottom of the tank. In fact, he showed me some in the lines after their clean. It was a white and tan sandy material. He said that really builds up in the bottom of your tank over time and is very difficult to flush out. He said it was not the stuvite stuff. He recommended that we use Pinesol instead and said that it is a good disinfectant and deodorizer and cleans too. He also said to always fill the tank all the way before emptying because that creates a tornado effect inside the tank to better flush everything out when we pull the valve. I am at a loss now wondering what to do next. He said he didn’t think our air vents were bad as you suggested in a previous video because I mentioned that to him. What do you think? I can’t live with this smell. My rig is a 2019 Momentum M328 Toy Hauler. They also cleaned the gray tanks (2). The bathroom sink produces a godawful smell every time you turn on the water. After he cleaned the tank which he said was not very dirty and we have removed and inspected the air valve under the sink and found it in working order and if he is correct and our vents on the roof are ok then where would we turn next for answers? I even tried putting a cup of Cascade automatic dishwasher liquid down the drain and emptied the hot water tank into the sink before we moved to our next location before I drained it thinking that would really clean up the tank. It was a little bit better but not resolved. I am tired of my new rig smelling so bad. We just purchased this rig some months ago, are seasoned RVers but certainly not RV mechanics. Can you give me some advice? PLEASE!
Jenny Faraschuk Quartzsite AZ presently for the winter/spring
TheRVgeeks
Saturday 20th of November 2021
Hi Jenny,
First, we're sorry to hear that you're having such a recurring issue with odor. Trust us, after our recent experience trying to track down our Mystery Gray Tank odor, we know what you're going through! It's NOT fun.
Second, since you've had your tanks cleaned thoroughly, that would seem to indicate that THEY aren't the problem, either. Also... we haven't heard/read anything about "grit" like that from Happy Campers before. We've been using it for MANY years now, and when we had our tanks power washed, didn't see any evidence that it had accumulated in our tanks at all. We're wondering if it's an issue with water chemistry (though you say you're in Quartzsite, which means you're in the same part of the world we typically "haunt" for the winter. ????
Based on what you've said, we have a couple of thoughts:
The bathroom sink smelling as soon as you turn on water sounds like the drain plumbing itself needs to be cleaned. We have that issue after days and days of dry camping, with very little water going down the drain. The build-up of "scum" starts to make a nasty, sulfury smell... which starts as soon as it gets wet (very unpleasant when you're brushing your teeth!). In our case, we can remove the drain stopper and use a toothbrush and cleaner to clean down the sides of the drain pipe... as far as we can reach. That usually does it for us. So may help your situation, too. It would help if you could being isolating where the odor is coming from (IF you can... took us almost a YEAR to find our mystery odor source!). Do you have a washer/dryer prep? If so... that sewer drain may be open, allowing gray water tank odors into the RV. If you can begin narrowing down to a specific area, that may help to identify the cause. Barring any of the above being an issue, do you notice that the odor is better/worse if you have a roof vent fan open? Or running? If it's bad when the vent is open, but NOT running, where are your sewer vent pipes located on the roof? It's possible that odor coming up out of the vents is coming back down into the RV through an open roof vent... depending on which way the wind is blowing.We hope one or more of those helps to isolate the problem, Jenny!