
Batteries are a critical part of any RV. Your RV battery gives you the power you need to operate a variety of features, including appliances, devices, and lights.
If you have a motorized RV, you also need a battery to start and drive your rig.
But there are several different types of RV batteries, and it’s important to understand the differences between them so that you don’t purchase the wrong type of battery for your camping situation, and so that you have sufficient power to run everything you hope to run while you’re camping.
This is especially crucial for boondockers like us, but it’s important information for every RVer to understand, even if you’re usually connected to shore power.
So, in this post, we’re going to break it all down in hopes of removing some of the confusion around RV batteries.
- 1) What Kind of Battery Should You Use In an RV?
- 2) What’s the Difference Between a Starting/Chassis Battery and a Deep Cycle Battery?
- 3) What Are the Different Types of Batteries?
- 4) How Long Does an RV Battery Last?
- 5) A Deep-Dive Into the Pros & Cons of Various Battery Types
- 6) Free RVing Tips, Tricks, Reviews, Giveaways & More
What Kind of Battery Should You Use In an RV?
Let’s clarify something at the outset:
If you have a driveable RV, (Class A, B, or C RVs are all motorized), then there are two different types of batteries in your rig. You’ll have a “chassis” (or “start/starting”) battery and a “house” battery (or batteries).
If you have a travel trailer or 5th wheel (an RV with no engine, that you tow), then you’ll only have a house battery bank.
Let’s briefly look at the difference between RV chassis batteries and RV house batteries.
Chassis Batteries
The chassis battery is your starting battery.

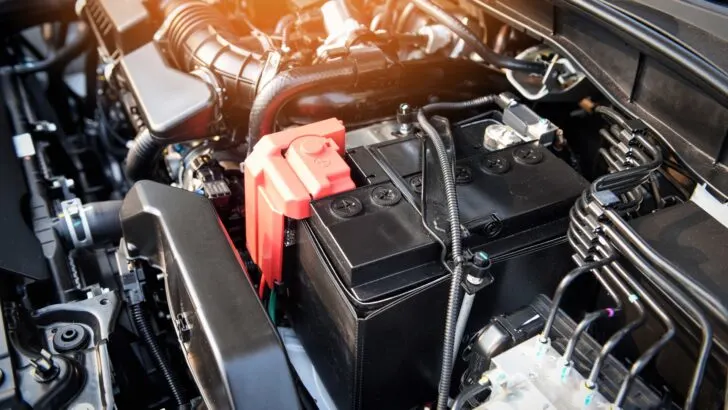
A chassis battery is a starting battery whose main job it is to start the engine of a motorized RV.
It sits in your engine compartment and starts your RV’s engine. (Be sure to check out our post on how to clean battery terminals to keep your chassis battery in good condition.) After start-up, most chassis batteries feed all the same things you’d expect on most motor vehicles: brake, tail, and turn-signal lights, dash heat and A/C, windshield wipers, horn, etc.
Again, chassis/start/engine batteries are only found on motorized RVs. The vehicle’s alternator keeps the chassis battery fully charged as you drive, so they stay fully charged in normal use.
House Batteries
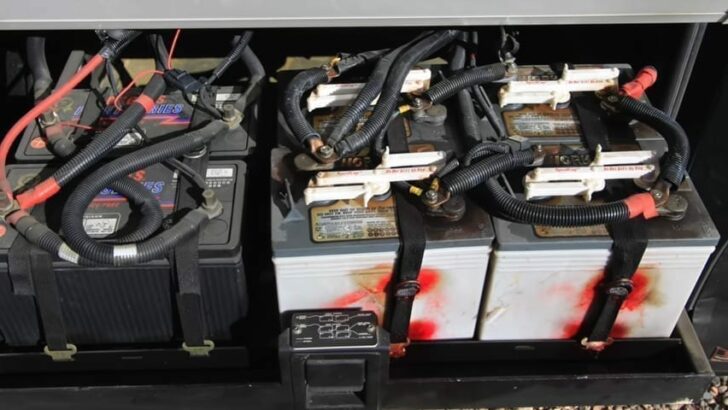
Most RVs have at least one house battery. Many rigs have an entire bank of them. These batteries power interior lights, water pump, vent fans, and other devices inside your RV.
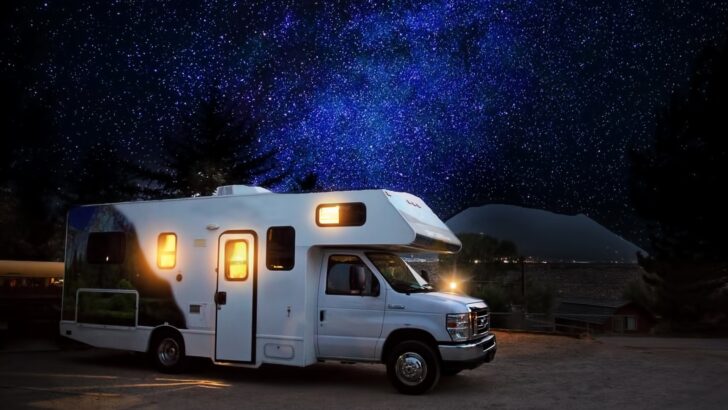

This RV is boondocking (not connected to shore power). Its the rig’s house batteries powering the interior lights.
Your house battery bank not only supplies power to your RV when you’re boondocking, though. It also supplies any power you may need when you stop for lunch en route to your destination. Need to flush your toilet or wash your hands while you’re on a road trip? You’ll need your water pump for that, and it gets its power from your RV’s house battery.
House batteries are designed to be drawn down, then recharged, as needed. Because their charge level cycles up and down as part of their normal operation, deep-cycle batteries are used for the house battery bank in an RV.
What’s the Difference Between a Starting/Chassis Battery and a Deep Cycle Battery?
Starting/chassis batteries and deep cycle batteries are designed for very different uses.
A starting/ignition battery is designed for strong, high bursts of power, using its maximum output in short bursts to start an engine.
A deep-cycle battery is designed for steady power use over longer periods. Instead of short bursts of maximum power, a deep cycle battery is designed for maximum capacity — that is, continuous power over time.
Starting Batteries
With a starting, or chassis, battery, the depth of discharge is very minimal, with only short spikes needed to start the vehicle.
Starting batteries are made with more plates, which are thinner than deep-cycle batteries.
Thinner plates, however, will warp and pit if they’re repeatedly discharged deeply. So, a starting battery is not designed for the deep discharges over time that a deep-cycle battery can provide.
Also, because starting batteries are generally used to start a vehicle, most starting batteries are rated in Cold Cranking Amps (CCA).
A CCA rating is the number of amps (amperes) a battery can deliver at 32°F (0°C) for 30 seconds while maintaining a minimum of 7.2-volts. The higher the CCA rating, the higher the battery’s cranking ability.
However, there’s no correlation between the CCA rating of a battery and amp-hour storage capacity. Amp hour storage capacity is what you’d be interested in for a deep-cycle battery.
Deep Cycle Batteries
A deep-cycle battery is designed to supply continuous power over time, while its charge level increases and decreases with use and charging. This is why you want a deep-cycle battery to provide the power to run the appliances and devices in the “house” portion of your RV. You need a battery that is unharmed by pulling power out of it, lowering its state of charge.
You’ll also find deep cycle batteries used in boats, golf carts, and motorized wheelchairs, as well as in certain types of industrial equipment.

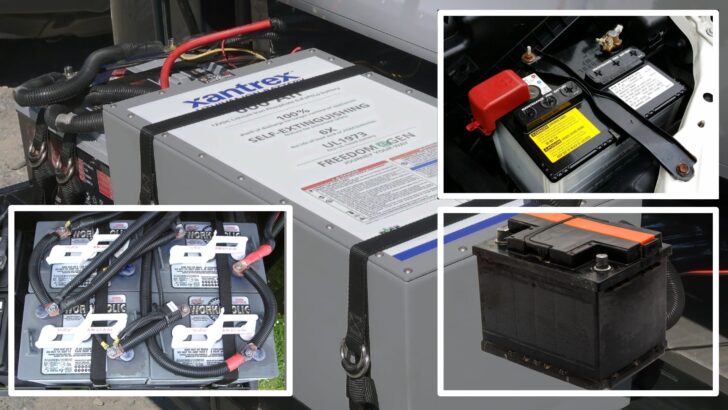
On the left are two chassis batteries, which start the engine. On the right are four lead-acid house batteries designed for the purpose of powering the appliances, devices, and components of an RV.
A deep cycle battery is designed with the purpose of providing maximum capacity over time rather than for short bursts of high energy. They have thicker plates which enable them to be safely cycled up and down without damage.
While designed to be discharged, it’s important to remember that discharging a deep cycle lead-acid battery below 50% depth of discharge will reduce its lifespan.
So deep cycle RV batteries have thicker plates to provide continuous power and a deeper discharge state. In comparison, start/chassis batteries have thinner plates to provide short bursts of high energy, and remain mostly or fully charged most or all of the time.
What Are the Different Types of Batteries?
There are four different types of batteries commonly used in RVs that utilize different types of battery chemistries.
All of these can be used as RV house batteries, but they’re not all the same. It’s important to know the differences to choose the best type of battery to power your RV optimally.
Flooded Lead Acid (FLA)
A flooded lead-acid battery is the most basic type of RV battery and can be used for house or chassis applications. As mentioned, the design of chassis/start batteries differs from deep-cycle house batteries. But FLA can be used for either application.
When a flooded lead acid battery is charged, the acid/electrolyte and lead plates in the battery react, which is how the electricity is stored.
Flooded lead acid batteries must be mounted and kept upright. Otherwise, the electrolyte would leak out of the vent caps. FLA batteries are quite heavy and require routine maintenance.
You need to check the cells of a flooded lead acid battery to make sure the electrolyte is where it should be (at the bottom of the filler tubes) because it will dissipate over time. FLA batteries require filling with distilled water to maintain the appropriate electrolyte level.

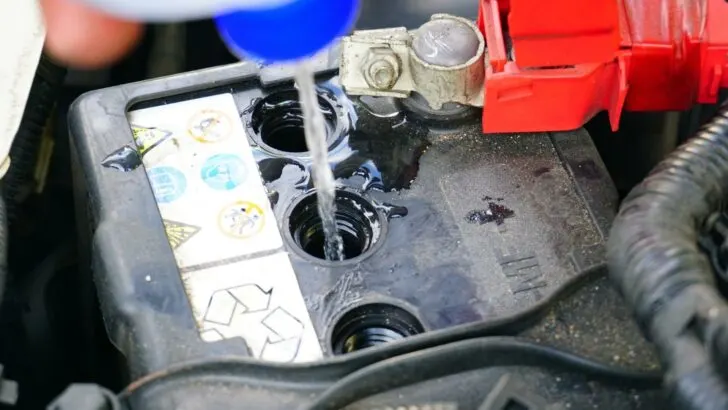
Flooded lead acid batteries require monitoring and maintenance to keep the electrolyte at the proper level.
FLA batteries, particularly those used in house applications, need to be monitored to make sure the depth of discharge is not too low. Generally speaking, it’s best not to allow a deep-cycle FLA battery to fall below a 50% state of charge. Otherwise, it can be damaged and its lifespan significantly shortened. (For more information, see our post on the best RV battery monitors.)
Flooded lead-acid batteries also out-gas, meaning they must be installed in a vented space.
When a flooded lead-acid battery is charging, it can produce hydrogen sulfide gas which is flammable/explosive, poisonous, colorless, and can have an odor that smells like rotten eggs. This gas is heavier than air, so it will accumulate at the bottom of spaces that aren’t properly ventilated.
There are three different types of flooded lead acid batteries.
Standard FLA
Standard flooded lead acid batteries contain lead plates and an acid electrolyte. These have been around for ages, and are the most common and well-known battery chemistry/form factor.
It’s also the cheapest option and the most readily available.
FLA batteries do best with 3-stage charging (Bulk, Absorb, Float) to ensure that all the lead sulfate is removed from the lead plates and returned to the electrolyte solution for the next discharge cycle. (Sulfation is the result of the chemical reaction that generates the electricity in the battery.)
We should note here that not all converter/chargers offer 3-stage charging. Some older RVs still have the original converter/charger, and some RVs may have a cheaper inefficient one. These can overcharge your FLA RV batteries if your RV is stored plugged in for long periods of time.
So, if your rig doesn’t have a three-stage converter/charger and your batteries are flooded lead-acid, you’ll need to disconnect your RV house batteries and store them properly for long-term storage.
For more on this, please see our post “Should I Disconnect My RV Battery When Plugged In to Shore Power?”
If you have standard flooded wet-cell lead-acid batteries, you’ll need a good-quality hydrometer to maintain them properly. And every RVer should have a good multimeter on board:

- Professional Battery Tester
- Compact hand held tester reads specific gravity of battery acid
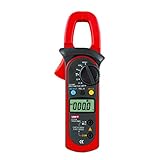
- Measures both ac & dc current up to 400 amps, ideal for vehicles, rvs, marine boats & etc
- Ac/dc voltage, current, resistance, frequency, continuity, duty cycle & diode check
Gel
A gel or “gel mat” battery is a style of flooded lead acid battery in which the liquid electrolyte (the “battery acid”) is concentrated into a gel by the addition of sulfuric acid and silica.
The thickened electrolyte allows for a gel battery to be stored in a variety of positions other than upright because they’re less prone to spilling.
They also produce fewer fumes, so there’s less outgassing. That means limited ventilation is not as much of an issue with gel batteries.
Advantages to Gel Cell Batteries:
- Less maintenance because the electrolyte doesn’t need to be topped off
- They don’t leak
- Can be installed in almost any position
- Vibration from driving isn’t an issue
- No fumes or off-gassing
- More resistant to sulfation
Disadvantages to Gel Cell Batteries:
- More expensive than standard wet cell FLA batteries
- More time is required to charge
- Excessive heat can damage the battery and reduce its lifespan
- Can still only be discharged to 50%
AGM
An AGM or “Absorbed Glass Mat” battery is another type of flooded lead acid battery.
An AGM battery has the same lead-acid chemistry, but the electrolyte is “absorbed” and contained within a matting inside the battery. This means that, like a gel battery, an AGM battery can be placed in just about any orientation.


There are various types of maintenance-free lead-acid batteries.
There are pros and cons to an AGM battery as well.
Advantages of AGM Batteries:
- Virtually maintenance free
- Spill-proof due to the glass mats
- Power output is high due to minimal internal resistance
- Shorter charging time compared to regular flooded batteries.
- Longer lifespan due to the fact that AGM batteries don’t self-discharge like other types of batteries, even after long periods of inactivity.
- They’re designed to be highly durable for use in the aircraft industry, so they’re very resistant to vibrations from driving, even over rugged terrain.
- AGMs are less prone to sulfation, so battery equalization isn’t needed nearly as often.
Disadvantage of AGM Batteries:
- Expensive compared to standard wet-cell batteries
- Charging capacity is reduced over time
- They’re sensitive to overcharging and high voltages, which can shorten their lifespan
Lithium
First, a lithium battery for RV use differs from the more generic “Lithium Ion” category of batteries. Those are known for offering very high power density in small packages and are used for battery-powered devices like laptops, tablets, cordless drills, etc.
The term “Lithium Ion” is a generic term that describes a whole classification of battery chemistries, just as the term “vehicle” covers a whole range of brands/models/styles of transportation from cars to pick-up trucks to diesel pushers.
The “lithium” batteries used in RV applications are typically Lithium Iron Phosphate (LiFePO4) which is extremely stable and safe.
These are much lighter than FLA batteries and can be discharged almost completely. So the 50% max state of charge doesn’t apply, leaving far more energy available than a seemingly equivalent FLA battery. There are no issues with deep discharges reducing battery life.
There are also no issues with outgassing, nor are they any free liquids inside. So LiFePO4 batteries can be installed just about anywhere.
Advantages of Lithium Batteries:
Lithium-ion (again LiFePO4), batteries tend to overcome most lead-acid battery disadvantages:
- They have greater energy density (the amount of energy a battery stores, given the space and weight), so you get more energy for the same amount of space.
- Fewer batteries are required to produce the same amount of energy (or more).
- Lithium batteries have less voltage sag and maintain a higher voltage throughout the discharge cycle, making them better for high-powered appliances such as cooktops & microwaves.
- Lithium batteries charge much faster because they accept a very high charge current, with less resistance to charging.
- They can run multiple devices & appliances simultaneously, with the only limitation being the RV’s inverter
- Better able to sustain deep discharges
All that said, there are some potential downsides to LiFePO4 batteries:
Disadvantages of Lithium Batteries
- Cost – or at least initial cost. Lithium does cost more to buy. However, they tend to be well worth that initial higher price because they don’t need to be replaced anywhere near as frequently as other types of batteries. They last a long time.
- Require specific charging components – Lithium batteries require different charging profiles than flooded lead acid batteries do. So upgrading to lithium could require changing out other components, (especially the converter/charger), for lithium-compatible versions.
- Temperature sensitivity – A lithium battery will be damaged if it’s charged while the battery temperature is at or below freezing. This means that they can’t be stored in a cold area, nor are they the best choice for winter camping in very cold climates unless they’re located in a heated space. However…
Lithium battery manufacturers have addressed this issue in a couple of different ways, as we pointed out in our post discussing misconceptions about lithium RV batteries.
First, some brands of lithium RV batteries allow you to continue to draw power to as low as -4℉.
But again, the problem is that permanent damage will likely occur to most lithium-ion batteries if you charge them in below-freezing temperatures.
BUT… virtually all lithium RV batteries employ a Battery Management System (BMS) that monitors the internal temperature. That ensures that the charging current won’t be allowed to flow into the battery when it would be damaged by doing so. (For more on all functions of a BMS, see our post “What Is the Function of a Battery Management System?“)
In addition to the protective features of a BMS, there are now lithium batteries on the market that have built-in heating elements. When the BMS detects that the battery’s internal temperature has dropped low enough, it can trigger the heating element to come on, allowing the battery to be charged well below freezing.
In fact, one of our favorite batteries, the 100Ah Battle Born, which is sized to be a direct replacement for a typical RV house battery, is self-heating. So is our own 600Ah Xantrex battery.
See more about (and others) in our post on the best RV battery for boondocking.
We know that many RVers are upgrading to LiFePO4 batteries. If you’re in the market for high-quality battery solutions for your rig, we’ve got a Battleborn coupon that’ll save you some cash.
How Long Does an RV Battery Last?
The answer to this question depends on the type of RV battery you have and how well you’ve maintained it.
In general, properly maintained FLA deep-cycle batteries often last anywhere from 4-6 years. However, many RV owners have to replace their RV batteries more often, typically due to a lack of proper care and maintenance.
However, high-quality lithium RV batteries are designed to last much longer than traditional lead-acid batteries. A properly-maintained lithium RV battery can last up to 10 years or more. In fact, some manufacturers of LiFePO4 batteries warranty their batteries for 10 years.
A Deep-Dive Into the Pros & Cons of Various Battery Types
If you’d like a deep dive into the pros & cons of the various battery types, we gave a lengthy talk on the subject at the 2019 Xscapers Annual Bash.
In the talk, to which we’ll link below, we compare and contrast the benefits and limitations of standard flooded lead-acid, AGM, and lithium batteries.
This is an uncut deep dive, so you might want to grab a glass of lemonade or a cup ‘o joe for this one!
Now that you’ve mastered the topic of RV batteries… consider extending your knowledge of your RV’s wiring and electrical system, too.
Free RVing Tips, Tricks, Reviews, Giveaways & More
Subscribe to our daily newsletter! We’ve been full-time RVers for 20 years (!) and share everything we’ve learned about RVing in our daily blog posts. Join our online community to receive a wealth of great RVing knowledge delivered right to your inbox.
Whether this is your first time on the road or you’re a seasoned full-timer, you’ll love the wide range of RVing topics we cover. Don’t miss a single article or any of our famous RV gear Giveaways — Subscribe today!
Eric
Wednesday 17th of April 2024
when hooking up two batteries in parallel, is it necessary that each battery be the same ah, group size, age, etc? I have two different 12v agm deep cycles. One is 100ah the other 125ah with different group numbers as well.
Thanks, Eric
TheRVgeeks
Thursday 18th of April 2024
Hi Eric. Great question. Technically, as long as they're the same voltage, no. BUT... to get the best life from both batteries, it's best of they are the same capacity (Ah), voltage, and age (preferably both new). Differences in any of these factors can lead to one battery bearing the brunt of use (aging it faster) and other inequities that just make the combination underperform. In a pinch? Or for short term? Or because you have these two batteries sitting around and they'll go to waste otherwise and you don't really care if they last the longest they could? Sure. But the best solution is two matched batteries.
Dale
Wednesday 23rd of August 2023
What about carbon-foam batteries and lead crystal batteries?
They both contain lead so they are heavy, and I believe they have better charge-discharge characteristics and a wider operating temperature range.
TheRVgeeks
Tuesday 29th of August 2023
Those are both interesting options, Dale. At one point, we were seriously considering carbon foam batteries to replace our house flooded lead acids we had at the time. But both of these options tend to be significantly more expensive than flooded lead acid batteries... without really providing that much of an improvement (either in capacity or performance). Honestly, with the availability of the good lithium iron batteries (and with prices coming down), we generally recommend them as the best option when you want to step up from lead.
William Moore
Tuesday 20th of June 2023
Questions: 1. I just installed LiFeP04 batteries, and normally my solar system charges them to 100% in a couple hours. But we've been in rain and shade for a couple weeks now, and I'm so used to the Lead Acid batteries I've been running my generator when they get to 75%. What percentage should I allow them to get to before I recharge from the generator? 2. Do they make or can you recommend an AGS that works off of percentage instead of voltage? The highest I can set my AGS to start the generator is 12.2v, but I think that's below the 10% remaining in the batteries and the BMS would shut down the battery before the AGS would kick in. 3. My Inverter/Charger was installed with Lead Acid batteries back in 2014 (before LiFeP04 became popular). Do you recommend upgrading my Inverter/Charger to something that was designed with Lithium batteries in mind? If so, which one?
TheRVgeeks
Wednesday 21st of June 2023
Hi William... in answer to your questions:
There really isn't any set %SOC at which you should regularly recharge lithium batteries. That's kinda their benefit: no more worrying about draining too low or having to fully recharge them regularly. So it's really more an issue of being sure that, at bedtime, there's enough power left to get you through the night. Unfortunately, we don't know of any AGS (yet) that offers the ability to use State of Charge (%) instead of voltage. Would be great if there was one... and we assume one will eventually be available, once Lithium more completely takes over, but until then, no. As a matter of fact, we have our AGS completely disabled because we didn't want to rely on voltage alone as the determinant for when the generator started up. There'd really only be two reasons to upgrade/replace the inverter/charger: (1) if it wasn't Lithium compatible (or didn't offer a "Custom" setting for configuring the charge profile) or (2) if you just wanted a larger charger in order to get the batteries charged faster when on shore or running the genny. If the one you have now is lithium compatible and charges fast enough for you... we'd say leave it.Hope that helps, William. It does take a while to adapt, but eventually you'll realize all of the little things you used to have to worry about regarding your batteries that you just don't have to with Lithium. Can be quite freeing.
Mike
Monday 5th of June 2023
Would be nice to see a list of Inverter\charger replacement models for RV's. I'm getting ready to do so, but have to take a look at my current inverter\charger to see what I need in order to upgrade to Lithium.
Bruce H.
Saturday 10th of June 2023
@Mike, Take a look at the Samlex EVO series of Inverter/Chargers with built-in transfer switch. They come in a range of power levels and battery pack voltages. These units are completely programmable for lead-acid battery types and Lithium. The display shows charging/ inverter status and power consumption. They are popular in the commercial field and less so in the RV We've had the 1,200 watt version since 2017 mostly running our all-electric fridge. First with lead-acid deep cycle, then since 2021 with 200Ahr LiFePO4. I was in the electronics business for 40 years and sold hundreds of power supplies, chargers and inverters. We had next to zero issues with Samlex products Nearly all these were in 24/7/365 applications. I can't say the same thing for other manufacturers or the high-end products costing many times what the comparable Samlex cost. Just my experience.