
When the weather starts turning warmer and thoughts turn to planning epic RV road trips, there are lots of RV maintenance tasks to accomplish, including RV spring cleaning.
After 20 years on the road full-time, we’ve got some good tips to share to help get your RV ready for the new camping season!
- 1) Sanitize Your Fresh Water Tank & RV Water System – An RV Spring Cleaning Must!
- 2) Clean Out Your Hot Water Tank (& Replace the Anode Rod In Suburban Tanks)
- 3) Clean the Interior of Your RV
- 4) Wash the Exterior of the RV
- 5) Wax the Exterior of the RV (Another RV Spring Cleaning Staple!)
- 6) Don’t Forget the Tires During RV Spring Cleaning
- 7) Clean Your Windshield Using 0000 Steel Wool
- 8) Clean Your Awning
- 9) Wash Your Solar Panels
- 10) Check Your Rooftop Sealants (at RV Spring Cleaning + in the Fall, too!)
- 11) Clean Your Black Water Tank
- 12) Clean Your Gray Water Tank
- 13) Clean Your Tank Sensors
- 14) BONUS TIP:
Sanitize Your Fresh Water Tank & RV Water System – An RV Spring Cleaning Must!
The first thing you’ll want to clean is the entirety of your RV’s water system. This will include sanitizing your fresh water tank and making sure that your rig’s water system is clean, healthy, and ready for drinking, cooking, showering, etc.
For the steps to follow, click over to our post about how to sanitize your RV water system.
Clean Out Your Hot Water Tank (& Replace the Anode Rod In Suburban Tanks)
Cleaning out your RV’s hot water tank is an important part of the RV spring cleaning process.
If you’d like a step-by-step guide, be sure to view our post on how to flush and clean your RV water heater or watch the video here:
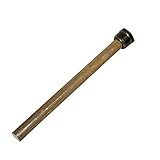
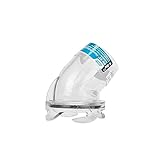
For this task, you’ll want to have a water heater tank rinser on hand, as well as a new anode rod (IF you’ve got a Suburban water heater with a sacrificial anode rod that’s ready for replacement).
Water heater tank rinser:

- EXTENDS THE LIFE OF YOUR WATER HEATER: The tank rinser lifts sediment that collects at the bottom of water heaters and flushes it out. This Camco RV...
- IMPROVES WATER HEATER FUNCTION: This camper accessory helps prevent tank corrosion and also restores your hot water tank’s heating efficiency by...
Suburban anode rod:
- Magnesium anode rod
- For use in RV water heaters
For an important comparison of a Suburban vs aftermarket anode rod see this video:
Clean the Interior of Your RV
This RV spring cleaning task can take some time, but it’s certainly worth the investment. This is where we make the interior of the RV sparkle, creating a home that’s ready to enjoy the rest of the year.
When we clean the interior of our motorhome, we like to use microfiber cleaning cloths which we also use for a variety of other tasks around the inside and outside of the coach.
Your cleaning process may involve using your favorite cleaning solution or a combination of white vinegar and water.
You’ll want to spiff up every room, literally every nook & cranny, vacuuming, sweeping, shining windows & fixtures, and removing dust, dirt, and cobwebs.
Once you’ve gotten things all cleaned up, you’re going to want to KEEP things clean, right? To help with that, we’ve got a deal for you! My Magic Carpet has just increased the discount available to RVgeeks readers from 20% to 25%!
Looking for washable rugs for your RV (or your house)?!?! Use the Discount Code "RVGEEKS30" to save 30% on your entire order when you shop factory direct at My Magic...Show More
Looking for washable rugs for your RV (or your house)?!?! Use the Discount Code "RVGEEKS30" to save 30% on your entire order when you shop factory direct at My Magic Carpet's website: BuyMyMagicCarpet.com.
Choose from a variety of sizes, colors, and patterns to complement or accent your home. And when they get dirty, just pop them into the washer (even your RV's washing machine!) to get them clean.
Read our post & watch our video about My Magic Carpet washable area rugs
Show LessYou may have heard us gush about these My Magic Carpet washable rugs for RVs before, but that’s because we really love ours. These rugs add color and warmth as well as protection to your floors (RV floors or ANY floors). They look great, the quality is fantastic, and they wash really well – yes, even right in your RV’s washing machine. (And you wouldn’t believe how great washable rugs are in an RV environment!) Take a look!
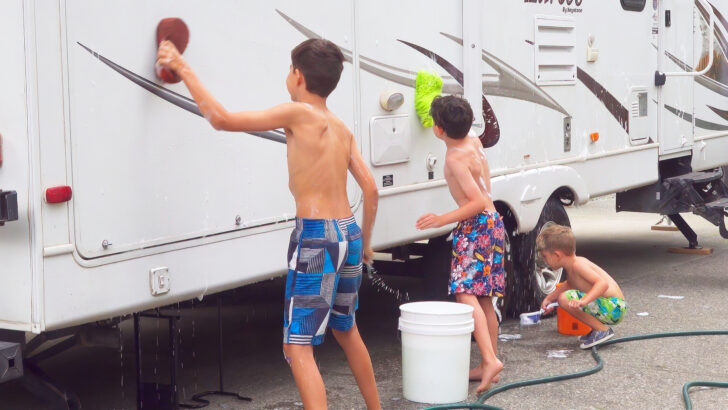
Wash the Exterior of the RV
Moving outside to the exterior of the RV, we like to thoroughly clean the entire rig from head to toe, and then some.
Some years back we bought a pressure washer to help with this task, and we’ve carried and used it ever since.
Pressure washer:
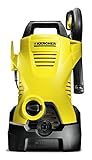
- Power Source Type: Corded Electric
You may not have (or need) a pressure washer, but your garden hose with a good attachment will work nicely. We also like to use a high-quality automotive car wash soap to clean our rig, like Meguiar’s Gold Class.
Meguiar’s G7101FFP Gold Class Car Wash:

- ONLY ONE STEP: Meguiar's Gold Class foaming car wash soap simplifies your car cleaning routine by combining cleaning and conditioning into one easy...
- CLEAN AND PRESERVE: Featuring an advanced formula, this powerful car shampoo and conditioner not only cleans your car, but it’s also gentle enough...
A water blade – or squeegee – really helps to keep water spots from forming, drying, and remaining. We like this One Pass water blade.

- Patented T-Bar edge removes over 90% of standing water
- Included Pole Adapter gives extended reach
Remember now – you’re talking to a couple of guys who travel, live, and work full-time in a 2005 motorhome that still looks brand new. This process is what has worked for us for all these years.
Wax the Exterior of the RV (Another RV Spring Cleaning Staple!)
Once we’ve thoroughly washed and dried the exterior of the RV, we like to use a high-quality wax like Meguiar’s NXT Generation 2.0. This wax not only provides a good shine to our rig but, more importantly, offers excellent paint protection. Our RV is outdoors virtually all year long, and a single waxing keeps our finish beading up the whole time.
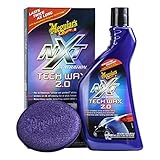
- IDEAL PROTECTANT: Proven synthetic wax with deep gloss provides maximum protection for modern paint and clear coats
- EASY TO USE: Wax glides on and wipes off effortlessly, leaving the finish slick and without a powdery residue
Don’t Forget the Tires During RV Spring Cleaning
We also thoroughly clean our tires and then apply UV protectant to help reduce the effects of exposure to the sun. For this part of our RV spring cleaning, we like to use Aerospace brand products. The ones we use are:
Aerospace Tire & Wheel Cleaner:

- Cleans both wheels and tires effectively
- Foaming formula lifts dirt and debris
Aerospace 303 Protectant:

- Ultimate Protection – Shields against UV ray damage to prevent fading and cracking, while also repelling dust, dirt, lint, and staining
- Non-Greasy – Dries to a smooth, matte finish with no oily or greasy residue. Apply every 3 – 5 weeks for maximum UV protection
This is also a good time to inspect the tread and sidewalls on your tires for signs of wear. While you’re at it, be sure to check the DOT dates on the tires to see if they’ve “aged out” and need to be replaced. For information about tire dates, check out our post and video “RV Tire Age, Care & Replacement” which also includes additional details about caring for, and replacing, your RV’s tires.
Clean Your Windshield Using 0000 Steel Wool
As you go around the rig cleaning your windows, be sure to pay special attention to your rig’s windshield, the window through which you’ll watch the road, the vehicles in front of you, and the areas you travel through on your adventures.
We’re happy to show you a method we’ve developed to super clean your windshield super fast.
If you’d prefer to watch us doing it, here’s our YouTube video!
We use the following products on our windows:
0000 Steel Wool:
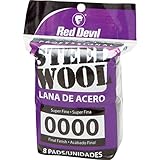
- Smooth shellac, lacquer or varnish before final top coat
- Buff furniture & woodwork - rubs out a high luster finish
Invisible Glass:

- RESIDUE FREE: The Invisible Glass formula contains no streaky soaps, scents, or dyes leaving absolutely ZERO residue on your glass. Your glass will be...
- AMMONIA-FREE: This unique formula contains no ammonia, so it’s perfect for use on tinted and non-tinted glass.
Rain-X:
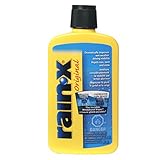
- Restores headlights and clear plastic by removing haze and discoloration
- Heavy-duty glass cleaner gently strips away heavy residue, dirt, bugs, film and road grime from windshields and glass
Pro Tip: We also use Rain-X on our fiberglass shower walls!
Clean Your Awning
One part of your RV that’s easy to forget during the RV spring cleaning process is your awning! But trust us – you’ll remember it the first time you go to use it! What RV spring cleaning routine would be complete without these key components getting tidied up at the same time?
As part of your spring cleaning, take care of your awning so that it’s ready to take care of you when the time comes this summer. Keeping it clean is a great way to make sure it’s ready to use and will last for many years to come. Of course, if your awnings (main, door, and/or window) or slide toppers need replacement, don’t even think about using anything other than the best – Tough Top Awnings!
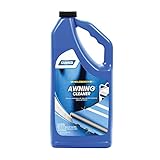
- Restores the appearance of RV awnings
- Removes mold stains, dirt, tree sap and road grime
Wash Your Solar Panels
Your solar panels can get dusty, dirty, and can even be covered with sap that drips from trees overhead. Be sure to clean your solar panels well so that they’ll be in top condition to deliver the awesome power of the sun to your RV battery bank.
To clean your solar panels, you can simply use your hose and a bucket of warm, soapy water. You can also add a little vinegar to the water if you’d like (¼ cup or so). But be sure to use a non-abrasive sponge or cloth and wash carefully, making sure not to drag debris across the solar panel glass. It’s important to clean them, but it’s also important not to damage them in the process (ESPECIALLY if they’re flexible panels, that can scratch more easily than their traditional glass counterparts).
Check Your Rooftop Sealants (at RV Spring Cleaning + in the Fall, too!)
This isn’t your typical cleaning task, but it’s very important to keep your roof sealants fresh and clean.
Now’s the time to check the sealants before the new camping season. This is one of the most important tasks an RV owner can do (at least twice a year) to keep leaks at bay because RV roof leaks are an RV owner’s worst enemy!
Clean Your Black Water Tank
Next, you’ll want to move on to your holding tanks. While it may seem silly to clean a waste tank, it’s very important to keep your holding tanks in good condition.
You can use a good holding tank deodorizer to keep your holding tanks as “fresh” as possible.

- Rid-X Holding Tank Deodorizer
- Septic tank treatment
Now’s a very good time to check to see if it’s time to replace your sewer hose. You don’t want to find out that you have a leak when it’s time for your first RV holding tank dumping of the season!
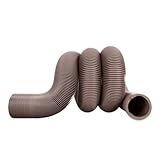
- RV heavy-duty hose is 15 mils of brown HTS vinyl
- Perfect for the seasonal RVer
Be sure to check out our post on how to set up a new sewer hose the easy way!
If you don’t already have them, we recommend a clear sewer hose adapter and a 4-in-1 sewer adapter:
- Clear RV Sewer Hose Adapter: See-through hose adapter allows you to see when your RV sewer system is clean
- Compatibility: Fits 3-inch diameter RV sewer hoses
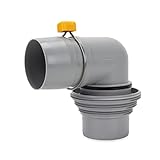
- Connects RV sewer hose to dump station
- Patented spin-lock rings for effortless hose connection
Clean Your Gray Water Tank
You’ll also want to clean your gray tank, and we’ve got you covered with our video on cleaning your RV gray water tank and sensors:
Clean Your Tank Sensors
If you’ve cleaned your tanks, but you’re still having trouble with your tank sensors, we’ve got suggestions for four ways to clean your RV tank sensors that may be very helpful to you.
If those attempts fail, however, you may need an internal power wash and struvite removal:
BONUS TIP:
Check out our annual RV maintenance and spring cleaning to-do list!
Follow along as we do our spring cleaning and tackle our spring maintenance list:
Geek Out with Us Every Week
Join our newsletter to learn about all things RV-related. Every week we offer free tips, tricks, product reviews, and more to our online community of RVers. So, whether this is your first time on the road or you’re a seasoned expert, we’d love for you to geek out with us!
AK Fish
Friday 5th of April 2024
What's this or why that? Be careful with mystery AC adapters that are questionable and tossing them out too soon. I tossed out an AC adapter I did not know what it belonged to until later when I looked at my rechargeable lithium jump starter pack case. No AC adapter.
It got tossed since it was laying around in the trailer after recharging it and I did not put it back in the case. Oops! Spent another $29 to get another mailed to replace tossed one.
TheRVgeeks
Friday 5th of April 2024
Oh no! Painful lesson to learn, but thanks for reminding us all to be careful!
Mark E
Saturday 9th of April 2022
Guys - you missed the most important item for spring cleaning - PURGE. Go through each compartment, bay, drawer, cabinet, etc. Everybody will find at least one "what's this" and a "why that" before they finish.
TheRVgeeks
Saturday 9th of April 2022
You’re so right, Mark! I guess it’s a testament to how much extra junk we’re hauling around that we forgot that! ????