
Replacing an RV water pump isn’t typically part of your regular maintenance routine when you own an RV. After all, a water pump should last for many years in normal use, assuming you winterize it properly during the off-season. So how will you know when it’s time to check on your water pump or replace it entirely?
- 1) When Do You Need to Do an RV Water Pump Replacement?
- 2) What You’ll Need for an RV Water Pump Replacement
-
3)
How to Do an RV Water Pump Replacement Step-By-Step
- 3.1) 1. Turn Off City Water and Water Pump
- 3.2) 2. Remove Water Pump Fuse
- 3.3) 3. Turn on a Faucet
- 3.4) 4. Disconnect Water Pump from Latching Controller if Applicable
- 3.5) 5. Remove Inlet and Outlet Lines from Pump
- 3.6) 6. Remove Screws Holding Pump in Place
- 3.7) 7. Remove Inlet Filter and Clean It
- 3.8) 8. Install Filter on New Pump
- 3.9) 9. Strip Wires and Crimp-on Connectors for Latching Controller
- 3.10) 10. Mount Pump into RV with Existing Screw Holes
- 3.11) 11. Connect Inlet and Outlet Water Lines to Pump
- 3.12) 12. Connect Pump Wires to Latching Controller
- 3.13) 13. Re-Install Water Pump Fuse and Turn on Water Pump
- 3.14) 14. Turn on Water to Ensure Proper Operation
- 3.15) 15. Check Water Connections for Leaks
- 4) Additional Tips for Completing Water Pump Replacement in Your RV
When Do You Need to Do an RV Water Pump Replacement?
The way you’re most likely to know when you need to replace your RV water pump is when the water stops running the way it normally does. When you turn on your water pump and open a faucet inside your RV, if the pump doesn’t turn on and the water doesn’t run, it’s likely that your water pump has failed.
Prior to a complete shut-down of the system, it’s possible that you may have noticed that your water pressure was getting finicky or inconsistent. This can indicate a pending failure of the water pump.
Other indicators that it might be time to replace your water pump include water leaking from the pump or unusual noises coming from the unit. And finally, some RV owners may choose to replace a water pump simply to upgrade to a more efficient or quieter brand.
Whatever the reason you may be considering replacing the water pump in your RV, we’re here to walk you through the steps to DIY the job. It’s a relatively simple process, as long as you know what to expect and you come prepared. We’ve got you covered there, so let’s get rolling.
What You’ll Need for an RV Water Pump Replacement
Most of the items on your list are tools you likely have on hand or can easily find at a local hardware store. These items include a drill or screwdriver, wire cutters, a wire stripper/crimper, spade connectors, a bowl or bucket to catch some water, and maybe even a sponge or towel for the same purpose.
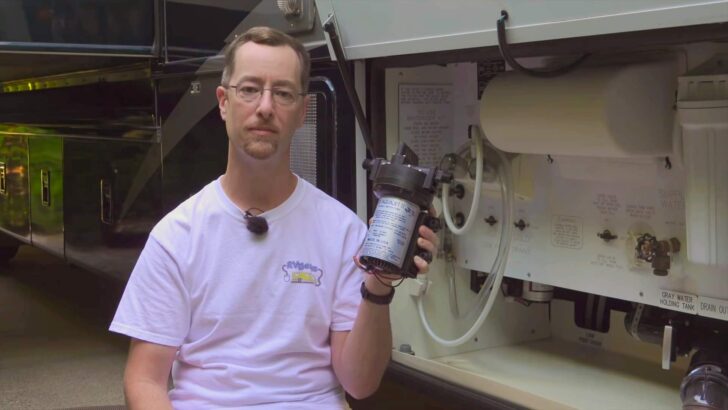
You’ll likely need to order a specialized item such as the water pump itself ahead of time, so plan accordingly. We replaced our failed water pump with a Remco Industries AES 55 ES Series Aquajet (but check out our post about the 5 Best RV Water Pumps to see if a different choice would be best for you).

- Liquid Temperature: 140°F (60°C) Max.
- Amps: 10 Max.
If you prefer reading over watching a video, you may prefer to follow the step-by-step instructions below. If you’re a more visual learner, you’ll probably appreciate our DIY tutorial video where we show exactly how we replaced our water pump.
How to Do an RV Water Pump Replacement Step-By-Step
Once you’ve got your tools and replacement items prepared, you’re ready to replace the pump. Out with the old and in with the new! It’s pretty straightforward if you follow the steps below:
1. Turn Off City Water and Water Pump
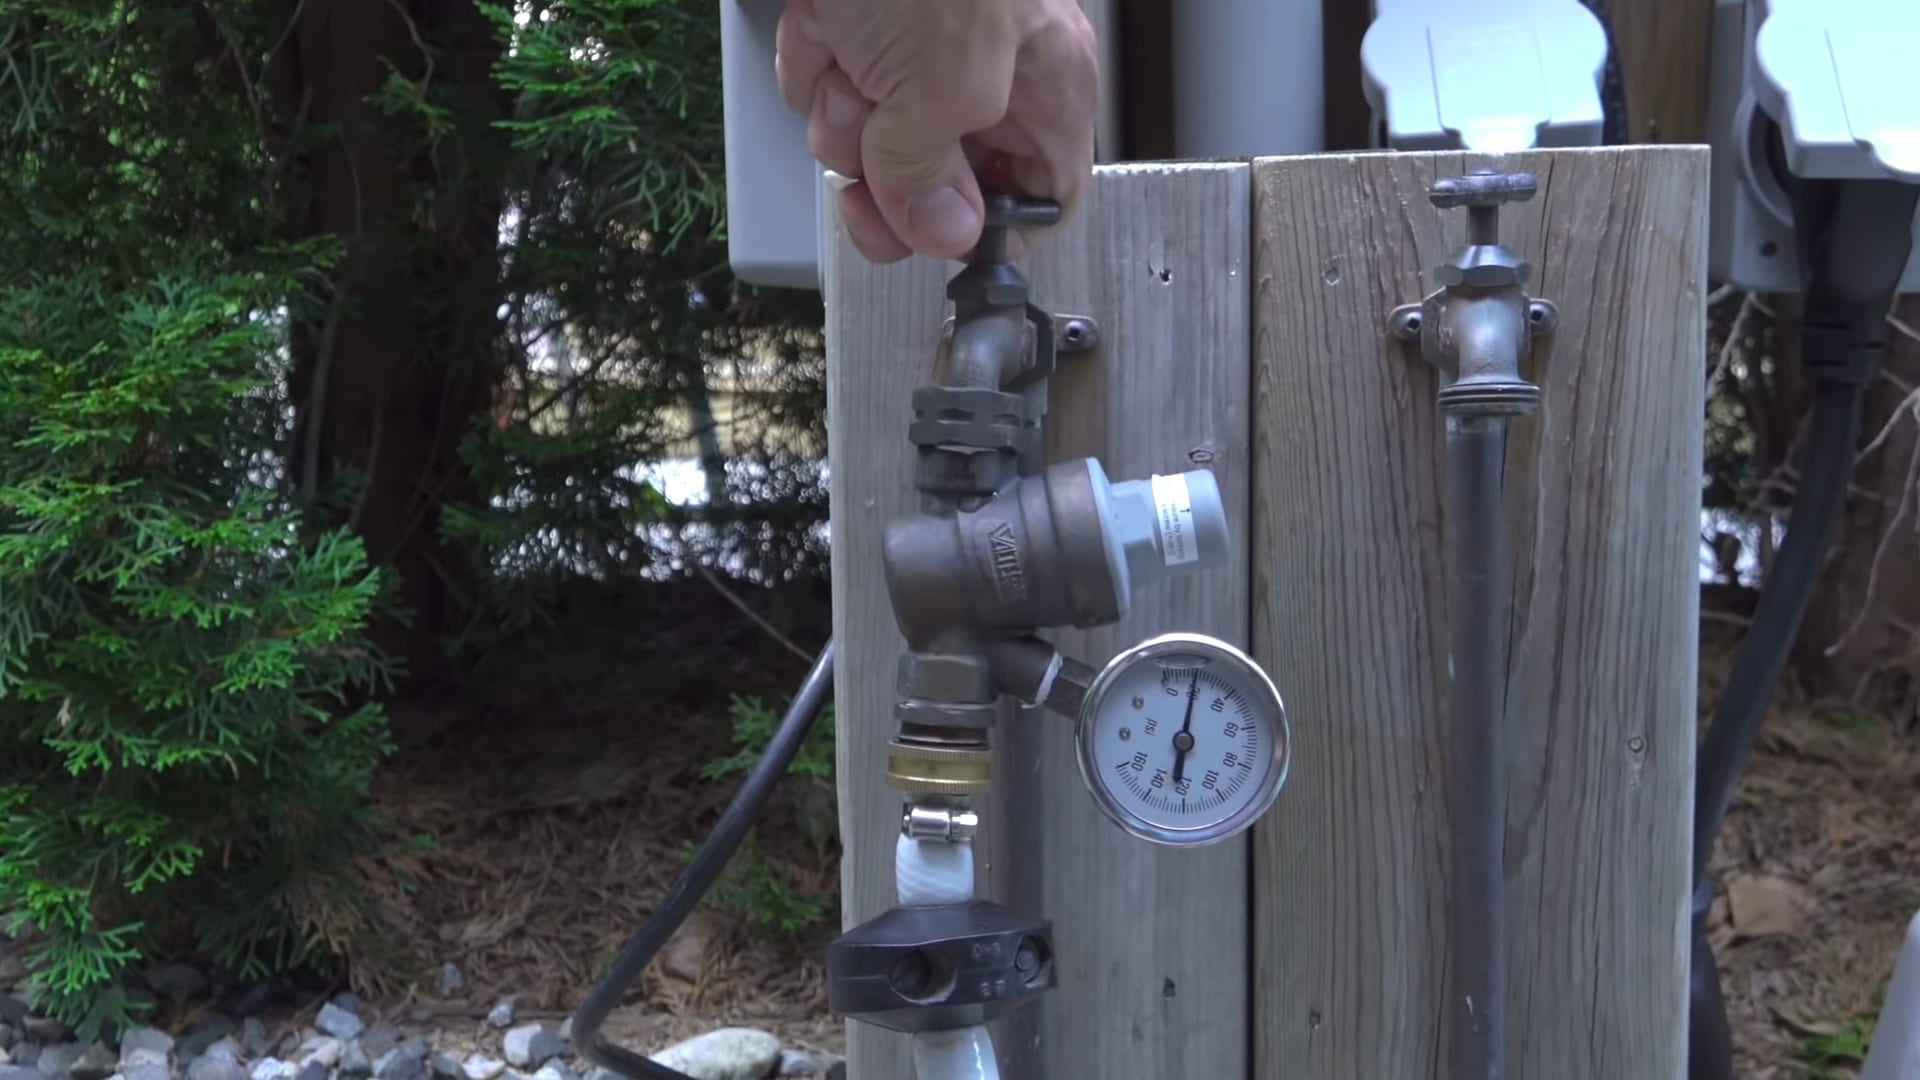
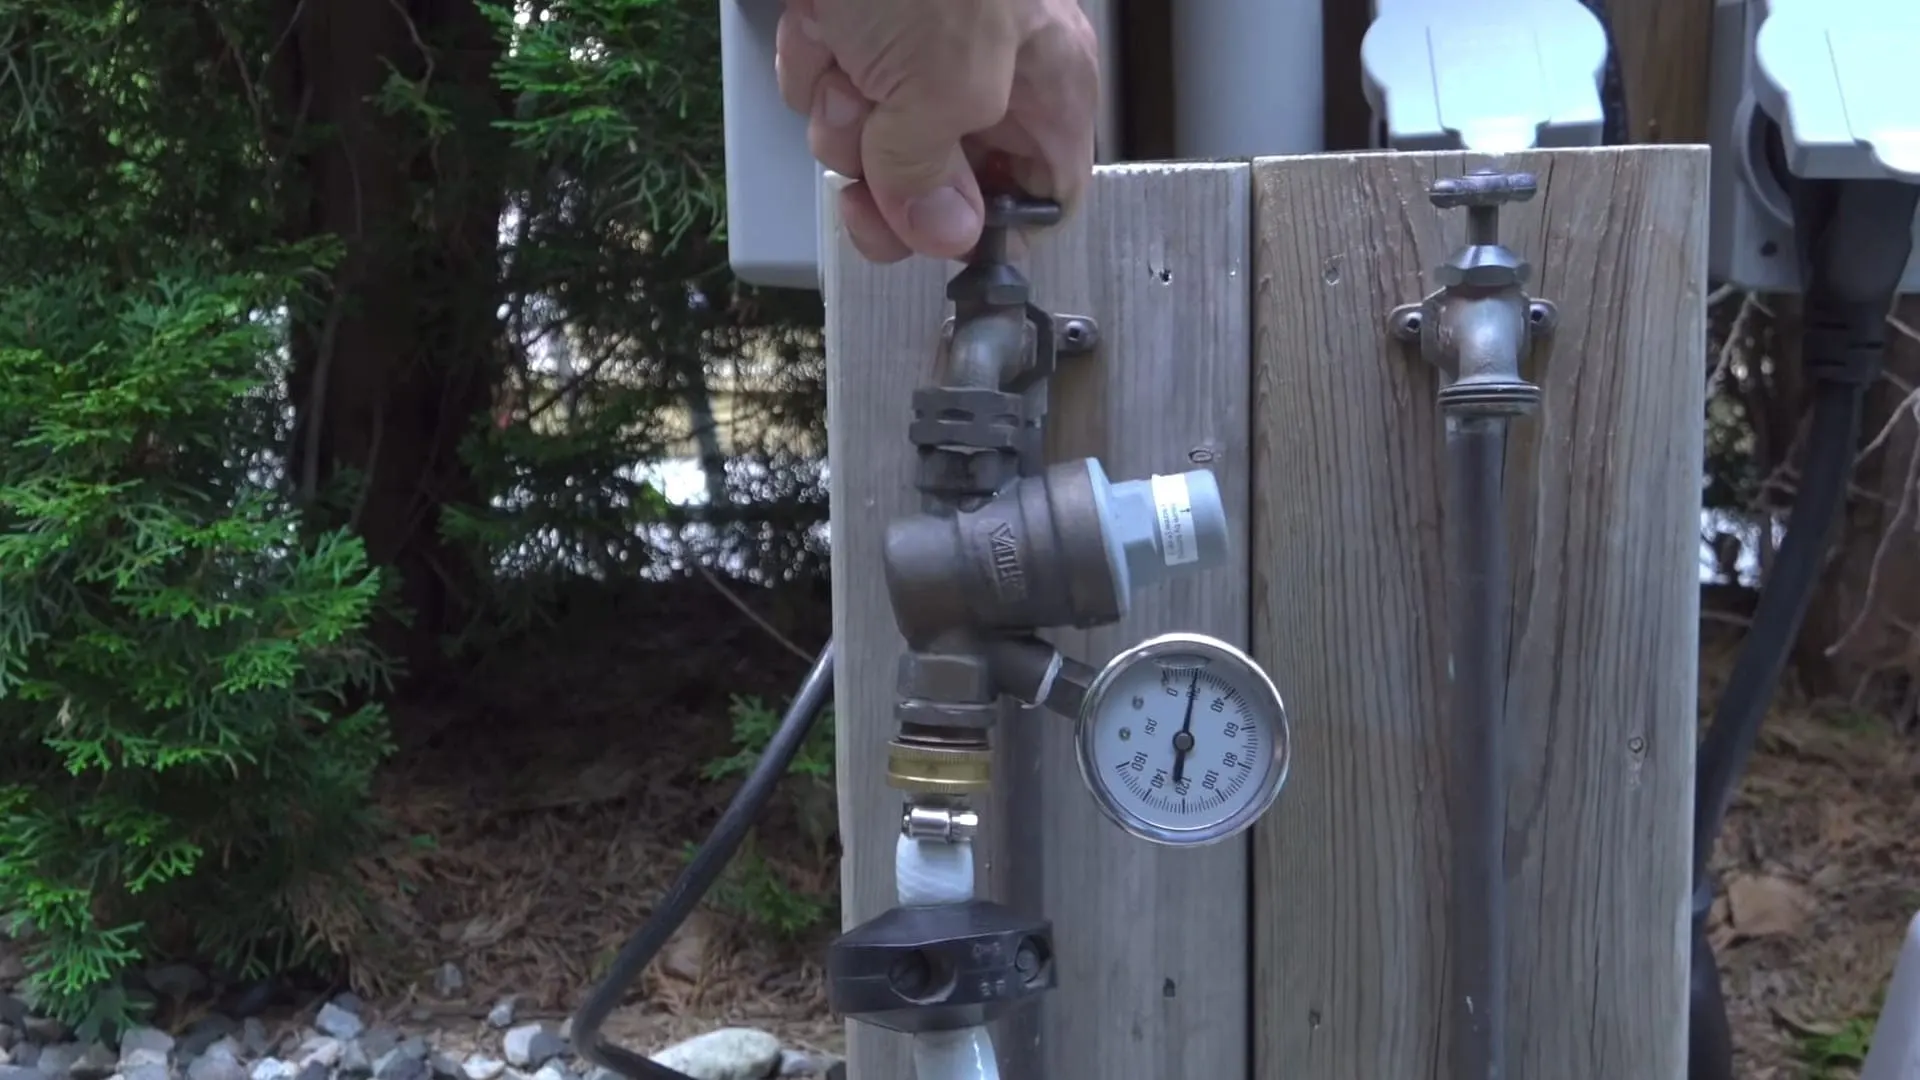
Start this DIY project by turning off the city water connection and turning off your water pump.
Anytime you’re working with your RV’s plumbing, your first step should be to turn off the city water if you’re connected to that source. You’ll also want to switch off the water pump.
2. Remove Water Pump Fuse

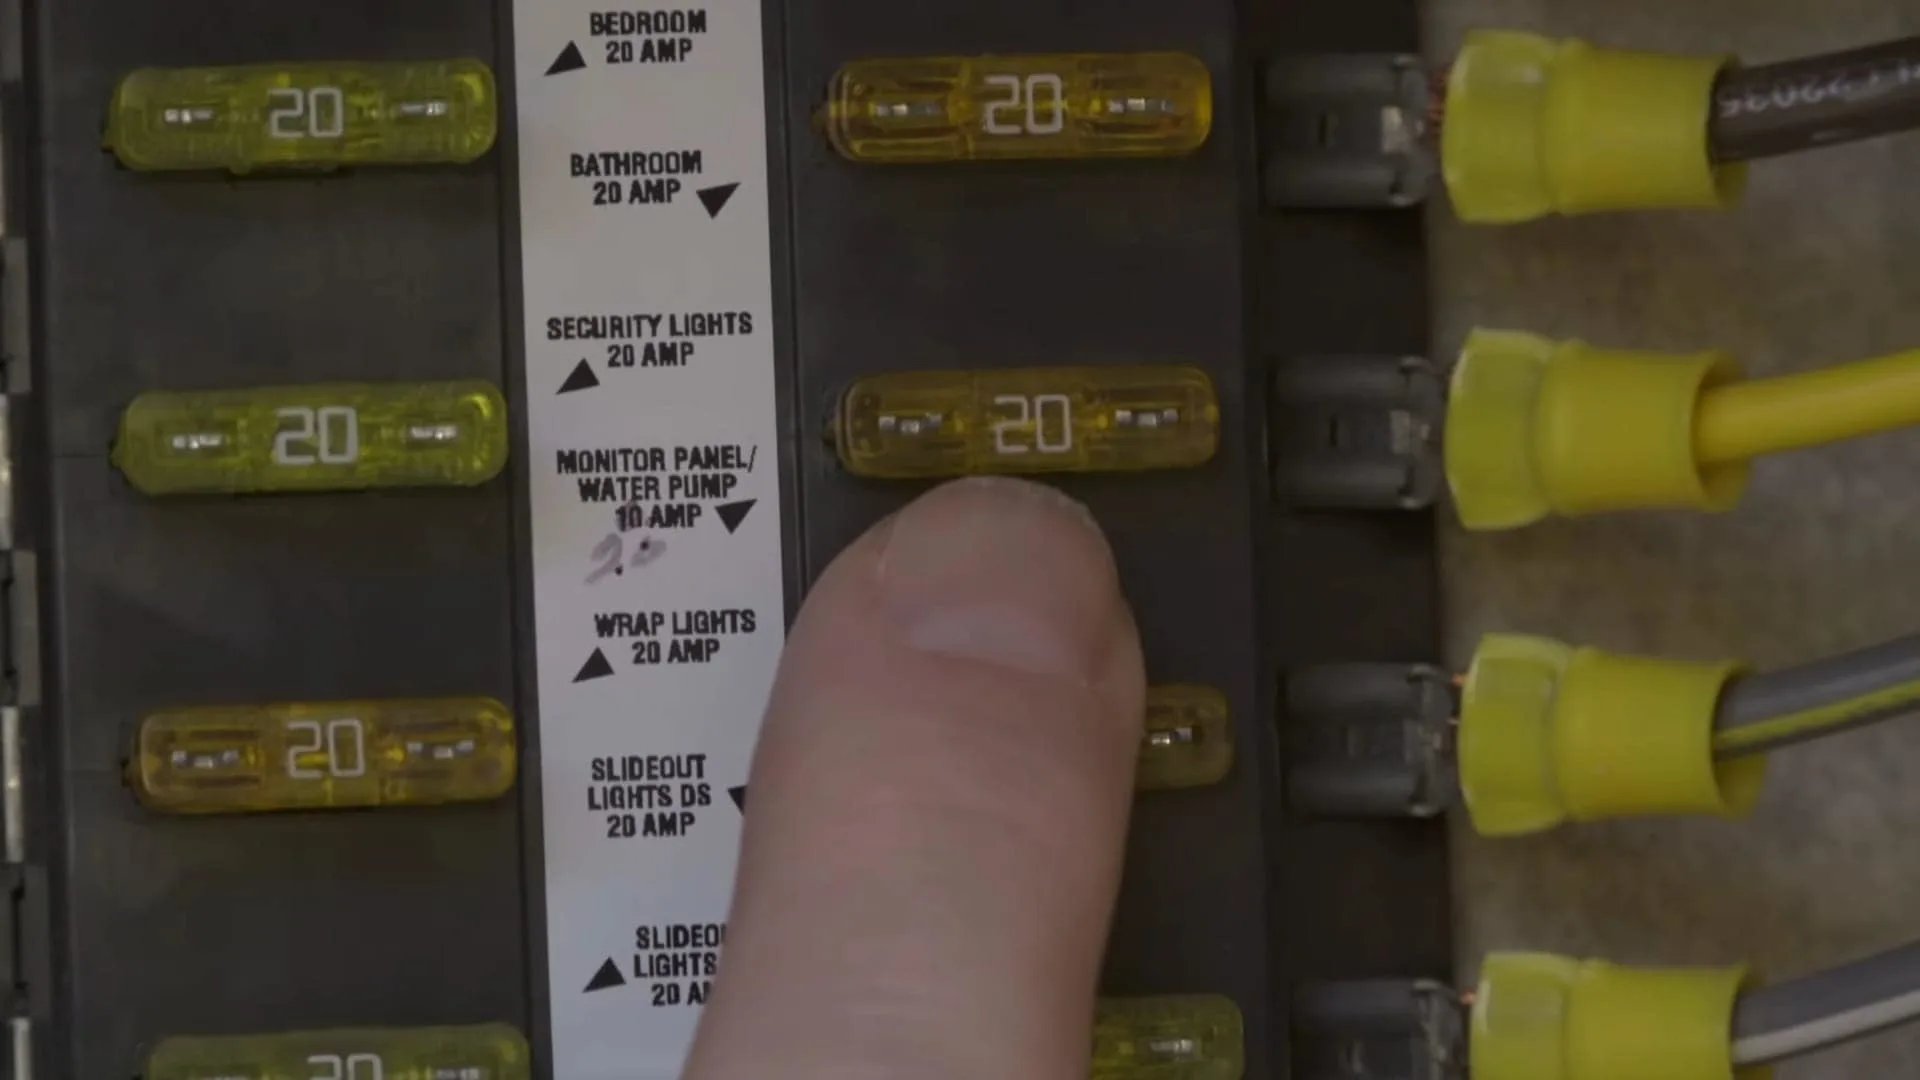
Locate your water pump’s fuse on the fuse panel and pull it for additional safety.
As an added precaution, you should remove the fuse that powers the water pump. You’ll find this on your 12-volt electrical panel.
3. Turn on a Faucet
Some people opt to turn on all faucets to bleed out any water pressure in the plumbing system. This might be a faster way to drain the water, but one tap is all that’s necessary. Once a single faucet runs dry, you can move on to the next step.
4. Disconnect Water Pump from Latching Controller if Applicable
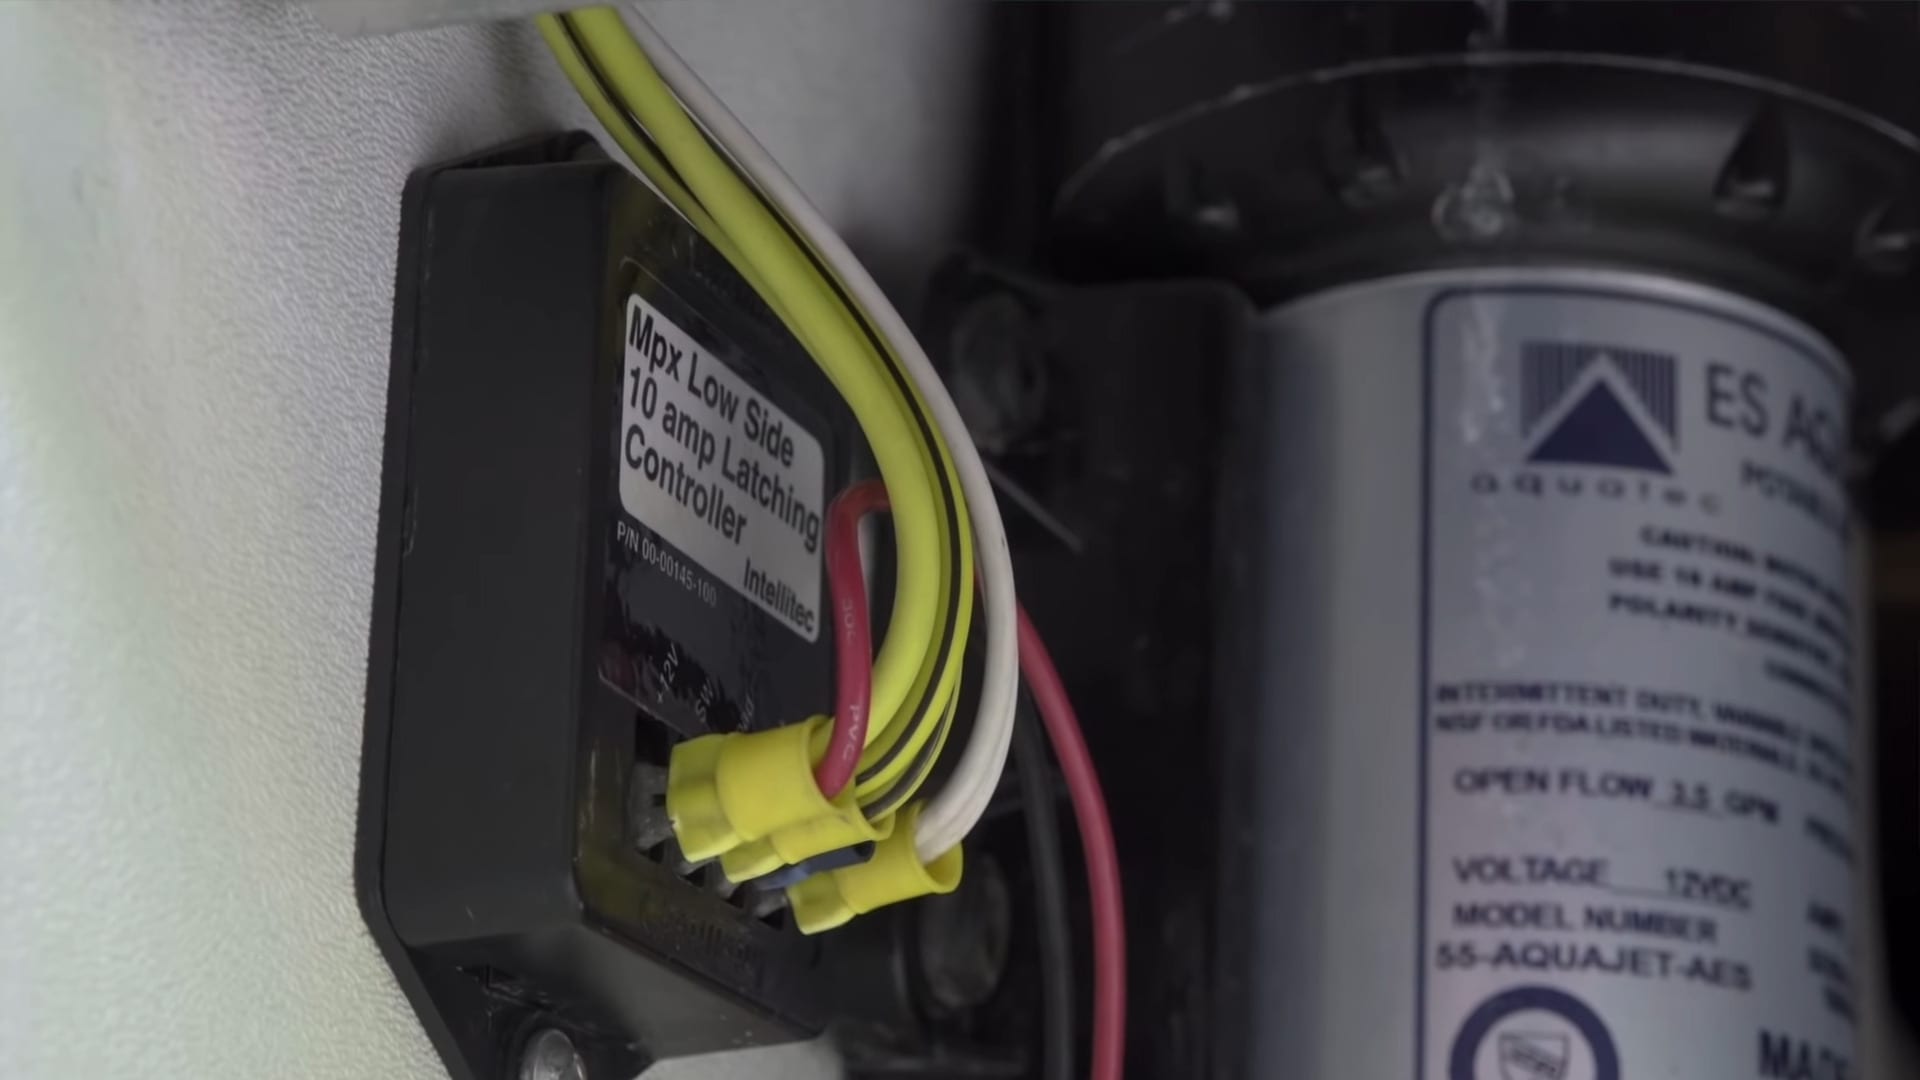
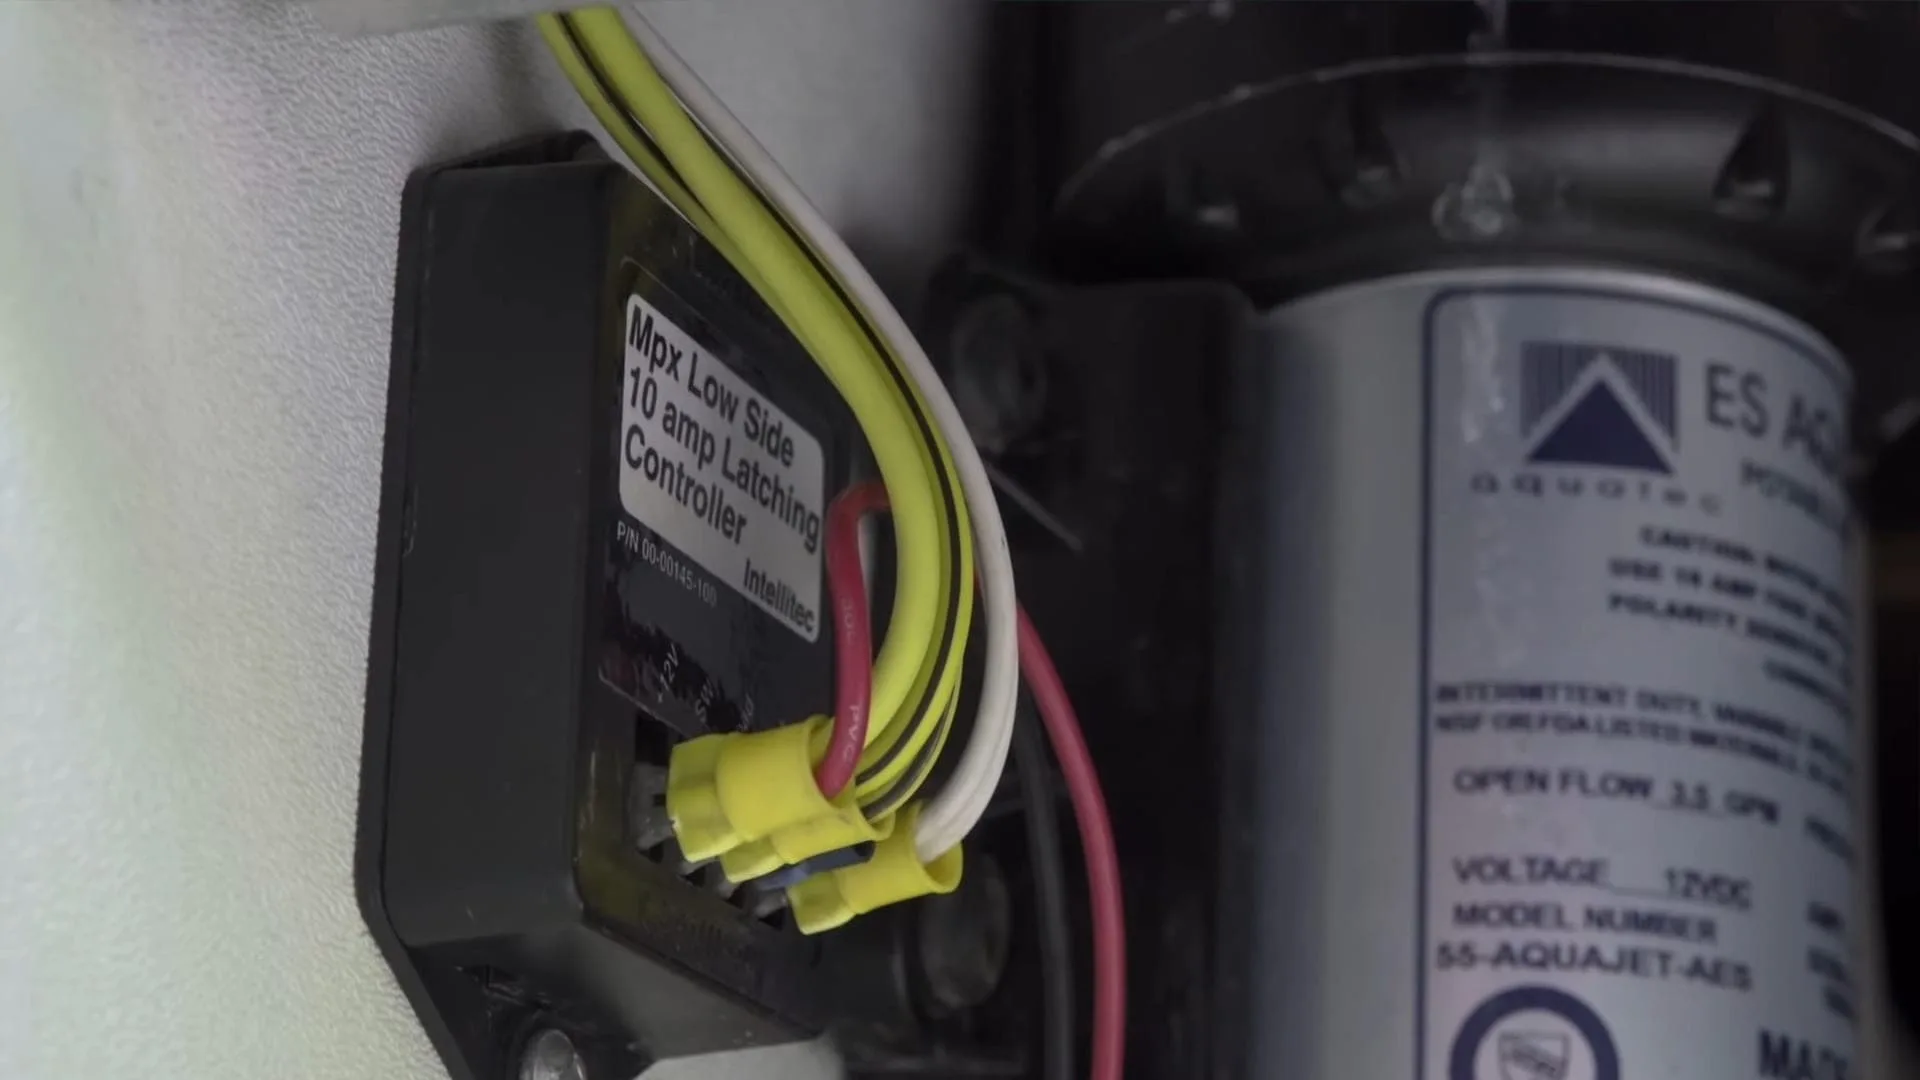
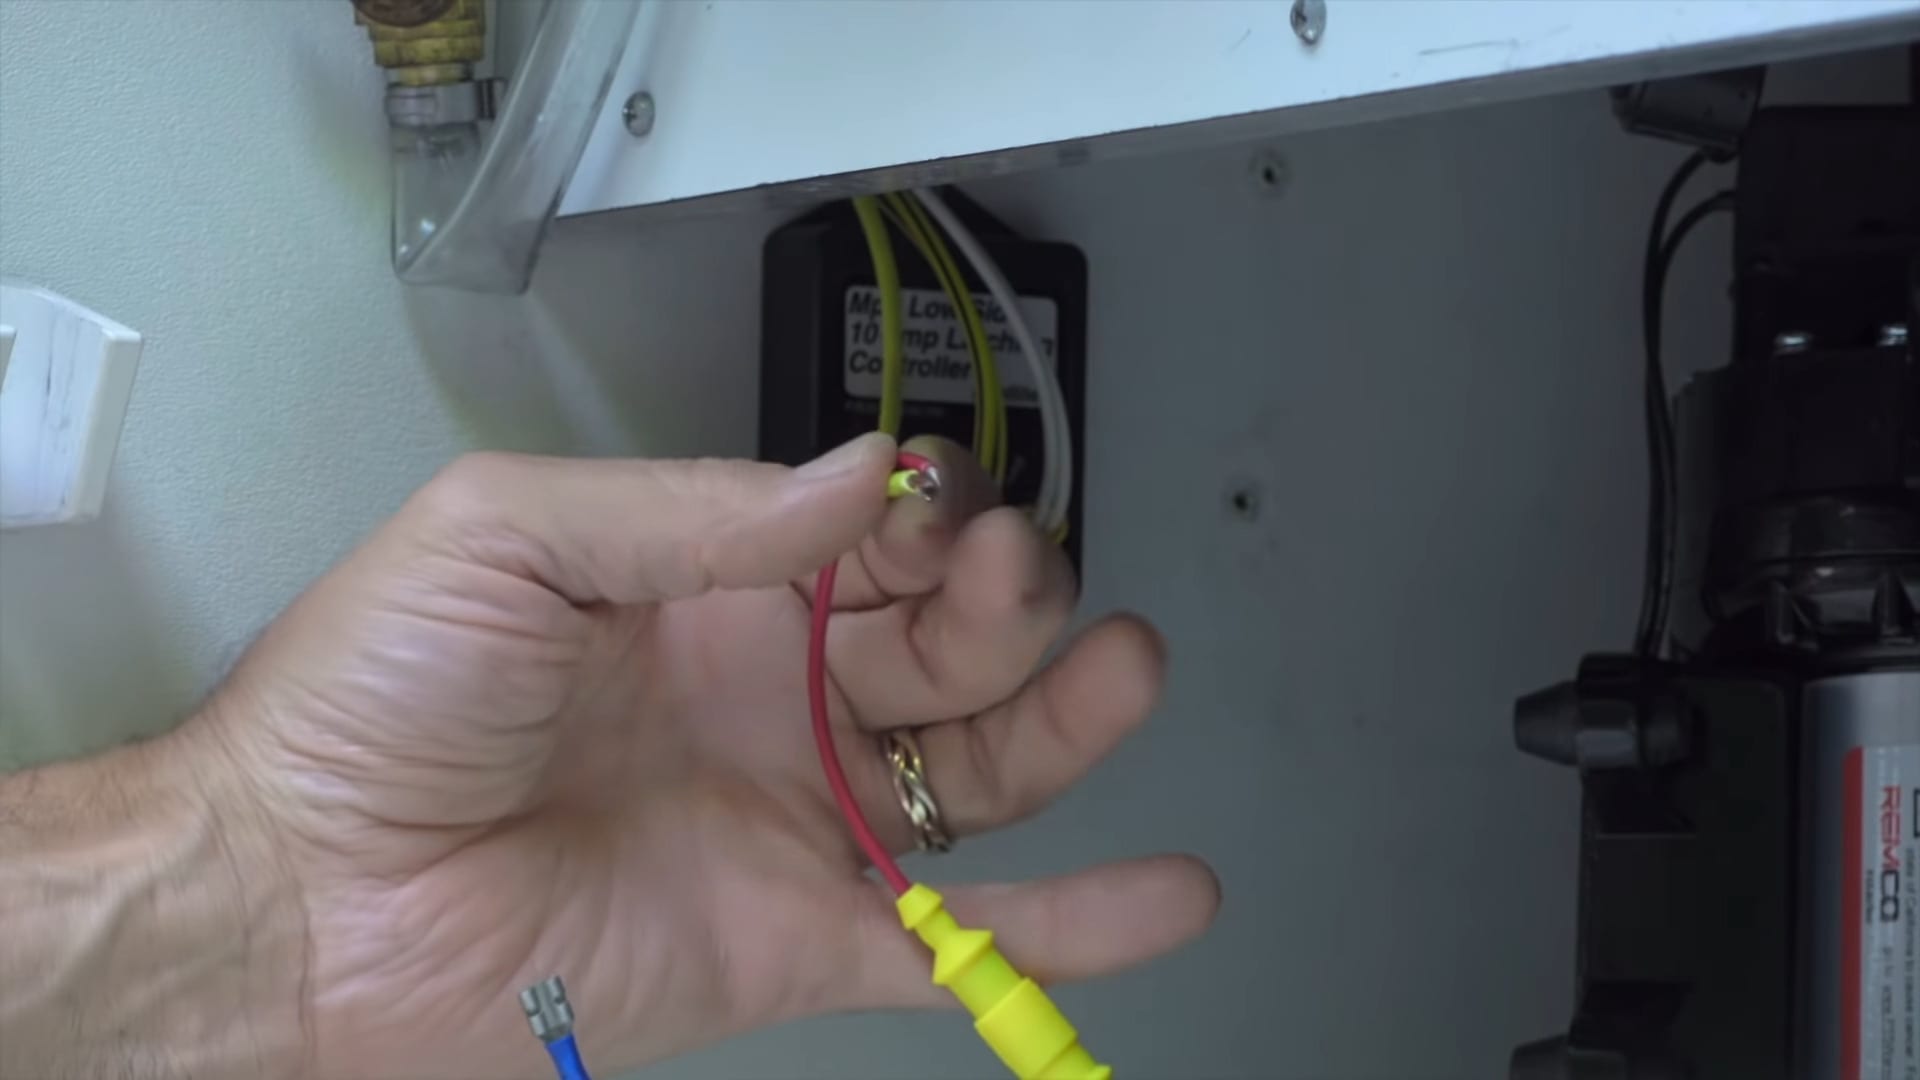
Here you see the latching controller positioned directly beside our RV’s water pump.
A latching controller allows an RV to utilize multiple on/off switches for the water pump. That way you can turn the water pump on or off from the bathroom, water bay, or kitchen for example. If your system has a latching controller, it will likely be located near the water pump. You should see a box with multiple wires feeding into the various water pump switches throughout your RV. (Your RV may not have a latching controller if you only have a single control for the water pump.)
To disconnect power, start with the pump’s ground wire from the latching controller, which is usually black. You might want to take a photo of the controller before removing any wires, to help you confirm that you’re reconnecting them correctly during re-assembly.

Remove the black ground wire from the latching controller.
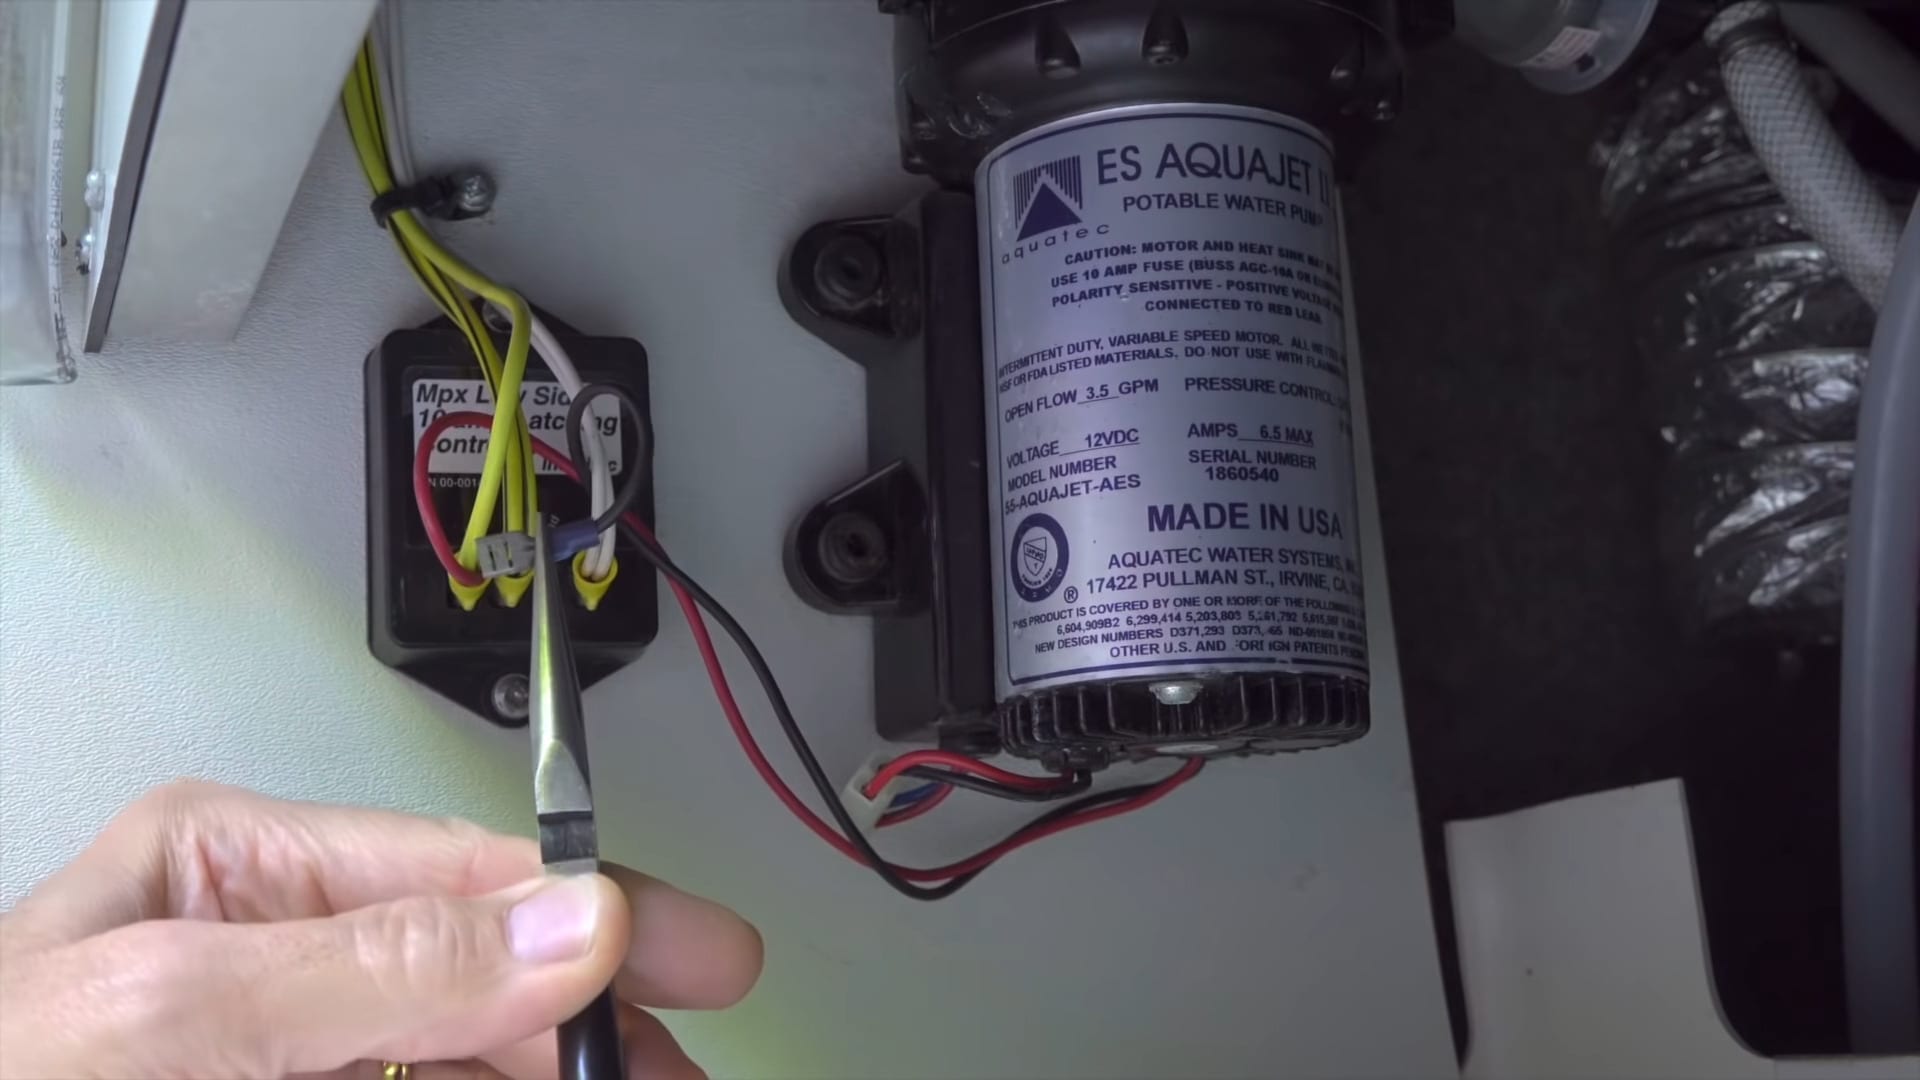
Next, remove the positive lead from the latching controller that goes over to the water pump, which is usually a red wire. Our positive lead is also connected to a yellow wire, and yours may have a similar set-up.
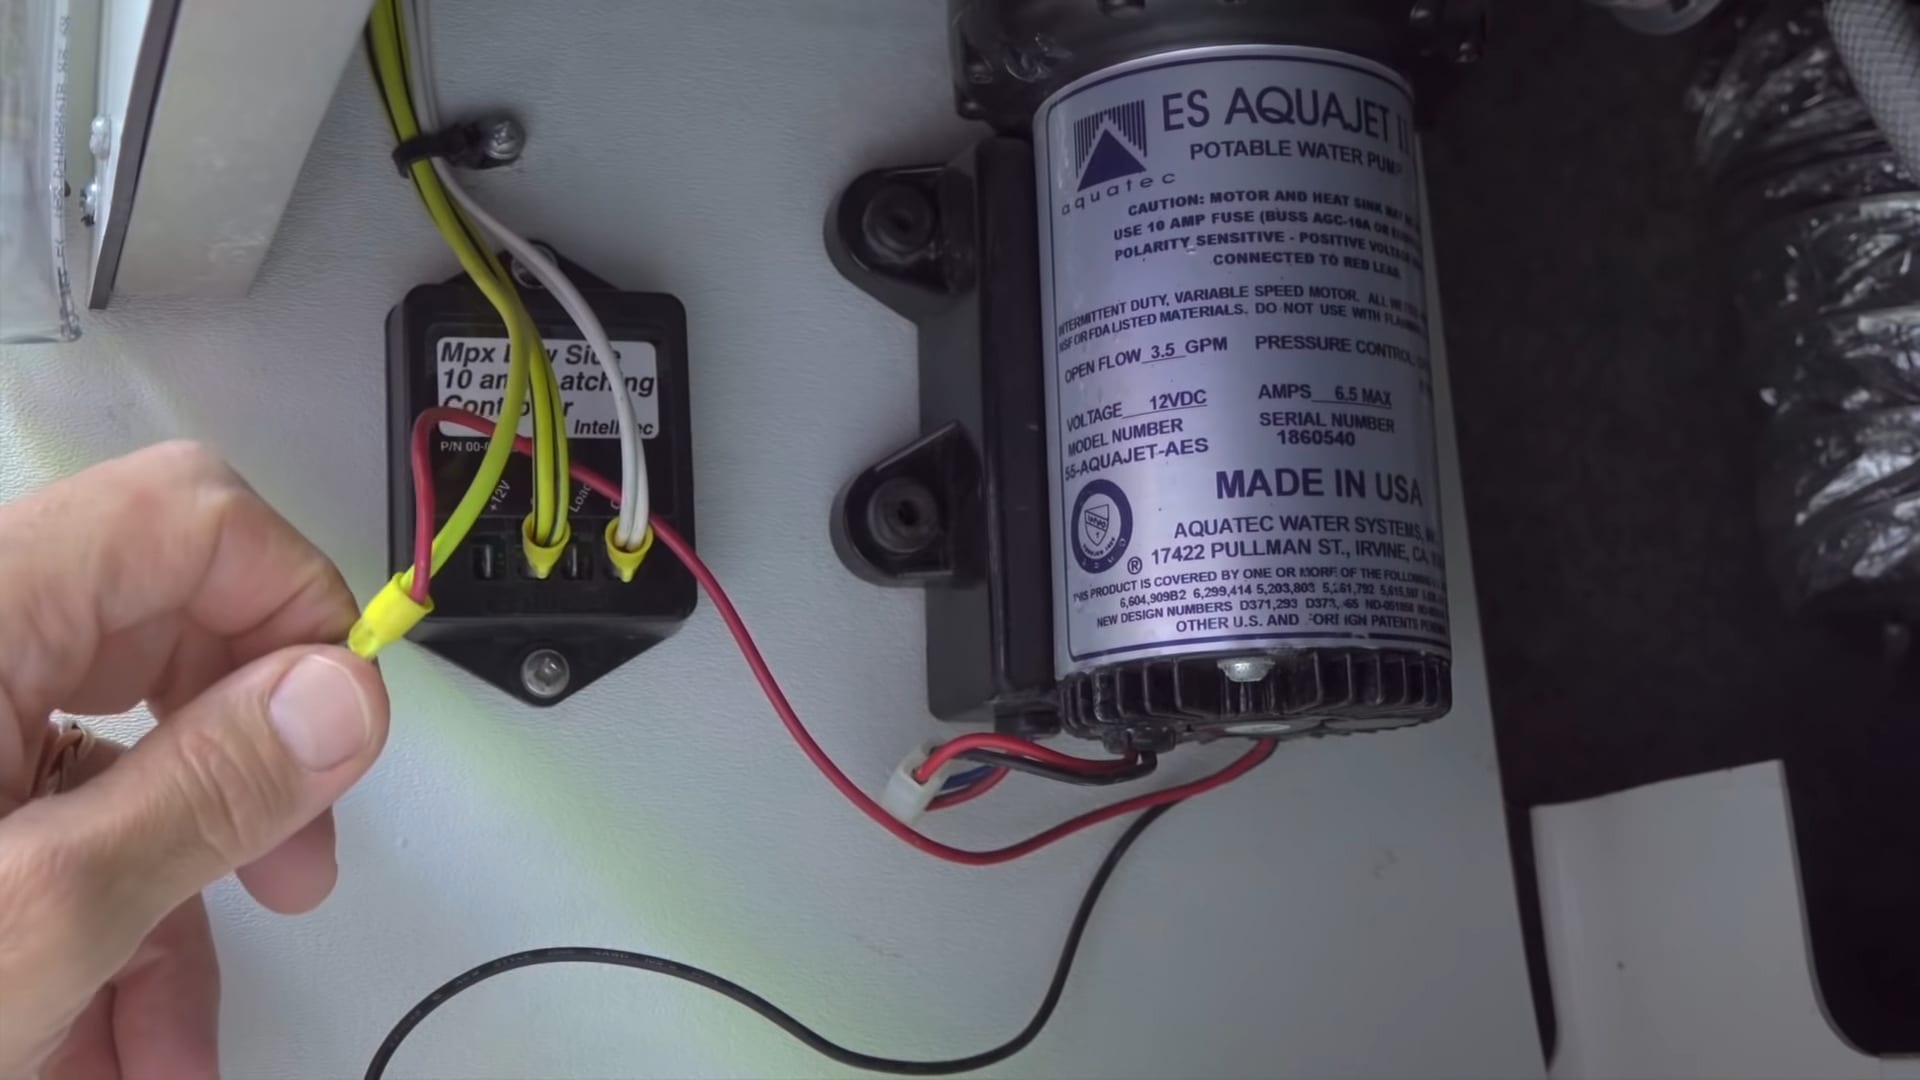
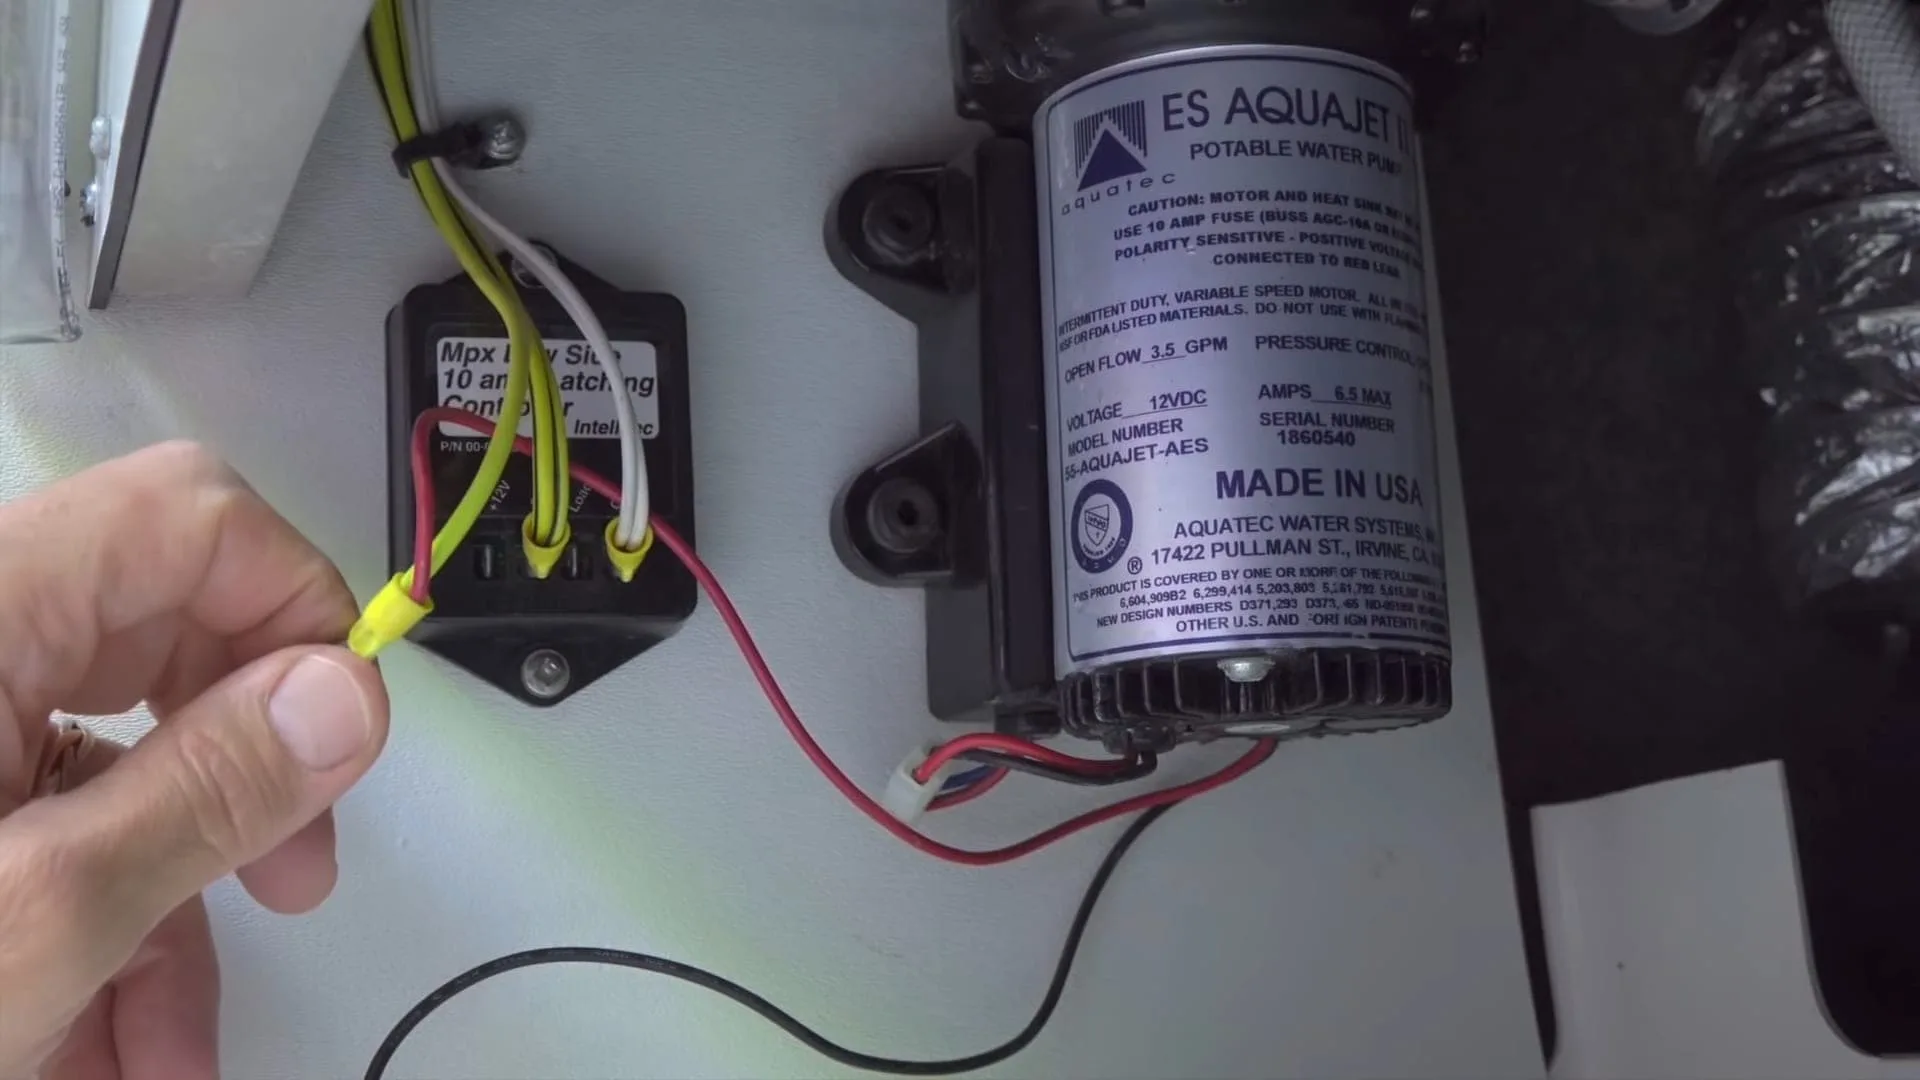
The positive lead contains the red and yellow wires.
After removing these, snip the yellow wire from the connector. You’ll eventually reconnect this wire to the positive lead on the new pump.
5. Remove Inlet and Outlet Lines from Pump
Place your bucket or bowl underneath the pump before you begin to unscrew it. Expect water to leak out as you unscrew both the inlet and outlet lines.
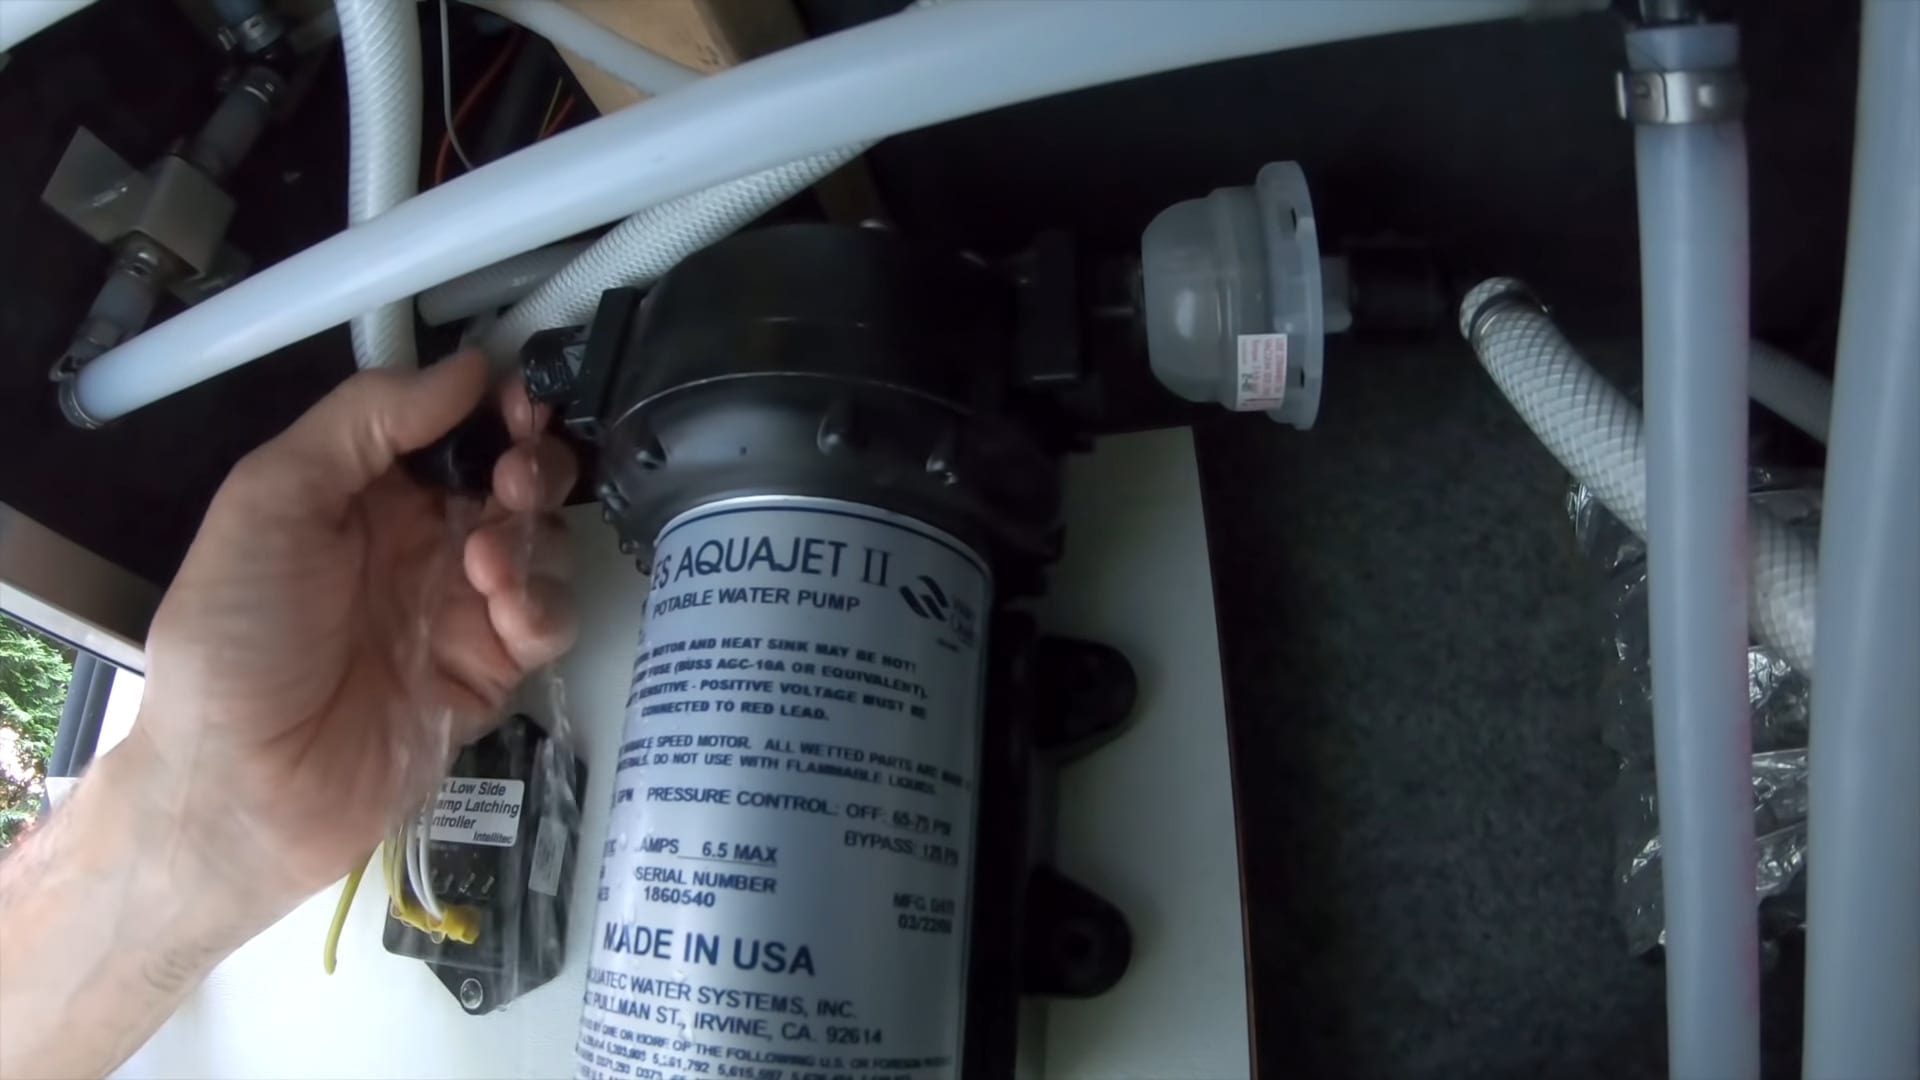

We recommend using your hands to unscrew the lines so as not to damage the plastic fittings. If the fittings are too tight, pliers might be necessary to get them started, but be sure to be careful so you don’t damage them.
6. Remove Screws Holding Pump in Place
Once you’ve disconnected the inlet and outlet hoses, you can simply unscrew the pump from its mount.
7. Remove Inlet Filter and Clean It

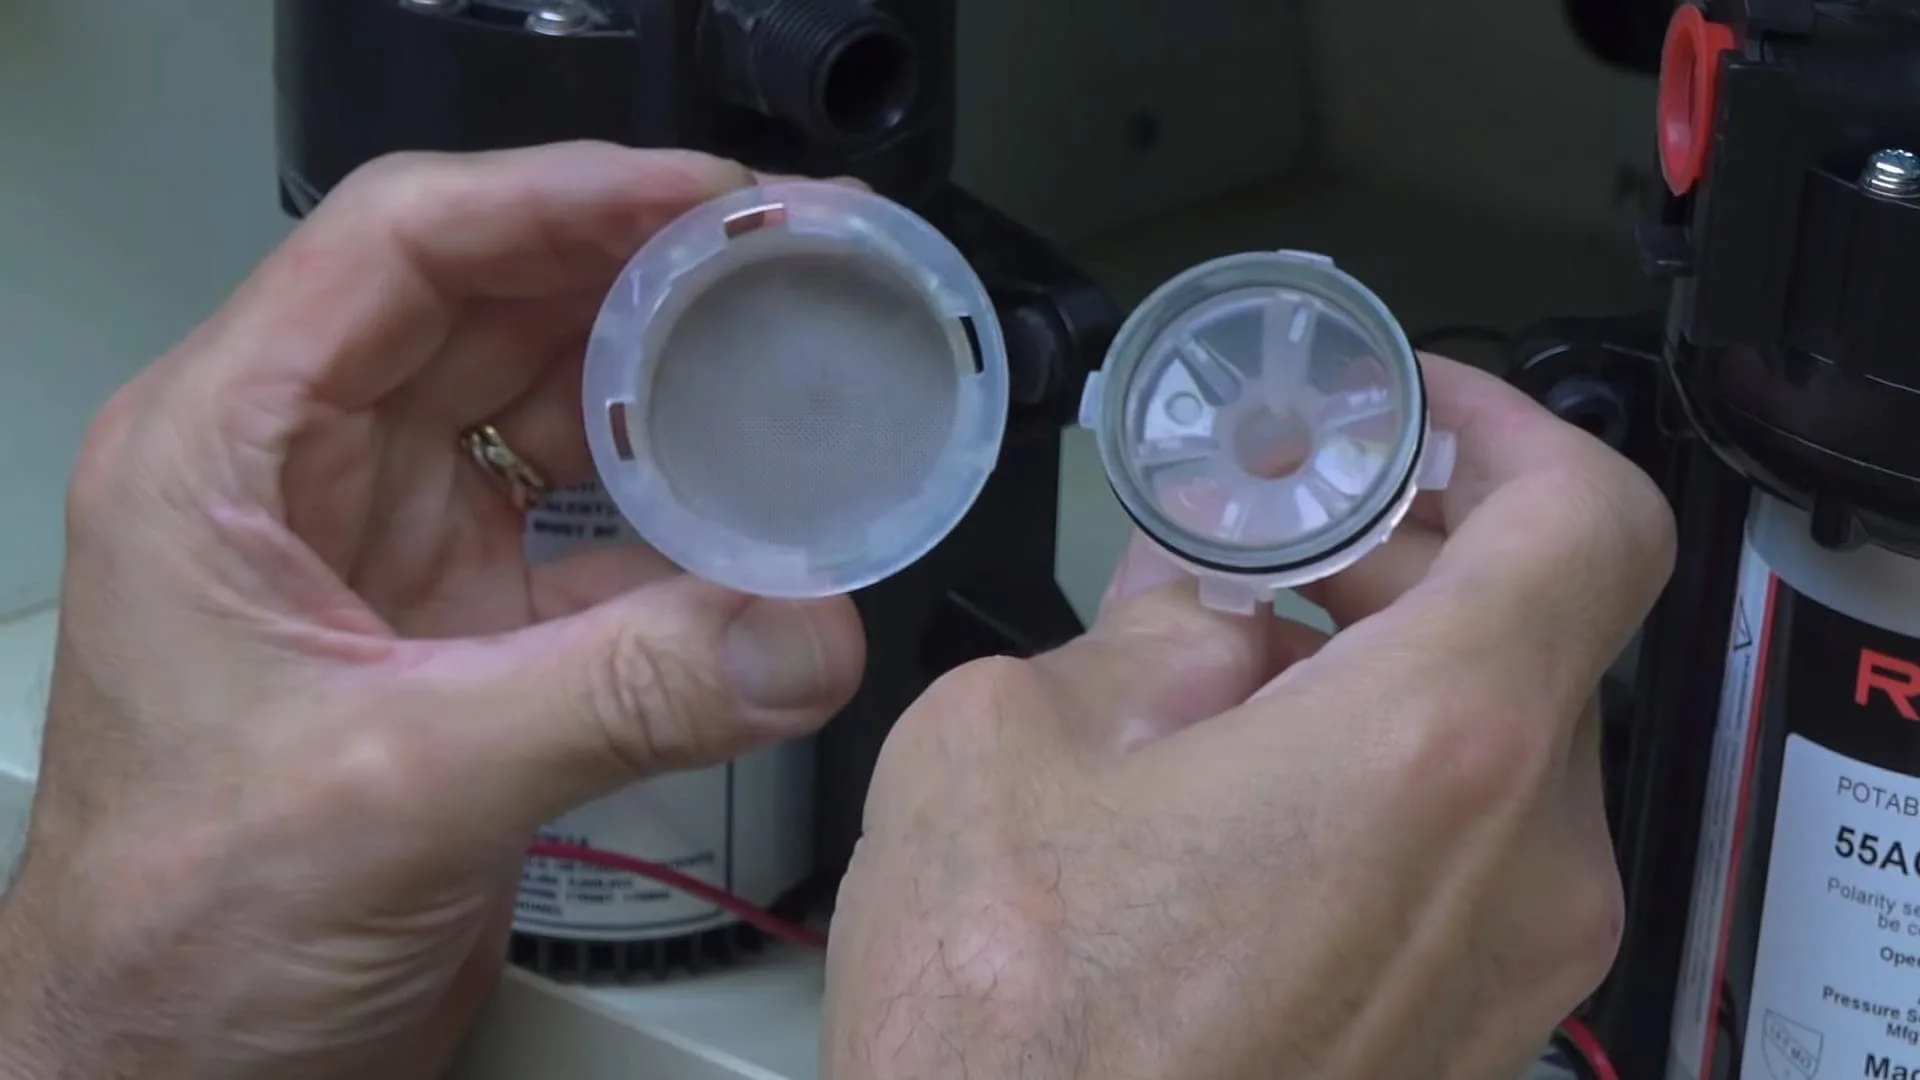
Removing the filter gives us a great opportunity to clean out any debris that has accumulated over time.
You’ll need to reinstall the inlet filter from the old pump onto the new one. Using a crescent wrench, you can unscrew the filter. Once you detach it, open the filter (the two halves of the filter should twist apart from one another) and clean away any debris inside. If it’s badly clogged (or just very old), it may be a good time to replace it completely.

- 【RV pump strainer specification】: 50 mesh stainless steel screen, twist-on water strainer, 1/2 inch NPSM Inlet, 1/2 inch NPSM Outlet
- 【Transparent design】: easy to know when it's time to clean out the container bowl of the strainer, convenient for you to clean out the supply line...
8. Install Filter on New Pump

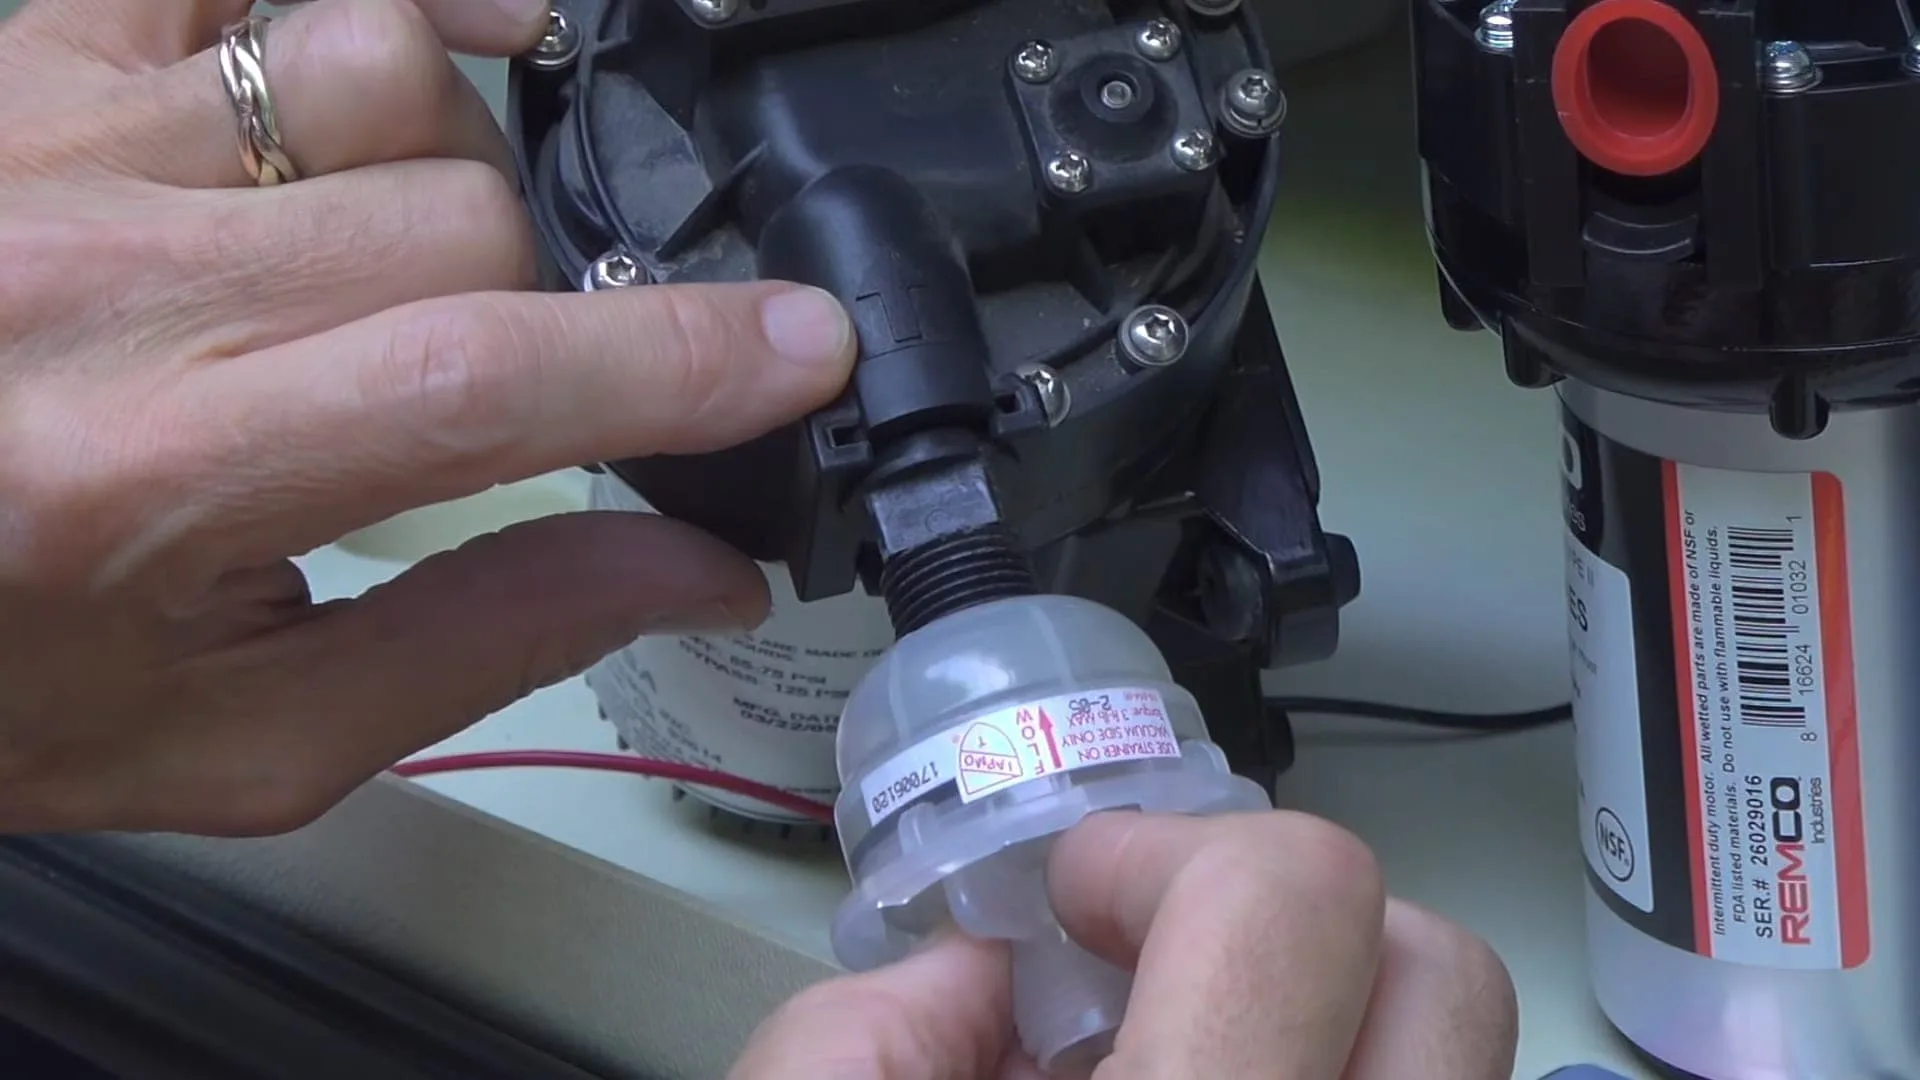
Note that both the pump and filter have directional arrows. Make sure both arrows are facing the same direction before screwing the filter onto the new pump.
Both the pump and the filter should have an arrow(s) indicating the direction of the water flow. Install the filter on the side of the pump that matches the direction of the arrow, with both arrows pointing in the same direction.
To install it, use a crescent wrench to screw the fitting from the new pump into the filter. Remove the red shipping cap from the pump, and firmly press and twist the fitting where the shipping cap was. Press the clip down to lock the fitting into place.
Repeat this step with the fitting on the other side of the pump where you see a red shipping cap.
9. Strip Wires and Crimp-on Connectors for Latching Controller
Locate the pump’s black ground wire and strip the wire insulation from the wire tip before crimping on a spade connector. Gently tug the connector to ensure a tight crimp.

Twist together the exposed ends of the red and yellow wires before crimping on a spade connector (again, your wiring may differ slightly depending on your RV make & model. If you’re unsure about the connections, refer to the photo you took before starting.
Next, strip the previously snipped yellow wire along with the red wire from the new pump. Twist together the exposed ends of the two wires before crimping on a spade connector. Again, tug gently to ensure the connector is secure.
10. Mount Pump into RV with Existing Screw Holes
You can usually use the same location and screw holes to mount the new pump (the mounting hole pattern is fairly standard). This will depend on the replacement you choose, but the exact replacement model of the pump often matches the earlier model. Mount the new pump with four screws.
11. Connect Inlet and Outlet Water Lines to Pump
Reconnect the inlet and outlet water lines to the new pump simply by screwing them firmly by hand. Again, be gentle with the fittings. They’re usually designed to be finger-tightened, so no tools should be required.
12. Connect Pump Wires to Latching Controller
Reconnect the positive lead (in our case, the yellow and red wires) onto the latching controller, followed by the black ground wire.
13. Re-Install Water Pump Fuse and Turn on Water Pump
Return the fuse that you removed from the electrical panel to its original location.
14. Turn on Water to Ensure Proper Operation
Now you can turn on the water pump at one of the switches. To check the function of your new pump, simply turn on a faucet. After some cavitating and sputtering (which is normal as the air clears from the lines) you should see consistent water pressure and flow, and the water should stop when you turn off the faucet.
15. Check Water Connections for Leaks
Once the water is running smoothly, close all faucets but keep your pump turned on, which maintains pressure in the system. With the system pressurized, check all connections at the pump and inline filter for leaks. Tighten them as needed.
Additional Tips for Completing Water Pump Replacement in Your RV
Hopefully, you’ve successfully swapped out your old water pump for a new one following these steps. Just in case you had a few hiccups, here are a few alternative options that you might need to consider.
Once New Pump is Installed, You May Need to Bleed Air Out of Lines
When you first turn the water back on, it’s common for the plumbing to contain air bubbles, so keep the water pump running. You may also want to turn on multiple faucets to allow the water to pass through the pipes. Sometimes it can take a couple of tries, turning a faucet on and then off again, to get all of the air to bleed out.
Alternate Option to Removing Fuse
Instead of removing the fuse, you can disconnect the RV from power and flip the battery disconnect switch, so no energy runs to the appliances.
Use Butt Connectors if You Don’t Have A Latching Controller
As previously mentioned, not all RV models have a latching controller. If that’s the case in your RV, simply use butt connectors (also known as end splices) to connect the existing power wires to your new pump.
Ultimately, replacing a water pump in an RV is relatively simple and an easy enough project to DIY for a single afternoon. Projects like these help you to become more acquainted with your RV and help you understand how the system works, which can be useful for future troubleshooting.
You might even find that you’re pretty impressed with your new DIY prowess and feel ready to take on more adventurous challenges as a result.
Congratulations on your new water pump installation! We recommend boondocking to allow you to fully test the waters. (See what we did there?)

One of the things we love the most about RVing is being able to have all the comforts of home, no matter where we’re camped for the night.
Geek Out with Us Every Week
Join our newsletter to learn about all things RV-related. Every week we offer free tips, tricks, product reviews, and more to our online community of RVers. Whether this is your first time on the road or you’re a seasoned expert, we’d love for you to geek out with us!
Patrick Donald Lyons
Wednesday 24th of November 2021
I replaced a water pump in July of '21. The Pump proved to be faulty and had to replace it again it with another new Pump in October of '21. I did both replacements under your video instructions and now all's well in LyonsLand.
For the second replacement, I got a 1/2" PVC SCH 40 threaded plug # 2113 from Home depot to stop the stream of water from the first disconnect. The plug saved me from I'd say, 90% of the water gushing all over me from the supply side of the pump for the second time. I should've learned from your, Peter's, bath in the video . So once again, Thank you, Peter and John for the videos you share. By the way, I sure lucked out when I bought my Newmar '05 MADP 4304. Saves me from having to adapt instructions from your videos.
TheRVgeeks
Wednesday 24th of November 2021
Ugh, Patrick. We feel for you with the REPLACEMENT pump being bad. Seems like quality control on parts is suffering in the crush of demand and lack of supply these days. Nothing worse than having the NEW part fail on you!
And clever idea on the threaded plug. Glad you found a way from getting drenched in the process (and hope we remember that trick if/when we ever have to replace our current water pump, LOL!).
robert oliver
Saturday 29th of May 2021
Your water pump probably failed because it was on while city water was on. The two rigs I have owned if city water was on the water pump was bypassed. The pump would still run though until it burned out from running dry, one of those learn the hard way lessons we all get from time to time.
TheRVgeeks
Saturday 29th of May 2021
Interesting issue, Robert. And sorry to hear that it caused you a problem. But that wasn't our issue... our Newmar isn't plumbed the same way your RV was. Our water pump (1) isn't bypassed when on city water and (2) we've never left it on when connected to city water. Ours just wore out after 16 years of full-time use.
Dave Densmore
Wednesday 26th of May 2021
First, a couple notes. -Particularly when wire are barely long enough, it can be helpful to cut the wires off a spade connector through the plastic insulator. If you cut through the connector instead of the wire, you can cut a little more to keep the maximum amount of wire. Plus, don't forget they'll be a next time to replace it, and you might need that little bit of wire!
-When using a butt connector, give the wire a little tug to make sure it's in well. Using some shrink tubing over a butt connection is not a bad idea. These connections are rarely in a dry location with no humidity, it'll help fend off corrosion, plus makes it a little more difficult to be pulled apart later.
I'm curious why after pulling the fuse to the water pump, you would need to disconnect the wires from the latching controller. Seems like pulling the fuse would stop any power going to the pump, or through the latching controller.
Thanks for the video, I've been holding my breath that our water pump doesn't fail.
TheRVgeeks
Wednesday 26th of May 2021
Hi Dave! Thanks so much for the additional tips. Great ideas. As far as the removal of the wires from the latching controller, we only removed the two wires from the pump itself, which of course have to be removed to remove the old pump. Sorry if we weren't clear about why we were doing that. It might be a little clearer in the video than in the text.