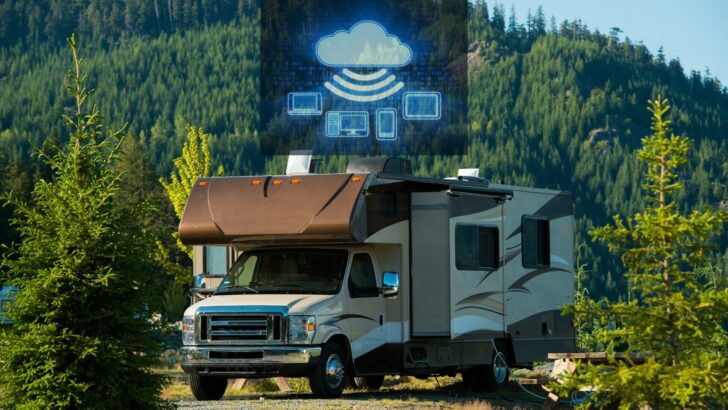

We work full-time while traveling and living in our RV and have done so for almost 20 years. So, you can imagine that a reliable internet connection is imperative for us. Most travelers may not have as great a need as we have for reliable connectivity, but do need a way to stay online.
Unfortunately, RV park WiFi is notoriously bad. So, today we’re visiting the topic of how to boost your WiFi signal in an RV park. Let’s take an in-depth look at what affects Wi-Fi signals as well as some real-world ways to improve your connection and give you a strong signal for reliable internet access.
Can You Get Good WiFi at an RV Park?
Campground WiFi is rarely sufficient for anything more than a quick check of email and a little surfing. More often than not, if your cell phone can get a data signal, you may be better off connecting that way.
But for those who have work to accomplish or who’d like to stream a movie or the news, RV park WiFi is going to be hit-or-miss at best.
Some of the things that affect your WiFi signals in campgrounds and RV parks are:
- The number of people connected
- Your distance from the WiFi access point
- The power or strength of the access point (oftentimes, they don’t install high power equipment, or the necessary WiFi repeaters to provide sufficient coverage)
- Obstacles that scatter or block the signal (walls of your RV, other RVs, buildings, trees)
- Electrical interference
How Can I Get a Stronger WiFi Signal in an RV Park?
There are a number of ways to improve your WiFi signal in a campground or RV park, depending on what you need to do. Let’s start with the simplest (and cheapest) ideas:
Move Closer to the Access Point
Ask at the campground office where the access point(s) is/are located. Alternatively, you can look for WiFi signs or for towers with WiFi antennas on them.
Eliminate Obstacles
Your own RV walls are one of the biggest impediments to a good line of sight to the campground’s WiFi signal, particularly if your RV is metal sided. For this reason, sometimes simply stepping outside of your RV will give you a stronger signal.
If not, you may need to walk closer to the access point. You’ll often see people sitting inside or outside of a campground building on their phones, tablets, or computers. Generally, they’re there to gain better access to the WiFi signal.
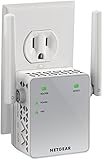
Use an Indoor WiFi Extender / RV WiFi Booster
As we noted in greater detail in our post “Is Campground WiFi Reliable”, WiFi range extenders offer one way to improve your ability to connect to the RV park’s WiFi by extending your WiFi signal.
WiFi range extenders can (technically) extend your WiFi signal by up to 2,500 feet, depending on the extender you own… though, in the real world, you’ll often see much less of an extension of signal range.
The advantage of WiFi extenders is that they’re inexpensive, easy to install, and are readily available through Amazon, Walmart, Staples, etc.
The disadvantage of WiFi extenders is that they simply re-broadcast the signal provided by the campground’s WiFi system. This may be fine if the park where you’re staying has a robust WiFi system (particularly the speed of their actual connection to the internet), but that’s not something you can rely on from park to park.
Another disadvantage of WiFi extenders for RV use is that they’re typically designed for home use, where you’ll only have to connect to your home network once. If you change campsites frequently when you travel, you’ll need to connect to each park’s network when you arrive. And this means reconnecting all of your devices to the new network. This may not be the best option for frequent travelers for this reason.
We’ll link here to a couple of inexpensive home WiFi extenders, followed by a better option (for not a lot more money) for those of you who travel frequently.
As always, be sure to read reviews!

- Dual Band WiFi Extender: Up to 44% more bandwidth than single band N300 WiFi extenders. Boost Internet WiFi coverage up to 1200 square feet and...
- Eliminate Wi-Fi Dead Zones - Enjoy Lag-Free Connection to any type of devices, including wired devices via Fast Ethernet port. System Requirements -...
- EXTENDED WIRELESS COVERAGE: Adds Wi-Fi range coverage up to 1000 sq ft, and connects up to 15 devices such as laptops, smartphones, speakers, IP...
- AC750 WI-FI SPEED: Provides up to 750Mbps performance using dual-band and patented FastLane(TM) technology.
This next unit is simpler to use and configure as it creates its own dedicated network with a password you set yourself. This means you’ll be able to connect all of your devices to this router’s WiFi network one time, and then you won’t need to change them at every new campground. Since you’ll already have a device connected to the router’s WiFi to access its admin portal, you’ll simply need to select the campground WiFi network to connect to once.

- Router and range extender. Powered by included 9v power supply, requiring 110V AC plug-in
- 2.4/5GHz dual-band Wi-Fi for fast speeds
Use A WiFi Booster Outside Your RV
Getting a Wi-Fi booster/antenna that’s installed/used outside of your RV can dramatically improve your signal.
Units like these can work very well:
Alfa WiFi Camp Pro 2 RV
This kit is designed to pick up a weak WiFi signal and repeat it as your own personal hotspot. This product is actually designed for use on boats, RVs, and campers, or large properties.
No products found.
To avoid permanent installation of the Alfa on your RV, you can use a suction cup antenna mount. Should you choose to do that, be sure to use this coupon to save 5% on your purchase!
TechnoRV.com is a supplier of leading RV technology products that are designed to enhance your RV lifestyle. That includes items like LevelMatePRO, Viair portable air compressors, connectivity...Show More
TechnoRV.com is a supplier of leading RV technology products that are designed to enhance your RV lifestyle. That includes items like LevelMatePRO, Viair portable air compressors, connectivity equipment, and more!
Use the Promo Code "RVGEEKS" to save 5% on your entire order at TechnoRV.
Show LessKING KS1000 Swift Range Extender and WiFiMax Router
The KS1000 has a fully automatic, omnidirectional Wi-Fi antenna with a range extender, giving you long-range signal access to a WiFi network. It’s dual-band (2.4GHz & 5GHz), which will improve connectivity to both the RV park’s network and for your own devices. Installation of the outdoor antenna is required.

- Fully automatic, omnidirectional Wi-Fi antenna with extender
- Provides fast, reliable, and secure long-range signal acquisition from your Wi-Fi network
Winegard ConnecT 2.0 Wi-Fi Extender for RVs
This roof-mounted WiFi extender is specifically designed for the mobile environment. It captures and re-broadcasts available Wi-Fi signals from campgrounds, RV parks, stores, truck stops, etc. to all devices in and around your RV. As with the KING unit above, installation is required.
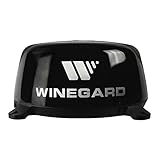
- Keep mobile devices, media players, and computers connected to WiFi with a reliable connection and expanded coverage
- Setup Requirements: Wireless 802. 11b/g/n 2. 4GHz network, computer, tablet, or smartphone with a web browser
What About Cellular Options?
Depending on your needs, RV cell boosters are certainly an option. These are signal boosters whose job it is to take a weak cellular signal and make it stronger. Essentially, boosters work by finding a cell signal, amplifying that signal, and then broadcasting it to other devices inside your RV.
You’ll find several options for RV cell boosters in our post on that topic.
For those of you who, like us, absolutely must be online consistently and reliably for work purposes, even the best WiFi extender won’t cut it. Certainly not consistently.
Your best bet may be to use options that connect to the cellular data network and then broadcast a dedicated local WiFi network for your devices to connect to. For an in-depth explanation of the differences between cellular and WiFi, see our post on RV internet options.
This section from that post will explain how you can use cellular data for RV WiFi access.
If you’d like to see how we manage to keep a reliable, consistent connection no matter whether we’re in the middle of the desert or on a beach, be sure to check out our post, Our RV Internet Solutions for 2021: Upgrading Our Tech Cabinet.
Geek Out with Us Every Week
Join our newsletter to learn about all things RV-related. Every week we offer free tips, tricks, product reviews, and more to our online community of RVers. So, whether this is your first time on the road or you’re a seasoned expert, we’d love for you to geek out with us!
John S.
Monday 8th of August 2022
After spending the last month on the road I can certainly appreciate the need for a good wifi connections. We did visit two places with really good wifi: one newer park with several router/transmitters located around the park and one park had a router/transmitter at each site. It was the best, but still not as good as our fiber optic connections down south or in BC.
The truth is that I relied on my cell hot spot for almost all our connections. Which works really good for emails, news and and short video clips but I don't know how people do it for work that includes uploading videos. I admire your patience. Or perhaps I should admire the amount you must spend monthly to get decent data service.
Rich
Sunday 7th of August 2022
Should you have listed the WiFi Ranger as an option?
TheRVgeeks
Sunday 7th of August 2022
Hi Rich. We had a WiFi Ranger Elite for several years and it did fine for us at the time. But the new options don't seem to have as much transmit/receive power and are fairly pricey... so we feel that the options we listed are better choices.