
Is your RV water heater leaking? If so, you’ve got an issue that could ruin your camping trip.
In today’s post, we’ll troubleshoot the main reasons for a leaking electric/gas water heater and what you can do to fix the problem.
When you’ve got a leak anywhere in an RV, there’s no time to waste – so let’s get right to it!
What Are the Main Causes of an RV Water Heater Leaking?
The following are some of the main causes of RV water heater leaks. We’ll list them, and then we’ll take each potential issue one by one, and describe the most likely way to resolve or repair the issue.
- Drain Valve/Anode Rod
- Temperature and Pressure Relief Valve
- Heating Element
- Water Inlet/Outlet Connections
- Rusty Tank/Tank Fracture
Drain Valve/Drain Plug
It’s possible that your drain valve/plug is leaking. This is more likely to be the case if you have a plastic drain plug such as those usually found on an Atwood water heater (rather than an anode rod, like Suburban water heaters have).
If this is the case, then with this DIY project you can replace that plastic drain valve with a metal one (or at least a new plastic one).

- Replacement Part: Provides a replacement for faulty RV water heater drain valves
- Features: ½-inch NPT male threads
Here are the steps to repairing a leak at the drain valve:
- Turn off your water heater and make sure the water in the tank has had time to cool (don’t get burned)!
- Open the hot side of the faucet closest to the tank.
- Lift the over-pressure relief valve to let the pressure out of the tank.
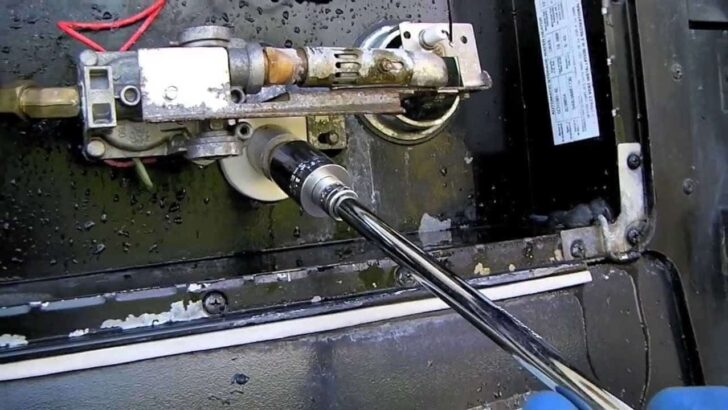
- Remove the drain valve with the appropriate socket and drain the water out of the tank.
- If the drain valve is plastic, you can replace it with a metal one now.
- If you have a metal drain valve and the threads are rusty at the top of the valve, clean them.
- Wrap threads with white Teflon plumber’s tape. Tape in a counter-clockwise direction, wrapping the tape around several times.
- Replace the drain valve.
Anode Rod
This is the exact same process as for the drain valve noted above, but Suburban water heaters have anode rods. They sacrifice themselves to protect the tank itself from corroding and also serve as the drain valve.
To resolve a leak at the anode rod:
- Turn off your water heater and make sure the water in the tank has had time to cool.
- Open the hot side of the faucet closest to the tank.
- Lift the pressure relief valve to relieve the pressure in the heater.
- Remove the anode rod with the appropriate socket.
- If the anode rod is still in very good condition (lots of material left on it), check the threads at the top of the rod and clean them.
- Wrap threads with Teflon tape, and re-tape in a counter-clockwise fashion, wrapping the tape around the threads several times.
- Replace the anode rod (either with a new one or with the old one if replacement isn’t necessary).
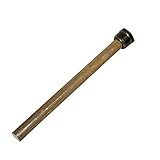
- Magnesium anode rod
- For use in RV water heaters
Pressure Relief Valve
There needs to be an air pocket at the top of a hot water tank. Otherwise, excessive pressure can build up inside the tank. If you lose that air pocket, (which can happen), you may find yourself with water leaking from the water pressure relief valve.
The pressure relief valve is seen and accessed from the outside of your water heater.
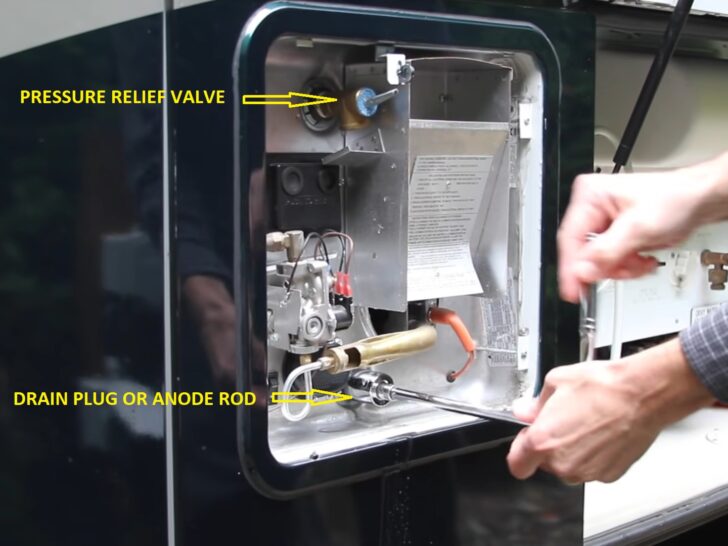
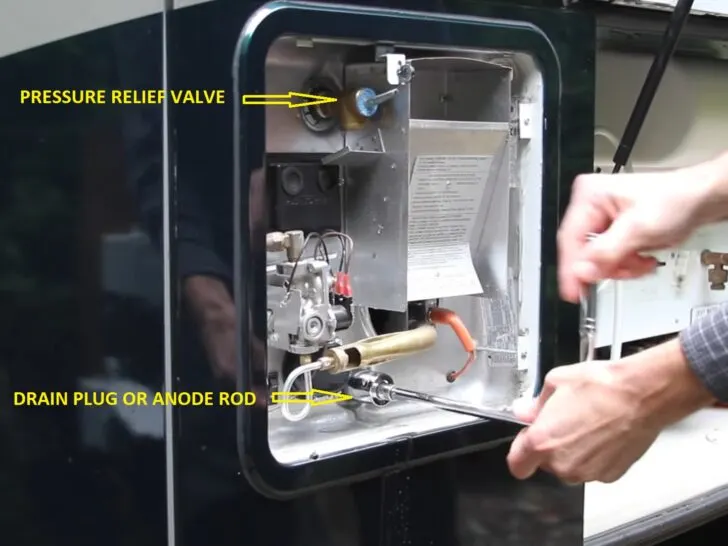
In this photo, you can see the pressure relief valve noted at the top and the anode rod location at the bottom. Note that this is a Suburban water heater. An Atwood RV water heater has a pressure relief valve like this one but has a drain valve/drain plug instead of an anode rod. From the outside of the hot water tank, these two items look very similar.
To fix a leaking pressure relief valve:
- Disconnect from water supply: (If you’re connected to city water, disconnect. If your water pump is on in your RV, turn it off.)
- Open the hot water faucet closest to the water heater.
- Open the pressure relief valve until it stops dripping (be careful – water could be hot!), and then let it snap shut.
- Close the hot water faucet.
- Restore water service either by reconnecting to city water or turning on your water pump.
(Note that you may have to repeat this process twice, but usually just once fixes the issue.)
For more detailed information on how the pressure relief valve works and how to repair this issue, see Mark Polk’s excellent video on the topic:
Heating Element
If you have a leak from your water heater’s heating element, one of two things is likely going on. Either you simply need to replace the heating element, or the problem is the threads into which the heating element is seated.
This is more likely on an Atwood hot water tank than it is on a Suburban. This is because the Atwood tanks don’t have an anode rod to absorb the corrosive action caused by hot water. So, in some cases, parts of the Atwood tanks can get eaten away because they take the brunt of the corrosive action.
Atwood doesn’t use anode rods because their tanks are made of aluminum, and not prone to the same corrosive action that affects Suburban tanks. But not all of the Atwood water heater’s components are aluminum.
One of the more common areas for this to be an issue could be the area/threads where the heating element is installed. A hole can actually be eaten away at this location.
One possibility is a leak from around the heating element. In this case, the heating element may need to be replaced or the entire tank itself may need to be replaced (if the threads on the tank itself are damaged).
If there is any damage to the socket into which the element screws, you’ll want to either have the tank repaired or replace the entire tank. (The latter may be most cost-effective in the end since the water tank is probably several years old if this type of damage has occurred.)
If you’re a confident DIY RVer, you may be comfortable just turning off the power to the electric water heater, disconnecting the propane line, draining the tank, removing the water heater tank, and re-installing a new one yourself. If not, you may need to call a plumber or at least an RV repair technician.
Water Inlet/Outlet Connections
This could be a relatively easy fix or it could be made more difficult by the fact that the inlet/outlet connections of your water lines could be buried/hard to get to in your RV depending on its installation location.
This type of leak could also possibly occur at your water heater bypass connections.
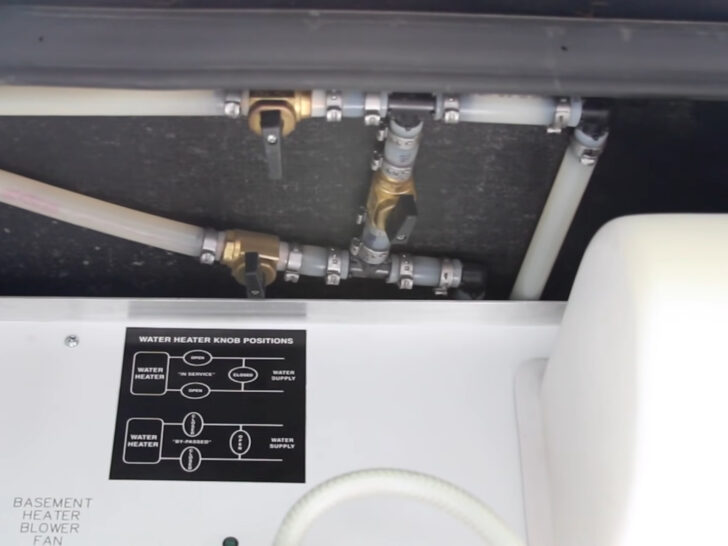
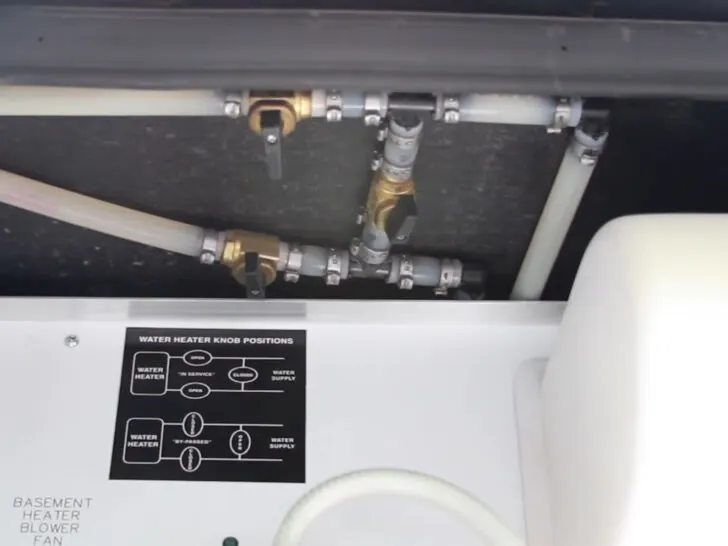
Leaks can occur at water heater bypass connections due to a loose fitting or from cracks due to improper winterization.
In either case, leaks at the hot or cold water inlet or outlet can be repaired. Sometimes it’s simply a matter of tightening a connection that has loosened.
You could also have a cracked fitting, especially if the water system wasn’t properly winterized.
These are usually standard (often PEX) fittings and can sometimes be replaced with a SharkBite fitting. They’re pretty easy to install, and don’t even have to be crimped on.
If the leak is coming from a piece that looks like a nut, this is most likely a check valve. These are also standard items carried by plumbing, hardware, and big box stores.
You may well be able to do all of this from inside the RV (again depending on location and installation) or you may need to pull the water heater out to gain proper access.
Rusty Tank or Tank Fracture
And finally, if the integrity of the tank is poor due to rust or a break/fracture in the tank itself, it will need to be replaced.
Unfortunately, if you’re experiencing internal tank leaks, or a leak from the bottom of the tank, it’s probably not salvageable. You’ll want to do this ASAP before you experience water damage in your RV’s basement.
Remember that hot water tanks can be damaged by improper winterization. Always take steps to properly winterize your RV especially if you travel to or store the RV in colder locations.
See our post on RV winterizing tips. You can also watch Peter winterize RV water lines using a Viair 400P air compressor in the video below.
Geek Out with Us Every Week
Join our newsletter to learn about all things RV-related. Every week we offer free tips, tricks, product reviews, and more to our online community of RVers. So, whether this is your first time on the road or you’re a seasoned expert, we’d love for you to geek out with us!
Erik Smith
Saturday 2nd of December 2023
RV water leaking underneath the tank into the bathroom but the water is ice cold what could it be?