

Winterizing your RV’s plumbing is incredibly important, especially if your RV will spend any time at all stored in sub-freezing temperatures over the winter months. Frozen water lines can quickly lead to burst water pipes, a broken water pump, and a devastating amount of damage to the RV itself. Proper RV winterizing of your plumbing system is something almost all RVers need to know how to do at one point or another. In today’s post, we’re talking about how to winterize an RV with an air compressor.
In yesterday’s post, we shared some helpful ideas to make your winter RV camping trip more tolerable enjoyable. Today we’re sharing a tip for RVers who will be storing, instead of wintering in, their rig.
Blowing Out RV Water Lines vs Using Antifreeze
There are a couple of different ways to winterize an RV. One involves pumping RV antifreeze into the RV’s water system. In our opinion, this isn’t ideal for a number of reasons, not the least of which is the unnecessary use of RV antifreeze (and the plastic containers it comes in). There’s also the issue of RV antifreeze sitting in your RV’s entire plumbing system for months. We use a non-toxic antifreeze, of course, but still – why use gallons of it every season if it isn’t necessary?
Another drawback of winterizing an RV using antifreeze is the need to DE-winterize when the warmer weather returns. In essence, this means going through the winterizing process in reverse, requiring both time and lots of water to thoroughly flush any residual antifreeze out of the system.
Those are some of the reasons why we prefer winterizing our RV with an air compressor.
However, we wouldn’t use just any air compressor. For example, we wouldn’t use a portable air compressor (the type with a tank (often referred to as a pancake compressor) because they can introduce oil or other contaminants into the fresh water system. They can also take up quite a bit of space.
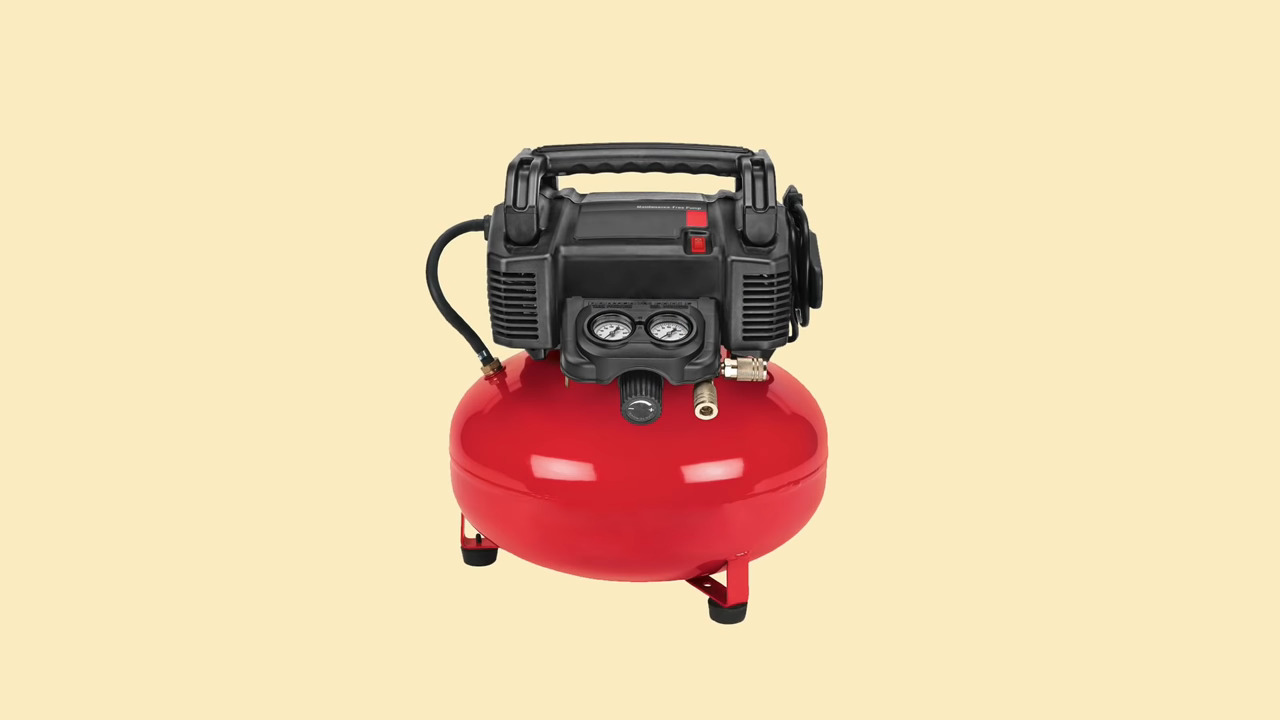
This type of air compressor has a tank that could introduce oil and other debris into your fresh water system.
What Do I Need to Winterize My RV With an Air Compressor?
If you’ve followed our full-time RV life for any length of time, you’ve probably learned that one of our favorite pieces of gear is our Viair 400P-RV portable air compressor. We’ve used this thing for YEARS (so we’re speaking from extensive experience), and we absolutely love it.
Not only is it tankless, but it also has a built-in air filter to prevent debris and contaminants from entering the system.
- PORTABLE *AUTOMATIC* COMPRESSOR for RVs & TRAILERS (Model: 40047, 150 PSI, Class C Tires) - Hit the open road with a reliable 12V air compressor,...
- POWER YOUR JOURNEY: Versatile Air Compressor for RVs & More. The 400P-RV Portable RV Air Compressor is your go-to solution for inflating tires on RVs,...

You may have seen our post last winter entitled “Which is the Best RV Air Compressor for You?” In that post, we looked at a number of air compressors and explained why we love our Viair 400P-RV so much.
But we waxed poetic about the 400P-RV long before that post. In fact, we used our Viair portable air compressor not only to fill the huge high-pressure tires on our 43-foot diesel pusher but also to winterize our plumbing system when we were planning to be away from the RV for a couple of months during the winter.
In order to accomplish the latter, we had to create our own little winterization kit for our Viair 400P-RV with a blow-out plug, an adjustable air pressure regulator, and male and female quick-connects. The system worked great, and we had a winning kit for winterizing our RV with an air compressor.
Viair must have seen our YouTube video demonstrating our winterizing kit, because not long after our video came out, they created one of their own just like it! This makes it easier than ever for anyone with a compatible Viair portable air compressor to winterize their RV using their air compressor, without having to make their own winterizing kit.
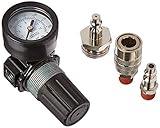
- RV Winterization Kit
- Protects your RV’s water system from freezing during the long winter months
What You’ll Need:
To winterize your RV using an air compressor you’ll need an air compressor, of course, and you’ll also need a couple of other items.
If you have a Viair compressor that’s compatible with the Viair winterizing kit, you’ll only need the compressor and kit, as well as a couple of gallons of RV antifreeze (yes, there are still a couple of places you’ll want to use that… just not throughout the system).
If you don’t have a Viair air compressor and winterization kit, you’ll need the following:
- Air compressor (the Viair 400P-RV is our favorite, also available at MobileMustHave.com – Save 5% with Discount Code RVGEEKS)
- Viair Winterization Kit – OR, if you don’t want to buy this kit, make your own using the following parts:
- RV-Safe Antifreeze (you’ll need a small amount for protecting your p-traps, etc)
How Do You Winterize an RV with Compressed Air?
We’re glad you asked! Here are the basic steps to follow to winterize your RV using an air compressor. Your RV may be different from ours, so the procedure may need to be adjusted accordingly.
The day before you plan to winterize, open the fresh water tank’s low point drain and shut off the propane and the electricity to the water heater.
On the day you’re going to winterize your RV:
- Dump and flush your black and gray tanks. (Following our video instructions here.) Leave the gray valve open and your sewer hose connected when finished.
- Disconnect the city water supply and turn off your RV’s water pump.
- Open the pressure relief valve on your RV’s water heater, and remove the drain plug or anode rod.
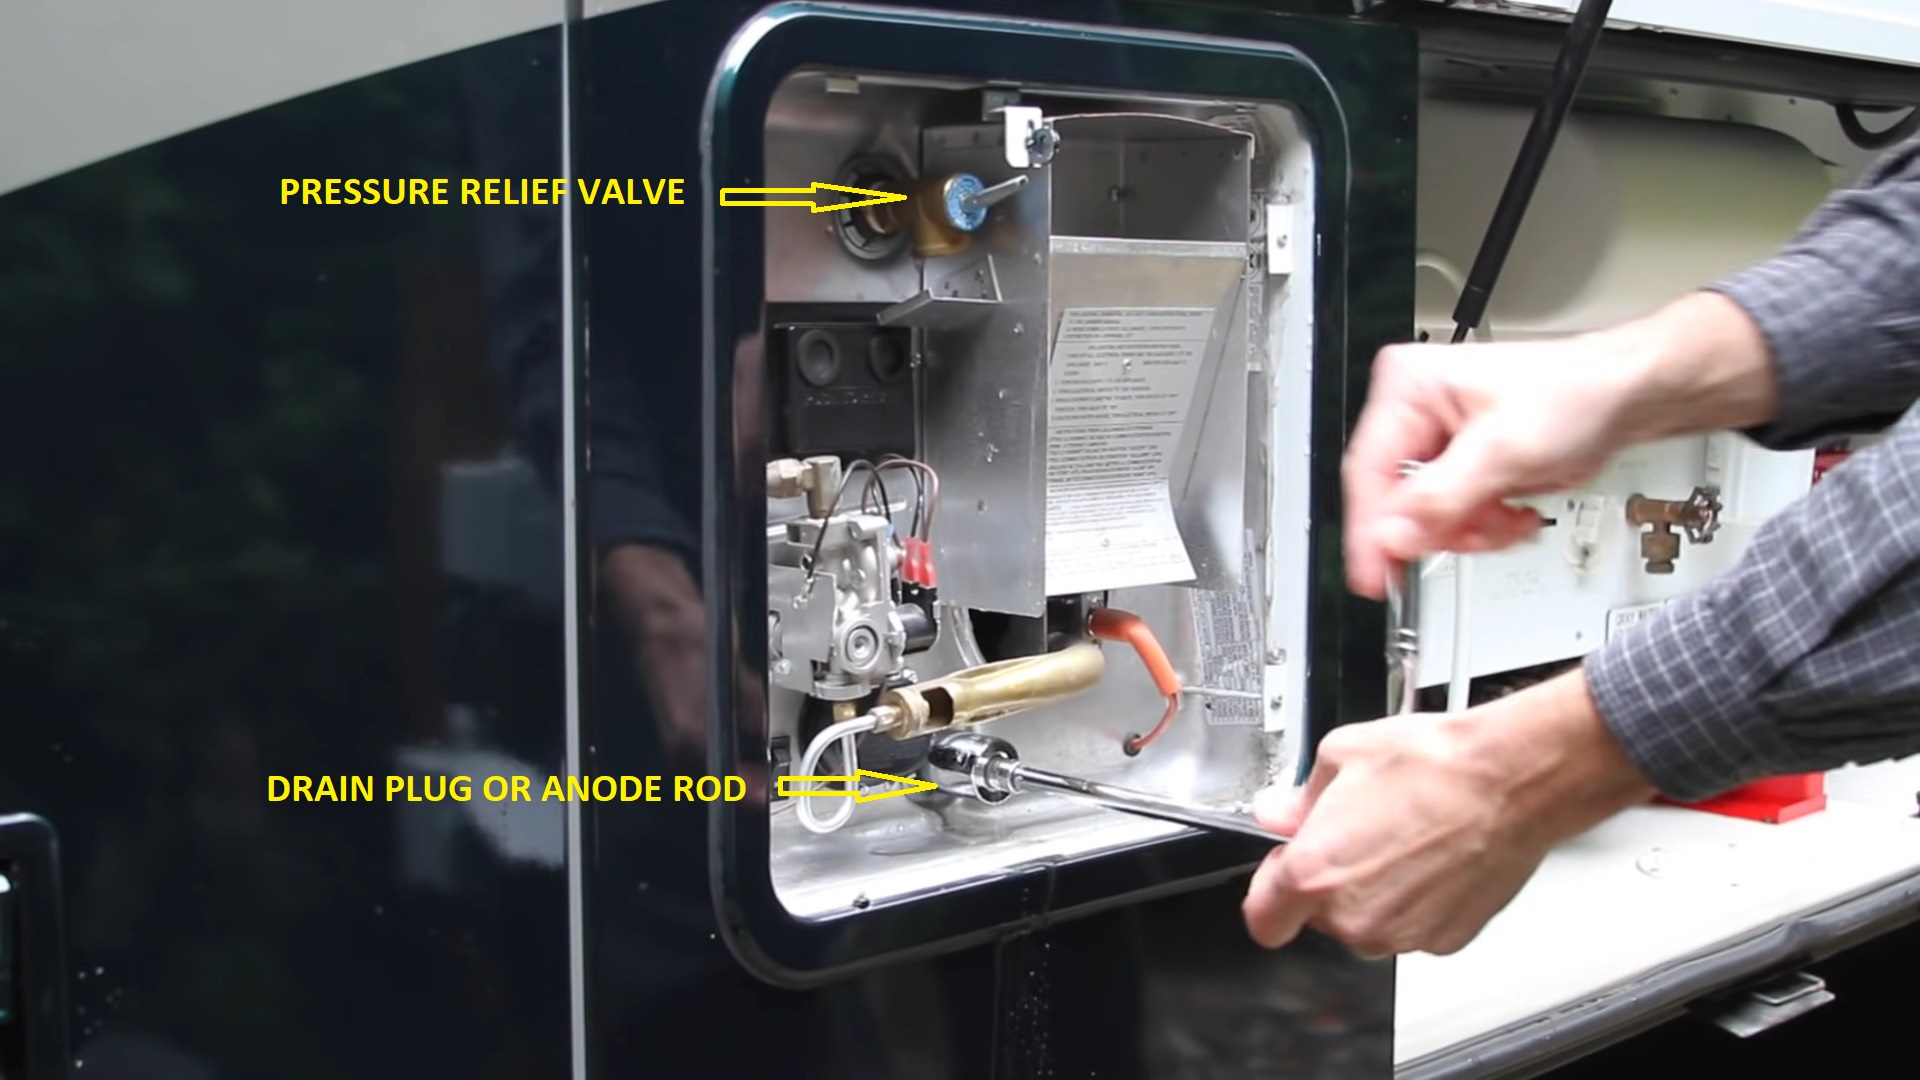
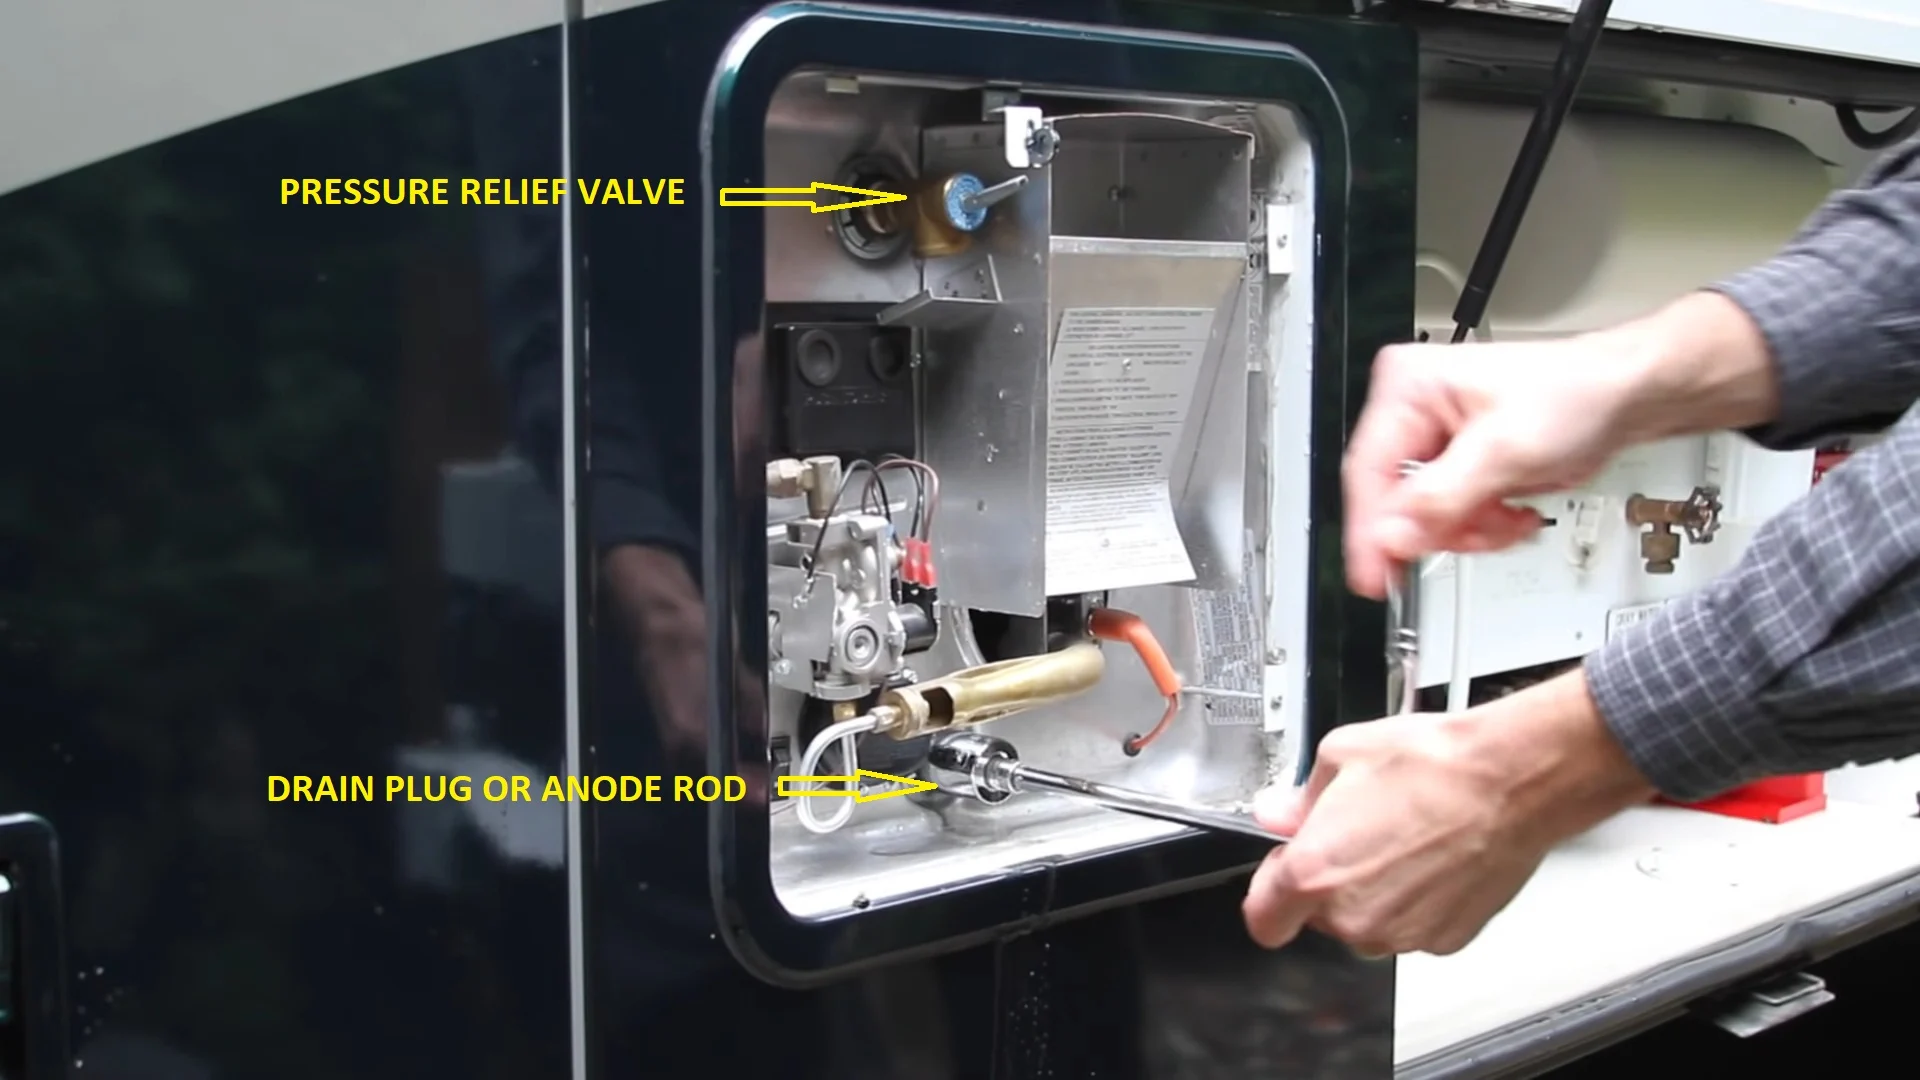
First, open the pressure relief valve. Then remove the drain plug (Atwood heaters) or anode rod (Suburban heaters). Stand out of the way and be prepared for water to flow out of the water heater.
- Using a tank rinsing wand, flush your RV’s water heater to clean out any loose scale and debris. If you’d like to watch our step-by-step DIY tutorials on water heater tank cleaning, you’ll find the Atwood video here, and the Suburban video here (with an important follow-up about anode rods here).
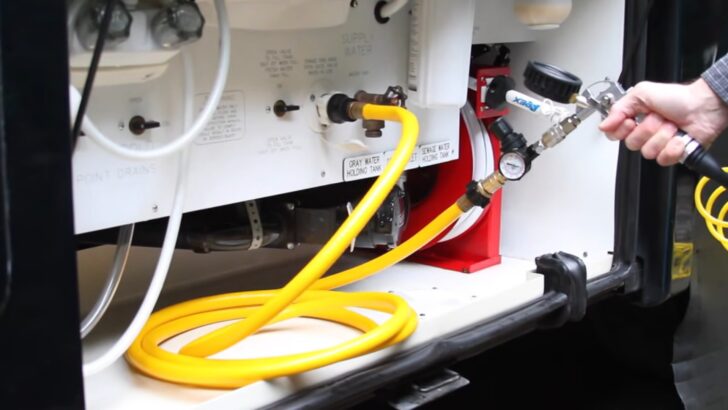
- Attach the blow-out plug. For RV’s with a typical fresh water connection, you’ll attach the blow-out plug directly to the water connection. For RV’s with a permanent hose on a reel like ours, you’ll attach the blow-out plug to the end of the hose.
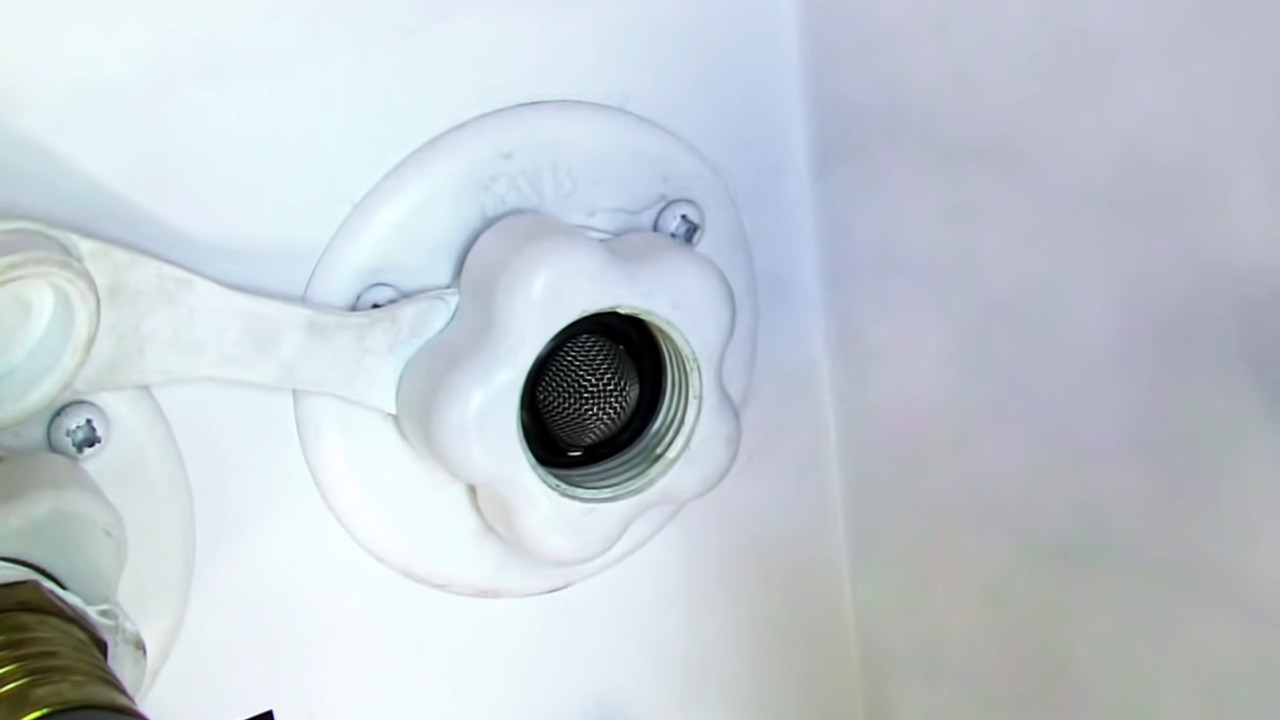
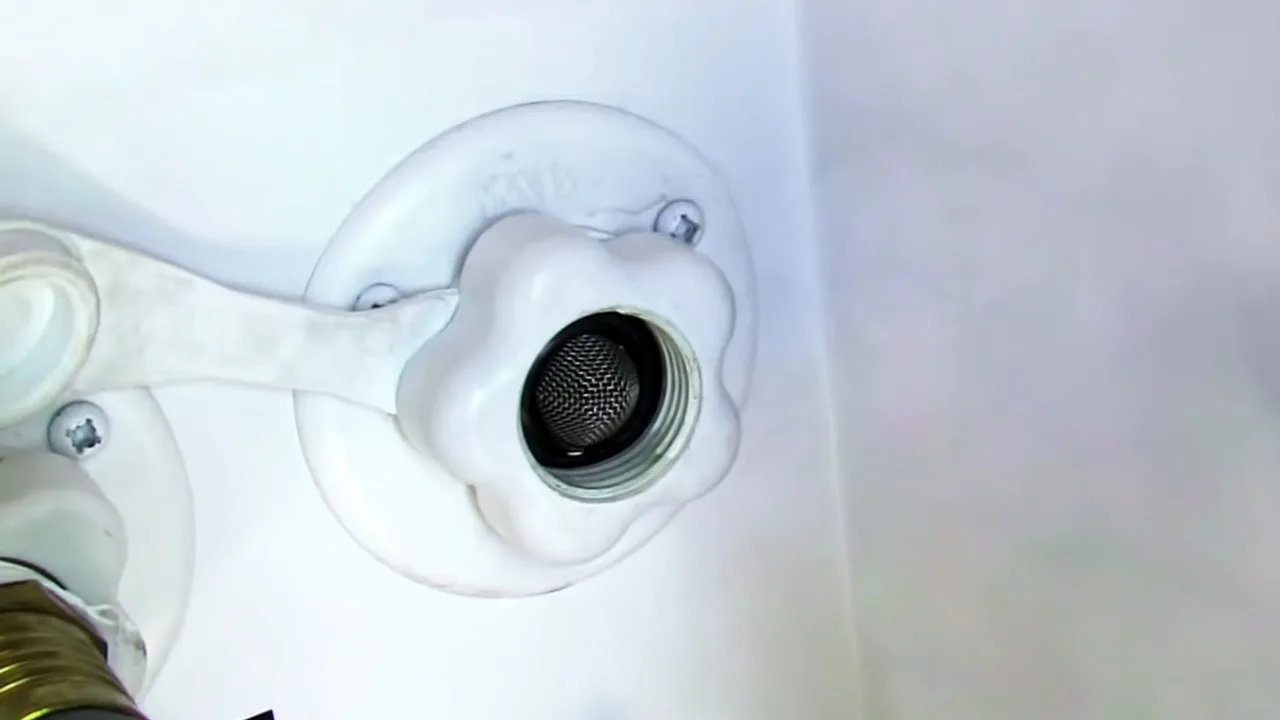
Attach your blow-out plug directly to your fresh water connection, (or directly to your hose if your RV has a permanent built-in hose).
- Set the inline air pressure regulator to a maximum of 45 PSI to ensure the pressure supplied by your air compressor doesn’t exceed the allowed limits on your RV’s plumbing (be aware, you MAY need to set it lower… not all RV plumbing can withstand 45 PSI)
- Connect your compressor to a power source and turn it on.
- Close the pressure relief valve on your water heater and pull the trigger of your air compressor wand. It’s not important to get every drop of water out of the water heater. The important piece is draining all the water from the lines leading into and out of it. Give the wand an extra squeeze or two until there is just a trickle of water coming out of the heater.
- If you have a Suburban brand water heater, then you have an anode rod that you removed to drain the water heater. Depending on the condition of the anode rod, this may be a good time to replace it.
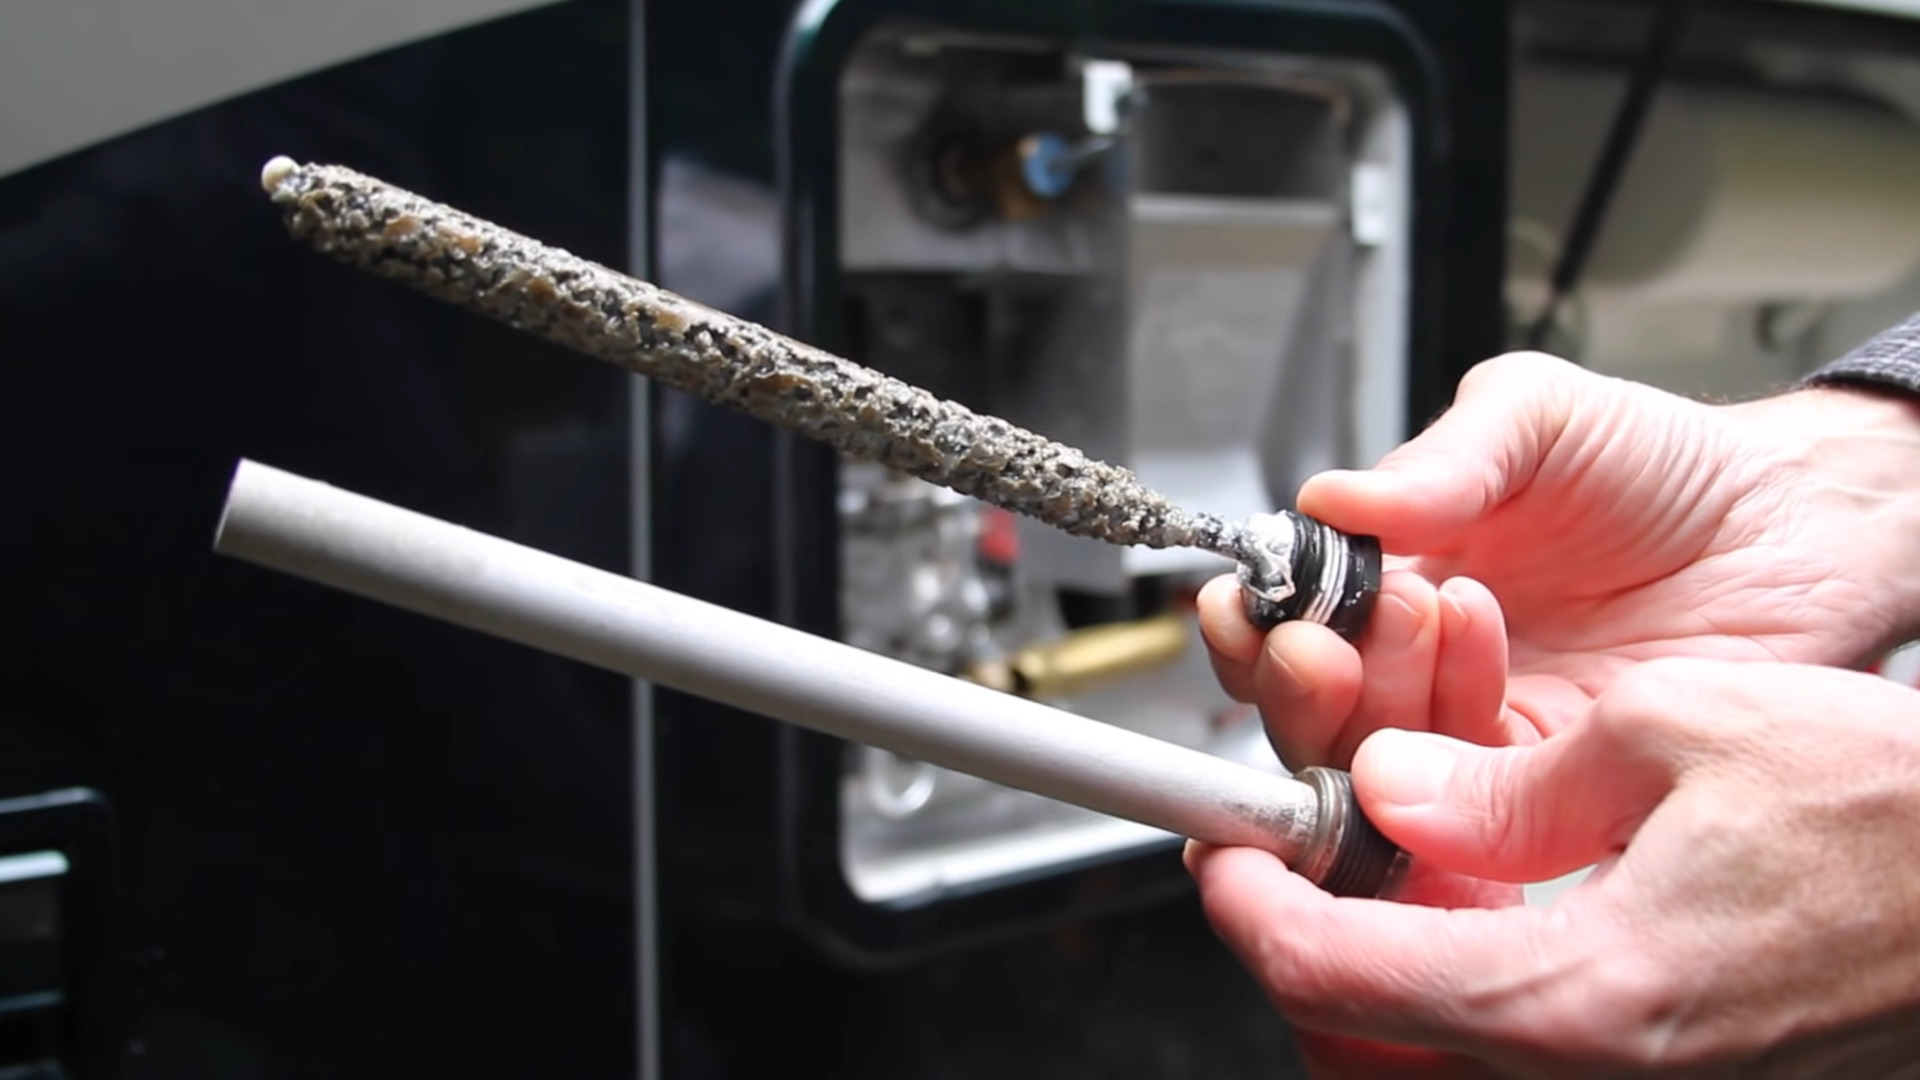
The anode rod on top has served its sacrificial purpose well and is ready to be replaced with the new anode rod on the bottom. It might have enough material on it to make it another year, but they’re cheap insurance, so why risk your water heater’s tank?
- Magnesium anode rod
- For use in RV water heaters
- Reinstall your drain plug or anode rod using plumber’s tape (wind several wraps around the threads). Tighten into place.
- Turn your water heater bypass valves to the bypass position.
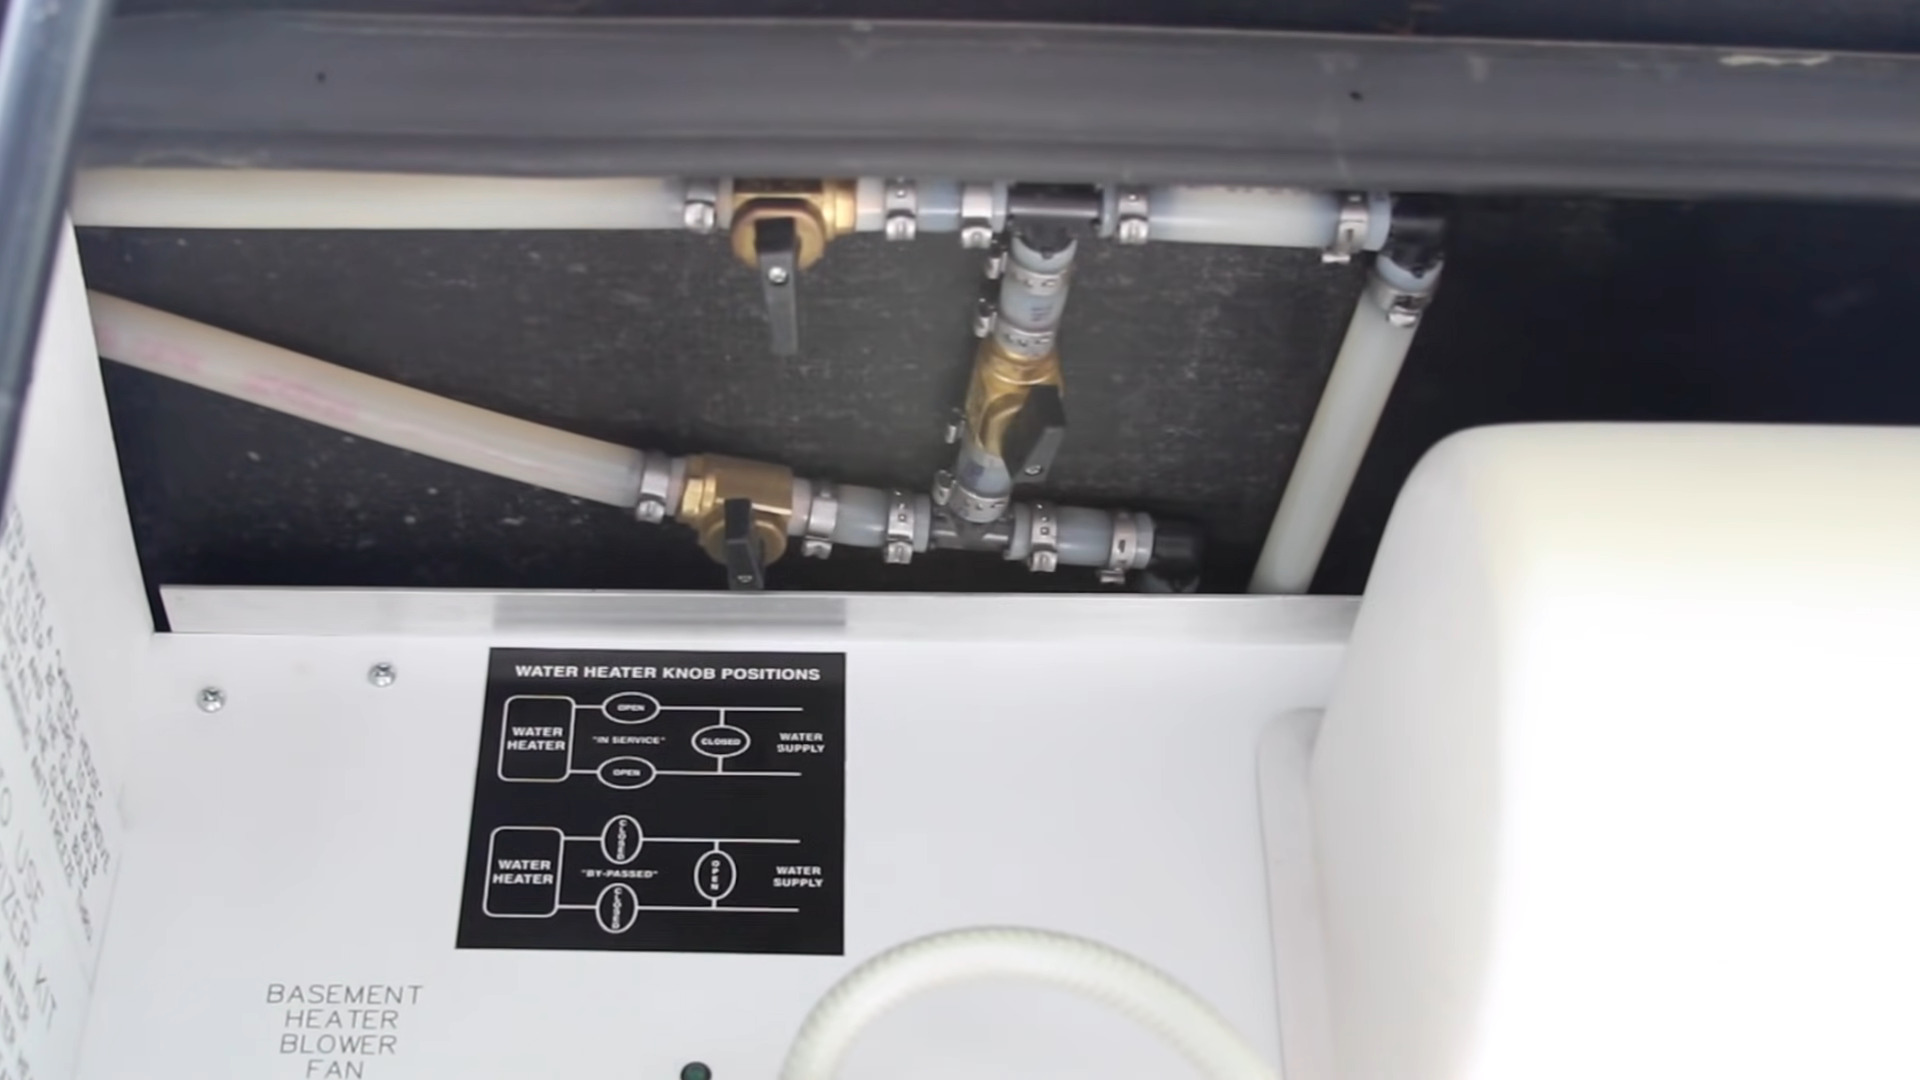
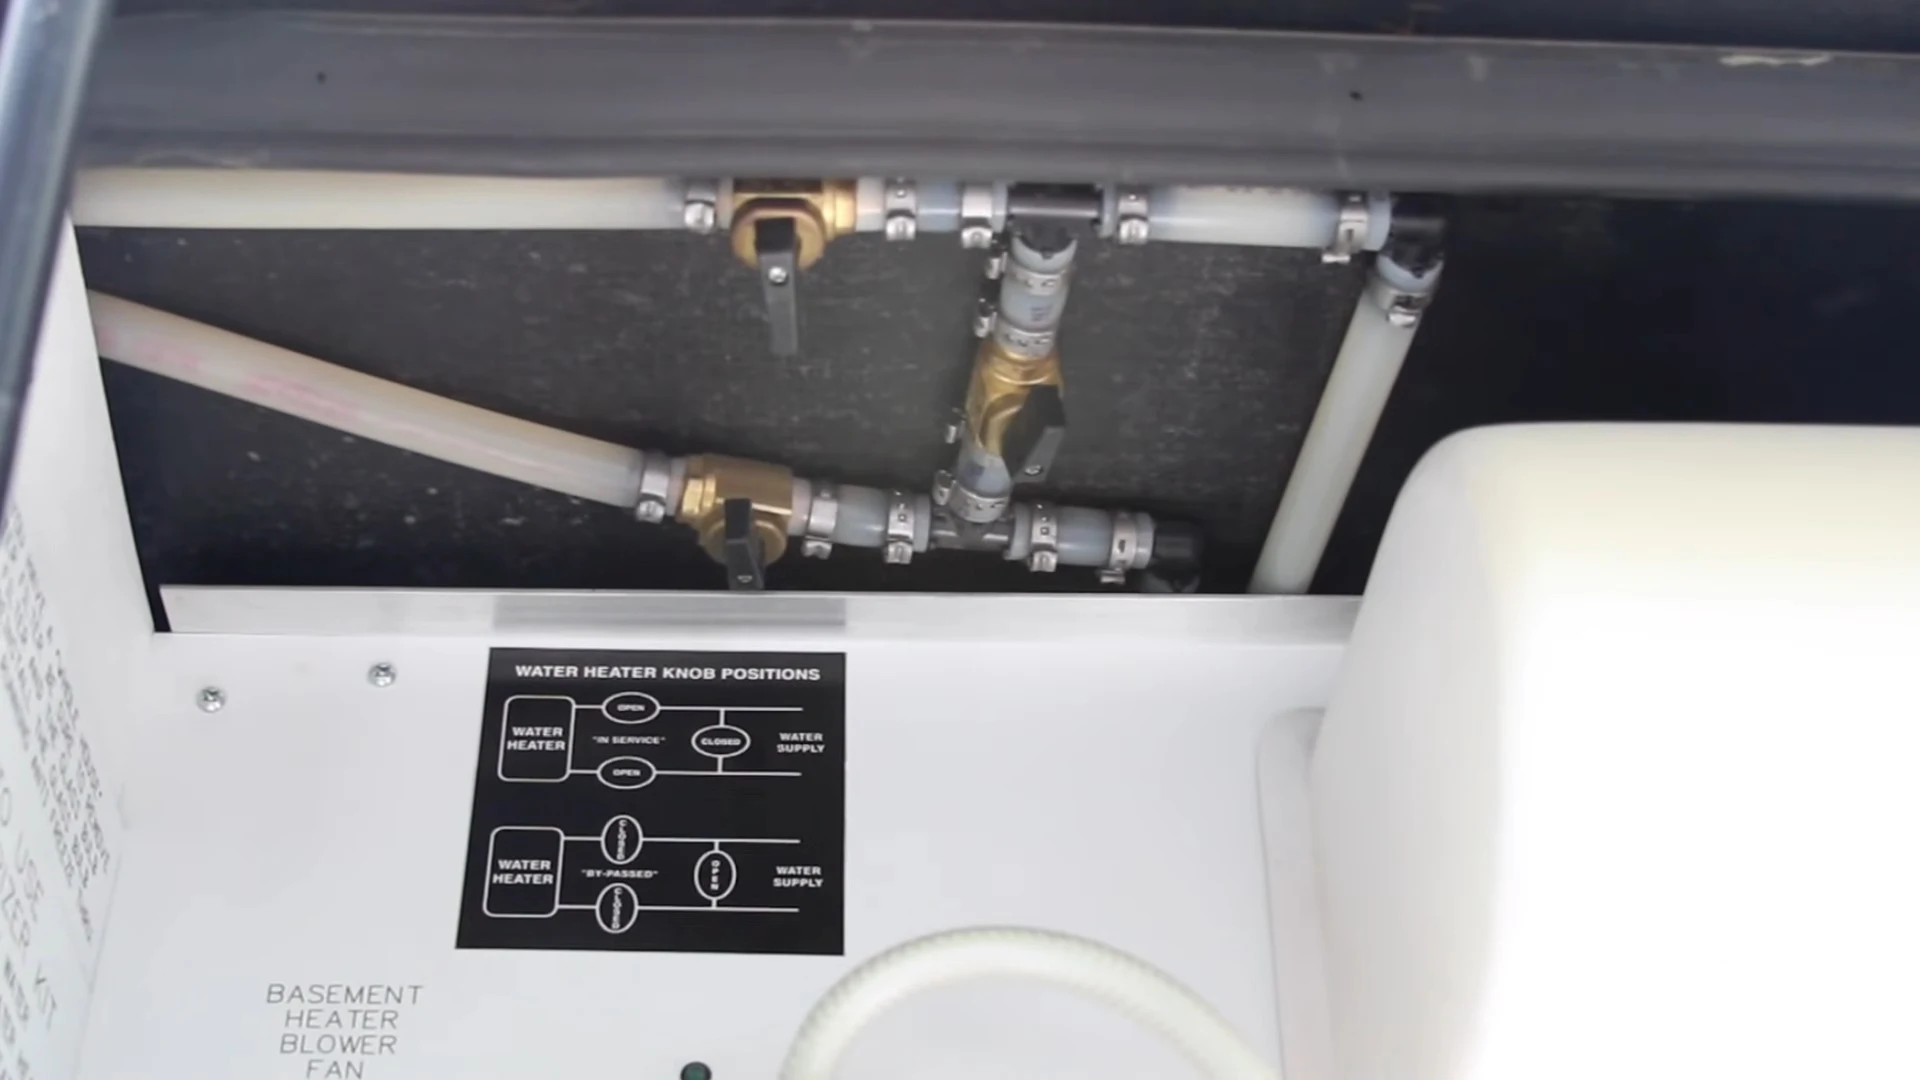
Your water heater’s bypass valves allow you to bypass the water heater when winterizing the RV.
- If you have a whole-house water filter, unscrew the housing, discard the water filter, empty the remaining water out, and reinstall it without a filter.
- Open the hot and cold low point drains of your RV.
- Turn on every faucet in the RV set to “warm” to allow all water to easily run out through the low point drains.
- If you have a water filter under your sink or an ice maker, turn the bypass valves and remove and discard the filter(s). Instead of a bypass valve, some RVs come with a short length of tubing, which takes the place of the discarded filter during storage.
- When water is no longer running out of the low point drains, close the valves and turn off all the faucets in your RV.
- Turning on one faucet at a time set to “warm” to open both hot and cold lines at the same time (or each side separately if you prefer… that works, too!), blow compressed air through the system one or two times until the water clears out of the faucet. If you don’t have a helper inside the RV to monitor this for you, a couple of 15-second blasts or 30 seconds total should blow the water line out sufficiently. Repeat this process at every faucet, and don’t forget your showerhead, kitchen sprayer, water dispenser, toilet, and toilet sprayer if you have one.
- Check your manufacturer’s instructions for draining your ice maker if you have one.
- If you have a dishwasher and/or washing machine, turn them on, blow out the lines, then shut them off. Follow any additional steps recommended by the manufacturer for RV winterizing. If your RV is pre-plumbed for a washing machine but you don’t have one, you still have to blow out the lines. Open each side one at a time and have a bucket or pitcher handy to catch any water that sprays out as you do so.
- Pour a cup or two of RV antifreeze into each of your RV’s sink drains to protect the p-traps from freezing. Don’t forget the shower drain.
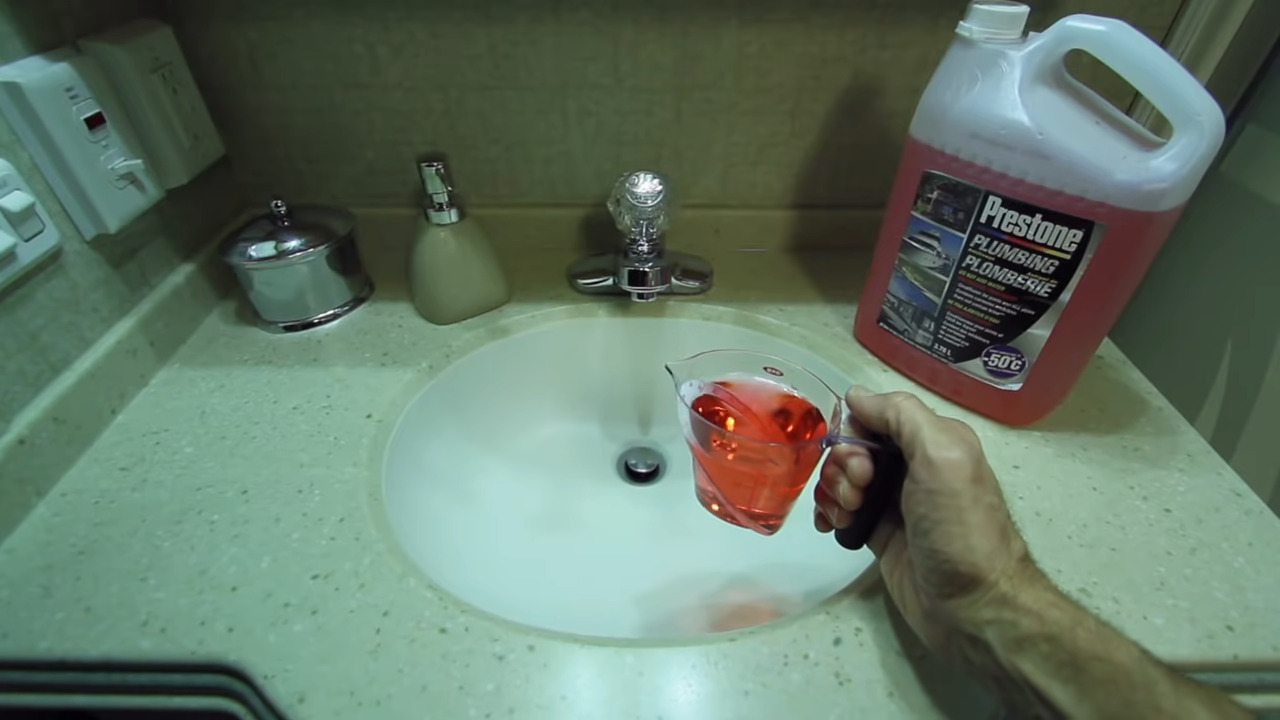
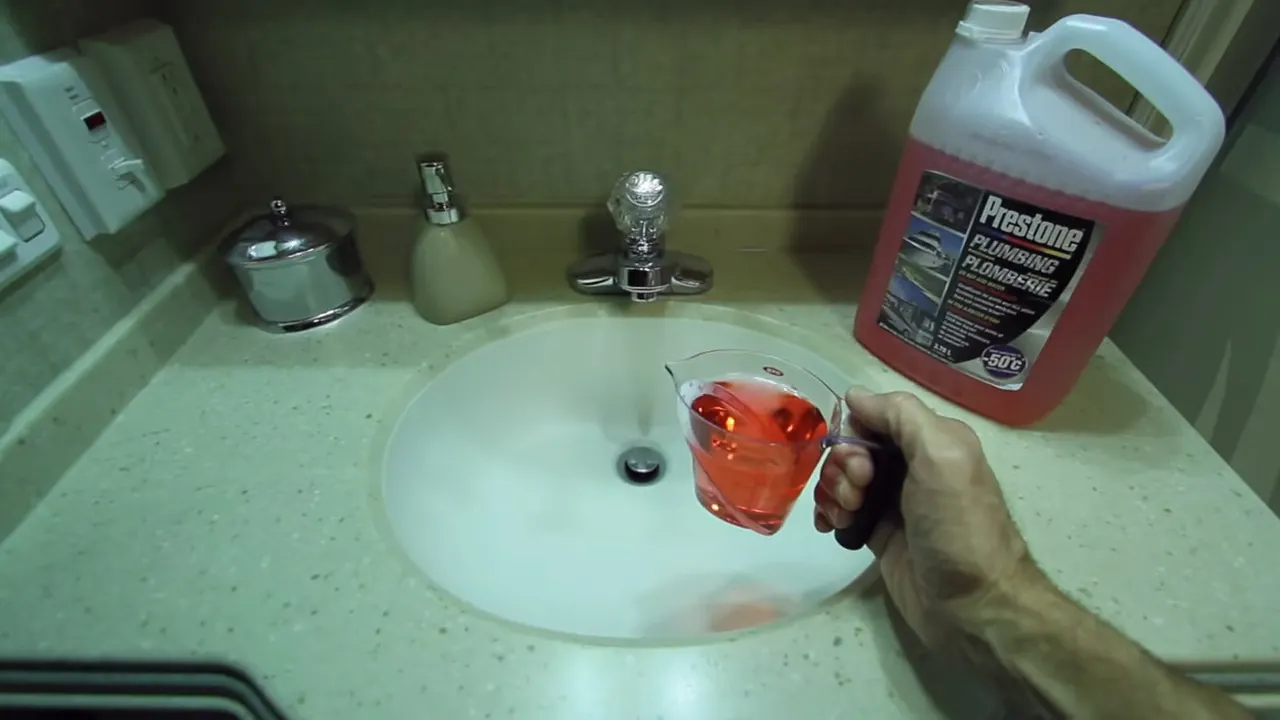
Pouring a little non-toxic RV antifreeze in all of your RV’s p-traps and in the toilet is part of the winterization process.
- Pour about two cups of antifreeze into the toilet and flush it. Pour two more cups or so of antifreeze into the toilet and leave it there.
- To protect our water pump from freezing, we pump it dry. To do this, we turn on our outdoor shower and our water pump and run the shower for about 15-20 seconds. Don’t run it dry for too long or you could risk damaging the water pump.
- Blow the remaining water out of the outdoor shower with the air compressor.
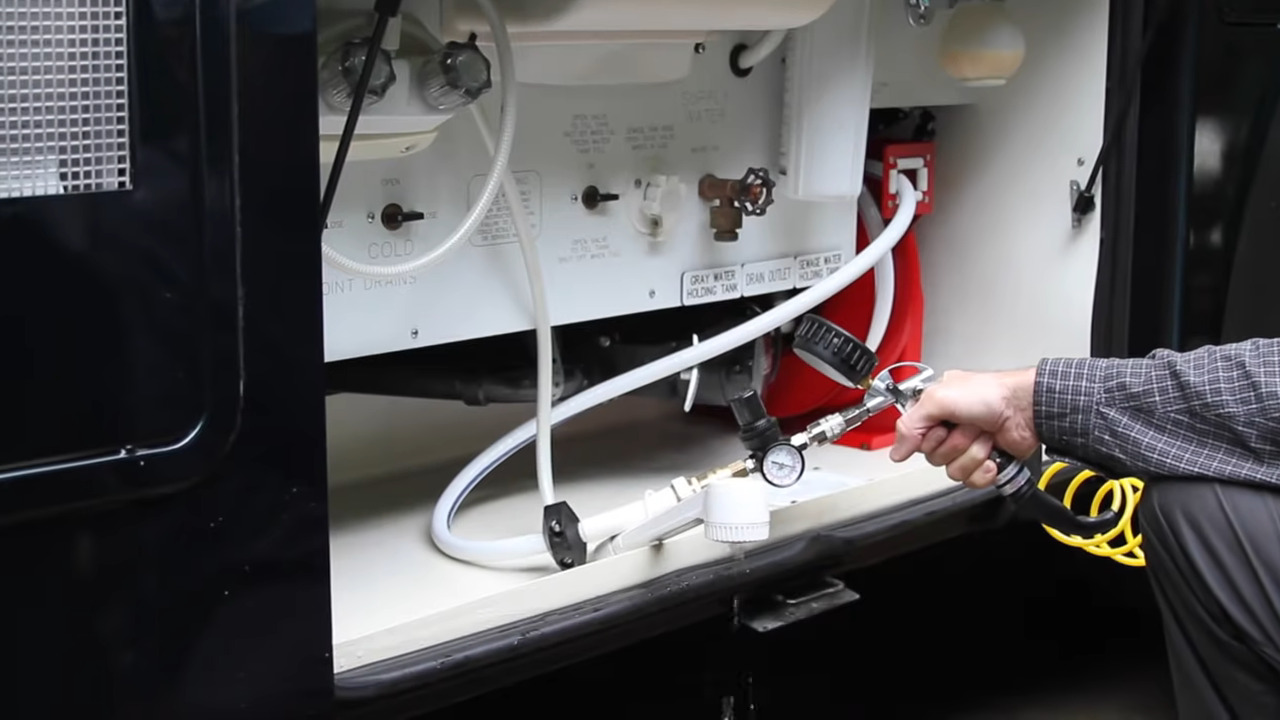
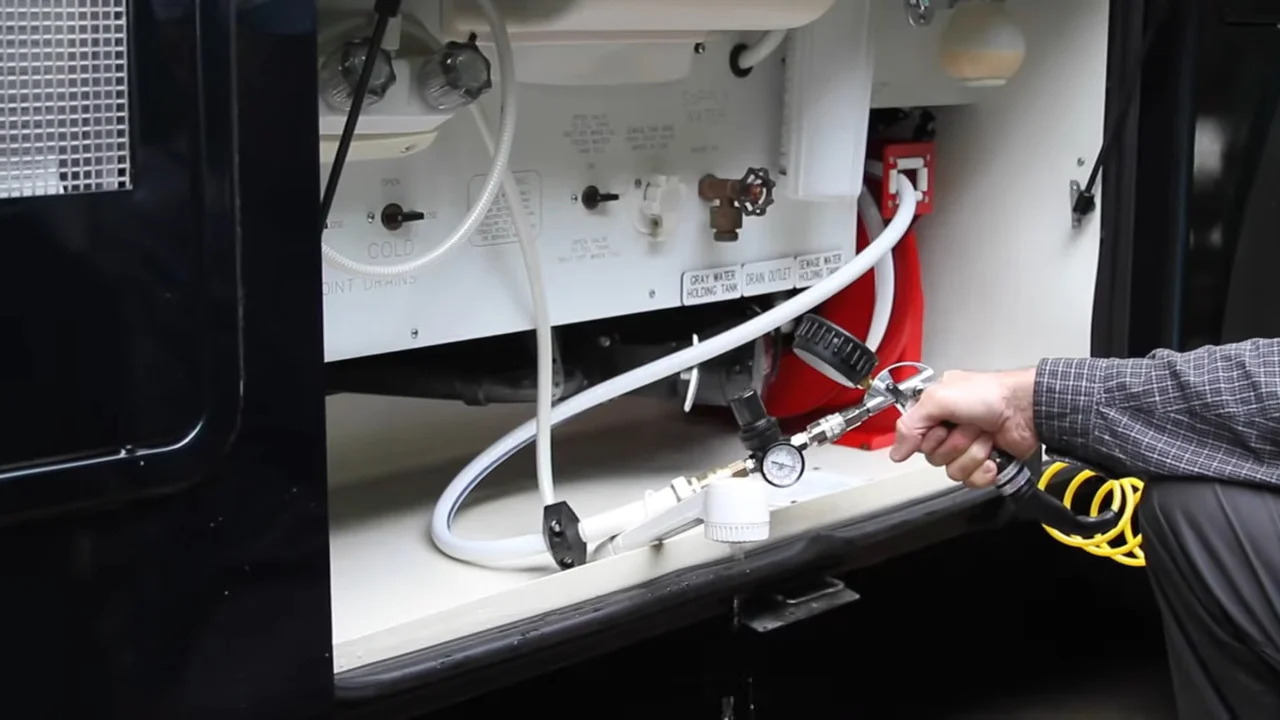
Use the air compressor to blow the remaining water out of the outdoor shower.
- To clear water from the fresh tank fill line, turn the “tank fill” valve on and blow it out. This will blow a small amount of water into the fresh tank, but that’s not a problem, and nothing to worry about.
- With a backflow preventer inline, we attach the air compressor to the black tank flush and blow it out as well.
- Close the fresh water low point drain.
- Close the gray valve.
- Detach your RV sewer hose and store it for the winter.
- Open all faucets in the RV and leave them open.
If you’d like a clearer picture of the entire procedure, watch our video below for step-by-step visuals of the entire process!
Conclusion
If winterizing your RV with an air compressor is in your plans this year, we hope this information will prove helpful to you as you navigate the process of winterizing your RV’s plumbing system.
Remember, when in doubt (or when you see something that’s different from what you see on our RV), check your owner’s manual for the recommendations of your RV’s manufacturer.
Geek Out with Us Every Week
Join our newsletter to learn about all things RV-related. Every week we offer free tips, tricks, product reviews, and more to our online community of RVers. So, whether this is your first time on the road or you’re a seasoned expert, we’d love for you to geek out with us!
Peter Dickson
Saturday 28th of October 2023
Blowing your water lines out works fine as long as two things are not in play 1. The climate you are winterizing for is not severe. With extreme temperatures the lines with residual water will freeze and water line repairs ( as well as locating the actual break) are difficult 2. This procedure is only good if you have a water heater. Any units with a Aqua hot or oasis system, the possibility of blowing all the water out of the on demand water is system is not there. A repair to one of these systems that is not winterized with antifreeze will run in to the 3 to 5 thousand dollar mark.
Bruce Niss
Monday 12th of December 2022
I have the exact same equipment you used except I'm using the Viair 450-45053RV. When I turn on the pump and pull the trigger on the air gun the air just trickles out the end of the hose--certainly not enough pressure to blow water out of the lines. A mechanic friend says I need a compressor with a tank to build up 40 psi. What am I doing wrong?
TheRVgeeks
Monday 12th of December 2022
Hi Bruce. It sounds like you're not letting the compressor finish pressurizing the hose completely before pulling the trigger. We've found that if turn the Viair on and allow it to pressurize (i.e. run until it automatically shuts off) before pulling the trigger, you get a sufficiently powerful "blast" of air to do a good job of pushing water out of the lines. We keep the trigger pulled for a little while until it doesn't sound like much is blowing out, then release the trigger and let the Viair pressurize up again. Pull the trigger once it shuts off, and another blast pushes more water out. If needed, attach both hose lengths together to give a larger volume of stored, pressurized air.
If that doesn't work for you, Bruce, there may be an issue with your Viair. Do you have trouble adding air to your RV's tires (i.e. it takes a very long time)?
Frank G.
Wednesday 26th of October 2022
Being this the 1st year RVing, I have really appreciated your video’s and articles. I took your recommendation for Winterizing with an air compressor, even purchasing the 400P Viair & Winterizing Kit! I have a question about blowing out the Black Tank Flush Line. There is no mention of opening anything, how/where does the compressed air escape?
TheRVgeeks
Thursday 27th of October 2022
Good question, Frank. We didn't mention opening anything when blowing out the black tank flush because there isn't anything you need to do. The air entering the black tank through the flush system will just vent out through the roof vent. No worries about the black tank getting pressurized.
Dan H.
Saturday 3rd of September 2022
Hi Guys: Our 2017 Dutch Star has a compressed air port under the hood near the Onan generator. Is using this compressed air for winterizing not a good idea?
TheRVgeeks
Saturday 3rd of September 2022
Hi Dan! We have one of those ports as well. We're pretty sure every diesel pusher has one, because if they ever need to be towed, the tow truck has to bridge an air line over to the rig to keep the system aired up so the parking brakes stayed released. You CAN use that air to winterize, but we prefer not to use any compressor with a tank (like those common pancake compressors, or the one on the RV itself). That's due to the potential for any tank-style compressor to blow sediment, oil, or other contaminants into our fresh water system. The Viair is tankless, and even has a filter on the inlet to prevent it from getting debris into it, so it's an assured source of clean pressurized air. Again, not that it's a huge risk that the RV's compressor would contaminate our water system. But we just like to be extra careful since we drink the water from our fresh tank (through our Acuva water purifier to kill any bacteria). Hope this helps explain our thinking. Always great to hear from a fellow Newmar owner!
Rich T.
Monday 28th of February 2022
Hi - I have a question about the photo of the red pancake compressor you suggest not using. There is a very popular "oil free" version of this same Craftsman compressor I've just ordered after seeing it recommended in some other RV blogs as one that does NOT introduce oil and dirt into water lines. Were you aware that there is an oil free version or do you have other issues with this specific one? I appreciate your blog as I'm getting up to speed on things.
M
Monday 4th of September 2023
@Rich T., I suggest Googling "Does compressing air cause condensation" and reading the articles that turn up. On every compressed air tank in our shop, stationary or portable,there is a valve to drain the tank. We do this monthly so that the tanks don't rust. Pressure and temperature changes in the air change how much water the air can hold. The condensation in the tank will eventually cause rust particles that will enter your RV system when you winterize unless filtered out. We have drainable filters at every air outlet in the shop to prevent moisture and rust/sediment from ruining our air-powered tools and paint jobs.
TheRVgeeks
Monday 28th of February 2022
Hi Rich! We've seen those types of tanks before. Even though they describe themselves as "oil-free" we do have some concern about any compressor that uses a tank when it comes to blowing out fresh water lines. Any time there's a tank, there's potential for sediment or other contaminants to build up. We know the Viar compressor we use is more expensive, but the dual benefits of no tank, and smaller size (an important consideration, especially for us full-timers) has us making the investment in tankless.