
If you’ve got a propane tank on your RV but you’re still hauling around those little green canisters of propane to use with your portable propane grill, it’s time to let us show you how to connect a gas grill to an RV!
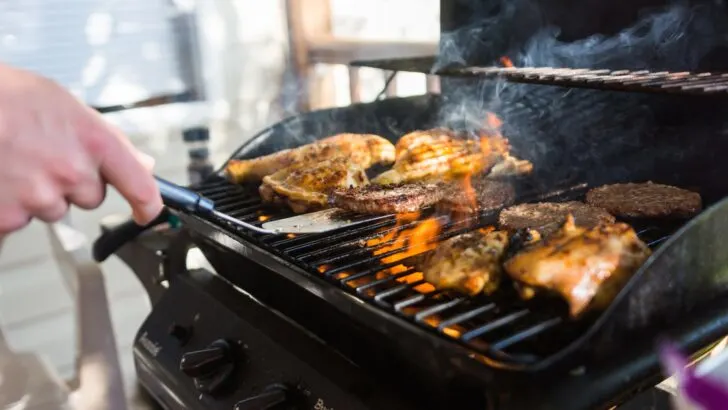
Propane BBQ grills are fantastic for cooking outside when you’re camping. We use ours multiple times a week.
But buying, carrying around, and disposing of, those little green bottles seems like a whole lotta nonsense and waste when most of us carry a built-in propane tank on our RVs (or at least mounted on the front of the rig).
Even if you’re carrying one of the larger portable propane tank sizes to use with your grill, you probably already have a supply of propane on board, so you’ve got redundancy going on.
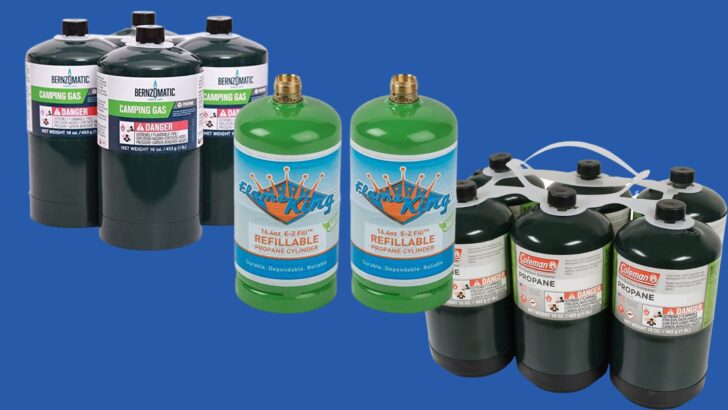
The trouble is that so many small gas BBQ grills are set up to use those little 1-pound propane canisters.
So, in this post, we’ll give you specific details on connecting your gas grill to an RV propane tank you’re already carrying.
By the time we’re finished, the only thing you’ll be left wondering is why you didn’t connect to your rig’s propane system long ago!
What’s Wrong with Disposable One-Pound Propane Cylinders?
There are a few reasons why we decided to learn how to connect our portable gas grill to our RV’s propane system and stop using disposable canisters.

We use our BBQ grill a lot, so carrying those one-pound canisters just made no sense at all for us.
They Run Out of Propane Quickly
There’s nothing much worse than thinking dinner’s ready, only to discover that the propane ran out right after you put your food on the grill.
Since those little canisters are so… little… that tends to happen fairly often.
They Need to be Purchased and Stored
Space is at a premium in an RV. Removing disposable propane cylinders from the list of gear we need to keep on board saves space.
Also, when you’re counting on a small propane canister to run your grill, you’ve gotta make sure you have plenty on hand.
The only thing worse than your little canister running out of propane while dinner’s on the grill is rummaging around for a fresh canister to finish cooking dinner, only to find that it was the last one!
Even though you could connect your grill to one of those larger 20 lb portable tanks typically used for grilling in a sticks & bricks house, they take up even more of that precious storage space than the little canisters do.
They’re Wasteful
And then there’s the matter of waste.
Those little green bottles are just plain wasteful. Not only do millions of them end up in landfills, but you’re also wasting money buying them.
They cost more, take up space, run out sooner, and are bad for the planet. A losing proposition overall.
Redundancy Can Be Bad In an RV
A prime directive of a do-it-yourselfer is to identify ways of improving the RVing experience through simple modifications.
How great it is to be able to eliminate redundancy while improving functionality and reducing costs.
So having the grill connected to the RV’s propane system is a big win. Using a resource that you already have available for an additional purpose is an excellent way to go.
How to Connect a Gas Grill to an RV

We use our grill frequently, so one of the first things we did was modify our onboard propane system to be able to feed our gas grill.
Our 2005 motorhome didn’t come with any way to connect a gas grill to the rig’s propane system.
So, one of the first things we did was to modify it so that we could connect our grill directly to our RV.
Originally, our system was set up for the propane to move directly into the regulator, and then up into the main line feeding the appliances in our motorhome.
We added a device called an “Extend-a-Stay” or a “Stay-a-While” to “T” into the system. This achieved a couple of goals.
First, it feeds the “T” off to things like our BBQ grill (it could also be used to connect to a firepit). It also allows us to connect to a large external propane tank for longer stays in one spot during colder months.
We also installed a 15 psi step-down regulator to prevent full high-pressure propane from going out to our grill. We had to add that into the line because we were running 24 feet of hose to the grill.
Unregulated propane coming directly from a tank can be in the range of 100-200 PSI. That much pressure over a long run of hose can force the oil in the propane to accumulate in the hose.
We originally had the long hose attached directly to our Extend-a-Stay (without the additional regulator), and eventually our propane grill stopped working properly.
We disconnected the built-in regulator on our grill and found it full of oil. The high pressure coming all the way over from the opposite side of our RV created this problem.
Once we added the 15 psi regulator ahead of the long hose run (near the propane tank itself), the problem was solved.
We’ve diagrammed out every part we used to modify our propane system to make our grill connection (and disconnection) quick and easy.
Following is the diagram for the parts we used on the propane tank side.
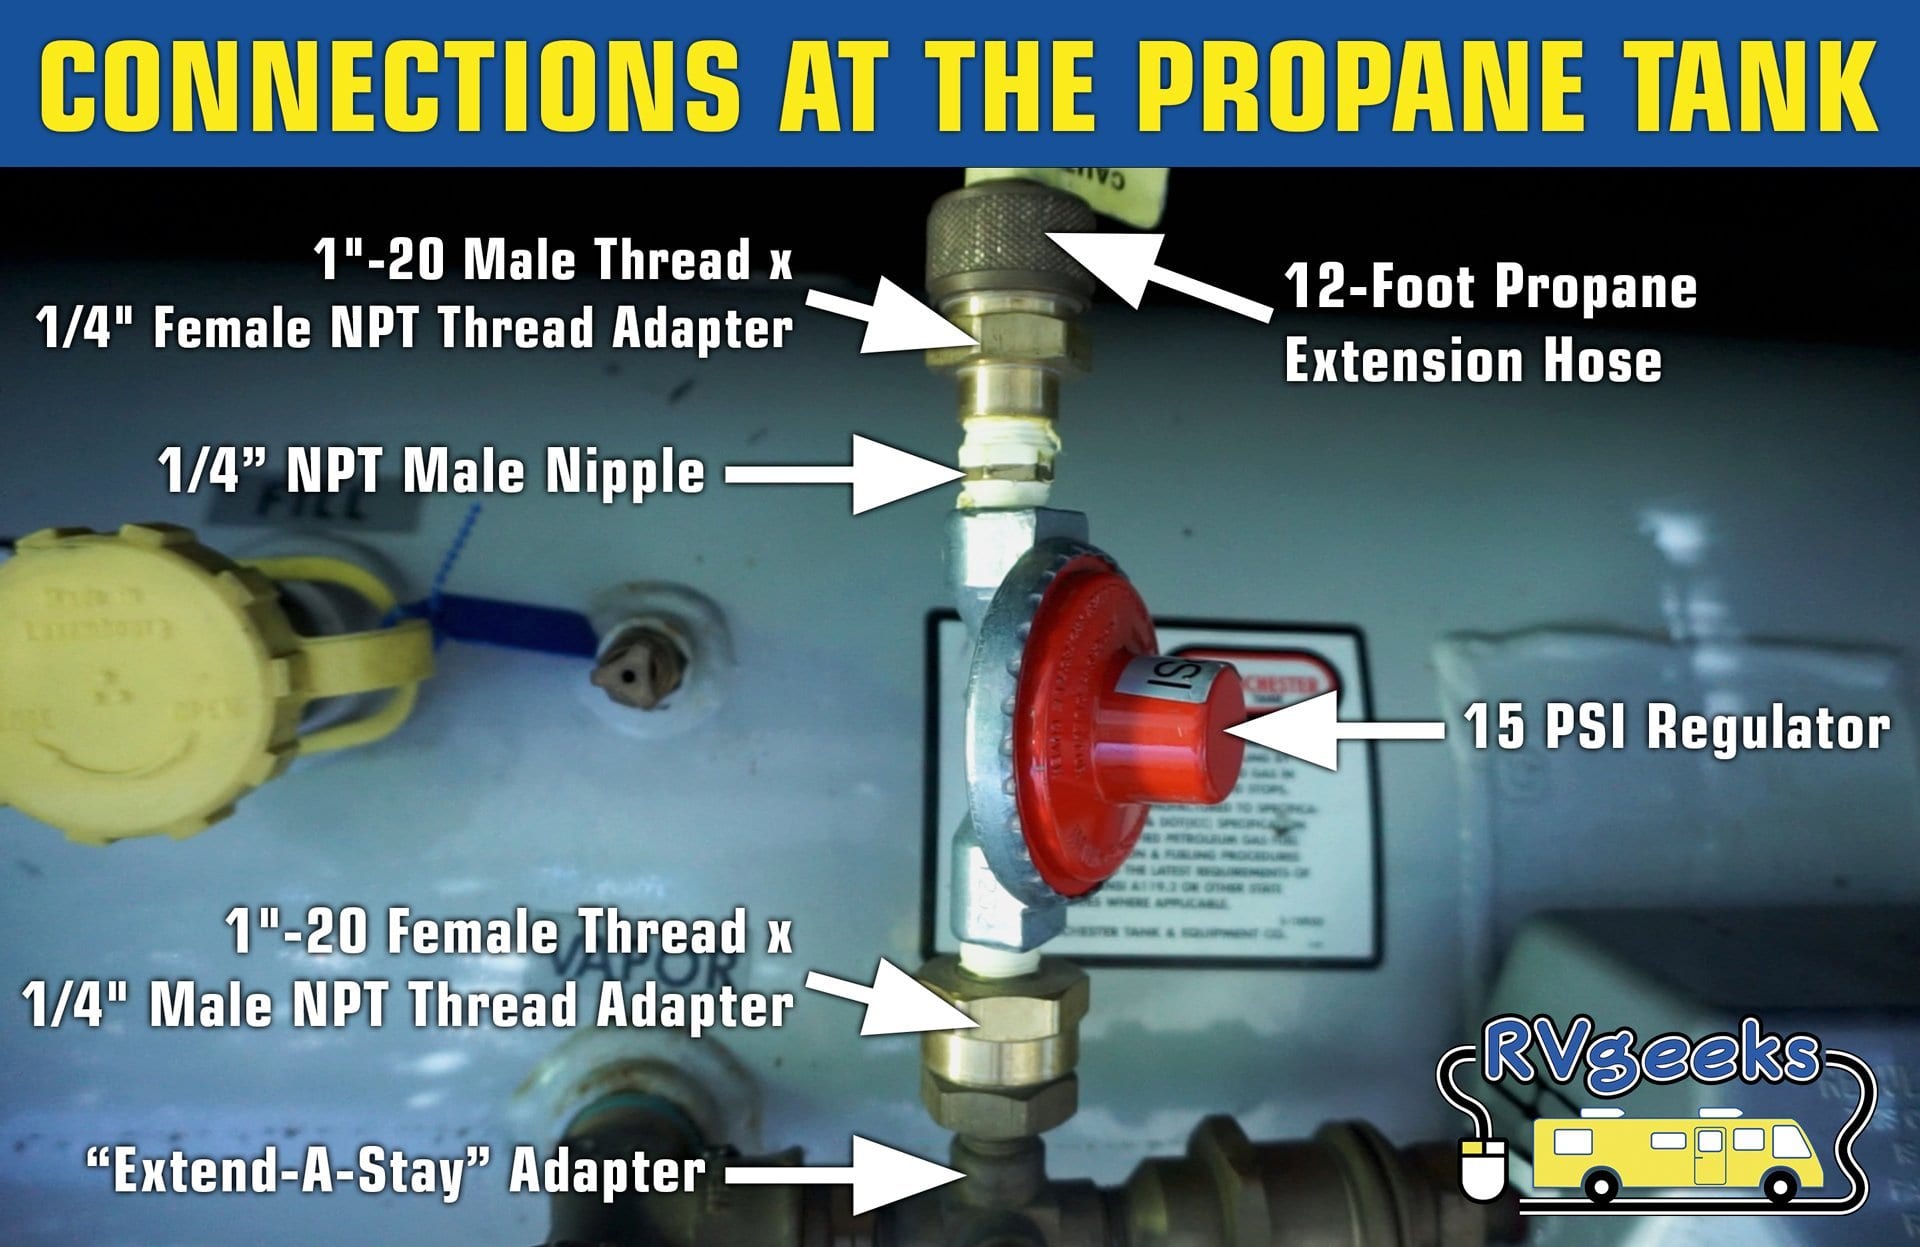

These are the parts we used for our connections on the propane tank side.
At the other end of the hose (the grill side), we added a fitting that goes into a quick-connect propane fitting. We then attached the other side of the quick-connect permanently to the grill.
So, when we want to use our grill, we simply attach the propane connection at the grill, and we’re ready to cook with gas!
Here are the parts we used on the grill side:
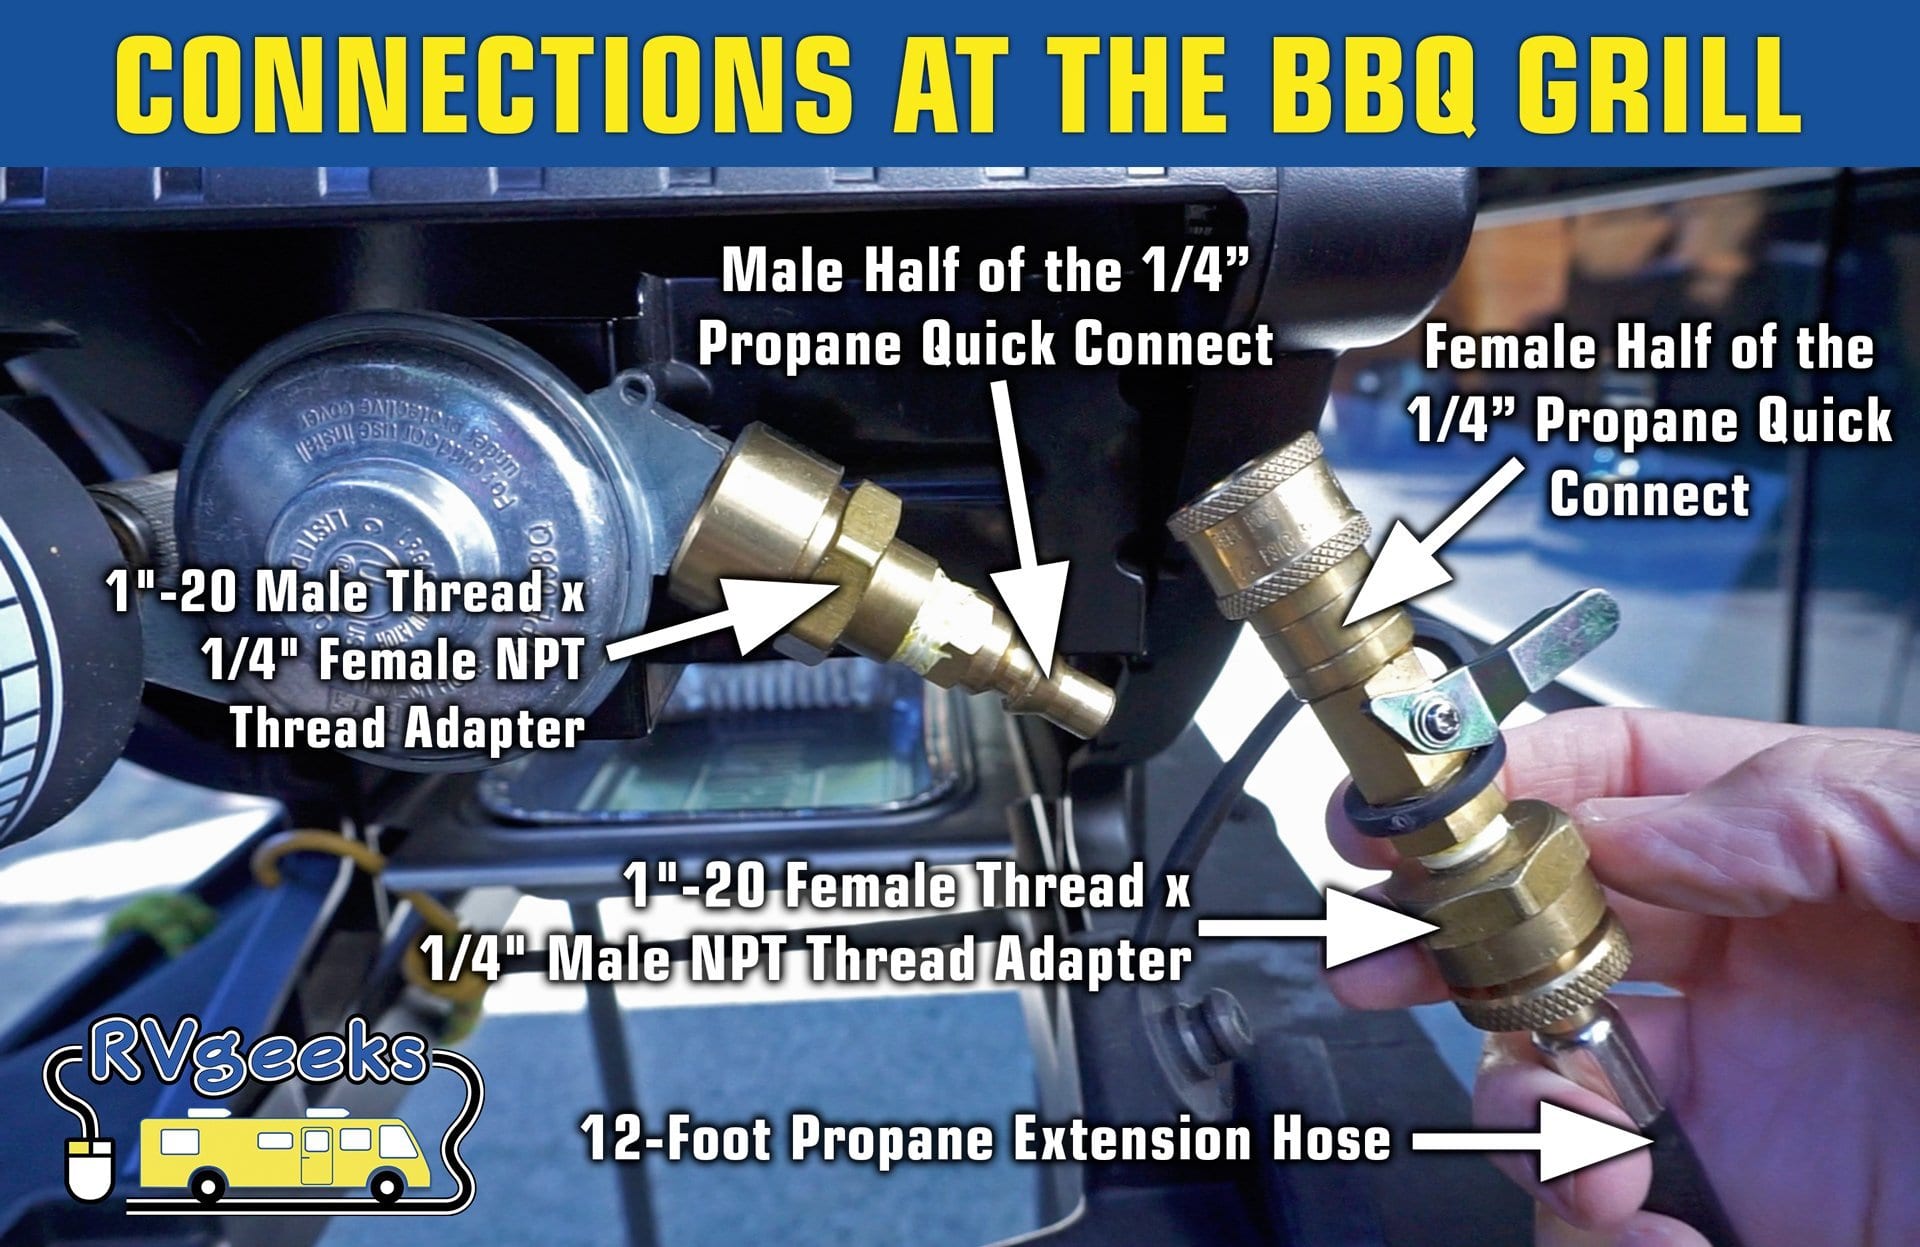

These are the parts we used on the grill side to connect the propane hose to the grill.
If you’d like to see all of this explained step-by-step, we encourage you to watch our video for more detail:
Where Can I Get the Parts to Connect My Gas Grill to an RV?
First, we should note that we have the Weber Q1000 Portable Grill. Other grills may be slightly different.
So, the parts listed below worked for us for connecting our Weber Q1000 grill, but it only has an 8,500BTU/hour output. If you’re connecting a higher-output grill or a propane fire pit, the PRESSURE output using these components will be sufficient, but the FLOW RATE may be too low to support the full output required.
Larger diameter hoses and/or connection parts (be sure they’re for high-pressure propane) may be needed to supply what you need for your grill. But the list below and the diagrams above should help you to piece things together successfully.
- Extend-A-Stay with 12′ Extension Hose
- 1″-20 Female Throwaway Cylinder thread x 1/4″ Male Pipe Thread Adapters (2) (You’ll need two of these.)
- 15psi Propane Regulator (This provides plenty of pressure for our 24′-long hose, and prevents oil build-up.)
- 1/4″ NPT Brass Male-to-Male Nipple
- 1″-20 Male Throwaway Cylinder thread x 1/4″ Female Pipe Thread Adapters (2) – (You’ll need two of these.)
- 12′ Propane Extension Hose (If you need more than the one that’s already included with the Extend-A-Stay)
- 1.5″ Desk Hole Grommet (You only need this grommet and a 1.5″ hole saw if you’re going to cut through a panel like we did.)
- Propane 1/4″ High-Pressure Quick Connect – Female with Shutoff Valve
- Propane 1/4″ High-Pressure Quick Connect – Male
- Yellow Gas/PTFE Tape (You need YELLOW for propane. Use 4 0r 5 wraps on all threaded connections.)
For anyone with a Weber Q1000, we’ve found the following accessories to be especially useful:
Note that if your RV already has a propane quick-connect, it’s LOW PRESSURE and needs a special grill (one without a built-in regulator). Otherwise, you may need to modify your grill to remove its regulator.
PRO TIP: The pressure output from the main propane regulator on an RV is VERY low. It’s commonly set to what is known as 11 inches of water column or 11″ WC — which equals about 0.4 PSI. So trying to use an appliance that’s also equipped with an 11″ WC regulator would mean double regulation.
That’s why we T’ed into our propane line right at the tank (before the main whole-house regulator)… because our grill came with a standard 11″ WC regulator on it. T’ing in after (downstream of) the main regulator would have required removing the grill’s regulator or buying a grill without one.
BUT… the 15 PSI step-down regulator we added to prevent oil build-up DOES NOT equal double regulation. That’s because, while 15 PSI is far lower than tank pressure, it’s still far higher than the 0.4 PSI that RV appliances use. In other words, it still allows plenty of pressure to run the grill just fine.
For more information, see our post on low pressure RV grills.
While we’re on the topic of propane, let’s be sure to use it safely. Watch our video on propane detectors to learn more:
Free RVing Tips, Tricks, Reviews, Giveaways & More
Subscribe to our daily newsletter! We’ve been full-time RVers for 20 years (!) and share everything we’ve learned about RVing in our daily blog posts. Join our online community to receive a wealth of great RVing knowledge delivered right to your inbox.
Whether this is your first time on the road or you’re a seasoned full-timer, you’ll love the wide range of RVing topics we cover. Don’t miss a single article or any of our famous RV gear Giveaways — Subscribe today!
Beat
Monday 11th of March 2024
What I don't understand is that you have a 15 psi regulator on the tank in front of the external hose. But there is another regulator on the grill. So 2 regulators?
TheRVgeeks
Monday 11th of March 2024
Yes @Beat. The 15psi regulator is reducing the pressure in the long length of hose between the tank and the grill. Without it, changes in atmospheric pressure and temperature cause an oily substance to come out (whether it's coming out of the propane gas or the hose is unclear) that would clog the regulator on the grill. 15PSI is low enough to prevent the oily buildup, while still being high enough to not cause a "double regulation" issue with the grill's regulator. That occurs when the first regulator drops the pressure down so low that it isn't high enough to "open" the second regulator... stopping all flow.
Jim T
Sunday 4th of June 2023
Hi Guys. Thanks for all the great information you provide! We've done the entend-a-stay install with the same oil carryover issues you had and I added the 15 PSI regulator between the EAS and the 12' hose and it seems to have cleared up the oil issue. Now we're experiencing a different issue. When I connect my Weber-Q grill I can only get the temperature up to 425 DegF. If I put a 1# propane tank on the same grill the temp goes right up to 600 DegF. I'm thinking about replacing the tank-to-15 PSI regulator with a 0-20 PSI variable regulator. Any thoughts?
BTW I talked to many LP people on the oil carryover issue with varying guesses of what may have been the cause (bad propane, overfilling the tank, reaction with the hose creating the oil, etc..). Only one guy had the experience and explained it very well. He said the tank pressure allows liquid propane to the high pressure side of any attached regulator. When you shut off the grill on that connection the liquid propane stays in the hose between the tank and the regulator on the grill (which was before we added the 15 PSI at the EAS side of the hose). That liquid propane will allow the oil in the propane condense in the hose and eventually work its way through the grill regulator and drip out the grill burner. Just an FYI of what I learned.
TheRVgeeks
Sunday 4th of June 2023
Thanks for sharing that explanation, Jim!
DFL
Monday 15th of May 2023
We have a quick connect on our rig, will one these extension hoses work with an old Coleman propane stove?
Brad
Sunday 14th of May 2023
Maybe I missed it in the reading, but if my new (2023) travel trailer already has a quick connect propane (low pressure) fitting, but my (Nexgrill) grill has a temperature control regulator that can’t be removed without losing the ability to control the flame/temp setting, is there a way to supply the proper pressure, or do I need to invest in a grill that’s either low pressure, or has a removable regulator? Same question goes for a portable propane fire pit I just purchased. Thanks!
BC
TheRVgeeks
Tuesday 16th of May 2023
Hi Brad. Sorry if it wasn't clear enough, but you'll need to do exactly what we did: tee into the propane supply upstream of (before) the RV's onboard regulator so you can supply full-pressure propane to your grill (and your propane fire pit). We used an Extend-A-Stay system that also provides an input connection to connect a portable (or larger) tank to supply propane when parked for an extended period. Comes in handy sometimes.
Stan
Saturday 13th of May 2023
Good work! I have two additional suggestions: First, I suggest a hard shut-off valve at the “T” where you connect to the coach system. That way the extension hose is not under constant pressure. Not a big deal with your set up that has a regulator upstream of the hose, but otherwise it puts a lot of faith in a twelve foot rubber hose. Also, it lets you shut off the gas at the source and burn up what is in the hose before you shut down and disconnect. Second, I ultimately went to using a one gallon (ten pound) standard (refillable) tank instead of either the coach connection or the green bottles. It seems to last forever, it lets me position the BBQ wherever I please on the campsite table, and the propane guy is happy to top it off when I fill the coach tank. They are $70-$80 at Amazon.