
In today’s post, we’ll demonstrate how to thoroughly flush and clean an RV black tank to help keep your RV odor-free. We’ll provide step-by-step instructions for making sure that your RV’s black tank is completely flushed out, making your motorhome, travel trailer, or fifth wheel a nicer place to be, and keeping your tank sensors working right.
If you already have an odor problem with your RV’s black tank, there’s no need to suffer that awful smell. Here are the easy steps to keep your tank clean and odor-free.
Why Is There a Sewer Smell In My RV?
There can be several reasons why there’s a sewer-like smell in an RV, but one common reason is that the black water tank isn’t getting completely emptied during the “dump & clean” process.
Many RVers think their black water tank is clean after they empty it and then flush out the sewer hose with water from the gray tank. But there’s more to it than that. The shape of many (most?) black tanks prevents them from emptying completely without some help.
Over time, sewage can build up in the tank and accumulate in places where it can harden into place. Thoroughly cleaning & flushing your RV black tank regularly by taking a few extra steps may be all you need to resolve the problem of a sewer smell in your RV.
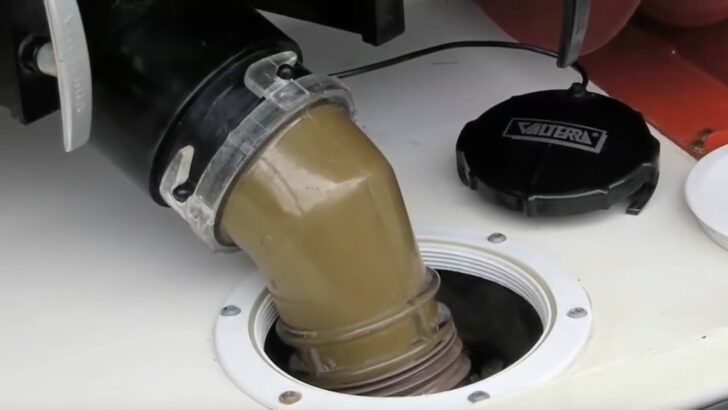
Even RVers who use a black tank flush system often don’t get their black tank sufficiently clean because they don’t use the most important piece of equipment necessary to monitor the cleanliness of the tank — the clear sewer elbow.
The clear sewer elbow is your only window into the black tank. Later in the post, we’ll link to a video in which we use our clear sewer elbow to demonstrate what happens when you dump and flush your black tank, thinking you’ve thoroughly cleaned it. We’ll show you exactly what can be left behind. If you’ve got an RV with a black tank, you need a clear sewer elbow.
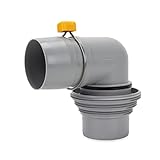
This one connects directly to the RV end of a sewer hose, and we’ve used one like it for years:
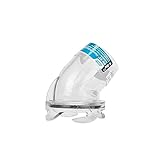
- Clear RV Sewer Hose Adapter: See-through hose adapter allows you to see when your RV sewer system is clean
- Compatibility: Fits 3-inch diameter RV sewer hoses

- RV heavy-duty hose is 15 mils of brown HTS vinyl
- Perfect for the seasonal RVer
If your sewer hose has permanently attached fittings, you’ll likely need to use a clear attachment like this one:
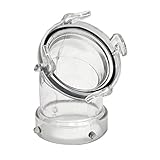
- Angles hose connections 45° to more convenient positions
- Reinforced ears for long lasting durability
Either way, a clear sewer elbow is arguably the most important piece of tank-dumping equipment to carry on your RV. Without it, you’ll never know whether your black tank is actually empty, even if you have and use a black tank flush system.
Keeping your sewage tank sufficiently clean to prevent sewer odors in your RV requires following a few simple steps, which we’ll lay out for you in the following section. We’ll even throw in a couple of tips that every RVer should know about when and where to empty their black tank.
How to Clean an RV Black Tank
Properly emptying and flushing an RV black tank is the first step to keeping the tank clean enough to prevent odors from accumulating and eventually making their way into your RV’s living space. The following steps will help you to keep your RV black water tank much cleaner than simply pulling the black valve and letting the contents drain out.
Note that you don’t necessarily have to go through all of the following steps every time you’re emptying your tanks. This is a more thorough flushing process that can be done periodically. We’ve laid out a simple “everyday” (although not every day!) dumping process in our post on dumping tanks on an RV.
But you’ll want to perform the following procedure regularly when time and circumstances allow, such as when staying in a full hook-up campsite (and keep in mind that, even at a full hook-up campsite, you don’t want to leave your RV’s black tank valve open!).
Dump Your Black Tank
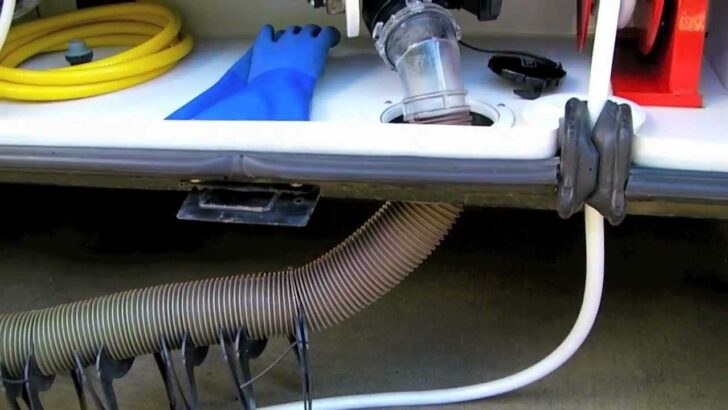
Of course, the first step in the dumping process is to connect your sewer hose. If you’re at a dump station, you’ll only connect the hose to the RV’s sewer outlet and stick the other end into the sewer opening on the ground. If you’re in a full hookup campsite, you’ll want to securely connect the hose to the park’s sewer inlet.

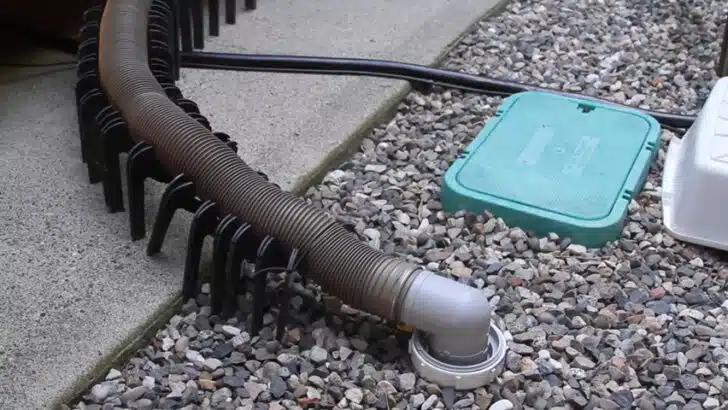
A solid, threaded, sealed connection to a sewer inlet means that dumping black water in a full hook-up RV park won’t be the odorous experience that releasing black water at a dump station tends to be.
We’ve always used the following universal sewer connection, but depending on the type of hose you have, yours may be different. It’s also a good idea (and even required in some states) to use a sewer hose support to keep your hose up off the ground. We’ve always loved our Slunky!
- Connects RV sewer hose to dump station
- Patented spin-lock rings for effortless hose connection
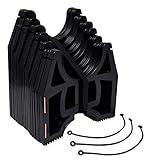
- RV SEWER HOSE SUPPORT: Elevated design supports your drainage hose and promotes better draining
- IMPROVED DESIGN: 26% wider and 30% deeper for increased stability and a smoother overall RV experience
Whenever a threaded water spigot is available, you’ll also want a have a garden hose connected between that tap and your black tank flush inlet. We always keep a short length of dedicated hose on board just for this purpose, along with an additional backflow preventer to protect the park’s fresh water supply (“additional” because the black tank flush system should already be equipped with a built-in anti-siphon valve).
This water hose from Camco is made for just this purpose with a bright orange color, so you’ll know it’s just for tank flushing use:
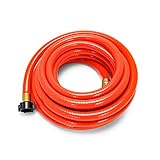
- DESIGNED FOR RV SANITATION: Keep your RV waste system clean & odor-free with Camco's reliable clean-out water hose. It can be used as an RV grey water...
- HEAVY-DUTY CONSTRUCTION: Built to last, this Camco RhinoFLEX 5/8″ internal diameter RV hose is constructed of durable PVC.

- Package Dimensions: 4.5 L x 1.5 H x 3.75 W (inches)
- Package Weight: 0.1 pounds
Even though you’ll generally dump the black and gray tanks at the same time, you’ll always want to dump your black tank first. Open the valve from the black tank and allow the contents to drain out while running the tank flush.
Flush Your Black Water Tank Thoroughly
Keeping your black water tank clean means flushing the tank thoroughly during the dumping process. Even if you’re not able to flush it this thoroughly every time you dump (such as when you’re at a dump station with no threaded fresh water line to connect to), you should try to give your black tank a more thorough flushing as described below as often as possible.
If you’re not sure whether your RV has a black tank flush system on board, or if you’re not even sure what a black tank flush system is, be sure to have a look at our post with everything you need to know about the RV black tank flush.
If you confirm that your rig does not have a built-in black tank flush (often called a Sani-Flush or San-T-Flush system), you can still keep the tank clean by using an RV tank rinsing wand. Those are designed to stick down into the tank through the toilet to rinse your tank from above. They have rotary spraying ability to flush any remaining waste from the sides of the black water holding tank and have a standard garden hose fitting to connect to your dedicated tank flushing hose.

- Package Dimensions: 27 L x 2 H x 3.75 W (inches).Fit Type: Universal Fit
- Package Weight: 0.5 pounds
After allowing the water to run for a short time with the black valve open (either using a tank flush system or with a toilet wand), look to see when the water visible through the clear sewer elbow runs mostly clear. Once it does, close the black tank waste valve while the water is still running.*
*NOTE: We’re well aware that this goes directly against a warning that most RV manufacturers include: “Never use the black tank flush with the black valve closed.” They surely have their reasons for this, which we think are mostly for liability purposes. If you were to walk away from your RV with the black waste valve closed and water running into the tank, it would, of course, eventually fill up.
Depending on the size of your black tank and how high the water pressure is, it might take as little as a few minutes for the tank to fill. The 45-gallon black tank on our Mountain Aire filled up in about 8-10 minutes with typical water pressure.
So what happens when the black tank fills up if you’re not there to open the black valve? It will come out the only available escape route: through the vent on the roof. What’s the lesson here? Never walk away from your RV during this thorough flushing process, and pay attention to the water level in the tank!
If you’re easily distracted, it might be better to let your black tank remain less than totally clean than to use this process. We did this literally hundreds of times over more than 20 years of full-timing. By paying attention to what we were doing, we never had a problem, and kept our tanks as clean as possible in the process.

Sorry to be graphic, but if you can’t handle seeing the color brown inside your clear sewer elbow, you won’t likely be able to care for your black tank properly. You need to know when the water runs clear, and this is how it’s done.
Once the black tank drain valve is closed, the built-in flush or wand will fill the tank with water. Once your black tank is showing nearly full on the sensor panel, open the black tank drain valve and let the water rush out. This is a key time to watch the clear sewer elbow. You’ll want to note whether the water is running clear or not.
If your tank is like our Mountain Aire, you’ll see proof positive that NO amount of simply allowing the flush water to run will, by itself, clean out all of the debris in the tank. Tank size and shape will affect the amount of waste still inside the tank after the initial flush. If you see absolutely nothing through the clear elbow except clear water, you’re lucky because your tank shape and size allow it to flush more completely than ours ever did.
If the view through the clear elbow reveals more debris coming out, wait for the tank to empty, and then close the black valve again with the flush water still running. Once the tank fills again, pull the black valve and empty it while watching the clear elbow again. Continue to flush the tank until the water runs clear through your transparent sewer elbow.
Because this flushing technique uses a lot of water, we don’t recommend using it every time you dump, or whenever you’re in an area with any water restrictions in place. This is strictly for doing periodic extra-heavy-duty tank flushing to keep debris from building up over time.
Once the water runs clear, turn off the flow to the tank flush or rinser, and allow the remaining water to run out fo the black tank. Then close the black valve (don’t open both the black and gray valves at the same time).
Dump Your Gray Tank
After you’ve emptied and flushed the black tank, the final step to emptying tanks is to dump the contents of the gray tank. Always dump the gray water tank last to flush out the sewer hose. While gray water can smell surprisingly bad (especially after a long water-conserving boondocking trip), it isn’t considered “sewage” and doesn’t have the same health risks as black water.
While we always rinse out the sewer hose with fresh water before stowing it after dumping, we’d still rather handle the sewer hose after it’s had gray water in it rather than black water. Even with all the flushing we did on the black tank, the water left in the hose can still contain harmful bacteria. Having gray water as the last thing in contact with the hose before we handle it again is a safer bet. For the same reason, always wearing gloves while dumping is another smart practice.
Not to make anyone self-conscious (much), but if we see you dumping your RV’s tanks and handling your sewer hose bare-handed, we’ll talk about you behind your back. 💩😂

- [High-quality Nitrile Gloves] -PEIPU Nitrile gloves are more thicker, stronger and more wear-resistant than typical vinyl gloves.PEIPU Nitrile gloves...
- [Comfortable Fit] – Fits like your own skin with excellent protection against liquids, gases, oils, grease, glass, and sharp objects.
Test the Cleanliness of Your Black Tank
Once you’ve finished the dump & flush procedure, you can do the “sniff test” to see if you’ve thoroughly flushed out your black tank — if you’re brave enough! Head into your RV bathroom, lift the toilet seat, and open the gate valve on the toilet (using your foot pedal or electric gate valve button, depending on your RV).
With the toilet valve held open, turn on the vent fan in your RV bathroom. If you don’t have a vent fan in your bathroom, turn on the vent fan somewhere else in your RV living space, leaving the bathroom door open.
With all the windows in the RV closed, and the fan on with the toilet valve open, you’ll know within a second or two whether or not you’ve succeeded in thoroughly flushing and cleaning your RV black tank. If the tank requires more flushing/cleaning, you’ll smell a foul odor coming up out of the toilet almost instantly as you run this “sniff test.”
If you don’t smell any odor at all, you’ve succeeded in thoroughly rinsing your black tank. If you still have an odor, you can rinse your black tank again. But if the odor continues to persist, you’ve probably got some sewage build-up in the tank that you’ll need to address (see below for further info).
Add Your Tank Treatment to the Toilet
Once your tank is thoroughly flushed and cleaned, you’ll want to add your choice of tank treatment to the toilet. In our video below, you’ll see that we used Rid-X back then. We used and liked it, but eventually switched to Happy Campers and preferred it. Whatever product you decide to use, we suggest avoiding anything with harsh chemicals or formaldehyde, since that’s banned in some places.

- RV toilet treatment scientifically proven to break down waste & tissue.
- Combats odors & breaks down waste in RV, marine and portable toilet holding tanks.

- Powerful Odor Control: Say goodbye to unpleasant odors with our powerful formula that neutralizes and eliminates foul smells, leaving your RV smelling...
- Effective Waste Digestion: Happy Campers breaks down waste and toilet paper quickly and efficiently, preventing clogs and ensuring smooth tank...
Add Fresh Water to the Tank
Remember that you never want your black tank to be dry. There should always be some liquid in the tank. While adding your tank treatment through the toilet, be sure to add fresh water as well. Ideally, you want enough liquid in the tank to be sure that any solids that are added will float.
When we’re heading out boondocking, we’ll add only a gallon or two, to ensure we have enough capacity for the length of our stay (and assuming that we’ll be adding just liquid to the tank for the first couple of uses). If you’re not boondocking, it could take as much as 3-5 gallons to provide that “float” layer, depending on the size and shape of your tank. If you’re not worried so much about running out of capacity, err on the side of MORE water, rather than less.
What If My RV Still Has a Sewer Odor After Cleaning the Black Tank?
If your black tank doesn’t pass the sniff test then you may have some solid waste dried down onto the bottom of it. To try to scrape any remaining solids from the floor of the tank, you can add a good quantity of ice and then drive your rig for a while. While the ice moves around as it melts, the weight of the ice moving over the bottom of the tank can help to soften and scrape off hardened-on debris.
After going for a long drive (twists and curves are helpful here), go back and dump/rinse your black tank again. If you see debris coming through your clear sewer elbow, you’ll know that the ice process was helpful in scraping dried-on debris off of the bottom of the tank. Repeat the sniff test now.
Another popular way to clean a black tank is to use water softener and laundry detergent. With this method, you’ll dissolve about two cups of water softener in one gallon of hot water. Add one cup of laundry detergent to the mixture, and pour the combined ingredients down the toilet and into your black tank.
Next, fill your black tank with water and let it sit for 24 hours. Drain the tank after at least 24 hours have passed, and try the sniff test again.
For a full step-by-step look at the dump-and-flush process in video format, check out our video below and follow along as we flush and clean our motorhome’s black tank:
Why Is It So Important to Clean an RV Black Tank?
Not only does a clean black tank keep your RV odor-free, but there’s another reason why it’s important to thoroughly clean it. Keeping the black tank clean also helps ensure that your tank sensors work better. Once those sensors are gummed up, more extreme measures may be required to get them working again.

Keeping your tank sensors working well involves regular cleaning of your RV’s black tank.
For more information on tank sensors, please see our posts on how RV holding tank sensors work and 4 ways to clean your RV tank sensors.
How Often Should I Clean the Black Tank in My RV?
How often you clean and flush your black tank depends to some degree on how often and for how long you use your RV. Again, it’s important to note that you don’t have to do a full flush & clean procedure on your RV black tank every single time you dump.
In fact, there are times when it’s best to quickly dump your tanks and move along. For example, if you’re dumping your tanks at a busy dump station (as opposed to an individual sewer connection at a full hook-up campsite), and there are people in line behind you. It’s neither necessary nor reasonable to take a lot of time flushing out your tank while you hold up a line of other RVers waiting to dump their tanks.
You should clean and flush your black tank fairly regularly (at least every few times dumping) to make sure that it’s being properly emptied. This will help prevent the build-up of debris that can increase the likelihood of an odor problem and make removal more difficult.
If you find yourself in need of the most effective tank cleaning available, we had both our black and gray tanks pressure washed in Lake Havasu City, AZ by Mike Roe of HydroCleanAZ.com. Mike is awesome, and his service can’t be beat. Here’s our video showing our rig getting an RV colonoscopy!
If you ever notice signs of leaking from the outlet to your black or gray tanks, be sure you know how to replace the valves (you can do it yourself)!
Free RVing Tips, Tricks, Reviews & Giveaways
As 20-year full-timers, we share everything we’ve learned about RVing over the years. Join our online community to receive a wealth of great RVing knowledge delivered daily to your inbox.
Whether you’re a new RVer or a seasoned full-timer, you’ll love the wide range of RVing topics we cover. Don’t miss a single article or any of our famous Giveaways. Subscribe to our newsletter today!
daniel banka
Saturday 20th of January 2024
great job ------I have been at it for 25 years and u covered everything that could be BLACK ---I water soften my tank with a little extra water before going camping to a full hook up camp ground --that way it cleans it self as I drive ---If u don't have a back flush ----u can back flush if use a macerator --I pump out mine in backyard into my sewer clean out --beats waiting in line
mot
Saturday 20th of January 2024
One sequence important thing to do:connect the sewer end first. Anything in your hose goes into the sewer not onto yhe ground, & pull the grey tank valve for an instant to check for leaking before opening the black tank. we also use a valtera clear valve on the tank end & dump the black tank. Then we open the grey valve fill the black. Close the grey valve. Flush the line. Do this ober 3-4 times to back wash the black tank. Then close the black valve. Now cycle several times to wash out the black tank line. Then we finish flushing the hose & valves with the last of the grey water.
Jbell
Saturday 20th of January 2024
A note of caution with the ice cube use in the black tank. We dumped some ice cubes into the black tank but it never got warm enough to melt the ice. Later, when we dumped the ice plugged the sewer pipe and the result was ………. Disturbing.
TheRVgeeks
Saturday 20th of January 2024
Yikes! Thanks for sharing that experience! Being aware of ambient temperatures (and the effect they may have on ice melting) is definitely an issue!
Joe Curbelo
Saturday 20th of January 2024
1 or 2 gallons?? I always put 5-10 gallons of water into my 40 gallonblack tank after I'm done flushing it. Even though the tank is flushed, that much water sloshing around will clean it even more and it's assurance that future "deposits" are completely submerged. I use a water meter on my flush hose.
TheRVgeeks
Saturday 20th of January 2024
Hi Joe. Good point. Since we mostly boondock, we're usually MORE concerned with having tank capacity for a 10-day to 2-week stay in one spot. Plus, we generally only need to add liquid to the tank for the first couple of uses... so that adds to the smaller amount of water we add before any solids get "deposited". 😉 We've updated the text in the article to make it more clear that you want to be sure to add enough water to provide a "float" layer for anything non-liquid.
Michael A Deehr
Sunday 23rd of May 2021
Great video, I am new to this and did not realize the black tank valve doesnt need to be open all of the time. I do have a question? How do you do this if you do not have the cleanout hose connection?
TheRVgeeks
Sunday 23rd of May 2021
Hi Michael. Yes... it's very important that you leave the black tank valve closed all the time. If you don't, the liquids drain out and leave the solids behind... which pile up into a pyramid beneath the toilet and can solidify. It's a real problem and can be difficult to fix.
If you don't have a tank flush system built into your RV, you can use a third party wand like this one: https://amzn.to/3ywecpX When dumping your tanks, you'd attach a second hose to the wand and feed it in to the bathroom. Step on the pedal to open the toilet gate valve and insert it down into the tank. Of course, you'll only want to do this if you're at a full hook-up campground, and not when you're at a dump station, since this process takes a little while and you don't want to hold up the people behind you.