
Clear, bright headlights are key to safe nighttime driving. They not only light the way ahead but also make sure that other drivers can see us. Unfortunately, headlights can become cloudy or yellowed over time due to sun damage, light scratches, and environmental contaminants. That’s why knowing how to clean cloudy headlights is an important part of basic auto maintenance.
Luckily, there are several simple, cost-effective ways to restore clarity to your headlights, ensuring optimal performance and safer driving conditions. In today’s post, we highlight some of those methods and the results we’ve had with those we’ve tried ourselves.
What Causes Cloudy Headlights?
Headlights get cloudy when the protective layer on the surface of the plastic headlight lenses breaks down, leading to oxidation and discoloration. This is often caused by UV rays, harsh weather conditions, environmental contaminants, and general wear and tear that causes fine scratches over time.
This looks bad, but there’s much more to worry about than appearance. The amount of light that both car & motorhome headlights put out decreases as the lenses become more and more cloudy. Foggy headlights reduce nighttime visibility, especially during adverse weather conditions.
When headlights don’t work as well as they should, the safety of the driver and others on the road is compromised. That’s why it’s so important to keep all your vehicles’ headlights (RVs included) in the best possible shape.
How to Clean Cloudy Headlights
There are lots of ways to improve cloudy headlights. Most involve polishing compounds and oxidation removers. We’ll share the methods we’ve had the best luck with over the years and a few other popular restoration systems that reportedly work well.
First, we’ll talk about how to prepare your headlights for restoration or thorough cleaning. You’ll also need to choose the cleaning solution and method you prefer. We’ll get to those in the next section. And it should go without saying (but we’ll say it anyway) — products differ, so following the manufacturer’s instructions for the product you buy is always the best way to go.
Materials Needed
Before starting the cleaning process, gather the following materials:
- Headlight restoration kit or cleaning solution of your choice (options listed below)
- Microfiber cloths (old rags or paper towels can work okay, too)
- Painter's Tape
- Car Wash
- Protective gloves
How to Clean and Restore Cloudy Headlights
We’re sharing the general steps you’ll want to take as you prepare to work on restoring your vehicle’s cloudy headlights. These steps may vary slightly depending on the type of restoration you’re doing and the headlight lens restorer solutions you’ve chosen.
Park in the Shade
It’s best if headlights are cool to the touch for this, so park your RV or car in a shady spot if possible.
Wash the Headlights
If the headlights are dirty, clean them with a good car wash to remove any surface debris. Dry them off with a towel, or allow them to air dry. If you’re only cleaning the headlights and not washing the whole car or RV, you can, of course, use any mild cleaner to clean just the headlights first.
Mask the Area Around the Headlights
To protect the vehicle’s finish, apply a line of painter’s tape all around the edges of the headlight.
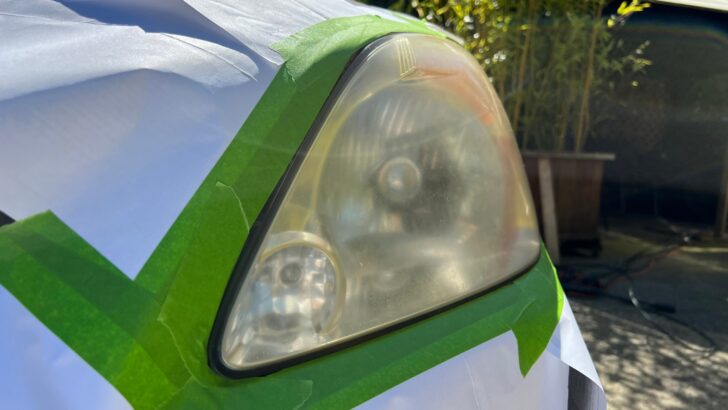
The photo below shows our 2003 Honda CR-V being prepped for headlight cleaning and defogging. As you can see, we used painter’s tape and sheets of paper around the headlights to protect our car’s paint job.
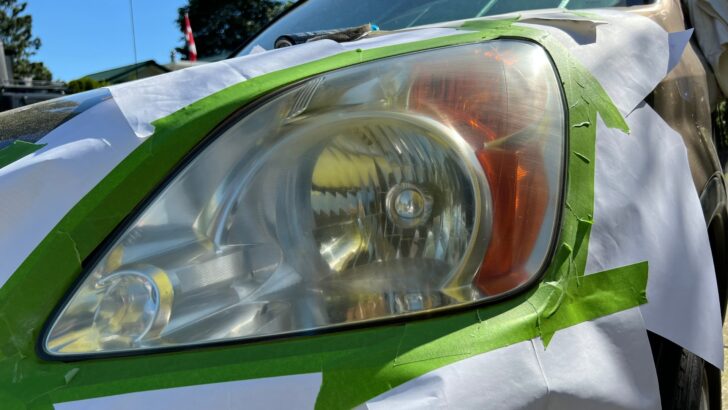

We used our favorite FROG tape and sheets of paper around the headlight to protect our Honda’s paint job.
Apply Headlight Restoration Solution
Most headlight restoration kits come with a cleaning solution and abrasive pads or light sandpaper. Apply the solution according to the manufacturer’s instructions, typically by spraying or wiping it onto the headlight surface.
Buff the Headlights
Using the abrasive pads (or sandpaper if that’s what’s included in your kit), gently buff the headlights’ surface in circular motions. Be sure to apply even pressure and keep the surface wet with the solution to prevent scratching. Again, follow the directions that came with your kit since they can vary.
Continue buffing until the cloudiness starts to fade and the headlights look clearer.
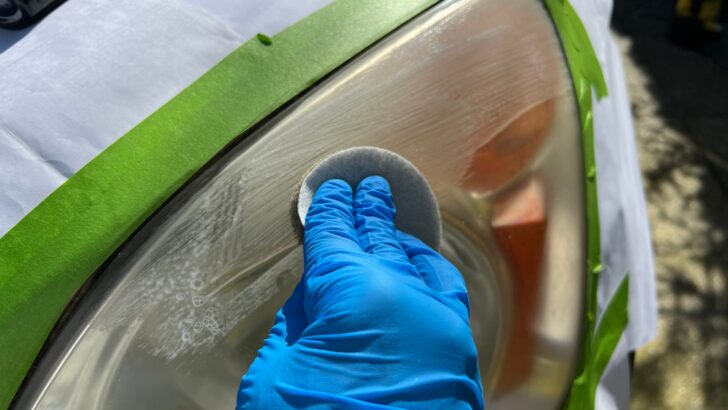
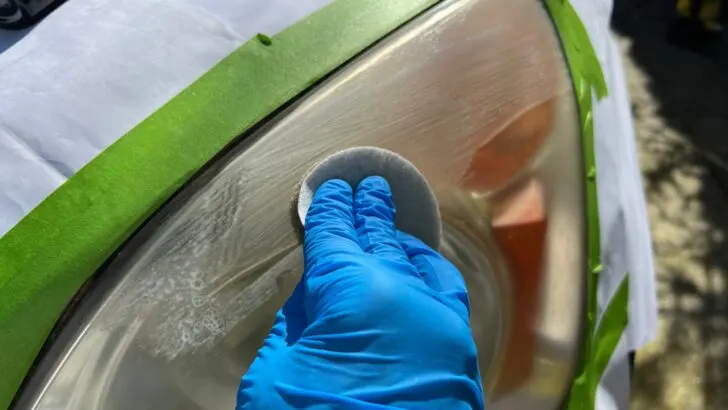
Most headlight restoration kits include an abrasive pad for applying the polish solution and buffing the headlight.
Rinse and Dry
Once you’re happy with the results, rinse the headlights with clean water to remove any residue. Dry the headlights thoroughly with a microfiber cloth to prevent water spots.
Apply Protective Sealant
To prolong the clarity of your headlights and provide additional protection against UV damage, apply the sealant that comes with your cleaning and restoration kit. You can also use your favorite UV-resistant sealant or clear coat. Follow the manufacturer’s instructions for application and drying times.
We like Meguiar's Clear Headlight Coating
Inspect the Headlights
Take a look at your headlights to make sure they look clearer. If they still appear cloudy, you can repeat the process to see if they’ll improve even more. But once you’ve applied the clearcoat sealant, you should already see, ahem, a clear difference.
Remove the Painter’s Tape
Once the sealant has dried completely, carefully remove the painter’s tape from the areas surrounding the headlights.
What Are the Best Methods for Cleaning Cloudy Headlights?
There are lots of options for cleaning cloudy headlights. We’ll start with the cheapest method, which you can try using something we’re sure you’ve got lying around the house. We’ve tried several methods ourselves and will fill you in on which ones they are and how we liked them.
Whitening Toothpaste
Yes, toothpaste. This was the first method we ever tried, and whitening toothpaste works surprisingly well as a quick, down-and-dirty way to get your headlights clearer in a pinch. It needs to be whitening toothpaste because it has small abrasives similar to those found in dedicated headlight restoration options.

- One 5.1 oz tube of Colgate Total Whitening Gel Toothpaste
- Enhanced Flavor
While whitening toothpaste works well to restore clarity to your headlights, you’ll want to add some UV protection once you’ve cleaned your cloudy headlights with the toothpaste method. Meguiar’s Clear Headlight Coating works well for this purpose:

- CLEAR LIGHTS: Maintains clarity on new or restored headlights
- UNIQUE FORMULA: Proprietary headlight coating provides durable UV protection
It may be hard to believe that an ordinary tube of toothpaste can clean your cloudy headlights. Well, we’ve done it ourselves, and here’s the video to show you how well it works:
Headlight Restore Wipes
Another method that we’ve found works well (and quickly) is using Headlight Restore wipes. This was the second method we tried.
After we’d been towing our CR-V around by the nose for nearly 17 years and spending most winters in the Desert Southwest sun, its headlights needed some TLC. The toothpaste we’d tried worked pretty well but didn’t last as long as we’d hoped. Next, we tried these wipes, and they cleaned and restored our cloudy, yellowed headlights to like-new condition.

- Restore Headlight Clarity: Eliminate yellowing, haziness, and oxidation for brighter, safer nighttime driving.
- Easy 3-Step Process: Clean, dry, and protect lenses in just minutes - no power tools needed!
This safely removes oxidation and yellowing and includes a wipe-on protective UV coating that makes your lenses stay clearer for longer. You can see the results in this video:
Meguiar’s PlastX Clear Plastic Polish
Meguiar’s PlastX is well-reviewed but only removes the haze/yellowing from the lens. It doesn’t include anything to add back the UV protection that was “baked into” the original lens surface. But it does have thousands of great reviews, so clearly it’s worked well for many people.
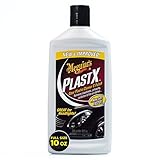
- PLASTIC CLEANER & POLISH: Rich gel formula quickly restores clarity to both rigid and flexible uncoated clear plastics, removing cloudiness,...
- HEADLIGHT CLEANING AND MUCH MORE: Great for use on headlights, Plexiglass, plastic convertible windows, brake lights and other uncoated clear plastic...
Since it doesn’t include a fresh UV lens coating, you’ll probably want to pick up some Meguiar’s Clear Headlight Coating to add protection to keep the lenses clear for longer.
Meguiar's Clear Headlight Coating
Meguiar’s Two-Step Headlight Restoration Kit
Meguiar’s headlight restoration kit is the method we used most recently on the headlights of both our Honda and our motorhome. It works really well and is our favorite of every headlight restoration method we’ve tried. Our headlights are still very clear after more than a year and a half. We’re happy campers.
- RESTORE HEADLIGHT CLARITY: Introducing a car detailing kit featuring high-quality car care products that quickly and easily restore headlights. The...
- YEAR-LONG PROTECTION: The revolutionary headlight coating in this car care kit helps your car shine brighter, longer by protecting against yellowing...
Cerakote Ceramic Headlight Restoration Kit
While we haven’t used the Cerakote headlight restoration kit ourselves, we’ve seen that it’s highly rated, so we wanted to include it here.
Cerakote’s kit is similar to Meguiar’s 2-step kit above but uses a wipe-on “ceramic” coating to protect the lenses after the haze has been removed.
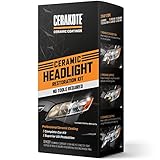
- LASTS AS LONG AS YOU OWN YOUR VEHICLE! - Our chemists developed our Ceramic Coating Headlight Restoration kit IN HOUSE at Cerakote HQ. We aren't...
- NO POWER TOOLS REQUIRED - Everything is included in the kit for your car. There are no tools required that could potentially damage your headlights or...
Sylvania Headlight Restoration Kit
We haven’t tried Sylvania’s restoration kit either, but it’s a popular choice with lots of excellent reviews. This kit includes fine sandpaper for prepping the surface and an activator that softens the plastic for easier sanding. The sand and polish step removes imperfections from the headlights and a bottle of UV block clear coat is included to keep the lens protected longer.
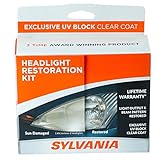
- Restores Headlight To A Like-New Appearance and Removes Haze: Headlight lenses on your vehicle can become yellow, dull, and hazy from the sun. Our...
- Restores Headlight Light Output: Restores original clarity and vision to sun damaged plastic headlight lenses. The lenses will be clearer, the...
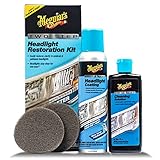
Meguiar’s Heavy-Duty Headlight Restoration Kit
Finally, we’re including Meguiar’s heavy-duty headlight restoration kit. This might be the one to try if you’ve got really cloudy headlights.
It includes Meguiar’s PlastX Clear Plastic Cleaner & Polish and a spray bottle of Meguiar’s Headlight Coating that helps retain the clarity of freshly cleaned or restored headlights for up to a year.
Note that this is a somewhat more aggressive method that uses heavier-duty sandpaper and a wool pad on a standard corded drill to polish the headlight cover to restore its clarity.
- PROFESSIONAL RESULTS: Cleans oxidized, yellowed and hazy headlights
- REVOLUTIONARY COATING: Protects against yellowing and re-oxidation of headlights for up to 12 months
No matter what method you use, cleaning the headlights of your vehicle(s) so that they’re clear and performing optimally is an important maintenance task that contributes to your safety and the safety of everyone else on the road around you.
For more about cleaning glass, see our posts on how to clean RV windows and how to use steel wool to clean glass.
Free RVing Tips, Tricks, Reviews & Giveaways
As 20-year full-timers, we share everything we’ve learned about RVing over the years. Join our online community to receive a wealth of great RVing knowledge delivered daily to your inbox.
Whether you’re a new RVer or a seasoned full-timer, you’ll love the wide range of RVing topics we cover. Don’t miss a single article or any of our famous Giveaways. Subscribe to our newsletter today!
Eric Phillips
Sunday 3rd of March 2024
3M also makes a great product. I read about it in Handyman magazine and tried it on my 10 year old Cadillac with amazing results.
https://amzn.to/3V1GhTV
Brian Nystrom
Sunday 3rd of March 2024
If the headlights are really bad, not just lightly hazed like yours were, you won't be able to avoid sanding and polishing them. If you want long-term protection of the restored lights, wipe-on or spray coatings won't cut it, as they generally only last a year or two. The best results come from using fillm products like 3M paint protection tape. Yes, it costs more that a restoration kit, but over the life of the vehicle, it may actually be cheaper and it's definitely less work than buying a kit and repeating the restoration process every year or so. Plus, your lights will always be clear and bright.
Bruce
Sunday 3rd of March 2024
Automotive finish rubbing compound takes the haze off, use the fine grade.
TheRVgeeks
Sunday 3rd of March 2024
Thanks Bruce!
William Moore
Sunday 3rd of March 2024
Deep Woods Off works well, the higher the DEET content the better. This is a short lived fix, but if you get cause out at night and can't see... this will get you there. I've found it works for about a month or so.
TheRVgeeks
Sunday 3rd of March 2024
Thanks for adding that, William! We'd forgotten about this quick down & dirty trick.
Jim
Monday 22nd of November 2021
Great articles on the headlight restoration! I’d never pay those ridiculous prices places charge for this service. QUESTION: We have a 2014 Honda CRV Toad. Wondering if you (RV GEEKS) or any others out there have found reasonably priced LED Headlight Bulbs that work well, have bright white light - increase the night time view and don’t burn out?
TheRVgeeks
Monday 22nd of November 2021
Hi Jim! We installed LED headlights we got from M4, and LOVE them. They provide brilliant, clear white light, far better than the originals, with great visibility. We're pretty sure the 9003 is the right one for a 2014 CR-V: https://m4products.com/headlights-h4-v6s-headlight-kit-with-h4-9003-hb2-bases/ If you decide to go with them, make sure you use the RVGEEKS discount code to save 5%.