
Have you ever found yourself with an unwanted guest in the form of a mouse in your RV, but you don’t have a mouse trap handy to catch and remove the critter? We did! But we quickly used a few items everyone likely has lying around to create a DIY mouse trap that took care of the problem in short order.
In this post, we’ll tell you – and show you – how to catch a mouse without a trap or, more accurately, how you can make a mouse trap with stuff from your junk drawer!
Why Did We Have to Make an Emergency Homemade Mouse Trap?
It all started when we were relaxing and enjoying a quiet evening during a week-long boondocking trip on remote BLM land outside Canyonlands National Park in southern Utah.


We were boondocking in a remote spot, so technically we were invading our stowaway’s natural environment.
We had the lights in the RV down low when we thought we spotted something moving in the shadows up front near the driver’s seat. Sure enough, a little field mouse had somehow gotten on board.
We’d never had a mouse in the RV before, so we had no mouse traps handy. Even if we had been anywhere near a store that might carry traps, they’d surely be closed this late at night. But we were eager to catch him before he could damage wiring or other critical RV systems, so we had to figure out how to make a mousetrap with items we had around the RV.
We didn’t especially want to kill our stowaway, so we wanted to create a humane trap that would allow us to release the mouse back into his environment before he decided our rig’s wiring would make a nice dessert. So we set out on a live mouse trap DIY mission!
How to Make a DIY Mouse Trap
Since we didn’t have a snap trap or any other commercial mouse trap, we decided to quickly make a simple rendition of a DIY bucket mouse trap with items we could quickly grab from inside the RV.
Catching mice shouldn’t be all that difficult, after all. They’re small, hungry, and have an impeccable sense of smell. So, if you find yourself in a similar situation, here’s what you’ll need to do:
Collect the Items You’ll Need to Create a DIY Mouse Trap
This type of mouse trap is easy to set up with supplies pretty much any RVer would have onboard:
- Deep bowl or bucket
- Some form of tube
- Peanut butter or other sticky treat
- Something solid to cover the top of the bowl/bucket
- Some form of solid object to use as a ramp (may not be necessary, see below)
For the tube, you can use a paper towel tube, toilet paper tube, contact lens box, or even just a sheet of paper rolled up into a tube and taped or held closed with a rubber band (which is what we used).
We got away with using a deep metal kitchen bowl because we were on guard and keeping watch. Still, a bucket with high sides would be a better option in most cases (if you have easy access to one) because it’s less likely that a mouse could fall into the bucket and then jump out (oh yes, mice are gymnasts, and they can jump!).
So, armed with these few simple items, our pest control system was prepared and we were ready to start getting rid of mice (OK, mouse… but you get the point!).

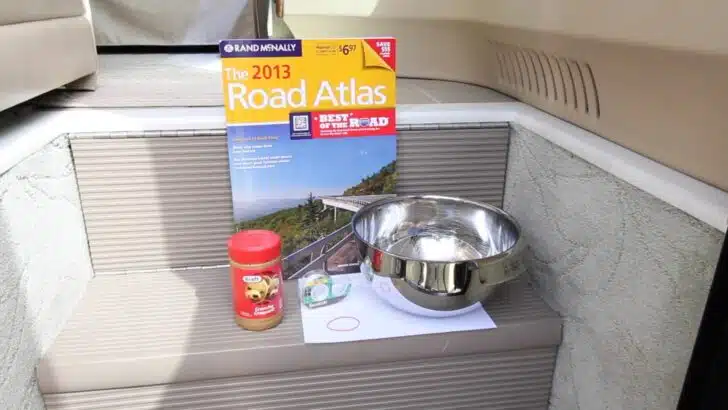
These are the items we used to construct a DIY mouse trap quickly.
Prepare the Tube
Locate a tube or roll up a piece of paper like we did, holding it in a tube shape with scotch tape or a rubber band.
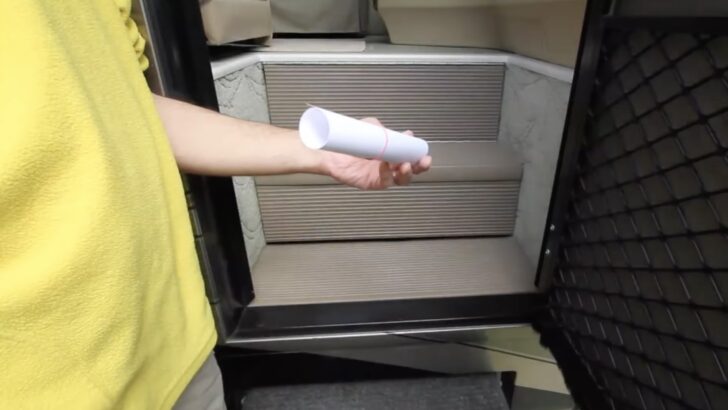
We used a piece of paper rolled into a tube and secured with a rubber band.
Next, place a dab of peanut butter inside one end of the tube, right at the edge.
Set the Tube Strategically Over the Bowl or Bucket
In this step, you must position your items strategically to create a trap. We used our RV steps, but you can also use a chair, a table, or any other item that’s taller than the height of the bowl/bucket you’re using.
Set the tube over the bowl or bucket with the peanut butter end set over the middle of the bowl/bucket.

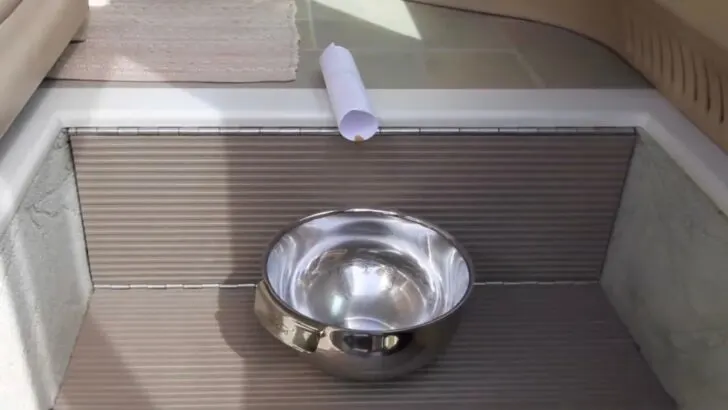
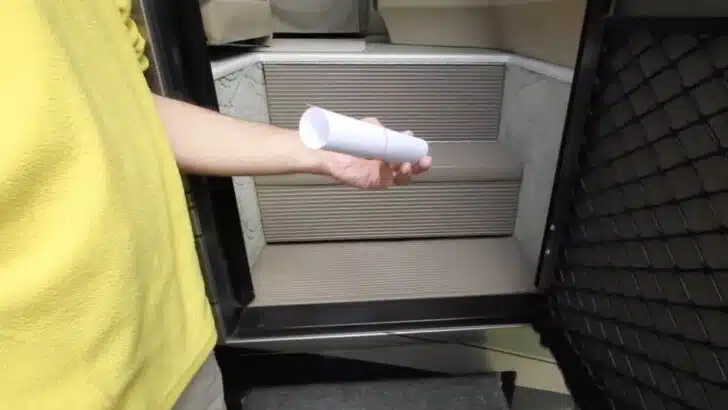
Here, you see the tube we created with a dab of peanut butter strategically placed on the step above where the bowl is placed.
Be sure to place the tube as far out over the center of the bowl or bucket as possible, balancing it just right so that it doesn’t fall… but WILL.
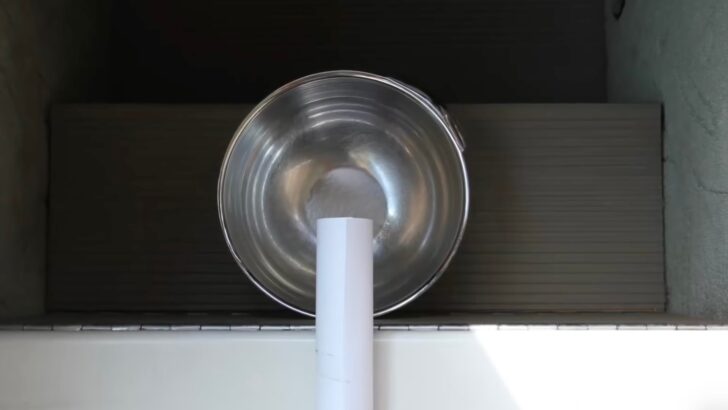

Position the tube’s peanut butter/treat end as far off the edge as possible. The goal is to balance it carefully so it doesn’t fall over the edge on its own, but it WILL when your mouse invader crawls down the tube to get the bait!
In our case, using our entry steps as the platform to place our tube above our bowl, we were all set. The mouse had easy access to the open end of the tube. But if you used a chair or other object to put your tube on, be sure that you also create a path/ramp for the mouse to get up onto it. You can use a board, a broom or mop handle, etc. Place it somewhere the mouse can easily hop on… and climb up.
NOTE: The balance of the tube is essential. You want it extended over the edge as far as possible but not so far that it could fall on its own. The goal is to lure the mouse to enter the far end of the tube… and crawl out toward the bait end. As its weight crosses far enough out, the tube will tip… taking mouse and all down into the trap!
Wait
We didn’t have to wait long before Mickey’s nose picked up the scent of the peanut butter, and he scurried right over to our trap. He went down the tube and straight for the peanut butter. That’s when his body weight knocked the end of the tube – and Mickey – straight into the bowl.
Capture
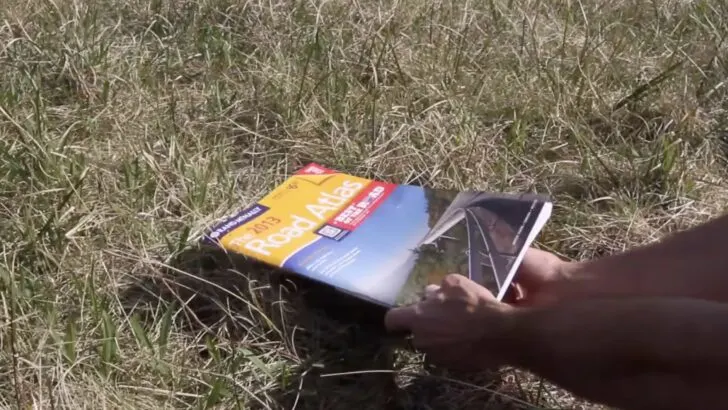
We returned to what we were doing and got up quickly when we heard the mouse in action. Sure enough, he fell for our bait (and into the bowl), so we quickly placed our atlas over the top, trapping him/her inside.


Here’s our old 2013 road atlas covering the bowl with the mouse inside, captive.
If you use a bucket, you can likely go to bed and check the trap in the morning because the mouse would be unlikely to scale the sides of the bucket once he’s in there (although, as we mentioned earlier, mice are EXCELLENT jumpers… so even a reasonably tall bucket may not be enough to contain them).
Release
Now, release the mouse back into his environment, as far away from your rig as possible!

If you made a humane trap, release the mouse back into his natural environment as far away from your RV as possible.
LETHAL OPTION: if you’re concerned about the possibility of your four-legged intruder being able to jump back out of the trap, you CAN add a couple of inches of water to the bottom of the bowl/bucket. This prevents them from being able to jump out again… but it WILL result in the poor thing drowning once they tire themselves out.
We opted NOT to go this route, as we were the ones who were invading THEIR home turf and felt that it was only fair that we return him/her back outside. But you need to make the right choice for your situation.
For a complete look at how we created and successfully used a DIY mouse trap on the fly, you can watch the YouTube video we made (no mice were harmed in the making of this video… enjoy the surprise at the end!)
Other Ways to Deal With Mice In Your RV
There are many ideas out there for dealing with the problem of mice in an RV. In the past, we’ve published an entire post on how to keep invasive mice out of your RV for good and another post answering the question, “Do mothballs keep mice away?”
The best DIY mouse trap is likely the bucket trap method. You can humanely use the bucket method by putting nothing inside the bucket so you can simply release the still-alive mouse/mice to their natural environment or (as we mentioned above) put water in the bottom of the bucket to kill the mice you catch.
Bucket traps are easy to set up in a way that makes them automatically reset to catch another mouse, so this method is perfect for placement in/around your RV when it’s in storage in a location where mice may be active.
There are various ways to use a bucket to catch mice… from using a plastic bottle on a wire to coating a wire coat hanger with peanut butter and placing it over the top of the bucket. Here’s a video from Shawn Woods (a man who does lots of mouse trap tests) on how to catch mice using only a bucket:
A simple bucket is easy to obtain from almost any hardware store.

- 90 mil HDPE construction offering maximum strength and durability
- Lifts up to 84 lbs. and holds up to a 9 in. bucket grid
For those of you who don’t want to make a DIY mouse trap (or who don’t have an urgent need to catch a mouse right this second), but who want a reliable, auto-resetting mouse trap, we’d recommend the Dizzy Dunker made by Shawn Woods:

Final Note On Trapping Mice
One standard piece of advice we’re all told about is to be careful leaving food out that might attract mice (this includes pet food). In this vein, we would like to leave you with one final note about using peanut butter or cheese (or other fragrant bait) to catch mice:
Setting traps using fragrant bait like peanut butter could attract mice into your RV. So, although setting traps to catch potential mice may be worthwhile, be aware that by baiting mice with peanut butter, cheese, etc., you could instead be inviting the suckers INTO your rig for dinner!
If you have issues with other pests like insects, see our post on RV bug screens. Or, if you’ve encountered a problem with bats, as we have, be sure to check out our post on dealing with bats in an RV.
Free RVing Tips, Tricks, Reviews & Giveaways
As 20-year full-timers, we share everything we’ve learned about RVing over the years. Join our online community to receive a wealth of great RVing knowledge delivered daily to your inbox.
Whether you’re a new RVer or a seasoned full-timer, you’ll love the wide range of RVing topics we cover. Don’t miss a single article or any of our famous Giveaways. Subscribe to our newsletter today!
Chuck
Monday 15th of January 2024
That was one scary mouse!
Max
Monday 15th of January 2024
I prefer ones that SNAP their furry little necks
Bob Pauls
Sunday 30th of November 2014
BTW, was that critter a USB or a PS/2 mouse?
TheRVgeeks
Sunday 30th of November 2014
USB (Apple). :)
Tony King
Tuesday 27th of May 2014
We got a mouse in our RV while in Yellowstone and they don't sell anything that will trap/hurt/poison anything ! Not even bug repellant.....nothing,zip,nada ! So that night I came up with my "Trap" by lying a towel across the kitchen sink and putting some peanut butter on a paper plate and then putting the sink cover back over it, mine had a finger hole in it. Turned off the lights and waited about 5 minutes and could hear it running around etc then it got silent. I slide sink cover to the side while bringing one side of the towel with it. I grabbed both sides of towel and picked it up and bingo ! I could feel him in the bottom of the towel. Me and him went for a short hike and everyone inside finally went to sleep. I carry 2 different kinds of traps now, one kills the other doesn't .
TheRVgeeks
Tuesday 27th of May 2014
Great mousetrap story Tony! But I have to be honest... rodents freak me out a little, so it was hard enough carrying one in a stainless steel bowl with an atlas on top. I doubt I could have gotten very far from the RV with him in just a towel! lol Nice work. And we always carry mousetraps on board now too.
Ingrid
Tuesday 27th of May 2014
Unfortunately, we've had mice in our RV....not fun. We now travel with a supply of mouse traps but perhaps you've provided another option!
TheRVgeeks
Tuesday 27th of May 2014
This was just our first experience, and so we now carry mousetraps too, to be deployed in case of the slightest sign of mouse activity. ;-)