
Our RV has two Fantastic vent fans and both are equipped with rain sensors. As we began our life on the road, we quickly realized that we needed to know how to install an RV roof vent cover, that is, a cover over the entire existing fan and lid. Why? Lots of reasons.
In today’s post, we’ll be sharing our reasons for wanting RV roof vent covers and a guide on how to install them so that you can do the same. Because trust us – at some point you’re going to want to open those vents and run those fans, even if it’s raining out, and you’ll need a roof vent cover to do so.
Let’s get to covering those roof vents!

RV roof vent fans (the most familiar of which are Fantastic Fan brand, now a part of Dometic Corporation) are, well…FANTASTIC! But they’re a whole lot more useful with RV vent fan covers installed.
Are RV Vent Covers Worth It?
In our opinion, they certainly are.
First, there are many times when we want to keep one or both of our vents open and the fans running, even when it’s raining. In hot but rainy weather, being able to open the vents and move some air to cool the RV and keep the humidity from accumulating is fantastic (see what we did there?) Capable of cooling the RV nicely, RV roof vents are also great for saving on air conditioning except in extreme heat.
Additionally, many times when we’re cooking we want our kitchen vent open and the fan running.
And finally, there are times when RVers want to keep their Fantastic fans running in hot weather when they’re away from the RV. This keeps the heat from building up inside the RV which can cause certain interior elements to break down. Leaving a Fantastic fan running on low can be very healthy for the RV, but suppose you take off for a hike or a swim or a kayak adventure and the skies open up while you’re away.
If you keep fan vent covers open when it’s raining, water gets inside your RV, and that’s never good. In fact, it’s horrible. Moisture and RVs are enemies – most RVs come with Fantastic fans for good reason.
The solution to all of this is to install an RV roof vent cover. So, yes – RV vent covers are worth it! RV roof vent covers allow air to flow from inside the RV out, and from outside, in.
How Do You Cover RV Vents?
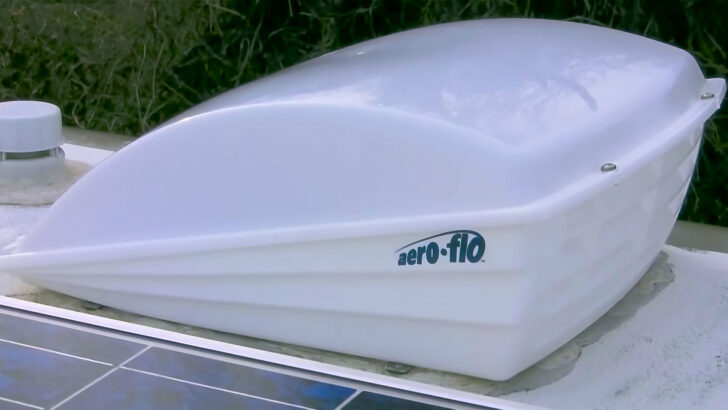
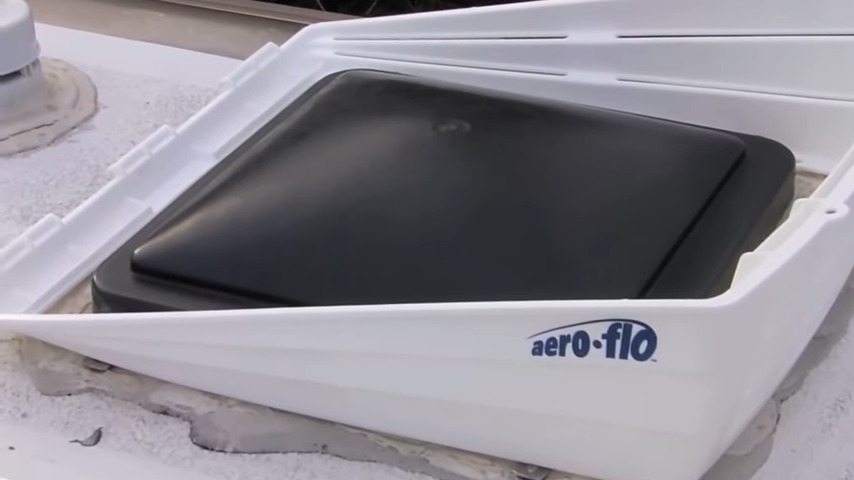
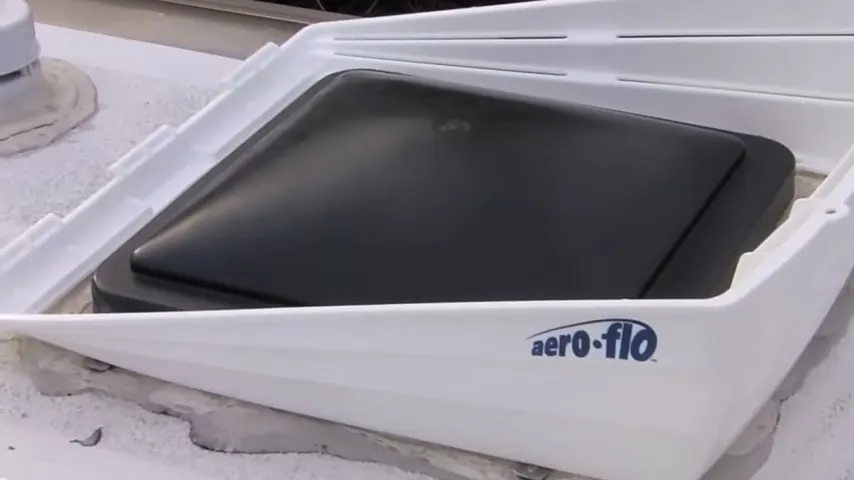
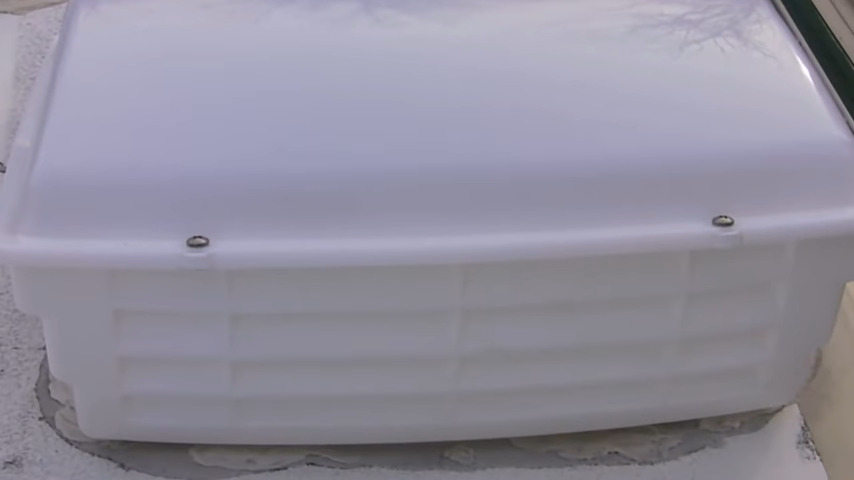
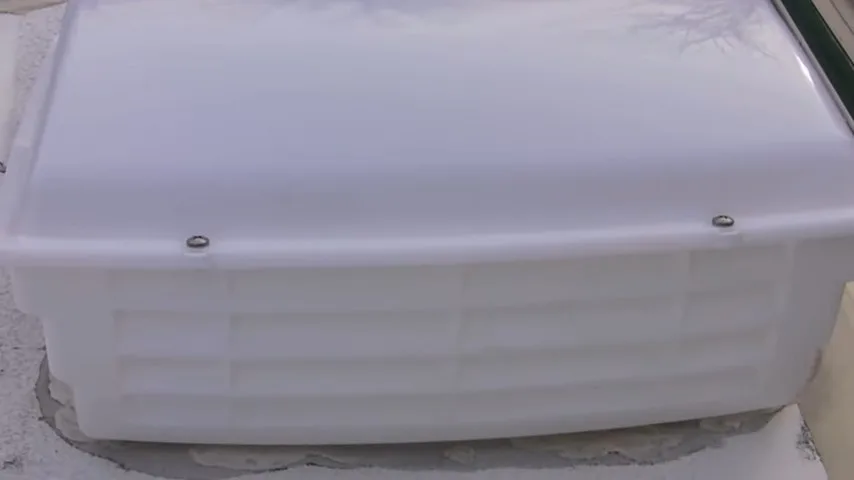
There are a couple of types of RV roof vent covers on the market, but our favorite is the Camco Aero-Flo because it allows for plenty of venting for high airflow, and it also offers easy swing-open access for cleaning.
- Offers 30 percent more open vent area than other brands
- Mounting hardware included; Mounts to existing 14” x 14” roof vents
These are available in black or white and are made of UV-resistant resin so they stand up to the sun and other weather exposure very nicely. And again, the entire lid lifts on hinges for easy access to the inside for the purpose of cleaning road debris, leaves, etc. from inside the vents should it accumulate (and it will!) over time.
Some folks question why we’d want a vent cover that restricts the vent’s lid from opening all the way. The answer is that the lid doesn’t need to open all the way for excellent airflow to be achieved with the Aero-Flo cover installed. Also, according to Camco, the Aero-Flo offers 30 percent more open vent area than other brands. This cover has vent slots on both sides and the back for maximum airflow.
We’ve never used any other brand of vent cover, but what we can tell you for sure is that both of our Fantastic fans work perfectly in all kinds of weather with the RV roof vent covers installed, and that’s been the case for 18 years. We’ve never found the roof vent covers to be limiting in any way.
Are All Roof Vents the Same Size?
The standard RV roof vent opening for the Fantastic-type fans is 14” x 14”. Not every vent on the RV market is standard, so you’ll want to measure your vent(s) before purchasing your RV roof vent cover just to be sure.
The Camco Aero-Flo mounts to existing 14” x 14” roof vents. The cover itself has dimensions of 23 x 22 x 7 inches. Fully installed (using the provided brackets), you can expect the Aero-Flo RV roof vent cover to be 22.5” long x 20” wide x 9” high (the height being important to know in case it’s the tallest item on your RV’s roof).
How Do You Install a Camco RV Vent Cover?
Learning how to install an RV roof vent cover is easy. Let’s take it step-by-step. First, here’s our video:
What You’ll Need
To install an RV roof vent cover you’ll need the following:
- New RV vent cover (comes with the brackets, nuts, and bolts) – the Camco Aero-Flo is our favorite choice
- Drill (we LOVE our DeWalt MAX 20V Drill/Driver)
- Sharpie or other marker
- Phillip’s head screwdriver
- Ratchet or wrench to secure hex nuts
How to Install an RV Roof Vent Cover
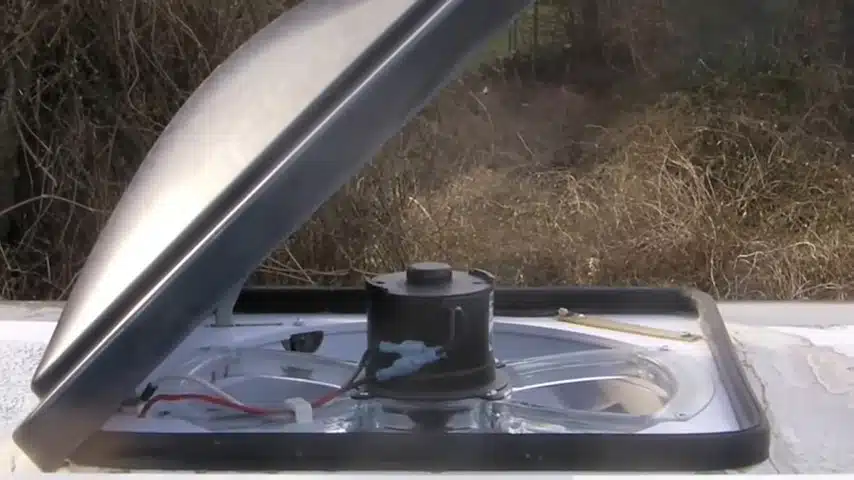
1. Separate the top of your new RV roof vent cover from the bottom and set the top aside.
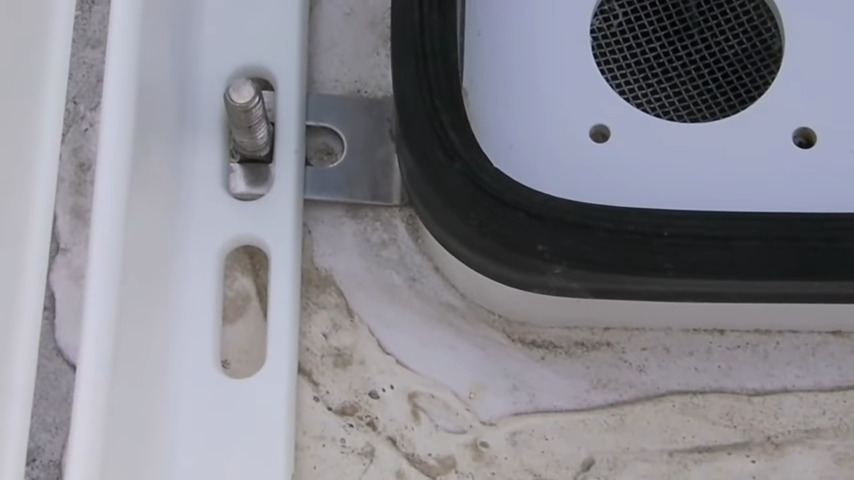
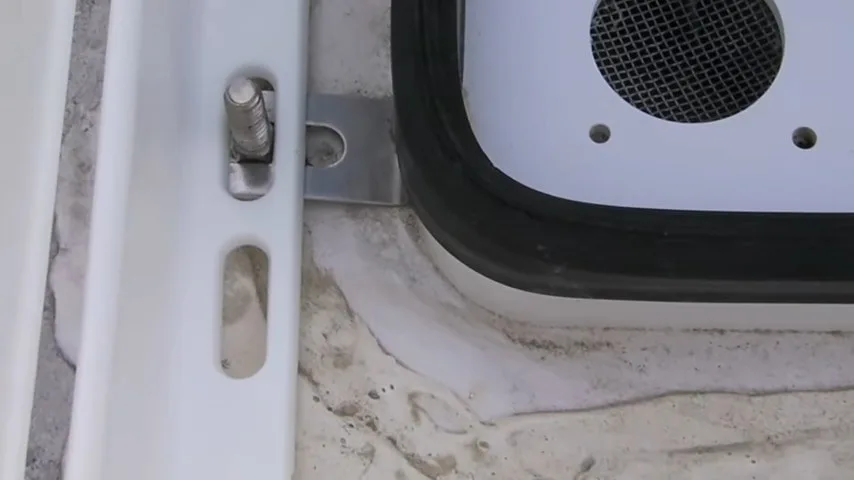
2. Locate the four mounting brackets that will hold the vent cover in place.
3. Line up and position the four L-brackets and use your Sharpie or another marker to mark their locations and where you’ll be drilling your holes.
4. Note whether there is access available for a washer and nut on the back of the bracket. If not, then select the self-tapping screws provided with the vent cover and set them nearby.

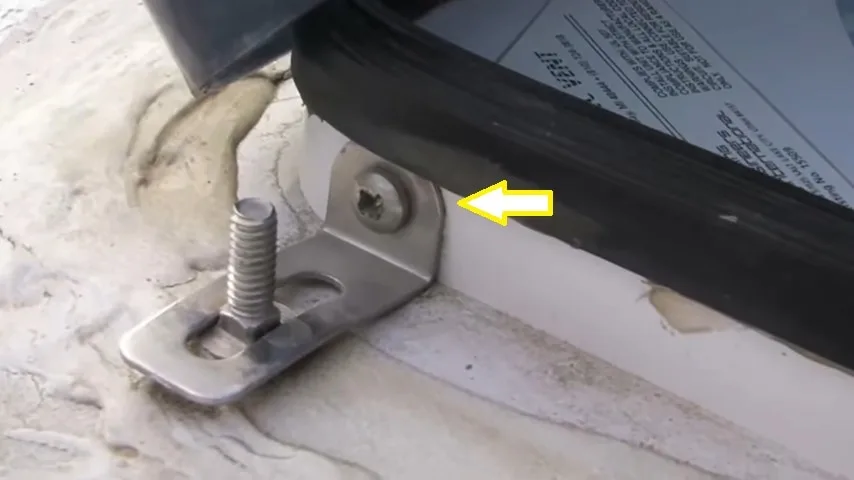
If there is no access available for a washer and nut at the back of the bracket, use the provided self-tapping screws as we’ve done here.
5. Pre-drill the appropriately sized hole as outlined in the provided instructions.
6. Screw the bracket into the base of the fan as shown in the photo above.
7. Position the base of the cover over the four screws with the short end of the base positioned toward the front of the RV.
Note that the short end of the Aero-Flo RV roof vent cover must be positioned toward the front of the RV.
8. Install and tighten the flat washers, lock washers, and nuts.
After positioning the base of the RV roof vent cover over the brackets, tighten down the flat washers, lock washers, and nuts.
9. Line up the hinge of the base and the cover, and swing the lid closed.
10. Using your Phillip’s head screwdriver, tighten the two screws at the back (tall side) of the cover, securing the lid to the base.
Secure the lid to the base at the back of the RV roof vent cover using the two Phillip’s head screws provided.
Now you can run your Fantastic vent fan anytime – including in inclement weather – without concern. You can also easily access your RV roof vent cover for cleaning, with just a Phillip’s head screwdriver.
Conclusion
Knowing how to install an RV roof vent cover will benefit you in many ways. You’ll be able to keep the lid of your RV roof vent open and your fan running regardless of the weather!
Installing an RV roof vent cover is one easy DIY modification that you can make to improve your RV and your RV lifestyle significantly.
Geek Out with Us Every Week
Join our newsletter to learn about all things RV-related. Every week we offer free tips, tricks, product reviews, and more to our online community of RVers. So, whether this is your first time on the road or you’re a seasoned expert, we’d love for you to geek out with us!
Jennifer Reissaus
Friday 29th of October 2021
Thanks for the informative post. It's good to have a trustworthy source for DIY RV projects. FYI the link for the Dewalt drill instead leads to the vent cover.
TheRVgeeks
Friday 29th of October 2021
Thanks Jennifer! We’ll get that link fixed ASAP!
BVJ&J63
Thursday 14th of October 2021
You say in your guide that it's not necessary to open the vent covers all the way for proper airflow (and they can't open all the way with these covers installed). But you didn't mention whether the auto-opening feature of the Fantastic vents will automatically stop when the fan cover hits the enclosure cover or if that will cause the motor to burnout or cause other damage. Can you address that? If you install these, does this mean you have to always manually open and close the vents so that they don't try to open further than physically possible with these covers installed? It's nice to have them set to open and operate at certain temperatures so I'd hate to lose that feature. Thanks!
TheRVgeeks
Thursday 14th of October 2021
Good question, BV! Yes... with the cover in place, the auto-open feature on the Fantastic vent still works (been using it for 16+ years and still going strong). The motor-lift for the Fantastic Vent lid relies on increased resistance to know when the lid is "open"... and then stops the motor. So with a vent cover in place, that increased resistance just happens sooner in its travel and it stops the same way.
Installing a vent fan cover onto an auto-open Fantastic vent fan will work exactly the same as NOT having one. You'll be good to go!