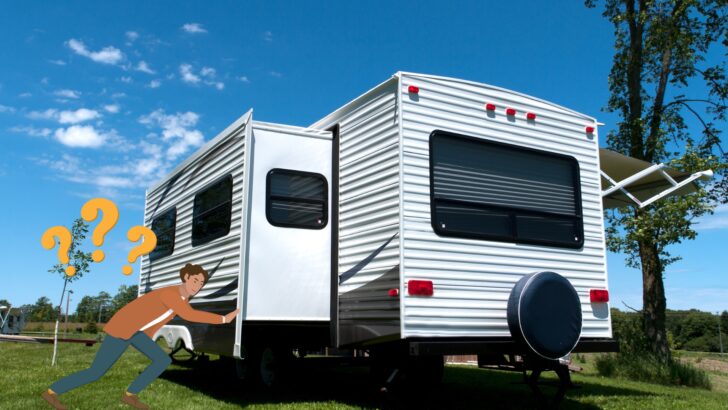

If you’ve ever had a slide out get stuck, you know the frustration and stress of being unable to drive your rig because the RV slide-out won’t retract. The best way to avoid that situation is to learn how to manually retract an RV slide room that’s stuck before you find yourself in that situation.
In today’s post, we’re talking about how to manually retract your RV slide out so that you can safely get your rig to an RV technician for service.
Being prepared is half the battle, so let’s troubleshoot several types of RV slide-outs and learn how to retract them manually.
Can All RV Slides Be Manually Retracted?
Most slides are capable of being manually retracted. In fact, they’re designed this way because if an RV slide gets stuck while it’s partly or fully extended, you can’t drive the RV to get it to a service center.
A slide that isn’t extending or retracting could be the result of something simple like your house batteries not being fully charged or even just some minor thing we’ve overlooked.
But knowing how to manually operate your RV slide (without causing any damage) can be very important.
Imagine getting ready to leave your site after a nice camping trip, and you’ve got a slide that won’t retract. Not only is your slide-out stuck — you’re stuck.
So, yes – there is a way to retract most RV slides manually. One possible exception might be RVs that have full-wall slide outs. These have large motors because they weigh so much and require a lot of force to move. So they may or may not be able to be manually retracted.
Basic Troubleshooting Steps for an RV Slide Out That Won’t Retract
Before manually retracting a slide out that’s stuck, consider these initial troubleshooting steps.
- Check to make sure there’s nothing blocking the slide’s movement on the interior or exterior.
- Is there power to the slide? Check your shore power/batteries/generator.
- Check for any blown fuses.
- If it’s a hydraulic system, is there fluid in the reservoir? (This may be difficult to check because slides & hydraulic leveling jacks need to be retracted to check the reservoir level.)
- Is there a lockout that needs to be released? (This may be a dedicated slide room lockout key or perhaps an ignition lockout, so check to make sure the RV’s ignition is in the “OFF” position.)
- If possible, check the wiring for continuity, which will require a circuit tester.
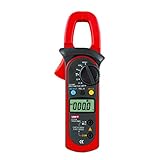
- Measures both ac & dc current up to 400 amps, ideal for vehicles, rvs, marine boats & etc
- Ac/dc voltage, current, resistance, frequency, continuity, duty cycle & diode check
As an aside, if you arrive at your campsite and your slide-out won’t extend, remember to check your RV slide lock if you have one. If we had to choose between a slide that’s stuck in or out, that’s an easy choice. At least a slide that won’t go out won’t prevent you from driving.
How to Manually Retract RV Slide Outs
As you may recall from our complete guide to the RV slide out, not all RV slides are the same, nor do they operate the same way.
So, as you might expect, different types of slide-outs manually retract differently as well.
In this section, we’ll offer some general instructions on how to manually retract each of the most common types of RV slide outs.
Of course, we can’t provide details on every year, make and model of slide system for every motorhome and travel trailer. So be sure to check your owner’s/operator’s manual for specific details related to your slide system.
To prepare:
It’s always best to start by consulting your owner’s manual for the manufacturer’s manual slide retraction recommendations.
If you don’t have the manual, contact the slide system or RV manufacturer.
If there’s a hand tool required or one that needs to be attached to a portable drill, prepare before you begin. (Different types of slide-outs require different tools or none at all.)
Now let’s look at some general instructions for manually retracting various RV slide outs.
Rack & Pinion Slides
If you have a rack & pinion slide-out with an electric motor, you should be able to manually retract the slide by taking the steps below.
Note that there are two different versions of this type of slide-out.
For Slide-Outs with Hex Nut Attached to the Electric Actuator Motor
- Find the hex nut on the actuator motor of your slide. You’ll need to access the hex nut from under your RV. You may or may not have to cut a hole to access the motor.
- Use a ratchet and the correct size socket to turn the hex nut clockwise to retract the slide.
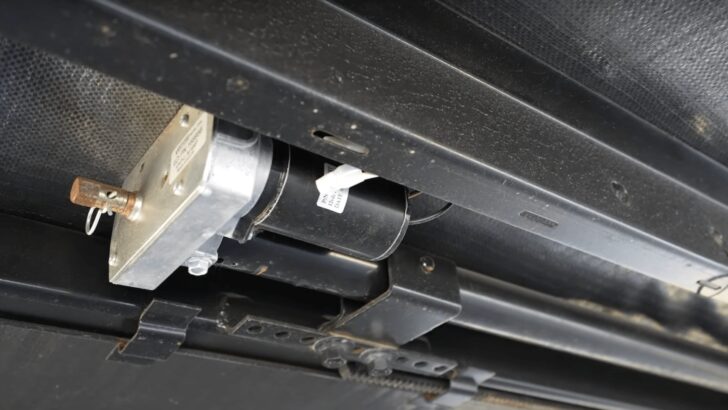
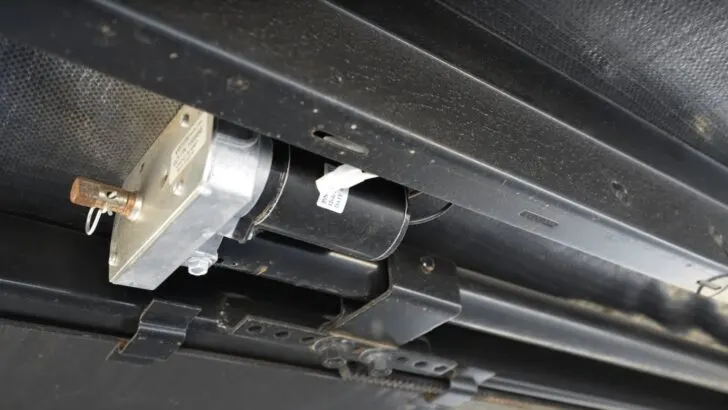
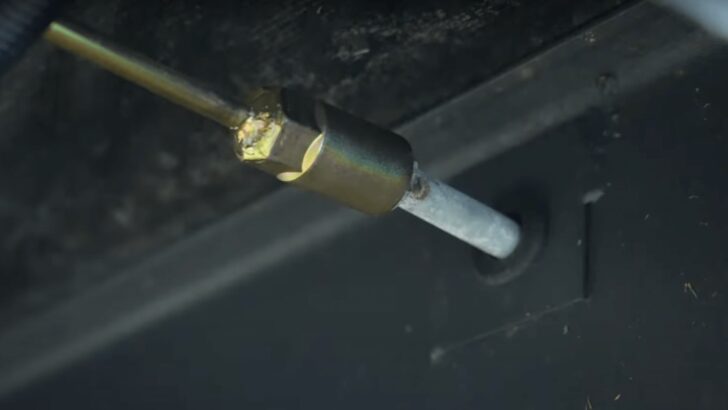
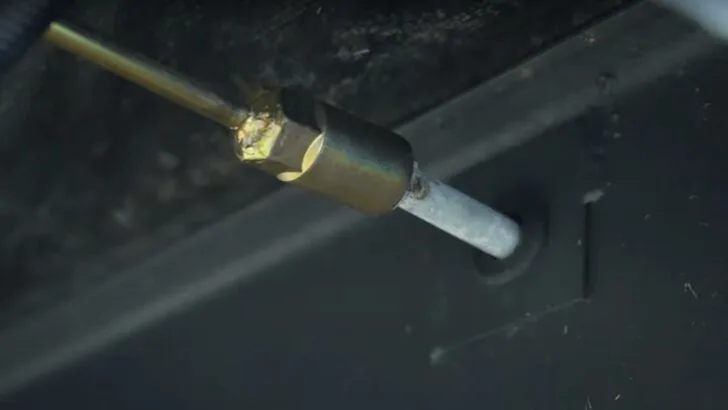
This is a rack & pinion slide with a hex nut attached to an electric actuator motor. You’d access this hex nut from under the RV.
For Slide-outs with an Extension Rod from the Motor Through the I-Beam
- Locate the electric actuator motor and identify the attached extension rod.
- Disconnect the battery to eliminate the possibility of electrical feedback that can cause damage to the system.
- Connect the manual override crank tool to the extension rod (if you have this type of slide, your rig should have a manual crank on board).
- Turn the crank handle clockwise. This should retract your slide-out.
- When you feel resistance, and the slide is flush with the wall, stop cranking. Be sure not to over-crank the handle. Doing so can damage your slide.
This rack & pinion slide-out has an extension rod that runs from the motor through the I-beam as shown here.
Hydraulic Slides
In addition to the troubleshooting steps for all slides, if you have a malfunctioning hydraulic slide, you’ll also want to check the level of the hydraulic fluid.
If your RV doesn’t have an electric indicator of the fluid level, try using a dipstick to check the level.
Tip: Make sure the hydraulic fluid tank is full whenever you travel.
- Locate the Hydraulic Motor
The motor is often located in the front luggage compartment, but it may be in a side compartment. If you can’t locate the hydraulic motor in either of these locations, check your owner’s manual or the manufacturer’s website for your model. - Find the Slide Out Valve
The slide-out valve is what determines whether the motor works automatically or manually. Typically, you’ll find two levels of system valves with tags on them, and a single slide-out valve with no tag. - Rotate the Slide-Out Valve
You’ll need to turn the valve either clockwise or counterclockwise to enter manual operation mode. Instructions should be found in the area where the valve is located. - Locate the Hydraulic Valve
Make sure the hydraulic valve is in the correct position. If not, the fluid won’t reach the slide-out. - Find the Manual Operation Panel
You may have a hand pump if you have an older model RV. In this case, you may need a metal bar to attach to the hand pump. Once attached, you can start pumping until your slide is fully retracted.Newer RV models will be more likely to have a knob. In this case, you’ll need an electric screwdriver. Connect it to the knob and retract the slide-out. A flexible screwdriver may sometimes be required to reach the knob. - Return Everything Back to Position
Once you’ve successfully retracted your slide-out manually, lock the manual operation valve back in position. Then put the slide-out valve back in the original position and close the motor cover.
In-Wall (Schwintek) Slides
If you’ve got a Schwintek (worm gear) slide, take the following steps to retract your slide manually:
- Grab a common pen (yes, a writing instrument).
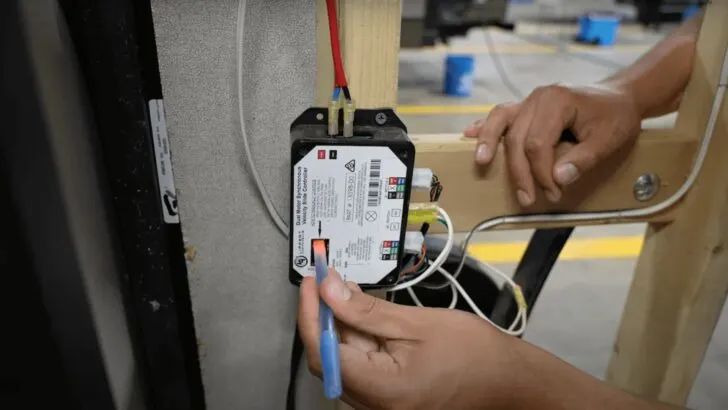
- Locate the electronic control box of your slide-out.
The electronic control box may be located in a lower storage compartment on the interior of your RV. - Bypass the control box.
The instructions for bypassing the electronic control box should be found on the box itself and in your owner’s manual.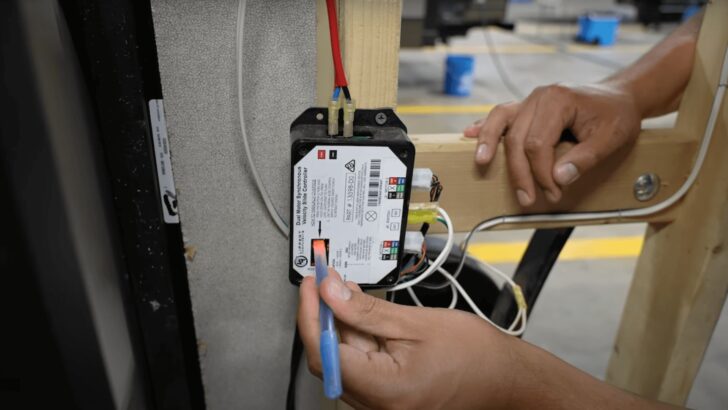
Using a pen, you can manually override the electronic control box of a Schwintek slide to retract it by first pushing the reset button 7 times, and holding the button down on the 7th/final press.
- Use your pen to push the reset button 7 times, holding the button down on the 7th press.
You should see green and red lights flashing. (NOTE: Only do this to RETRACT your slide, never to extend it.) - Press the slide-out switch as you normally would to test it.
At this point, your slide should retract to allow you to drive your RV to a service technician for assessment and repair.
Again, there’s no harm in bypassing the electronic control box to RETRACT your slide. But you should never do this to extend it.
Cable Slides
If your rig uses cable slides, prepare by locating a portable drill and a #3 square (Robertson) torque bit.
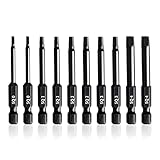
- ROBERTSON SQUARE DRILL BIT SET - 10 Piece Set in the Following Sizes #0, #1, #2, #3, and #4 (2 of Each Size)
- CONVENIENT PLASTIC STORAGE CASE - Our Drill Bits Come in a Durable Locking Plastic Storage Case for Easy Storage
Also, locate the foot-long flexible extension that came with your RV.
Be sure to take a look at your owner’s manual for reference.
Follow these steps to manually operate your slide out:
- Locate the slide motor.
Your slide-out motor is typically found on top of the slide in the center. It’s easiest to access from inside your RV’s living space. You’ll see the cables and pulleys attached to the motor. If an interior fascia is attached, remove it to access the motor. - Place the Robertson (square) #3 bit in the end of the motor.
- Connect the extension.
Connect one end of the square bit to the extension, then connect the other end to your cordless drill. (If you haven’t removed the fascia, move the extension up and over it.) - Engage your drill in reverse to drive counterclockwise to retract your slide-out until the seal is flush with the exterior wall.
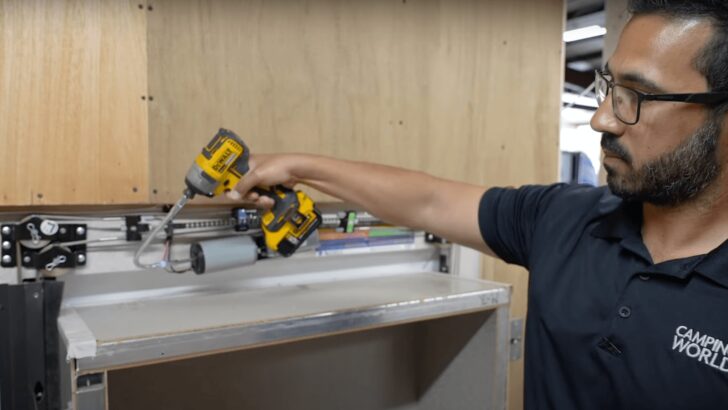
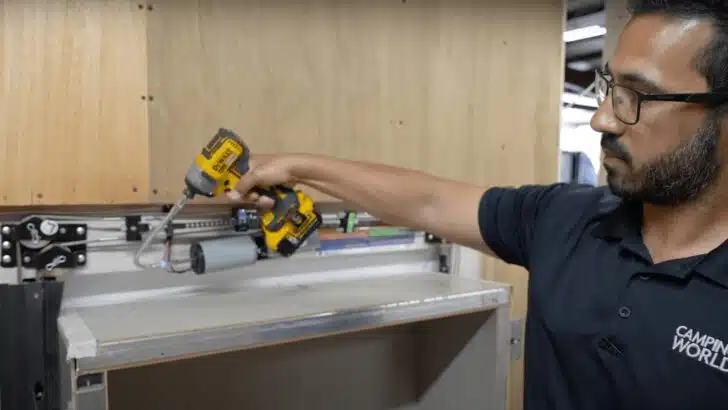
Here’s a technician manually retracting a cable slide using a cordless drill and a #3 Robertson bit. (Photo credit: Camping World)

- Dewalt drill has compact and lightweight design that fits into tight areas.NEW 18V XR Li-Ion compact drill driver featuring XR 1.3Ah Li-Ion battery...
- High performance motor of the power drill delivers 300 unit watts out (UWO) of power ability completing a wide range of applications
Video Tutorial on Manual Retraction of Cable, Rack & Pinion, and Schwintek Slides
If you’d like a video guide on how to manually retract a cable, rack & pinion, or Schwintek style RV slide-out, here’s a video from Camping World that’ll take you through the steps:
Free RVing Tips, Tricks, Reviews, Giveaways & More
Subscribe to our daily newsletter! We’ve been full-time RVers for 20 years (!) and share everything we’ve learned about RVing in our daily blog posts. Join our online community to receive a wealth of great RVing knowledge delivered right to your inbox.
Whether this is your first time on the road or you’re a seasoned full-timer, you’ll love the wide range of RVing topics we cover. Don’t miss a single article or any of our famous RV gear Giveaways — Subscribe today!
Bill
Tuesday 4th of July 2023
Retracting a cable slide as shown, works for the first foot or so of retraction. After that you are less and less able to hold the drill because the slide is pushing your body away and you just don't have enough arm length. I was able to make a rod extension that allows the drill to be operated to one side of the slide
William Moore
Monday 12th of June 2023
One situation you didn't mention is if you have a broken cable. My rig has four slides with four different slide out systems (one of Forest River's better ideas). There are four cables on the slide (they keep the slide "true" to the opening). Do not manually push the slide in, and do not pull the broken cable out. If you do either of these your repair process just got a whole lot longer.
1. Pushing the slide in will create slack in the other 3 cables and you will end up with a mess like backlash on a fishing reel. You will probably get the slide stuck due to binding by not pushing it in straight. And... the cable opposite the one that broke may get off track and you will have to figure out the routing for it as well. 2. Pulling the broken cable out is a huge mistake. I pulled the broken cable out, only to find out that you actually use the old cable to get the new one routed properly. 3. My cables are an odd size so finding one was a nightmare. You can find common sized cables on Amazon. (I had to get mine directly from Forest River) 4. For those who have cable operated systems I recommend inspecting your cable connectors at the slide out (outside where it attaches) If you see fraying, change your cable before it breaks. 5. Check the alignment of the cable to see if it is rubbing on the framing passing through the wall. That's what causes the fraying.
There are several YouTube videos on how to install a new cable but none that address the issue without the old one still in place. It was a painful process but with two people and two flat screwdrivers we were able to re-route the new cable. If you are going to do it yourself you will need to invest in a "cable" wire crimping kit. I got a hydraulic one on Amazon for $80. It's the best insurance I have, and I hope I never have to use it again for this problem. The new cable will come with something like a "Chinese Handcuff", you slide it on the end of each cable and it gets tight as you pull on it (you may have to cut the frayed end off the cable to do this, so measure it first to determine the correct length). Then pull the old cable out and the new one will follow the path of the old. Follow the directions in the kit for crimping and trimming the excess cable.
Finding a mobile RV Tech that will come to you for this issue is going to take a while. Most are backed up with AC problems and they may not have the cable in stock. If you do it yourself, YouTube is awesome for learning how to do it. Watch closely and make sure your slide is square to the unit or it will bind up and get stuck.
Ray Davis
Saturday 10th of June 2023
I once was advised to always fully open or fully close a slide out without pausing in a rack and pinion system. Is this a truth or a myth?
TheRVgeeks
Saturday 10th of June 2023
Hi Ray... it varies a lot by RV and slideout manufacturer. Generally speaking, it's a good idea to run the slide(s) fully in either direction, to make sure they run the complete cycle. That said... we've interrupted the cycle on our Newmar rack-and-pinion style slides on occasion and haven't had any issue.
Hydraulic slides are another style where it's always good to ensure you run it completely in or out. In this case, just in normal use, they can creep in or out if not fully cycled. Since they're using hydraulic fluid, you need to ensure the cylinders are properly pressurized so they can hold the slides in the correct position.
Dr. Mike
Friday 9th of June 2023
Question: Once the slides are in, will they have to be braced so they will not slide open?
TheRVgeeks
Saturday 10th of June 2023
Hi Mike... yes... if you have to move the RV to get it in for repair (or just to get it home), it's a good idea to use something to brace the slide once it's in the closed position (proper length 2x4s between the inside slide flange and wall should do) to make sure it doesn't open while you're driving.
Of course, it goes without saying that you'll need to be on extra alert monitoring the slide in your sideview mirrors! ????????
Paul Thorpe
Friday 9th of June 2023
There is a typo in your discussion of ignition interlocks. You said, "so check to make sure the RV’s ignition isn’t in the “OFF” position." It must be off for the slides to work. Unless Newmar used a different control system in your Mountain Aire, than my identical (except a foot shorter and no tag axle) Mountain Aire, my slides will not move unless the ignition IS OFF!
TheRVgeeks
Friday 9th of June 2023
Thanks for catching that, Paul! All fixed.