
If you own a travel trailer, 5th wheel… or really any type of trailer at all… it’s good to know how to repack trailer bearings. This will help you stay on top of an important piece of trailer maintenance to keep your towing experience safe and trouble-free.
Repacking trailer bearings is a routine maintenance task that helps prevent friction and heat buildup, reducing the risk of bearing failure. As we get ready to take delivery of a brand new towable RV of our own (yes we’re excited!), this post provides a step-by-step guide to the process of repacking trailer bearings to keep your camper ready to hit the road.
- 1) How Do I Know If My Trailer Bearings Need to Be Packed?
-
2)
How to Repack Trailer Bearings
- 2.1) Tools and Materials
- 2.2) Important Note:
- 2.3) Raise the Trailer
- 2.4) Remove the Wheel & Tire
- 2.5) Access and Remove the Bearings
- 2.6) Clean & Inspect The Trailer Wheel Bearings and Other Components
- 2.7) Clean & Inspect the Wheel Seals and Replace If Needed
- 2.8) Repack the Bearings
- 2.9) Reassemble the Hub
- 2.10) Adjust Bearing Play
- 2.11) Install Dust Cap
- 2.12) Reinstall the Wheel
- 2.13) Check the Bearings and Clean Off Any Extra Grease
- 2.14) Repeat for Other Wheels
- 3) Free RVing Tips, Tricks, Reviews & Giveaways
How Do I Know If My Trailer Bearings Need to Be Packed?
Before we get into the steps for how to repack trailer bearings, let’s run through a list of things that could indicate that it might be time for this important maintenance task to be completed. Keep in mind that a failed trailer bearing can be a serious event. So any of the things listed below should at least be cause for inspection.
NOTE: If bearings are being re-packed, and inspection reveals a problem with them, it may be time for bearing replacement. Like so many other maintenance and repair tasks, labor is often a bigger issue/cost than parts. If we were removing a wheel, we’d consider installing new bearings while the wheel is off if they show any signs of compromise. That’s especially true if they’re older or there’s the slightest concern about the condition of the wheel bearings or bearing races.
High Mileage or Long Periods of Without Use
If you’ve towed your trailer a significant distance or if it has been sitting unused for a long time, it’s important to inspect the bearings to see if they need to be repacked. Bearings and seals can dry out over time which reduces the effectiveness of the lubrication.
Unusual Noise
If you hear any unusual noises like grinding or rumbling while you’re towing your trailer, it could be due to friction or wear within the wheel bearings.
Excessive Heat
After towing your trailer, hold your hand right near the wheel hubs to check for heat. Excessive heat at the hub can indicate insufficient lubrication or other issues and may mean that the bearings need to be repacked, or even replaced. At the very least, excessive heat calls for further inspection.
Heat may also mean other problems. That’s true for more vehicles than just trailers. We were visiting our friends Tom & Cait Morton at their property in Michigan and we had just such an experience. Tom stepped out of the back seat of our Honda CR-V and noticed that the area around one rear wheel was putting off a lot of heat.
We removed the rear wheel and found that the brake caliper had seized. Thanks to Tom for both catching the problem and helping us replace the necessary brake components and bleed the system.
Wheel Play
Using a jack, lift each wheel/tire off the ground. Then, grab ahold of the sides of the tire with both hands. Pull in and out, trying to make the wheel and tire wobble, checking for play/looseness. If you feel excessive movement this may indicate that the bearings are worn or damaged.
Uneven Tire Wear
Regularly inspect the tires of your trailer for uneven wear which can indicate improper alignment or wheel bearing issues.
Visible Wear/Damage
To visually inspect both the inner and outer bearings, you’d need to remove the wheel. So this isn’t something you’ll likely want to do unless it was either time to re-pack the bearings with grease, or you’re seeing or hearing some other indicator of a problem.
But when the bearings are off for routine grease re-packing, inspection is part of that process. You’re looking for signs of wear or damage (see below for more details). If you find either, the bearings will likely need to be replaced.
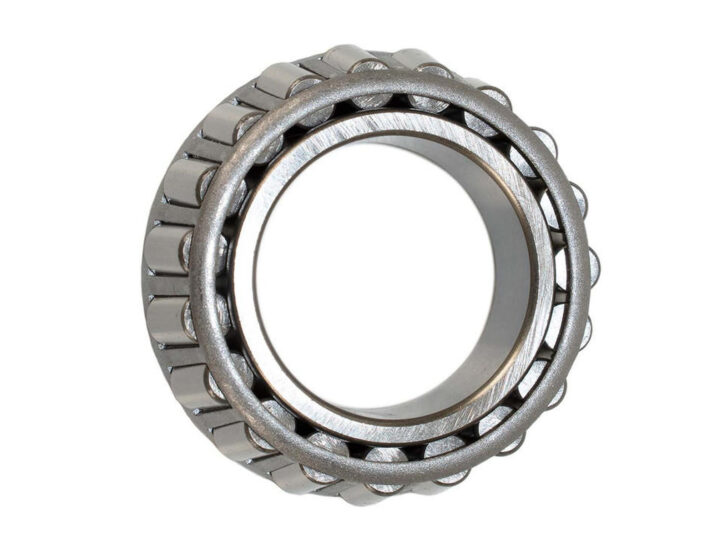
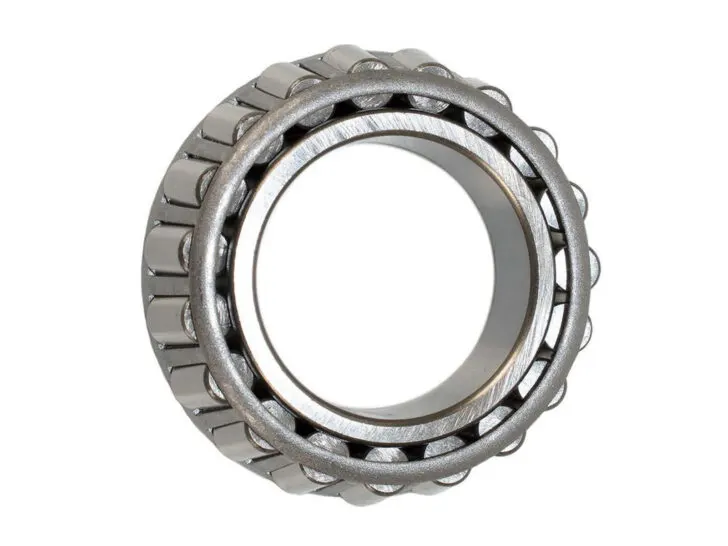
If repacking trailer wheel bearings with grease reveals damage or wear, they may need to be replaced with new ones like this typical roller bearing.
Leaking Grease
Look for any grease that has leaked around the wheel hub or on the inside of the wheel. If the grease is leaking you may have a damaged seal or bearings that are overpacked. Leaking grease can cause problems with other components as well.
This is another case where other vehicles besides trailers can be affected. Our motorhome had a leaky inner wheel seal on one of the tag axles, which was discovered during a professional chassis inspection. The tech marked the leak as “urgent” because of the importance of fixing it before grease got onto the brakes.
This is how staying vigilant can save time, money, and trouble. If that leak had continued long enough that grease got onto the brakes, it would have substantially increased the scope and cost of the repair.
Specific Use Cases
If you frequently tow your trailer in harsh or dusty conditions, the bearings may require more frequent inspection and repacking. Since we plan to spend even more time boondocking with our new towable than we did with our motorhome (one of the reasons we chose it), we’ll keep this in mind for sure!
Manufacturer’s Recommended Maintenance Schedule
Be sure to adhere to the manufacturer-recommended maintenance schedule for bearing repacking to ensure safe, optimal performance. As with so many things related to owning and using any kind of equipment, the manufacturer often has the last word on the use and care of their products. That’s especially true for complex machines like RVs.
How to Repack Trailer Bearings
Let’s start with a list of tools and materials that are commonly needed to complete the job. These items can be purchased at many auto parts stores or online.
Tools and Materials
- Jack
- Jack stands
- Lug wrench
- Wheel bearing grease
- Brake Cleaner
- Small brush or toothbrush
- Clean rags or towels
- Disposable gloves
- Seal puller or screwdriver
- Bearing packer tool (optional)
- New castle nut cotter pins or other new retaining hardware, if needed
- New inner grease seals (the old one may have to be bent to remove them). If buying them in advance, you’ll need to know the axle type ahead of time. Otherwise, you can take the old one to an auto parts store to get a match. That would, of course, require doing the job on a day and in a place where you can run to the store during the job. Of knowing that your wheels may be off your trailer until you get replacements.
- New bearings may also be needed if the old ones are found to be discolored, pitted, or otherwise damaged.
Important Note:
Before beginning the job, be sure that your trailer is on a level surface. Apply the parking brake and/or use wheel chocks to prevent any accidental movement. Safety first!
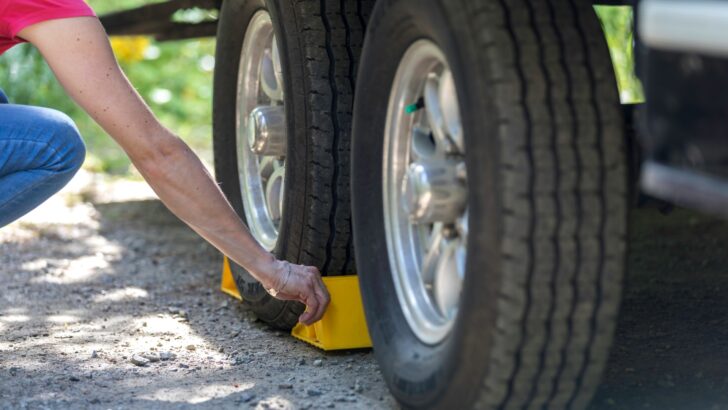
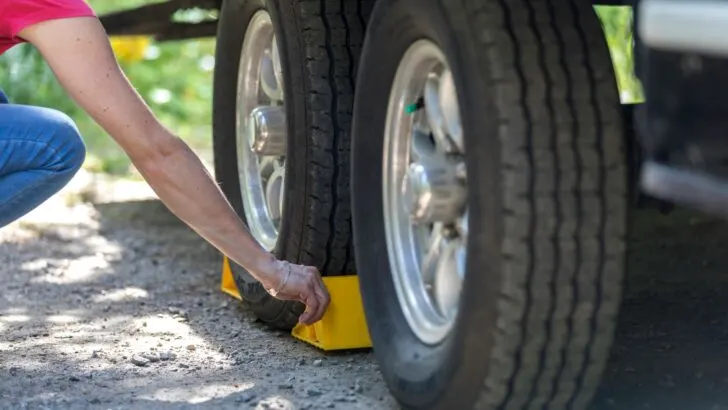
Be sure to set your parking brake and/or use wheel chocks to ensure that there’s no accidental movement while you’re working on a wheel.
Following are the steps to take to repack your trailer bearings.
Raise the Trailer
Place your jack under the trailer’s frame near the first wheel you plan to work on and use it to lift the tire off the ground. Then place a jack stand under the frame to provide additional support and stability. Make sure the trailer is securely supported before proceeding. Never remove the wheel and tire from, or get underneath, any vehicle that’s only being held up by a jack.
PRO TIP: If you’ll be removing the lug nuts by hand with a lug wrench (vs an impact wrench), you may want to slightly loosen the lug nuts before raising the tire off the ground. Once it’s in the air it will spin, making it difficult to loosen the lug nuts by hand.
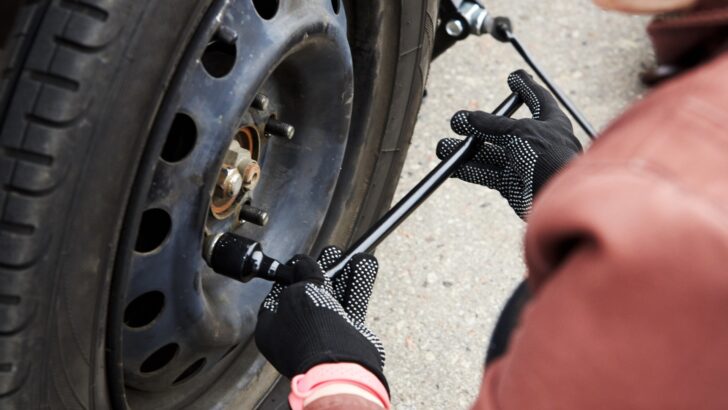
Remove the Wheel & Tire
Use a lug wrench or impact wrench to remove the lug nuts, then remove the wheel & tire and set it aside.
Access and Remove the Bearings
Locate the dust cap covering the hub. Use a screwdriver or seal puller to carefully remove the dust cap without damaging it. You should see grease when you remove the cover. If not, you’re way overdue to repack the bearings.
Use a rag or towel to wipe away any grease to see what type of nut holds the bearings in place. If it’s a castle nut, straighten and remove the cotter pin. Other types of nuts may have tabs that will need to be bent to allow removal.
Whichever type of setup you have, the cotter pin or tabs are there to guarantee that the nut can’t come loose. Once you have them out of the way, you can use a wrench to remove the nut. Watch for the outer seal, which looks like a large washer, which will most often stick to either the castle nut or the outer bearing.
PRO TIP: Take note of the orientation of each wheel bearing before you remove it. This will come in handy during reassmebly when you could end up asking yourself “Does it go in this way… or the other way?”
Once the nut is off, you can pull the hub/drum off. Be sure to hold a rag over the center opening as you wiggle the drum off so that the outer bearing won’t fall onto the ground as the drum comes off the spindle. The outer bearing should easily fall right out into your hand. Again, note which side of the bearing faces in and which side faces out.
Removal of the inner bearing requires the removal of the grease seal first. Use a seal puller, a flat-blade screwdriver, or some other lever to pry the seal loose. You may need to lightly tap the side of the screwdriver/lever with a hammer to break the seal loose. If this damages the seal, which isn’t uncommon, the new ones you bought in preparation for the job will be needed.
Once the grease seal has been removed, you should be able to easily lift the inner bearing out with your finger. Here’s an image that may be helpful as you identify the parts:

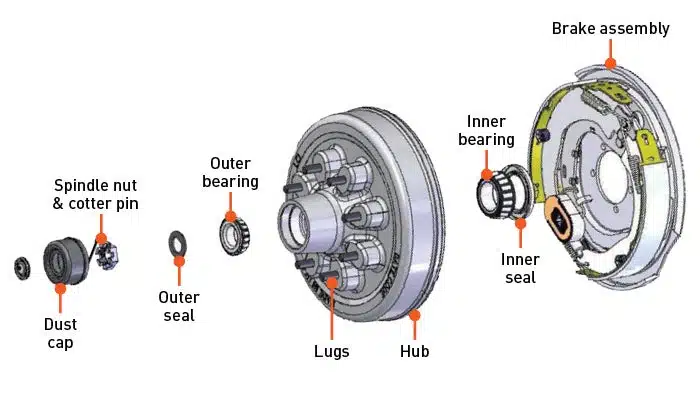
This trailer hub diagram shows the typical parts of the trailer hub. (Photo source: Lippert)
Clean & Inspect The Trailer Wheel Bearings and Other Components
Thoroughly clean the old grease from the bearings using a rag or towel and some brake cleaner or other solvent. This will help break down and dissolve old grease and contaminants, and allow you to see them better for a more thorough inspection.
You can also use a small brush or toothbrush to scrub the bearings, spindle, and surrounding areas, paying attention to the small crevices and spaces where grease and dirt can accumulate.
After you’ve finished cleaning them, allow the bearings and surrounding components to air dry completely before applying fresh grease to be sure that no residual cleaning solution remains.
Inspect the bearings for any signs of wear, pitting, discoloration, or other damage. Bearings can be reused if they’re in good shape.
Races are installed into each side of the hub and are the surfaces that each bearing rests against. Clean and inspect both the inner and outer races.
You’re looking for pitting, scratching, and/or discoloration. A bluish tint on the race indicates that the bearing has heated up. That’s a sign that you may have waited a bit too long to re-pack the bearings since they shouldn’t heat up when they’re properly packed with grease.
This is also a good time to clean and inspect the axle/spindle.
Clean & Inspect the Wheel Seals and Replace If Needed
Check the condition of the wheel seals. If they show signs of damage, wear, or leaking, it’s a good idea to replace them. The inner seal not only holds the grease in place to protect the bearings, but if that grease should leak onto the brakes that can lead to brake issues. As mentioned above, this can cause problems for all vehicles, not just trailers.
Repack the Bearings
Apply a generous amount of high-quality wheel bearing grease to each bearing. This can be done by hand or using a bearing packer tool for a more even distribution. The simplest way to do it is by placing a generous blob of grease into one hand and sliding the edges of the bearing down onto the blob. As the old grease is pressed in, you’ll see old grease begin to come out the other side of each section of the bearing.
Keep pressing new grease in, and rotating the bearing around as you go. Once you’re pressed fresh grease all the way around one bearing, do the same thing with the other one. In case it doesn’t go without saying, be sure to place the freshly greased bearings down on a clean surface and protect them from loose debris.
NOTE: We’ve already mentioned that grease leaking onto the brakes can cause big problems. For the same reason, be extra careful to avoid getting grease onto the brakes during this entire process.
Reassemble the Hub
Wipe a layer of fresh grease all the way around the inside of the inner side of the hub. Place the repacked inner bearing back into the hub, ensuring that it’s facing the correct way. This is where our tip above comes in where you noted the orientation of the bearings. If you forget to note it during disassembly, they generally go in with the narrow side first.
If new seals are needed, install them now. Using a hammer and a small section of 2×4 (or similar scrap of wood), carefully and lightly hammer the inner wheel bearing back into place. It’s important to keep the bearing as level as possible while doing this so that it will seat properly into place.
Once it’s all the way down, run your finger all the way around the top to be sure it’s completely seated and level with the surrounding hub.
The outer bearing can be greased and installed before or after placing the hub back onto the axle. If you decide to place the outer bearing into the hub before putting the whole assembly back onto the axle, be sure to keep your hand over the opening to prevent it from falling out.
Carefully slide the hub back onto the axle and hand-tighten the castle nut over the outer seal.
Adjust Bearing Play
Keep in mind that this isn’t the normal “nut & bolt” situation, where you simply torque the castle nut down tight. That would prevent the wheel from turning. But you also don’t want it to be loose, which would allow the hub to rock on the axle.
Adjust the castle nut to achieve the manufacturer’s recommended bearing play. Tighten the nut lightly, then back it off slightly as needed, just until the hub rotates smoothly. The trick is to have the nut as tight as possible without impeding the hub from rotating freely.
If you’re using a cotter pin, install a new one through the spindle and castle nut. We prefer to use a fresh cotter pin, but if the old one is in good shape, it can safely be reused.
Install Dust Cap
Once the bearings are in place, reinstall the dust cap. Make sure it’s properly seated and not damaged.
Reinstall the Wheel
Put the wheel back on the trailer and hand-tighten the lug nuts. Remove the jack stand, and lower the tire just enough so that it makes contact with the ground. This will prevent the wheel from spinning while you tighten the lug nuts.
Using a standard criss-cross pattern (tightening opposing nuts as you go around the wheel), torque all lug nuts firmly into place.
Check the Bearings and Clean Off Any Extra Grease
Before lowering the trailer completely off the jack, we suggest a final check. Raise the tire back up off the ground slightly. Then spin the wheel & tire by hand to make sure it rotates freely. We also rock the tire side-to-side to confirm there isn’t too much play.
If the wheel/tire spins freely and doesn’t rock side-to-side you can lower the trailer completely off the jack. Check for and wipe off any excess grease around the hub.
Repeat for Other Wheels
Repeat this process for each wheel, making sure that all bearings are properly inspected and repacked, and then lower the trailer back to the ground and tighten the lug nuts in a criss-cross pattern using your lug wrench.
Remember to refer to your trailer’s manual for specific guidelines and torque specifications as needed.
After driving the trailer for the first time, within the first 50 miles or so, be sure to re-check the hubs for leaks. Also, confirm that the lug nuts are all still torqued properly.
Routine repacking of trailer bearings is essential for maintaining the safety and performance of your trailer. It’s important to ensure that your trailer’s wheel bearings are in good shape and adequately lubricated, reducing the risk of overheating, premature wear, and potential failure.
Want to see all these steps being done? Here’s a video that shows it really well:
Free RVing Tips, Tricks, Reviews & Giveaways
As 20-year full-timers, we share everything we’ve learned about RVing over the years. Join our online community to receive a wealth of great RVing knowledge delivered daily to your inbox.
Whether you’re a new RVer or a seasoned full-timer, you’ll love the wide range of RVing topics we cover. Don’t miss a single article or any of our famous Giveaways. Subscribe to our newsletter today!
Sam
Saturday 9th of March 2024
We have a bumper pull 2506S Rockwood Mini Lite. I had to get the bearings done. I was inundated with information from the web, but none this detailed. You saved $350 + Tax (PA) at a dealer. The seal kit was $29, change from etrailer, grease, etc., for a total of about $70 for packing four bearings.
Thank you so much, Peter and John.
Frank
Monday 19th of February 2024
Lube the inside lip of the inner seal so that it doesn’t start out dry.
TheRVgeeks
Monday 19th of February 2024
Thanks for the added tip, Frank!
Gordon
Monday 19th of February 2024
I found that the lugs only hold the wheel/tire to the hub. Once the castle nut is removed, pull the wheel/tire/hub off all at once.
TheRVgeeks
Monday 19th of February 2024
Thanks for the tip, Gordon!
Pat
Monday 19th of February 2024
Thanks for the information we had to do our atv trailer and our boat trailer
TheRVgeeks
Monday 19th of February 2024
Apparently you two are handier than you think! 😄
Gordon
Monday 19th of February 2024
Back in the days when I did this myself, I never took the wheel/tire off the hub. It saves the time & effort, but makes it a little easier to get the side to side motion properly set when reassembling.
Is that still OK to do it this way? Is there a reason to remove the wheel/tire, aside from the physical size of the wheel/tire? I definitely would not want to take a HUGE motorhome wheel/tire combo off all at once.😉🙃
TheRVgeeks
Monday 19th of February 2024
Hey Gordon! We're TOTALLY with you on not touching big motorhome wheels & tires on our own, lest we get crushed... or a hernia! LOL We know you can re-pack grease from the front, but wondering if/how the rear bearing can be inspected without removing the wheel? Was yours a different style that we're picturing? Sorry if we're missing something.