
Painting an RV interior can give a rig a fresh new look. But if you intend to paint the interior of an RV, you need some RV-specific tips to get the best results and avoid common mistakes.
We recently posted about RV interior paint ideas and thought we should do a follow-up on some common mistakes people tend to make when painting in an RV.
While RVs may be homes-on-wheels, they’re not constructed in the same ways that sticks & bricks houses are. So, when you go to paint the interior of an RV, you’re facing some uncommon situations that can impact results, sometimes in some pretty serious ways.
Today we’re sending out some essential tips to keep in mind when you’re planning on painting an RV interior.
- 1) Clean the Surface of Your RV Interior Well
- 2) Important Tips About Taping
- 3) Never Use Water-Based Primers or Paint on RV Interior Wall Coverings
- 4) Use Separate Primer & Paint Products
- 5) Use Heavy-Nap Rollers When Painting an RV Interior
- 6) How to Handle Unpaintable Silicone Caulk in an RV Interior
- 7) Keep Resale Value in Mind
- 8) Have You Painted the Interior of an RV?
- 9) Free RVing Tips, Tricks, Reviews, Giveaways & More
Clean the Surface of Your RV Interior Well
As we noted in our post on RV interior paint ideas, the key to a good interior paint job is PREP. Preparing the surface you’re going to paint is an essential part of painting any home, and this is especially true of painting an RV interior. So a few of our tips are part of the important prep phase, which happens before you ever open a can of paint or primer.
No matter how big your rig may be, generally speaking, an RV is a small space. Cooking grease, moisture from showering, cooking, and just breathing, and lots of dust collect on the surfaces of your RV walls and ceilings.
Before picking up a paintbrush, it’s important to thoroughly clean the surface you’ll be painting with a solution that’s sure to cut through everything, including cooking grease. You may not think it’s there, but it probably is.
When you clean the surfaces on the interior of an RV prior to painting, use a product containing TSP or another effective degreaser that’ll also remove the dust you’ve accumulated in your rig as you’ve traveled.
We’ll include links to a couple of popular pre-paint cleaning products here. But we also want to note that many people achieve good results using a solution of Dawn dishwashing liquid and warm water. Dawn is well-known for its excellent grease-cutting ability.
Just be careful to avoid getting the walls of your RV overly wet. Remember, the walls of your RV are unlikely to be constructed like the walls of your sticks & bricks home. (More on that in just a minute.)
Here’s a TSP cleaner, specifically designed to prepare surfaces for painting:

- Removes deposits of grease, grime, smoke, soot, stains and chalked paint
- Suitable with most washable, floors and woodwork including decks and siding
This one uses a TSP substitute, is very popular, and gets excellent reviews:
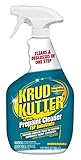
- Cleans and etches surface providing excellent adhesion, even on high gloss surfaces
- Removes tough stains like grease, smoke, mildew and dirt; leaving a clean, fresh surface
Important Tips About Taping
We’ve heard complaints from people who paint RV interiors and even home interiors that they prepped really well with quality painter’s tape. Then, when they pulled off the tape after working so hard to complete the paint job, the new paint came off with the tape in several areas. This left them with a lot of touch-up work to do, and a lot of frustration as well.
Here are options for frustration-free clean edges:
Don’t Tape at All
That’s right – it’s an option not to tape at all and some people do this successfully. It’s generally best to tape, but if you have a steady hand and some painting experience, you can use a high-quality edging brush without taping.
Just be sure to have a damp cloth in your other hand because you will have errors and need to clean them up immediately as you paint. This option is really best if you’re doing a small project, and it’s not for everyone. But it’s certainly an option for some.

- White & silver CT polyester with chisel trim
- Very soft formulation, feather stroke
Tape Using High-Quality Painter’s Tape
If you do tape, be sure to use a high-quality painter’s tape. It’s well worth the investment. Low-quality painter’s tape or masking tape is never a good idea. You won’t get the results you want, and you may have difficulty removing the tape without leaving residue or torn tape behind.
Worse yet, the tape may not cover well. That can leave you with paint on areas you were trying to protect by taking the time to tape in the first place.
According to many professionals, green Frog tape is one of the best choices.

- Advanced PaintBlock Technology: FROGTAPE Multi-Surface Painter's Tape is equipped with innovative PaintBlock Technology, which forms a micro-barrier...
- Versatile Application: This painter's tape is designed for use on multiple surfaces, including painted walls, trim, woodwork, glass, metal, and more.
Remove the Tape While the Paint is Still Wet
This is an important step. You don’t want the paint to dry before you remove the tape. if it does, the dried paint adheres the edge of the tape to the wall, so when you remove it, it can pull some of the new paint off the surface along with it.
Sometimes, particularly when applying multiple coats (maybe a coat of primer and 2-3 coats of paint), removing the painter’s tape while the surface is still wet isn’t practical. If you can’t remove the tape while the paint is still wet, the following solution will be helpful.
Cut Tape Away from Dried Paint
If you’re applying multiple coats and can’t remove the tape while the paint is still wet, carefully run a razor blade along the edge of the tape before removing it. Simply score along the edge after the final coat, to cut a line through the dried paint. Then, remove the tape before the last coat dries.
Be careful not to cut through the tape, or you may leave behind a thin line of it, which could pull paint off when removed.
Use a Metal Edger
Some professional painters use edgers (sometimes called paint guards or trim guards) instead of tape. These are generally stainless steel metal strips (some have handles). They typically range from about 12″ to 24″ inches long, but can be shorter or longer, as needed.
To use one, hold the metal edge against the wall, and any overlapping from your paintbrush goes onto the edger/metal strip. They’re easy to clean and give you a clean edge without using tape.
Here’s a 12″ version followed by a 23″ version:

- Painting Trim guard is perfect length and thickness for precision painting around walls, ceilings, windows and trim
- Stainless steel edge is easy to clean and more durable
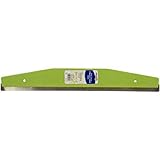
- The product is 23" Straight Edge Tool
- Easy to use
In case it’s unclear how one would go about using this type of paint/trim guard, here’s a quick video showing the process:
Never Use Water-Based Primers or Paint on RV Interior Wall Coverings
Do not use water-based primers or paint on any wall covering. Here’s why:
The substrate of an RV wall is frequently 1/4″ luan plywood or something similar. The adhesives that are used to hold the wallpaper to the substrate can easily be reactivated by water in primer or paint.
This can break the bond that holds the wallpaper to the substrate. That can leave you with a real mess that can turn your RV interior painting project into a nightmare involving the removal of every bit of wall covering and adhesive right down to the substrate. Oil-based paints are recommended.
Once you’ve cleaned and primed the surface with a high-quality primer, any high-grade latex paint (Sherwin-Williams, Behr, Benjamin Moore) should work well for RV renovating. You may have a favorite brand that you consider the best paint for RV interior renovations.
Here are the most important things to keep in mind when you’re painting RV walls or cabinets:
Prep work is job one! Wood filler, cleaning, priming, and taping take time. Don’t cut corners here. Then choose your paint colors carefully. Renovating an RV can be fun but you could be disappointed if you get carried away with the wrong colors.
Keep in mind that an RV is a small space, and you’ll be closely surrounded by those walls whenever you’re inside the rig. Remember, if you decide to sell or trade your RV in the future, purple isn’t everyone’s favorite color! (Yes, re-sale value is important… more on that below.)
Use Separate Primer & Paint Products
We know… it’s easier to use a combination primer + paint. While these may be/seem more convenient, it’s highly recommended to use separate primer and finish products when painting the interior of an RV.
Although it’s possible to get away with all-in-one products, durability won’t be as good as when you use a separate primer and paint. KILZ Odorless Oil-Based Primer is a great primer for RV interiors.

Use Heavy-Nap Rollers When Painting an RV Interior
Don’t make the mistake of using a foam roller for painting an RV interior. Rough/textured surfaces require a good heavy-nap roller. A 3/8″ nap should suffice for smooth surfaces like ceilings, but if your RV walls have textured surfaces, you may want to go with a 1/2″ nap.
It can also help to lightly sand the walls and other surfaces, but be aware that sanding can create a lot of unwanted dust in an RV, so light sanding is best.

- White Dove Multi-Pack 1/2" nap - 3-Pack Dump Bin
- White Dove Multi-Pack 1/2" nap - 3-Pack Dump Bin
How to Handle Unpaintable Silicone Caulk in an RV Interior
Many RV manufacturers use silicone caulk for good water resistance and because it’s clear and durable. However, silicone is UNPAINTABLE. (We use all caps here because that’s how unpaintable it is – completely unpaintable.)
We’ve seen RVers attempt to paint over silicone caulk only to be so frustrated that they ended up spending hours removing all of the silicone caulk throughout the area where they were painting. Don’t do that.
There are a couple of ways to deal with unpaintable silicone caulk.
- Try covering the caulk with an oil-based primer. While we haven’t done this ourselves, we’ve heard that a good quality oil-based primer (like the one we linked to above) will adhere to silicone. If it does, you can let it dry and paint over it.
- The second option is to use a paintable latex caulk over the silicone caulk. Then you should be able to paint over that new layer. Dap Alex Plus painter’s caulk is one of the best products for this. It contains a percentage of silicone but is still paintable.
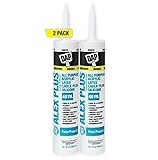
- This product is a 10.1oz White caulk
- Premium quality
Pro Tip: After running your bead of caulk, use a wet finger to smooth it out. PRO Pro Tip: Wear a disposable nitrile glove when smoothing the caulk. Your hands will thank us. Also, keep a damp cloth or rag with you as you work. You’ll need it!
Keep Resale Value in Mind
Be aware that resale and trade-in value will likely be impacted when you paint the interior of an RV. This is especially true of newer RVs.
If you’re considering painting the drab, faded interior of a 20-year-old RV, you may improve the look, positively impacting the value, depending on how well the paint job is done and what colors you use.
However, if you have a relatively new RV and don’t like the dark tones that RV manufacturers often use, be aware that the resale/trade-in value is likely to be negatively impacted by painting walls and cabinets.
Resale values for RVs that have been altered, including interior painting, are generally lower than those with original interiors. Potential buyers are concerned about how well the paint job will hold up over time and travel and may wonder why it was even necessary in a newer rig.
We read a piece from a longtime RV salesperson who noted that when they sold used rigs on their lot, the ones that were altered, including interior painting, were more likely to go to auction because they didn’t sell on the lot.
That doesn’t mean you shouldn’t do it. It just means you should be aware that this may be a consequence, which you’ll want to weigh it as you decide whether to paint your RV’s interior… and what color.
Have You Painted the Interior of an RV?
If you have experience painting the interior of an RV, we’d love to hear about it. Leave a comment below letting us know what worked, what didn’t, and how the paint job has held up over time.
Free RVing Tips, Tricks, Reviews, Giveaways & More
Subscribe to our daily newsletter! We’ve been full-time RVers for 20 years (!) and share everything we’ve learned about RVing in our daily blog posts. Join our online community to receive a wealth of great RVing knowledge delivered right to your inbox.
Whether this is your first time on the road or you’re a seasoned full-timer, you’ll love the wide range of RVing topics we cover. Don’t miss a single article or any of our famous RV gear Giveaways — Subscribe today!