

Anyone who has ever towed a travel trailer (or just about any type of trailer) or carried storage boxes, bikes, or other gear on their hitch knows that hitch noise and rattle can be pretty annoying. Fortunately, a hitch stabilizer is a simple remedy to stop the noise and make your travels more enjoyable.
In this post, we’re looking at hitch stabilizers, sometimes referred to as hitch tighteners, to see how they work, where to get one, and why you should. We already have one for our new travel trailer, even before we’ve taken delivery. That’s how great these inexpensive little devices are.
What Is a Hitch Stabilizer?
When you insert a drawbar/stinger into your tow vehicle’s hitch receiver to tow a trailer, it’s likely to shake, vibrate, and rattle. This happens because the tolerance between the inner dimension of your towing vehicle’s receiver and the size of the bar being inserted into it isn’t that tight.
That slight gap makes it easier to insert and remove the stinger from the receiver and allows for slight manufacturing differences. But that gap on the inside of the receiver allows what’s in it to move a little. Unfortunately, this makes noise and can bang around during towing. This is where hitch stabilizers/tighteners come in.
A hitch stabilizer uses leverage to apply pressure to the stinger/drawbar, holding it firmly against one side of the receiver. These small but heavy-duty devices clamp the bar firmly in place, preventing it from moving around inside the receiver as the rig moves down the road.
This easy-installation, inexpensive device is great for towing a travel trailer or boat trailer or even for a hitch-mounted rack, storage box, or bike rack. Whatever you’re using your vehicle/trailer’s hitch receiver for, a hitch stabilizer/tightener comes in handy to stop the movement and the resulting noise.
Even though we’ve never owned a travel trailer (until now!), we’ve used a hitch tightener/stabilizer in two different ways: for our Roadmaster Nighthawk tow bar, and the bike rack mounted into the hitch on the back of our car. They make a world of difference, and we knew we’d need one on our new trailer from day one.
Benefits of Using a Hitch Stabilizer/Hitch Tightener
There are a few different benefits of using a hitch stabilizer/tightener.
Stops the Noise/Rattle
The most common reason people use a hitch stabilizer/hitch tightener is to stop the rattle caused by the gap we just mentioned. If you’ve been towing a trailer without one, you may not have noticed how much noise the hitch makes. Next time you’re getting parked in a campground, listen as you drive forward and backward. Once you notice how much a trailer hitch rattles and bangs around without a hitch tightener, you’ll probably want one, too.
Prevents Wear
Over time, the movement between the stinger and hitch receiver can cause wear on both parts. This can lead to rust, which is caused by the movement wearing away the protective paint/coating. Over a long enough time, it could even lead to metal fatigue and failure.
Increases Stability
If you use your hitch to carry things like an RV bumper rack (storage tray/box) or a bike rack, a hitch stabilizer increases the stability of whatever you’re carrying. When we first installed our bike rack, it wobbled around a lot. Once we added a hitch tightener, the entire rack was much more stable and quiet, including the bikes themselves.
Drawbacks of Hitch Stabilizers
We can think of only one drawback of using a hitch stabilizer. Depending on the type of stabilizer you buy, tools are likely required to install or remove it. That means whenever you want to remove what’s in your receiver, it will take a wrench or two, and a little extra time. There are some hitch stabilizers that don’t require tools to remove, and we’ll link to a couple of those below.
How to Choose a Hitch Stabilizer/Hitch Tightener
When choosing a hitch stabilizer/tightener, you need to match the stabilizer/tightener to the size of your receiver (the part that’s attached to the tow vehicle).
The most common receiver size is 2”, but smaller (1.25”) and larger (2.5”) ones are available. To determine the size you need, simply measure across the opening of your receiver.

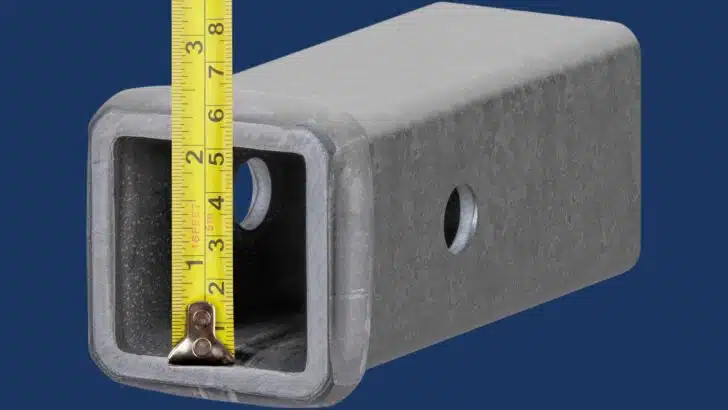
To determine what size hitch stabilizer/tightener you need, simply measure the opening of your hitch receiver. Two inches, like the one shown above, is a very common size, but some are larger or smaller.
Some hitch receivers have an extra threaded hole, which uses a set screw to apply pressure/force to whatever’s inserted into the receiver. This can reduce vibration/rattling, but we’d suggest that these aren’t as effective as the type we use at stopping movement between the receiver and the stinger/drawbar.
The first type of hitch stabilizer we’re linking to is the type we’re sure will eliminate any rattle/movement because we’ve used this type (and brand) for years. We just bought a brand new one for our new travel trailer. Once you clamp one of these in place, the receiver and stinger are so solidly connected it’s as if they’re made from a single piece of heavy steel. There’s no movement, rattle, or noise from the connection. At. All.
Note that these do require tools to remove and install, but they’re very effective at stopping rattling noise and movement.
PRO TIP: Always install flat washers first, followed by the lock washers and then the nuts. We saw a comment where someone complained about the nuts loosening over time, and they included a photo of their hitch with the lock washers installed first. No wonder they loosened up! Even quality equipment requires proper installation. Even better, we’re doing the same thing that David mentioned in the comments below… replacing the nuts with Nylocs!
Rhino USA Hitch Tightener for 1.25” or 2” Receivers

- AMERICAN OWNED, FAMILY OPERATED - Join the Rhino Family & Support a USA based Father/Son Business!
- ELIMINATES HITCH MOVEMENT - Completely Eliminating all Hitch Noise, Rattle & Wobble
Rhino USA Hitch Tightener for 2.5” Receivers

- ELIMINATES HITCH MOVEMENT - Completely Eliminating all Hitch Noise, Rattle & Wobble
- FITS COMMON HITCH SIZES - Our Heavy Duty Hitch Tightner Fits all Class I, II, III & IV Hitches
The following two are an option for anyone who needs to regularly and easily remove the anti-rattle device without tools to remove what’s in the receiver. While we don’t have any personal experience with these, the concept is the same as the type we use (above), except that you don’t need tools to remove or install them.
CURT No-Tool Anti-Rattle Hitch Clamp (2”)
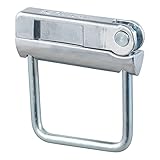
- QUIETER TOWING. The CURT anti-rattle hitch clamp promotes quiet towing of your trailer by clamping down onto the receiver hitch connection. Warning:...
- EASY TO USE. This easy-to-use anti-rattle hitch tightener requires zero tools for installation. Simply clamp the U-bolt down onto the shank and...
CURT No-Tool Anti-Rattle Hitch Clamp (2.5”)

- QUIETER TOWING. The CURT anti-rattle hitch clamp promotes quiet towing of your trailer by clamping down onto the receiver hitch connection. Warning:...
- EASY TO USE. This easy-to-use anti-rattle hitch tightener requires zero tools for installation. Simply clamp the U-bolt down onto the shank and...
If you want to eliminate the rattle/noise of your hitch receiver when it’s in use, this is an inexpensive way to do it that can also offer additional benefits in terms of wear and stability.
For more on trailer hitches, see our posts on proper trailer hitch height, weight distribution hitches, drop hitches, and our guide to how to hitch a trailer safely.
Free RVing Tips, Tricks, Reviews & Giveaways
As 20-year full-timers, we share everything we’ve learned about RVing over the years. Join our online community to receive a wealth of great RVing knowledge delivered daily to your inbox.
Whether you’re a new RVer or a seasoned full-timer, you’ll love the wide range of RVing topics we cover. Don’t miss a single article or any of our famous Giveaways. Subscribe to our newsletter today!
Roger Smith
Sunday 28th of April 2024
I have had great success with the Hitchclamp cross clamp for my 3" Ford receiver needing a reducer to a 2.5" Equal-i-zer hitch. I have tried the others.
TheRVgeeks
Tuesday 30th of April 2024
Thanks, Roger. Hadn't seen the Hitchclamp before... looks really well made and a very interesting design!
David B
Sunday 28th of April 2024
I replaced the nuts with nylon locking nuts for added security that the nuts won’t back off.
TheRVgeeks
Sunday 28th of April 2024
We’re doing the same exact thing!
Greg Gimlick
Sunday 28th of April 2024
I’ve used this Blue Ox version for years, the price has gone up significantly since I bought mine, but it takes up slop in two directions: https://amzn.to/49VBXcz
Bill Scott
Sunday 28th of April 2024
I have a hitch stabilizer on our bike rack and it works well. However there are 3 additional connection points on he bike rack that are also lose and rattle around. To resolve I inserted shim stock on 2 sides of each connection and the entire bike rack is more rigid.