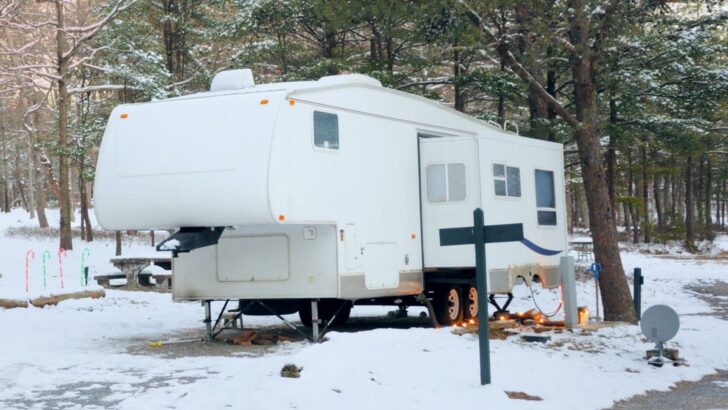

As winter rolls in once again, lots of RVers put their rigs into hibernation mode, while others travel to warmer climates. Some RVers, however, spend time camping in the winter in areas where temperatures regularly approach or drop below freezing. Some travel to visit loved ones over the holidays or take an occasional winter camping trip, while others camp in cold and snowy weather longer-term or throughout the winter. With these folks in mind, today’s post offers The RVgeeks’ 15 tips for winter RV living.
-
1)
Can I Use My RV for Camping in the Winter?
- 1.1) Fill Your Fresh Water Tank and/or Use a Heated Water Hose
- 1.2) Fill Propane or Connect to an External Propane Tank
- 1.3) Keep Sewer Hose Off the Ground and Flowing Downward
- 1.4) Keep Gate Valves Closed and Insulated During Winter RV Living
- 1.5) Run a 60-Watt Incandescent Light Bulb
- 1.6) Seal Off Sewer Hose Entry(ies)
- 1.7) Use Steel or Brass Wool to Seal Small Openings
- 1.8) Use a Remote Temperature Sensor
- 1.9) Moisture Control For Winter RV Living
- 1.10) Use Holding Tank Heating Pads
- 1.11) Warm Your Bed to Use Rig Heat Less
- 1.12) Insulate RV Windows
- 1.13) Insulate Your Skylight
- 1.14) Cover AC Unit/Units
- 1.15) Watch this Video from Mortons on the Move
- 2) So It’s Possible to Go Camping in Sub-Freezing Temperatures?
Can I Use My RV for Camping in the Winter?
You can absolutely use your RV for camping in the winter, provided you prepare adequately to keep yourself and your RV safe from harm.
It’s not easy to camp in winter, but many people do it with joy and very little stress, and that’s because they’ve learned how to prepare their RVs for winter RV living. They know how to keep the plumbing system from freezing and bursting, keep the temperature inside the RV at a safe and comfortable level, reduce or prevent moisture accumulation, seal out intruders with little paws and big whiskers, and many other important winter camping preparations.
Anyone who’s lived in an RV for any duration of time in cold and snowy climates is likely to have a list of things to do – and a list of things to NOT do – to stay safe and warm while keeping the RV from winter damage.
Here are 15 of our top tips for winter RV living:
Fill Your Fresh Water Tank and/or Use a Heated Water Hose
Water. It’s very important for a multitude of reasons, but when the temperature falls below freezing, water turns to ice. And when it does this, it expands… potentially bursting/damaging hoses and plumbing. For this reason, if you have the intention of doing some winter camping, you’ll need to put water on the top of your list of things to prioritize.
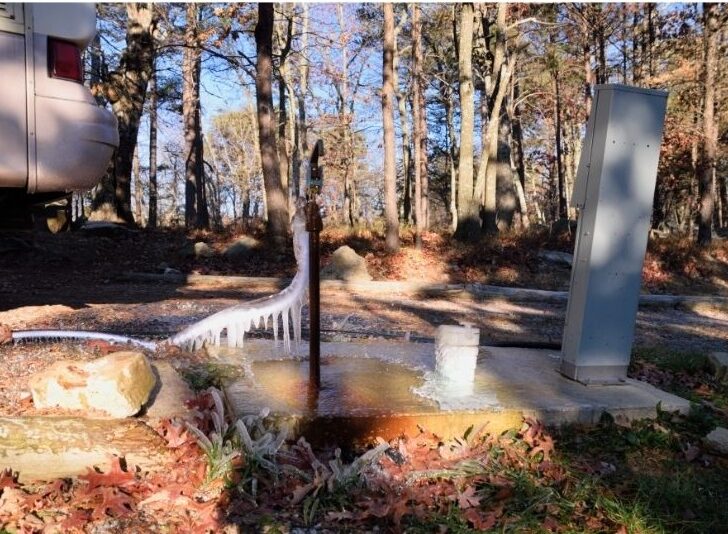

A frozen water hose like the one shown at this campground spigot means no water coming into your RV, and may also mean a plumbing disaster if your rig’s plumbing isn’t adequately protected from freezing temperatures.
If you’re winter camping for a short duration (say a week or less), you can simply fill your fresh water tank and plan to use that water for washing, cooking, drinking, etc. If you’re parked near a city water source of any kind, you can connect your fresh water hose and refill your fresh water tank as needed. This technique avoids the issue of your fresh water hose freezing at all.
However, if you’re planning to be winter camping in an area where ambient temps are likely to hit freezing or below on a regular basis, you may wish to invest in a heated water hose.
You can buy one as noted in the previous link, or you can make your own heated water hose as we’ve done. Either way, it’s very important to make sure that the water coming into your RV from your city water source can’t freeze during periods of winter RV living.
And while you’re at it, be absolutely sure to always use a water pressure regulator when connected to any city water source – including in the winter, in which case you may want to wrap it in some type of insulation.
Fill Propane or Connect to an External Propane Tank
Prior to heading out on a winter camping trip (or before getting settled at a long-term winter campsite), be sure to fill your propane tank/tanks, or obtain the necessary materials to connect to an external propane tank as we show in this YouTube video.
If you’re going to need propane for heating your rig and water, and for cooking, you’ll need to prepare ahead of time so that you don’t run out (we recommend having a couple of different options for heating your rig if you’ll be camping in sub-freezing temperatures because you can’t risk losing all of your heat sources).
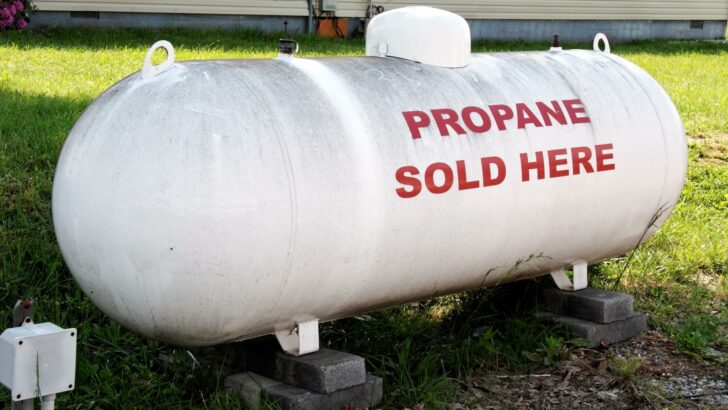

Don’t run the risk of running out of propane when you need it most… refill your tanks ahead of time!
Keep Sewer Hose Off the Ground and Flowing Downward
If you’re going to be connected to a sewer inlet during your stretch of winter RV living, you’ll want to keep your sewer hose off the ground and running on a downward slope. An easy way to achieve both of these goals is to do what we’ve done… which is to use a Slunky sewer hose support.
The Slunky elevates and supports your sewer hose (off the frozen ground) and provides the slope you need for proper drainage. The Slunky is a 20-foot support that’s 7” tall at the RV end, sloping to 4.5” in height at the sewer end.
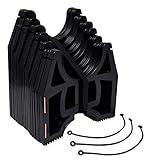
- RV SEWER HOSE SUPPORT: Elevated design supports your drainage hose and promotes better draining
- IMPROVED DESIGN: 26% wider and 30% deeper for increased stability and a smoother overall RV experience
Keep Gate Valves Closed and Insulated During Winter RV Living
Along with using a sloping sewer hose support, you’ll want to keep your gray water and black water gate valves closed (you should ALWAYS leave your black valve closed!), opening them only when you want to dump your holding tanks.
When left open, only small amounts of gray water will drain out through the hose at a time. That small flow could freeze as it flows through… slowly building up (like the layers of a pearl) until the hose is blocked.
Also, if you’ll be camped in freezing temps for longer than a few days, you may want to consider insulating your gate valves so they’ll open when you need to dump those tanks. Frozen gate valves and a full holding tank make a miserable combination.
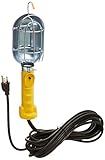
Run a 60-Watt Incandescent Light Bulb
When we’re winter camping in very cold temperatures, we run a 60-Watt incandescent light bulb in our rig’s “basement” which is where our water compartment is located. While you might not think of a 60-Watt light bulb as providing much heat, it’s a small space and it serves to achieve our goal of not having to run our rig’s furnace (our single biggest consumer of propane) to keep the water compartment warm.
We hang the lightbulb safely using a work light bulb guard like this:
- Designed in the USA with quality materials
- Used in Tactical, Outdoor, Recreation levels
Keeping the water compartment warm with the light bulb allows us to shut off the furnace and use space heaters to stay warm inside the RV.
Please note: we specifically referred to an incandescent light bulb. LED bulbs don’t give off the heat that incandescents do (it’s part of the reason they’re so much more power-efficient), and so LED bulbs wouldn’t be effective in this application. Look for “rough service” bulbs (used in high-vibration locations like garage door openers) like these:

- 60 WATT A19 FROSTED GLASS ROUGH SERVICE BULB - Provides 550 Lumens of output; Comfortable 2700K soft white color; Standard E26 Medium Base
- STANDARD HOUSEHOLD SERVICE LIGHT BULB - Rough service bulb contains additional wire to support and protect the filament from vibration and external...
Seal Off Sewer Hose Entry(ies)
Another way to tend to the warmth of the basement or water compartment during winter RV living is to seal off the sewer hose entry. If you’ve got your sewer hose connected, then you’re probably running it through a hole provided in the bottom of the bay. That hole allows cold (and potentially rodents) into the water compartment, thus negating the warmth provided by the light bulb.
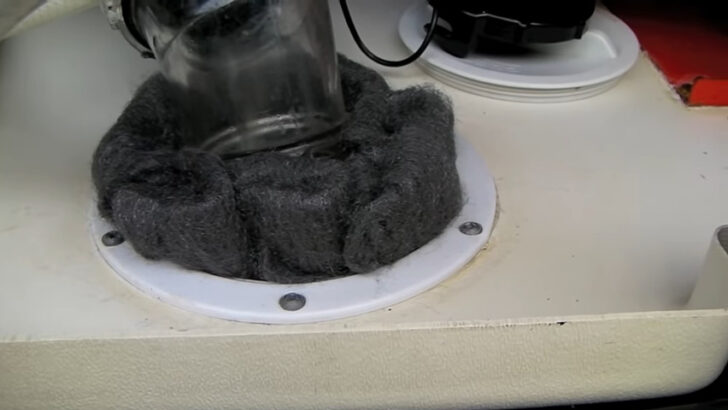
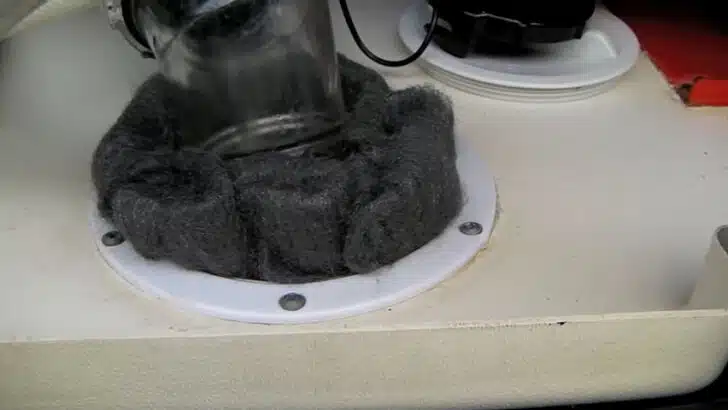
We use steel wool to seal around our sewer hose opening when camping in the cold. This serves two purposes – to keep the cold from entering the bay and to keep mice from entering as well! If staying in a damp climate, or for longer term, consider brass/bronze wool instead, since it won’t rust.
Use Steel or Brass Wool to Seal Small Openings
To keep mice from seeking warmth inside our RV we’re careful to seal all small openings using steel wool. Brass wool also works. We also set traps in the basement and anywhere else rodents may be able to enter, just in case they foil our attempts to seal them out. We’re not mean-spirited and we do love animals. We just don’t like stowaways that reproduce at warp speed and love to gnaw on everything in sight (and lots that ISN’T in sight)… ending an otherwise wonderful winter RV living experience!
Use a Remote Temperature Sensor
We have an indoor/outdoor thermometer with a wireless temperature sensor. When camping in very low temperatures, we place the sending unit in our basement/water compartment and bring the monitor into the RV so that we can keep an eye on the temperature in that bay. This works very well and serves to alert us if the temperature in the water compartment should drop.
One like this should serve the purpose well:
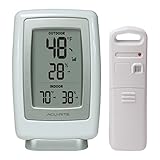
- Digital thermometer | Monitor indoor & outdoor temperature, directly from the room thermometer
- Hygrometer | Humidity gauge allows you to track comfort levels inside & outside your home
Moisture Control For Winter RV Living
Moisture control is essential in an RV to prevent mold and mildew from causing potentially serious issues. In winter, it’s especially important to keep moisture at bay. The three greatest producers of moisture in an RV are showering, cooking, and breathing. Since we generally need to do all three, we suggest keeping moisture at bay using a few simple methods, especially during periods of winter RV living.
Even though you’re probably inclined to want to seal everything up airtight to keep heat in and cold out, DON’T! You’d just be trapping in all of the moisture you’re creating in your RV. So…
First, run your vent fans… yes, even in winter. You need to be able to run your roof vent fans in any kind of weather. This is why we have long recommended the installation of RV roof vent covers. They allow vents to be open without letting rain or snow enter the RV.
Check out our post on how to install an RV roof vent cover for further information. Vent covers aren’t expensive and are well worth the minimal effort to install.
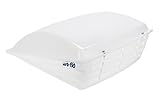
- Offers 30 percent more open vent area than other brands
- Mounting hardware included; Mounts to existing 14” x 14” roof vents
Second, we recommend using a squeegee to pull the water off of your shower walls and toward the drain after each shower. If you don’t do this, your RV absorbs a significant amount of moisture while the shower is drying on its own because the water is evaporating.
A shower squeegee is also inexpensive but is an important tool in keeping moisture at bay. We use it all year long – not only when winter camping.
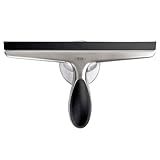
- Wipes off tiles, mirrors, shower doors and windows
- Flexible blade works on rippled surfaces
Finally, if you take the actions noted above and still continue to see moisture accumulating on your RV windows (which means your RV is absorbing moisture in the walls, etc. as well), you can opt to use a small electric dehumidifier (if you’re connected to shore power) or a dehumidifying product like DampRid or something similar positioned throughout the interior of the RV.
Use Holding Tank Heating Pads
If you’re winter camping in sub-freezing temperatures for an extended period of time, you may need to warm your holding tanks by using holding tank heating pads. Some RVs come from the factory with tank heating pads (we opted for them when we bought our Newmar Mountain Aire, and ultimately we’re glad we did).
We recently published an entire post detailing what holding tank heating pads are, how they work, and five of the best on the market. You can check out the 5 Best RV Tank Heating Pads, where you’ll also find information about pipe heaters, gate valve heaters, and elbow heaters as well.
Warm Your Bed to Use Rig Heat Less
This is an easy tip and it works very well. So that you don’t have to run the heat throughout your rig or run your space heaters all night to stay warm, use warm linens including flannel sheets, and invest in an electric mattress pad or blanket to take the chill out of the bed by preheating it before you get in. You can thank us later.
Just be aware… if you’re not running your propane furnace, you aren’t supplying any heat to your RV’s basement/water compartment(s). Most RV furnaces are configured with a duct or blower designed to add heat there whenever the furnace runs. If you’ve set the heat back too low, or are using small space heaters inside the living space to avoid running the furnace, your basement/water compartment isn’t being heated… so use a remote temperature sensor and/or an incandescent bulb like the one listed above.
Insulate RV Windows
You may also want to consider insulating your RV windows depending on how long you plan to be winter camping in very cold temperatures.
You can insulate windows with heavy curtains or you can create DIY “storm windows” using ⅛” plexiglass or PETG panels which you’ll custom cut to fit your windows. You would adhere them to your windows using clear double-sided mounting tape like this:
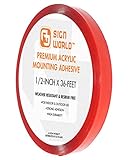
- PRESSURE SENSITIVE - Press firmly for 15-20 seconds to activate bond, holds up to 5 lbs per square inch of tape.
- WEATHER RESISTANT - Using industrial-grade heavy duty acrylic adhesive, this is perfect for indoor and outdoor mounting projects. Whether it be in...
Many campers choose to use Reflectix, heavy-duty foam board, or even bubble wrap to insulate windows. The problem with these products is twofold. First, they seal out the light and need to be removed and installed daily to allow the sun in (unless you like living in a dungeon). Also, they tend to allow moisture to accumulate on the windows.
You can also use a combination of choices to cover your windows such as your choice of window covering combined with heavy-duty curtains. Although we often think of them as insulation from the sun, high-quality windshield covers can also be helpful in cold weather.
Insulate Your Skylight
You may also want to insulate your skylights using a pre-made skylight cover like this:
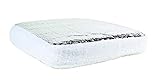
- RV VENT REFLECTIVE INSULATION: Camco’s vent insulator blocks the sun's damaging rays. It helps keep your RV cooler in the summer and warmer in the...
- SAVES ENERGY: This product reduces heat transfer and increases A/C efficiency.
These are inexpensive and serve to insulate your RV from the cold that can come through the relatively thin plastic of the skylight. Please note that this one is 14” x 14”. You’d need to measure the inside of your skylight frame to obtain the proper dimensions for your insulator.
Some RVers use these in their roof vents as well, but if you do this, remember not to cover them all as it’s very important to run a roof vent fan to prevent moisture from accumulating in the RV.
These skylight/vent insulators are also good to keep the heat out in summer.
Cover AC Unit/Units
Cover your roof air conditioning units. This is important from the perspective of keeping the cold from entering your RV in winter, and also as a means of protection from the elements. Check out this post from our friends Tom & Caitlin Morton for more on air conditioner covers.
Of course, you don’t want to do this if your RV’s air conditioners are also heat pumps and you plan to use them as a source of heat while you’re camping. Just be aware that they’ll only work in outside temperatures of about 40°F and warmer, so they probably won’t be of much use when the temps really begin to drop.
And speaking of Tom and Caitlin, they’re our 15th tip for winter RV living!
Watch this Video from Mortons on the Move
So It’s Possible to Go Camping in Sub-Freezing Temperatures?
It’s possible and it’s even fun! However, as we’ve noted above and as the Mortons note in their video, it’s imperative to maintain attention to safety when camping in freezing temperatures. Not only is it important to stay warm and healthy, but you have to be very cautious with propane and even electricity.
Preparation is everything. If you’re adequately prepared, you can indeed enjoy camping in the deep freeze. We think we might stick mostly to snowbirding – (camping all winter without the snow).
Geek Out with Us Every Week
Join our newsletter to learn about all things RV-related. Every week we offer free tips, tricks, product reviews, and more to our online community of RVers. So, whether this is your first time on the road or you’re a seasoned expert, we’d love for you to geek out with us!
Hunter Dotson
Saturday 7th of January 2023
Please send me your newsletter. Thank you!