
Pleated day/night window shades are a common feature in just about every class of RV. The design relies on thin fabric cords sliding across hard plastic parts, so cord wear and breakage is not only a distinct possibility but a fairly likely probability. Fortunately, restringing RV pleated shades isn’t difficult… IF you know how.
Restringing RV pleated window shades is a fairly easy DIY job, with the majority of the cost being labor. So, in today’s post, we aim to save you lots of money and frustration by showing you how to restring RV pleated shades.
Armed with the instructions in this post, plus our video and the downloadable PDFs we’ll provide below (with diagrams for restringing 2-string, 3-string, and 4-string shades), you’ll be a pro in no time flat. So, let’s get to it!
???? More of a visual learner? Skip down to the video and watch, instead of reading!
- 1) Why Do My RV Pleated Shades Break?
- 2) What Do I Need to Restring My RV Pleated Shades?
-
3)
How to Restring RV Pleated Shades
- 3.1) Remove any decorative window treatments.
- 3.2) Unscrew the cord anchors that hold the strings in place.
- 3.3) Unclip the top of the shade and remove it from the wall.
- 3.4) Remove the knobs used to open and close the pleated shades.
- 3.5) Remove the cord anchors from the cords
- 3.6) Remove the end caps
- 3.7) Disassemble the RV pleated shade
- 3.8) Remove the old cord
- 3.9) Measure out the new cord
- 3.10) Prepare the spring
- 3.11) Re-string the night shade (upper) portion of your RV pleated shade
- 3.12) Re-string the day shade (lower) portion of your blind
- 3.13) Re-assemble the day & night shade sections
- 3.14) Re-assemble the bottom bar/rail
- 3.15) Reassemble the top bar/rail
- 3.16) Re-insert the end caps
- 3.17) Re-attach the knobs
- 3.18) Prepare your re-strung RV pleated shade for installation
- 3.19) Re-attach the wall anchors to the new cord(s)
- 3.20) Mount the blind back into its brackets
- 3.21) Attach the wall anchors to the wall & adjust the cord
- 3.22) Final Step to Restring RV Pleated Shades: Re-install your window treatment
- 4) Restringing RV Pleated Shades is Even Easier With Our Video Tutorial!
- 5) Conclusion: How to Restring RV Pleated Shades
Why Do My RV Pleated Shades Break?
We’ve been full-timing in our current RV for well over 16 years now, and we’ve had to restring shades an average of once or twice a year or so. The issue is in the design, which calls for there to be enough tension on the cords to hold the shades where you put them, preventing them from falling on their own.
However, keeping tension on the cord also increases the friction against the hard plastic parts as you open and close the shades. So it’s a delicate balance that sooner or later leads to broken cords.
We keep a supply of replacement cord on hand for that inevitable time when one of the shades begins to fall loose at an angle, letting us know that the cord is frayed and about to break.
What Do I Need to Restring My RV Pleated Shades?
Knowing how to restring RV pleated shades is about 99% of what you need to get the job done. This is not only an easy project but also an inexpensive one.
The single item required to complete the job is replacement cord, which is cheap and readily available. Very minimal mechanical skills or tools are required.
The following steps, some cord, and a little time, patience, and care are all that’s needed for this task.
You can buy the cord on Amazon as shown below, or you can purchase it at a fabric store or through the manufacturer of your shades. Having a spool on hand will ensure that you’re prepared whenever one of your pleated shades needs restringing (and trust us… they will!).
Note that there are a variety of colors and diameters available. Our blinds use the 1.4mm diameter string, but be sure to check your old string (in a non-frayed section) to see if yours is different and order accordingly.

- BLIND CORDS - An industrial strength polyester lift cord to restring, repair, and build your own blinds. Compatible with all mini-blinds and roman...
- POLYESTER RESISTANCE - Each roman shade cord is composed of 100% polyester fibers that ensure long-lasting, everyday use. Preventing cord strands from...
How to Restring RV Pleated Shades
Remove any decorative window treatments.
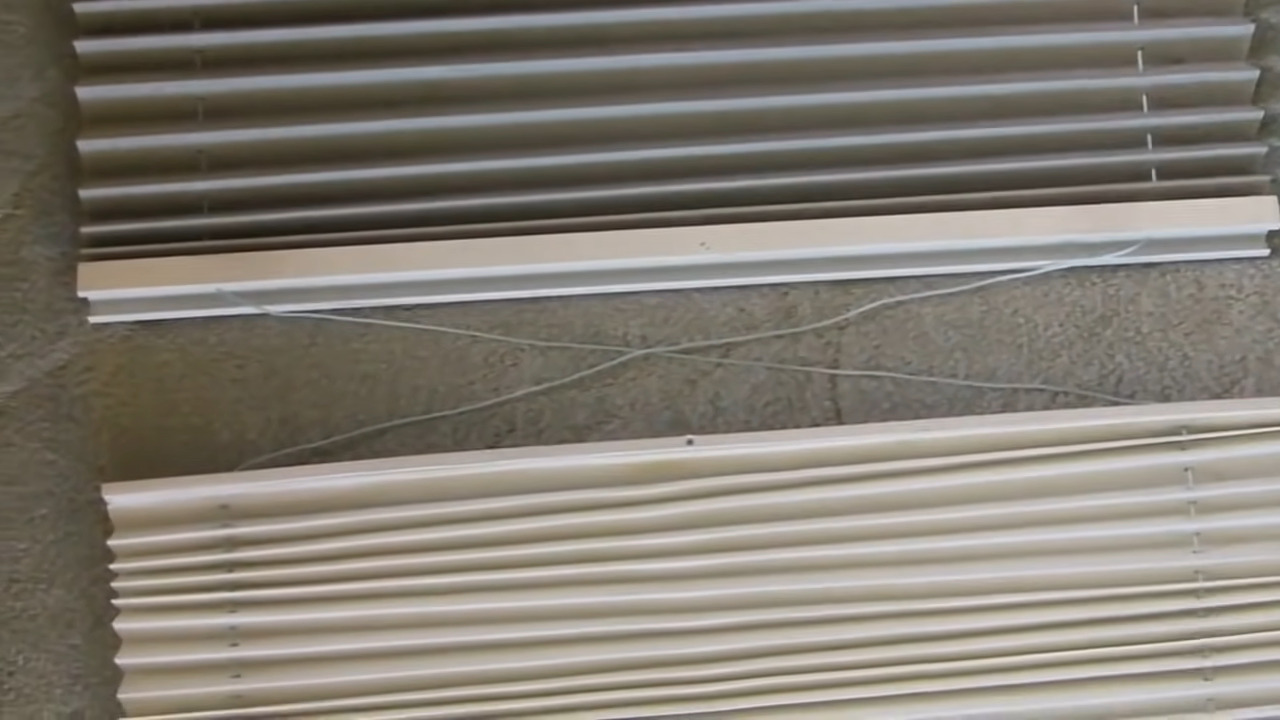
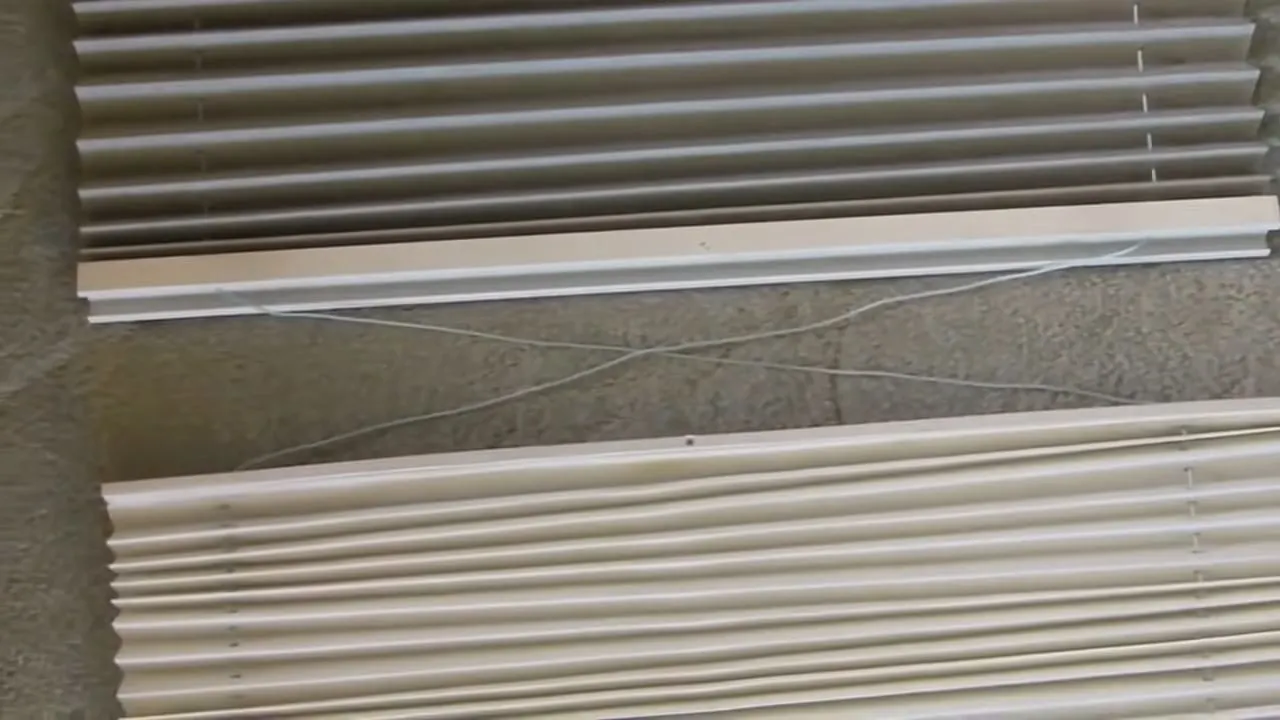
If your RV has any kind of window treatment (also known as a valance or “lambrequin”) it’s best, or likely necessary, to remove it prior to working on the blind. The strings for the blind are held in place at the bottom by screws inside small spools, which may be hidden or hard to access with the window treatment in place.
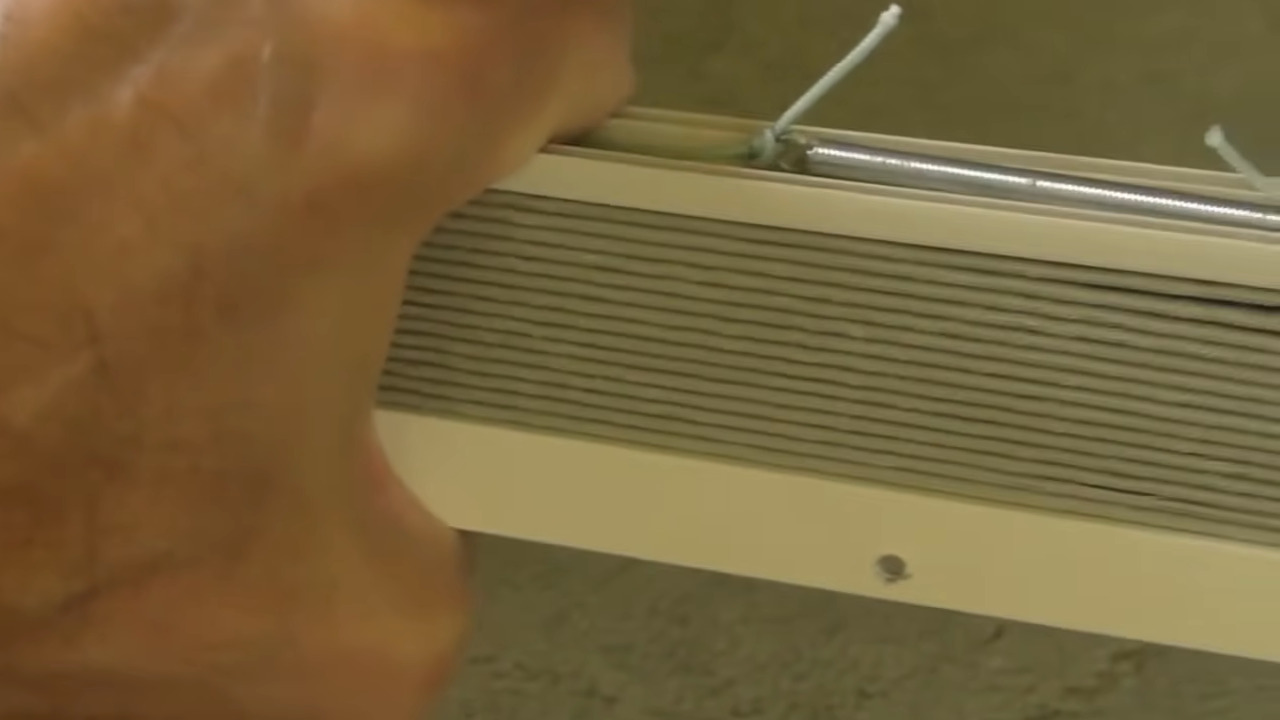
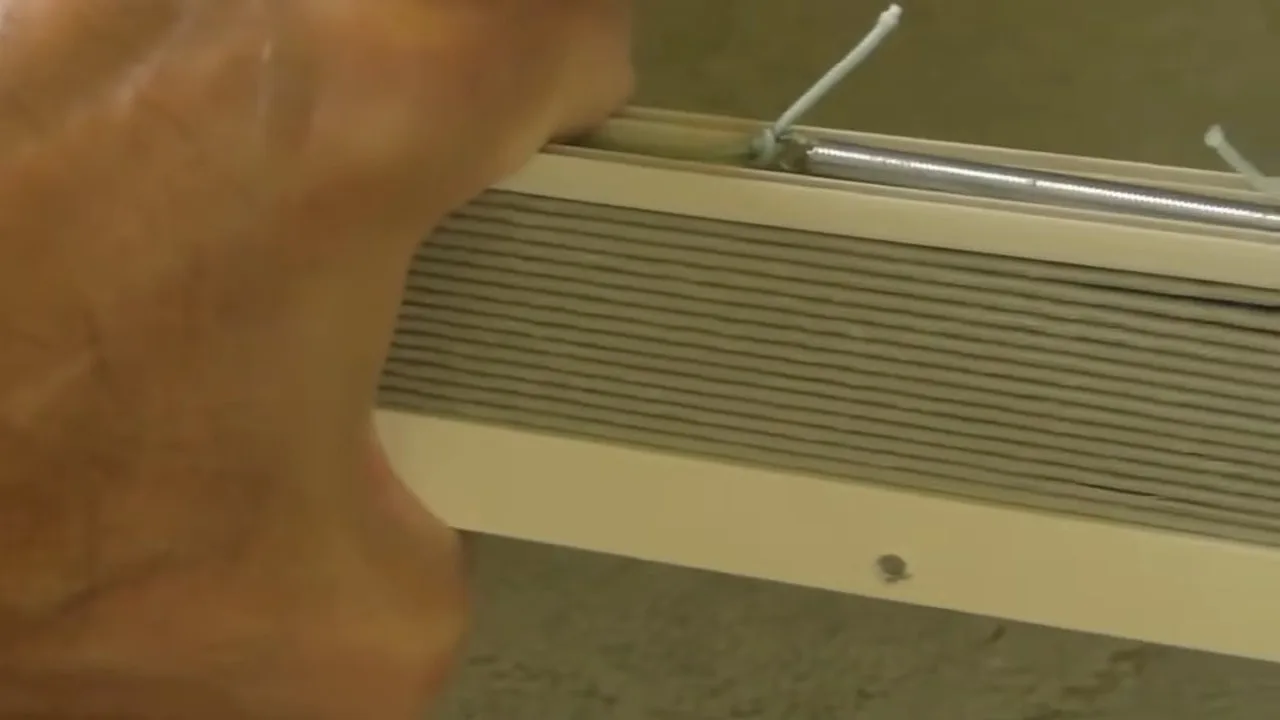
Here you can see a frayed string that is just about to break.
The frayed area of this cord is a sure sign that it’s about to break, rendering our shades unable to work properly.
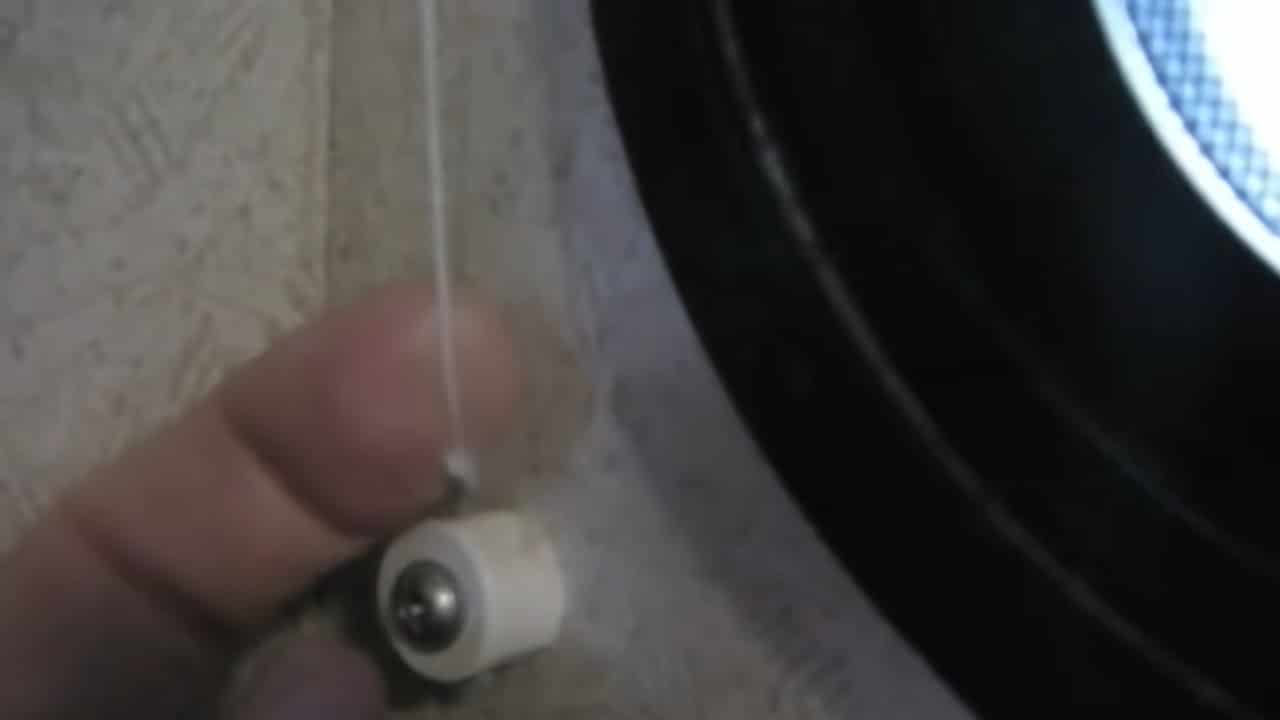
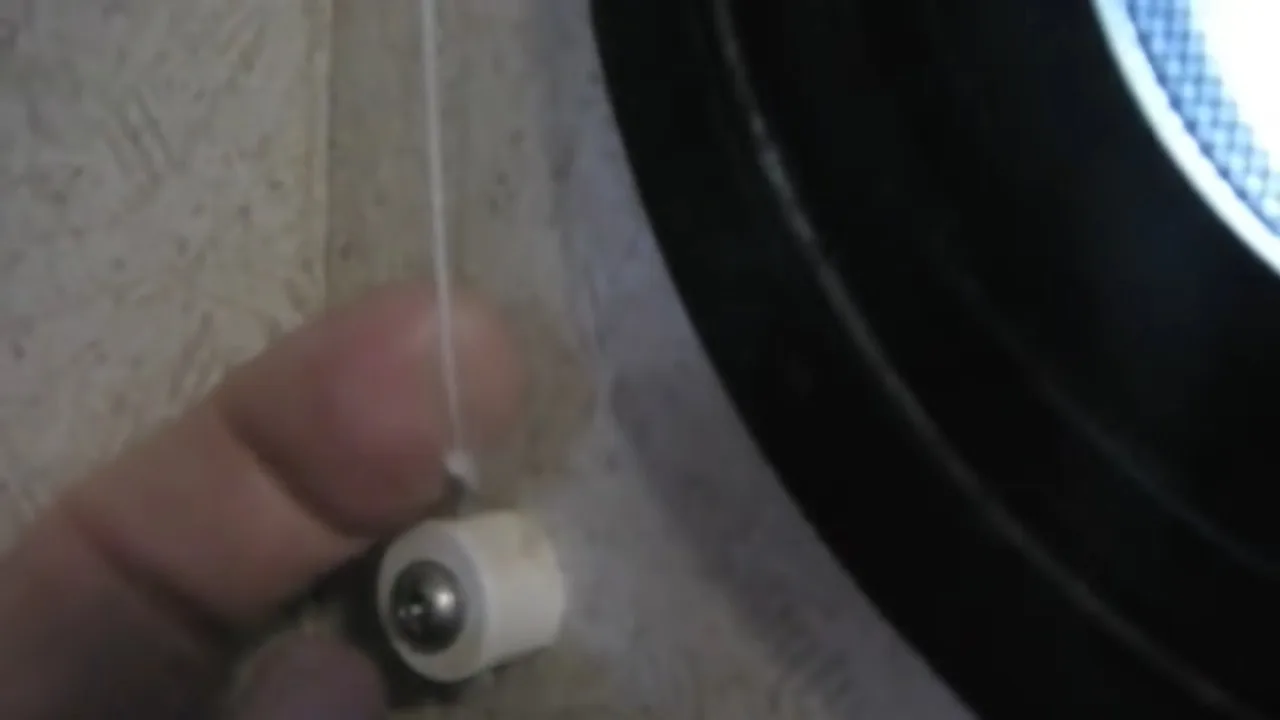
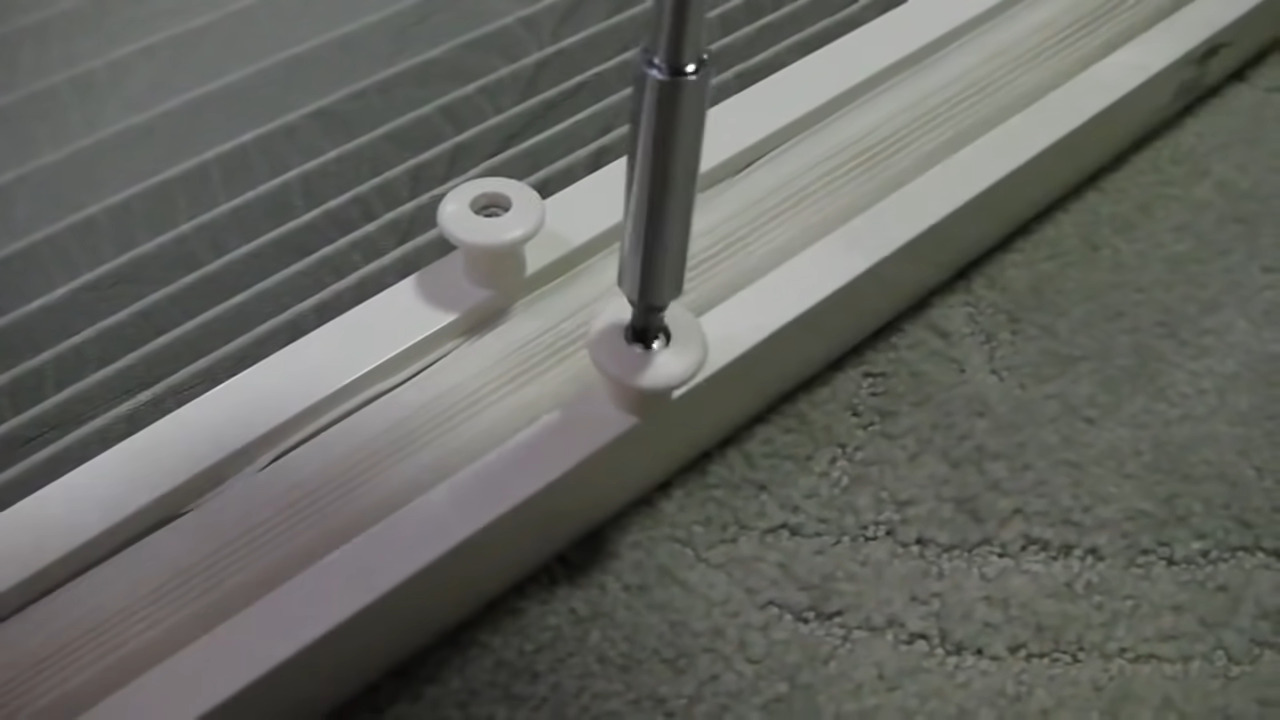
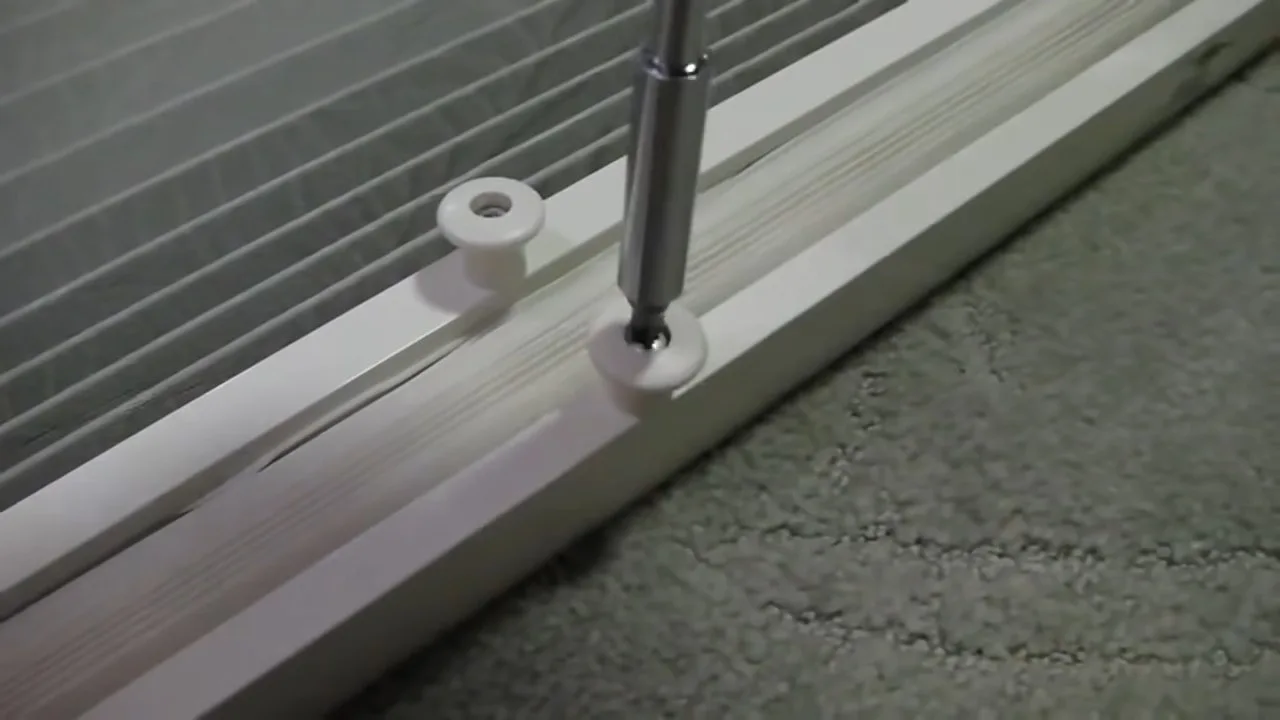
Unscrew the cord anchors that hold the strings in place.
Once those are loose, the only thing holding the entire blind in place are the clips at the top of the shade.

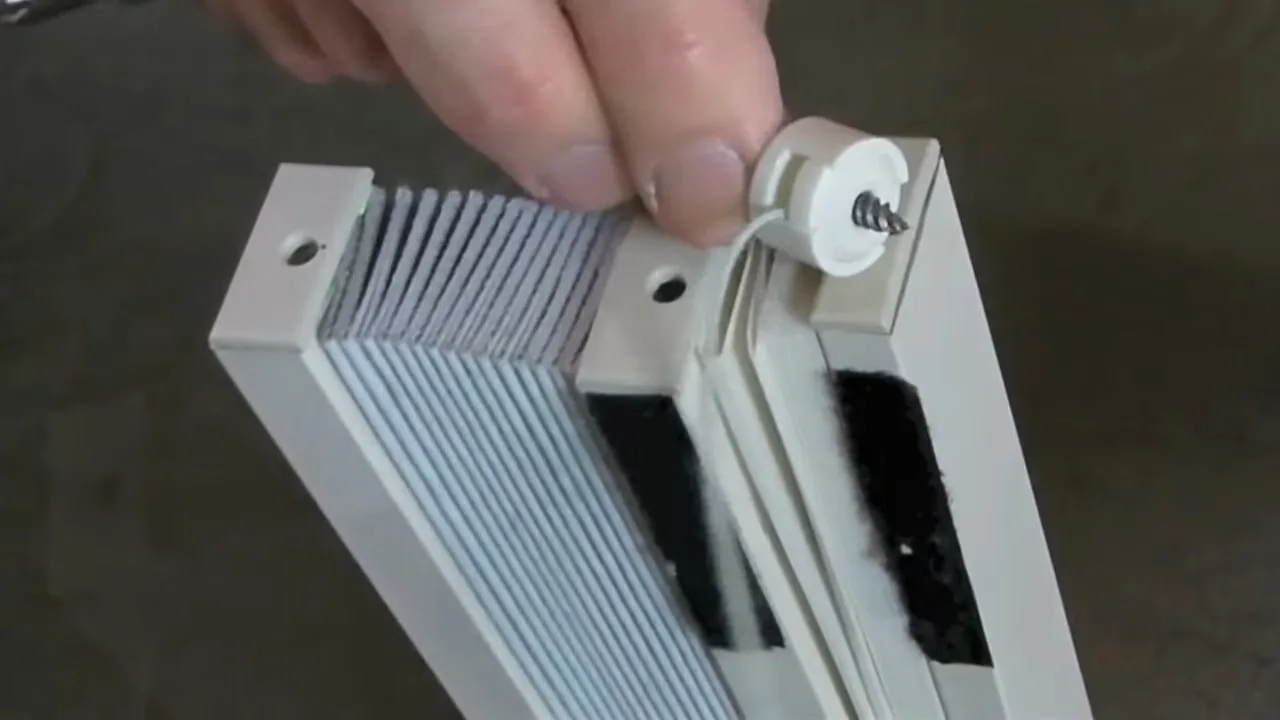
These small attachments at the lower ends of the shades hold the cord in place. Simply unscrew them to remove or adjust the cord.
Note: We’ve heard from other RVers that their pleated RV shades came with different cord anchors than ours. Yours may be the kind that looks like a small spool. They accomplish the same task, but require you to tie the cords to them, making it harder to adjust the tension on the cords if needed. If you want to replace your spool-style cord anchors with ones like ours, which hold the cord tight by clamping down on it, they’re available from Amazon:

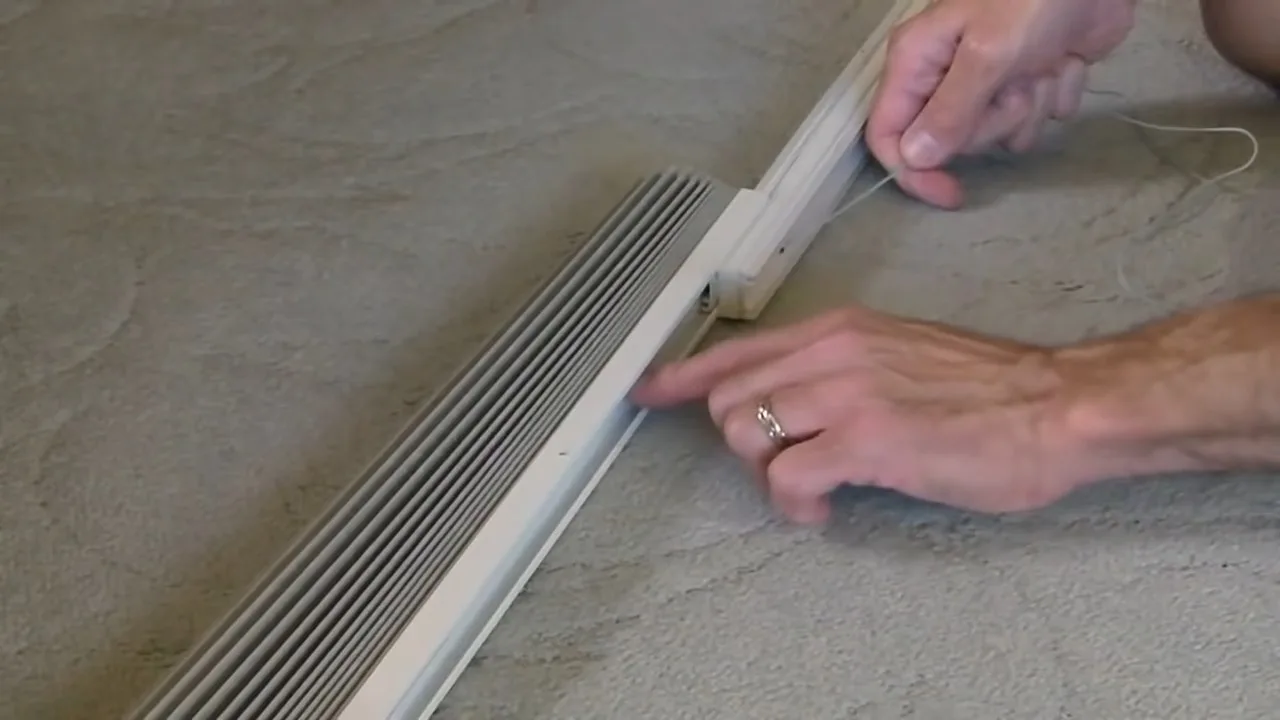
Unclip the top of the shade and remove it from the wall.
This is typically done by gently twisting the header bar of the blind up and away from the wall, while simultaneously rotating the back of the bar (the part that’s closest to the wall/window) downward and toward you. This should pop the shade’s header bar loose from the brackets.
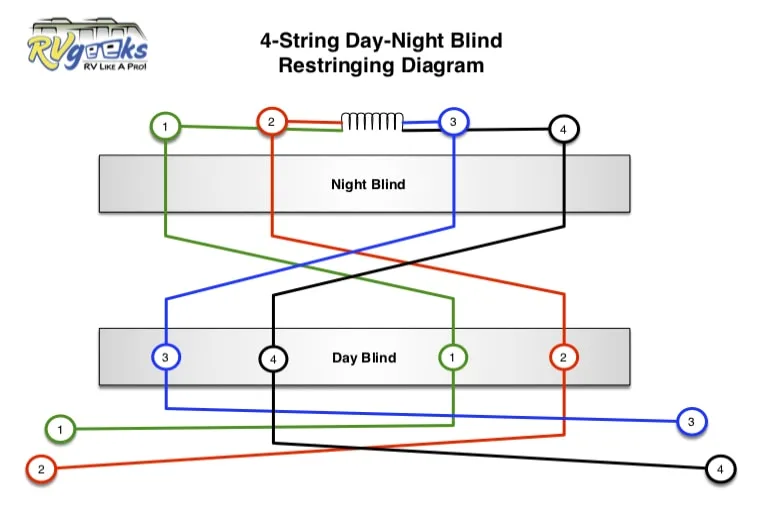
Once the shade has been removed, you’ll need to note how it’s strung, especially if you don’t have the restringing instructions from the manufacturer. You may be working on 2-string, 3-string, or 4-string shades. The wider shades have a more complicated stringing pattern. Further down in this post, we’ve provided you with downloadable diagrams for all three types that should be helpful.
Remove the knobs used to open and close the pleated shades.
These small round knobs are used to open and close the shades and must be removed for this project.
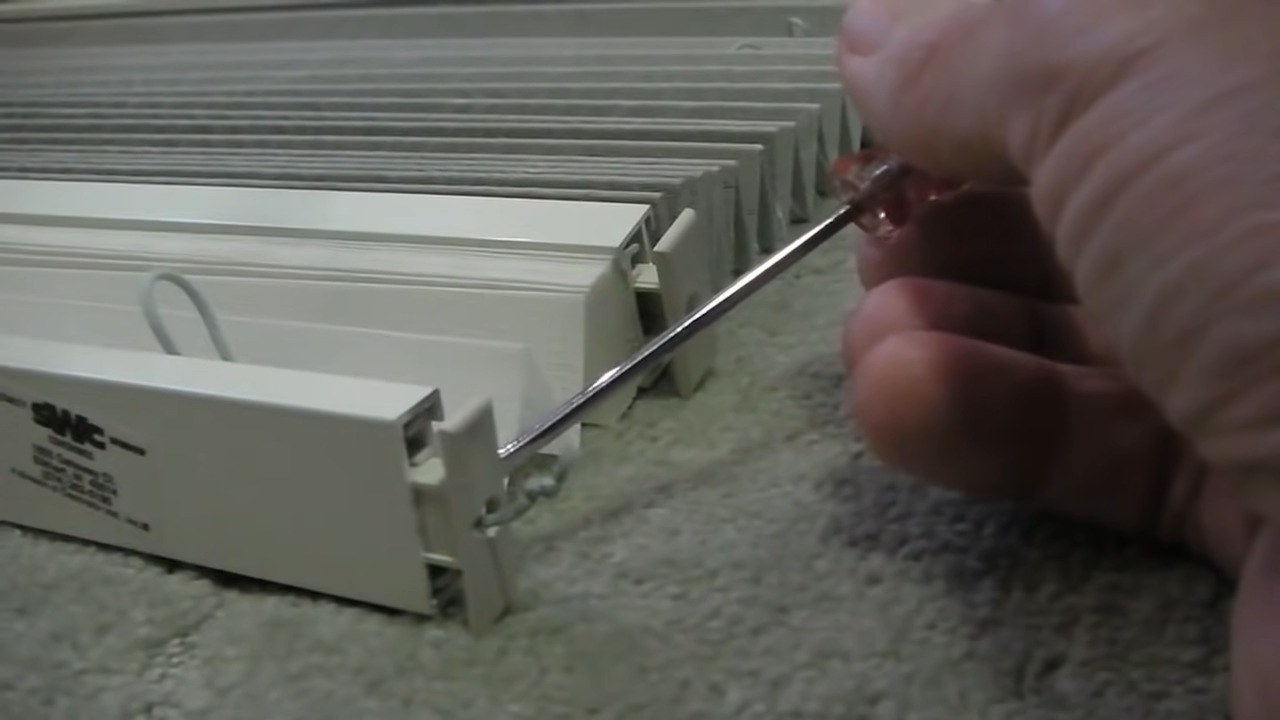
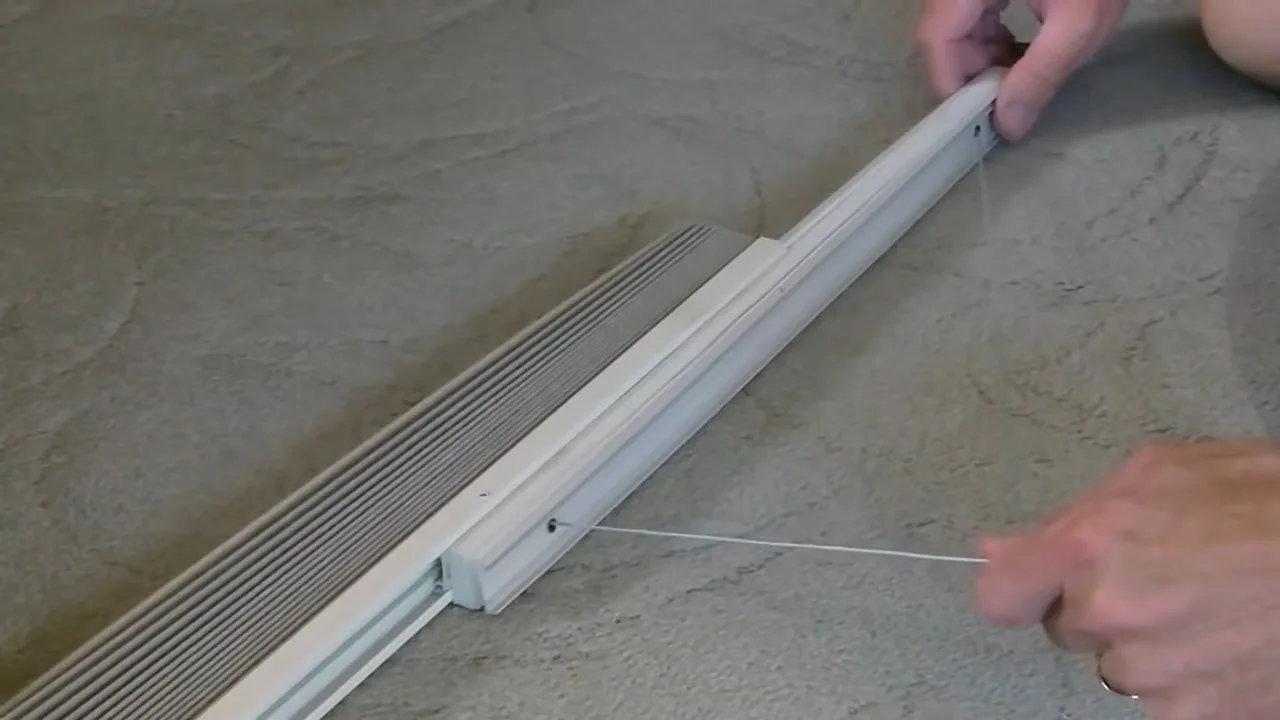
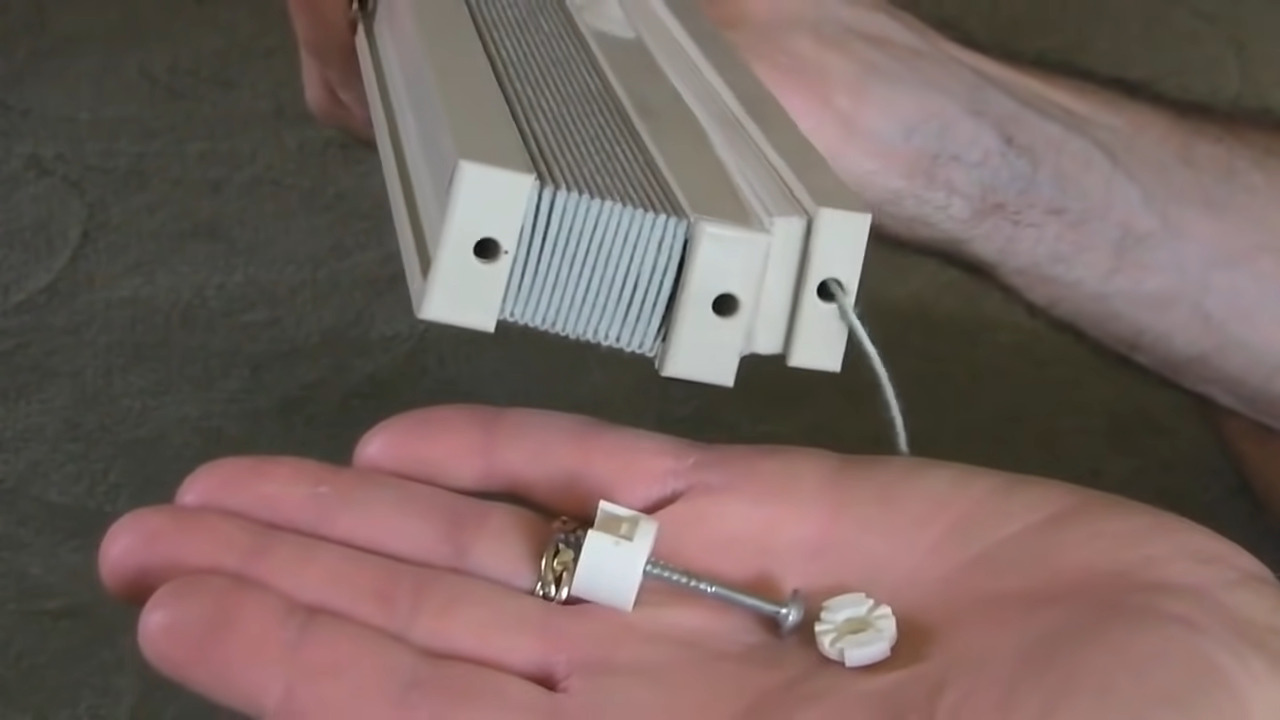
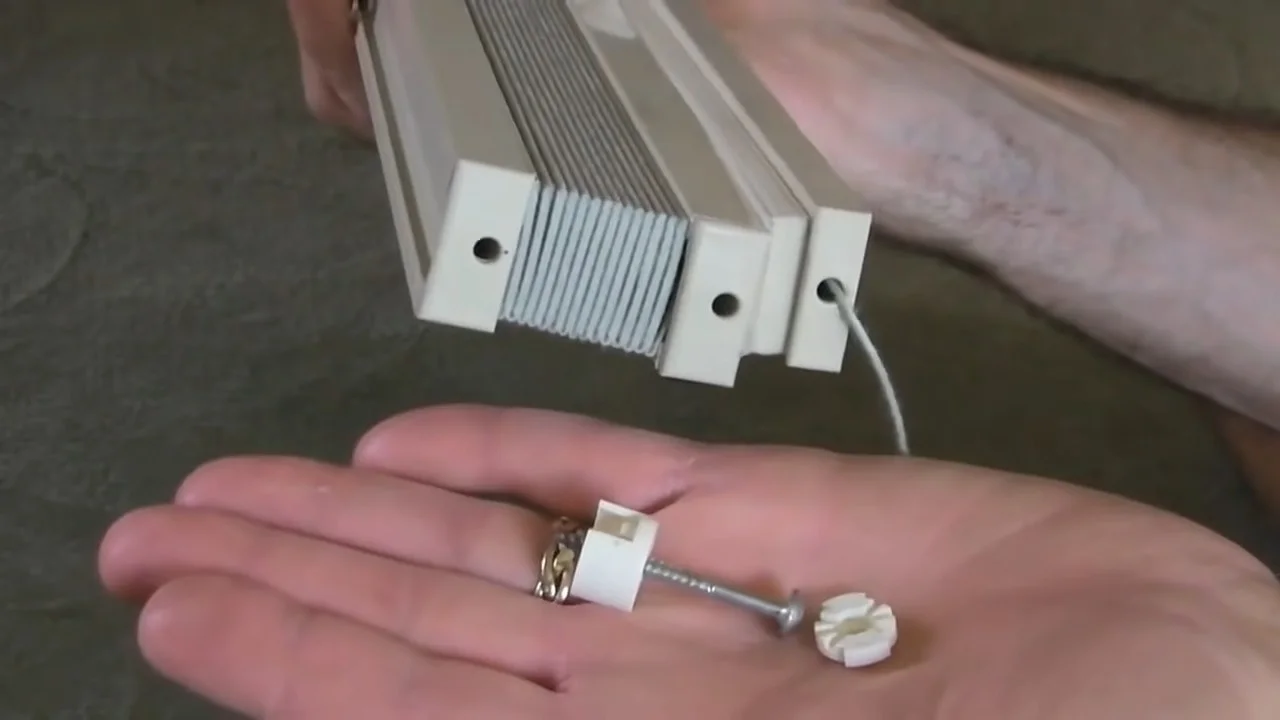
Remove the cord anchors from the cords
Using a small flat blade screwdriver, pry open the two pieces of the cord anchors that connect the cord to the wall. Set them aside for re-assembly later.
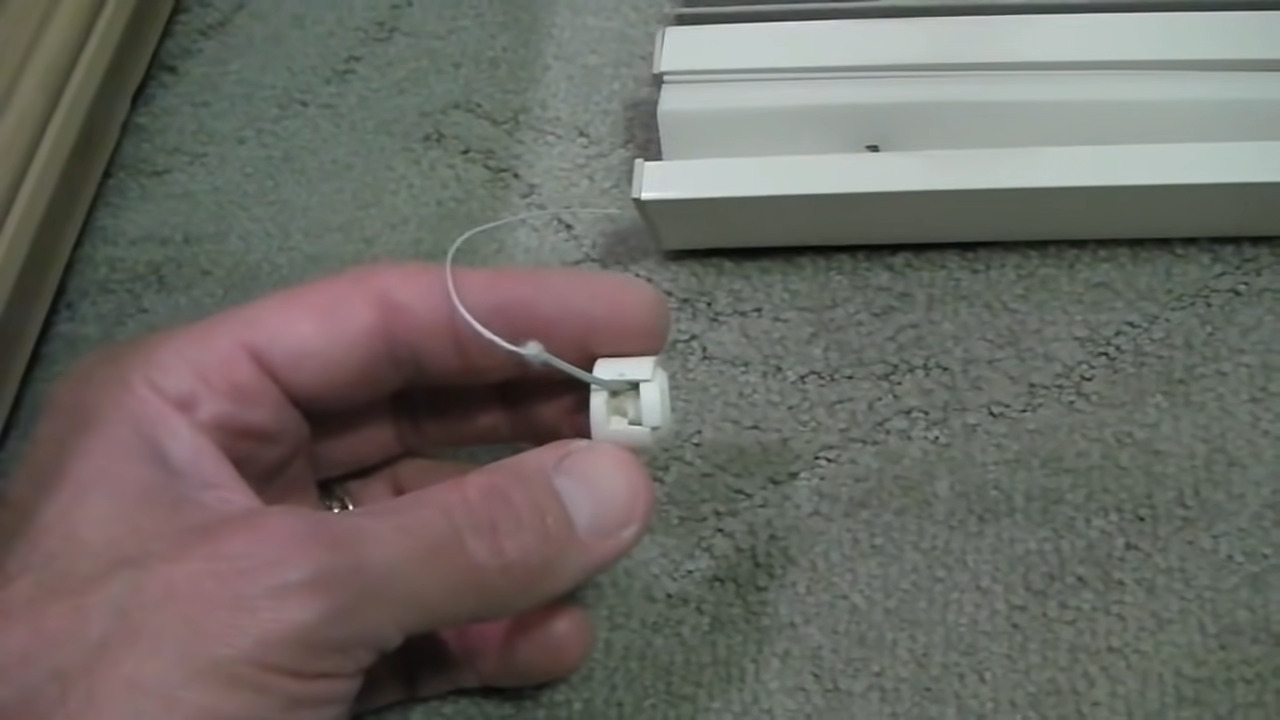
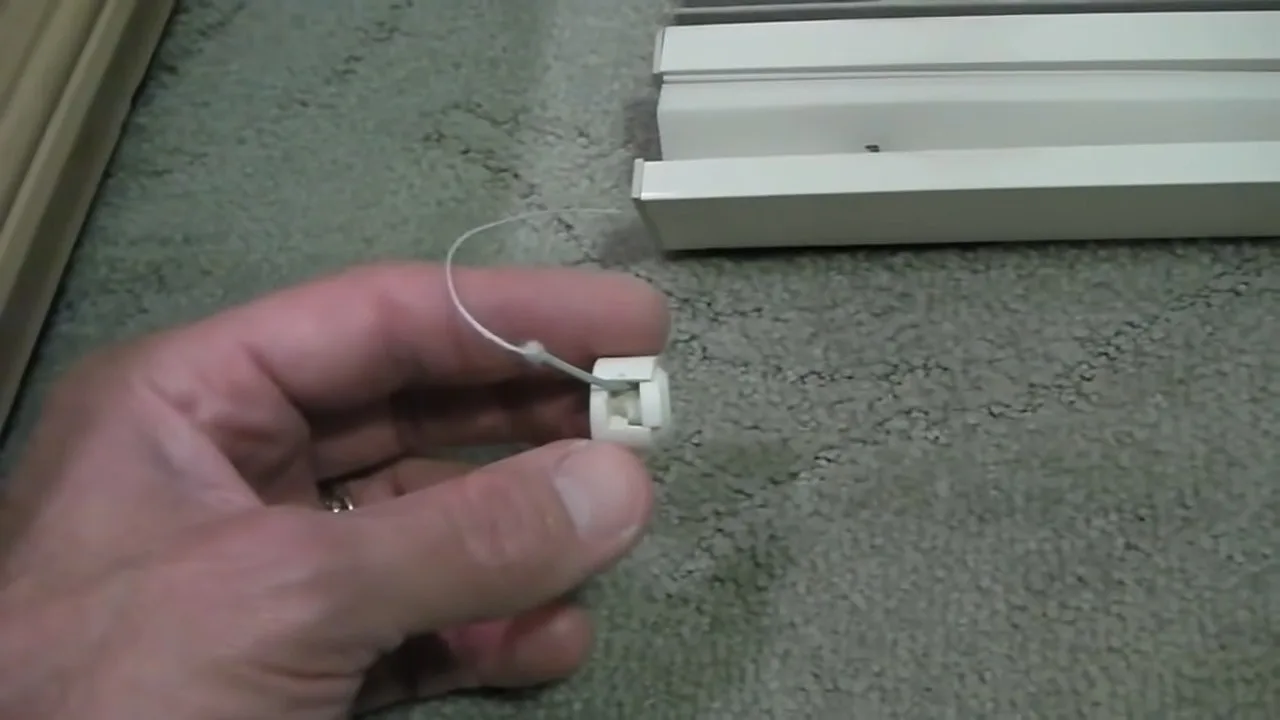
Prying open the cord anchors allows us to remove the cord to replace it.
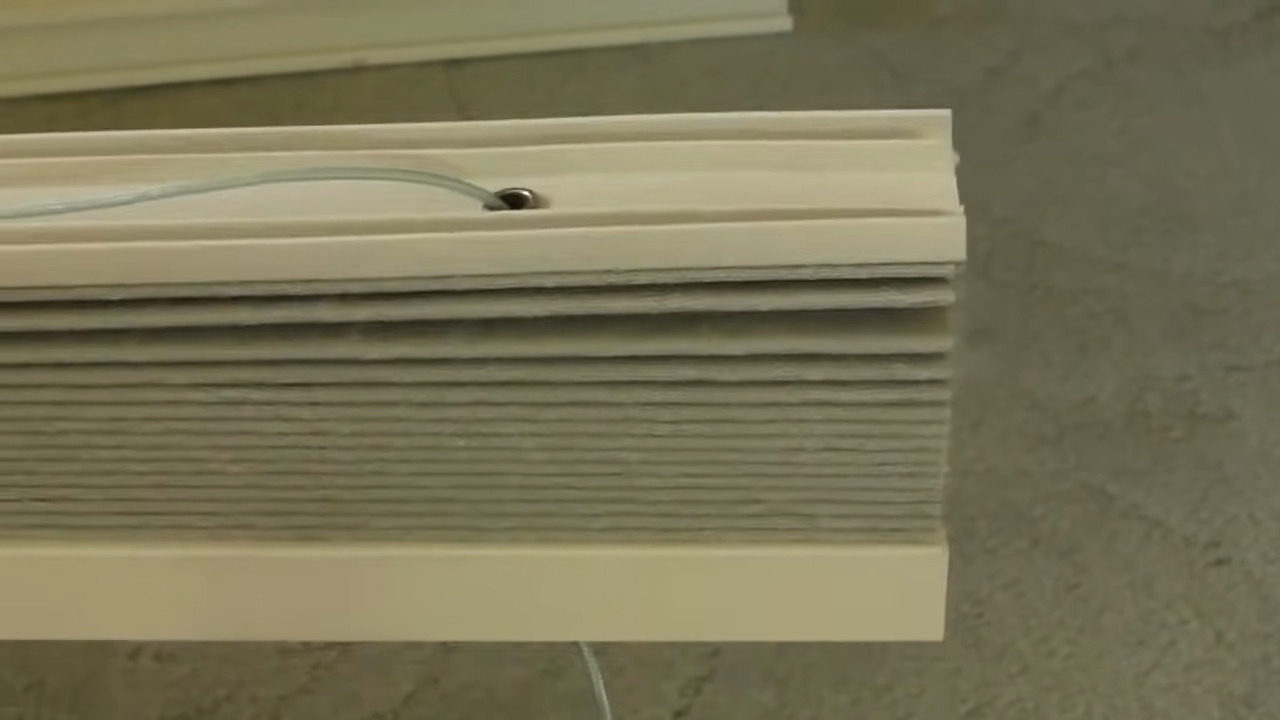
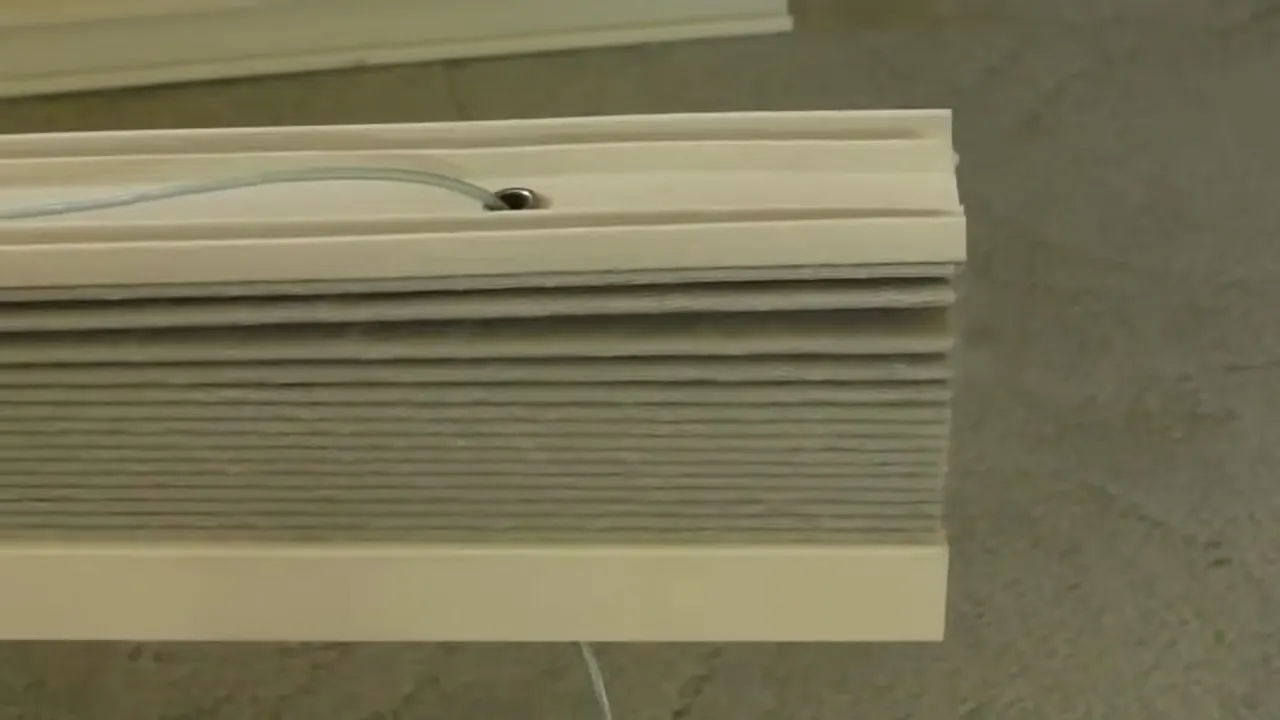
Remove the end caps
Pry out the end caps from the ends of each bar and remove them. For a day/night shade, there are three on each side.

All of the end caps need to be removed. A small flat blade screwdriver works well for this purpose.
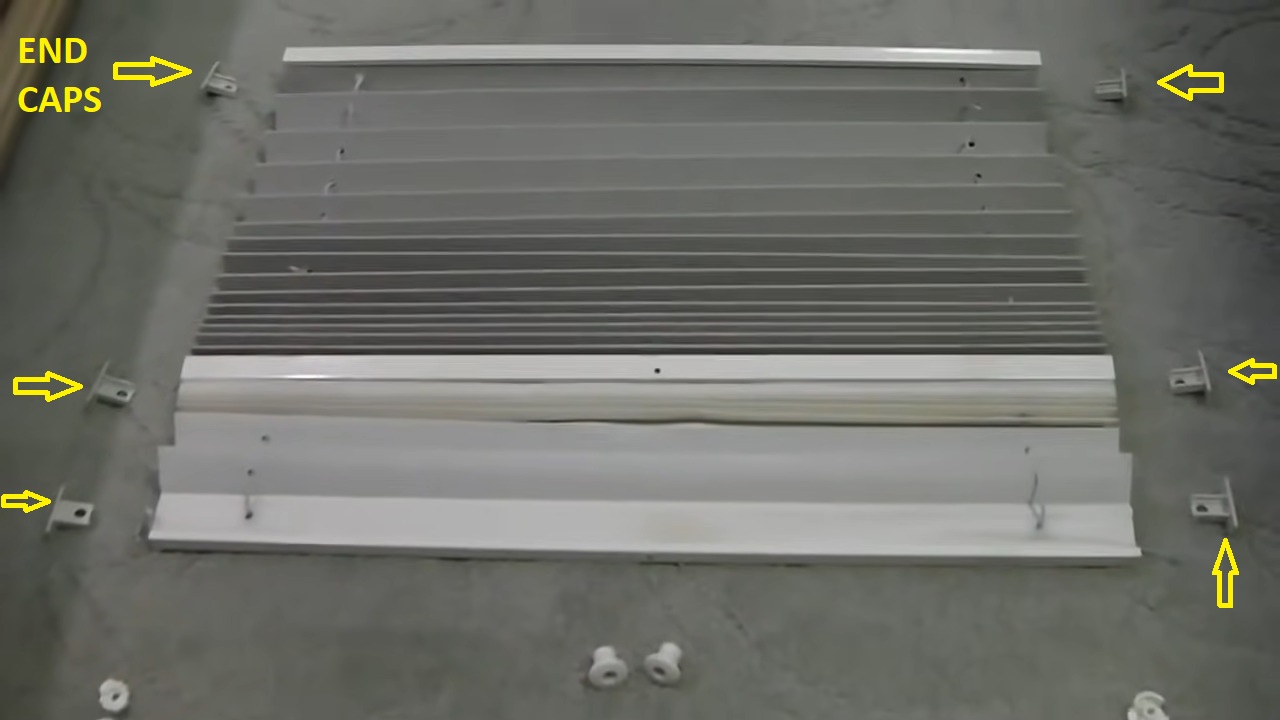
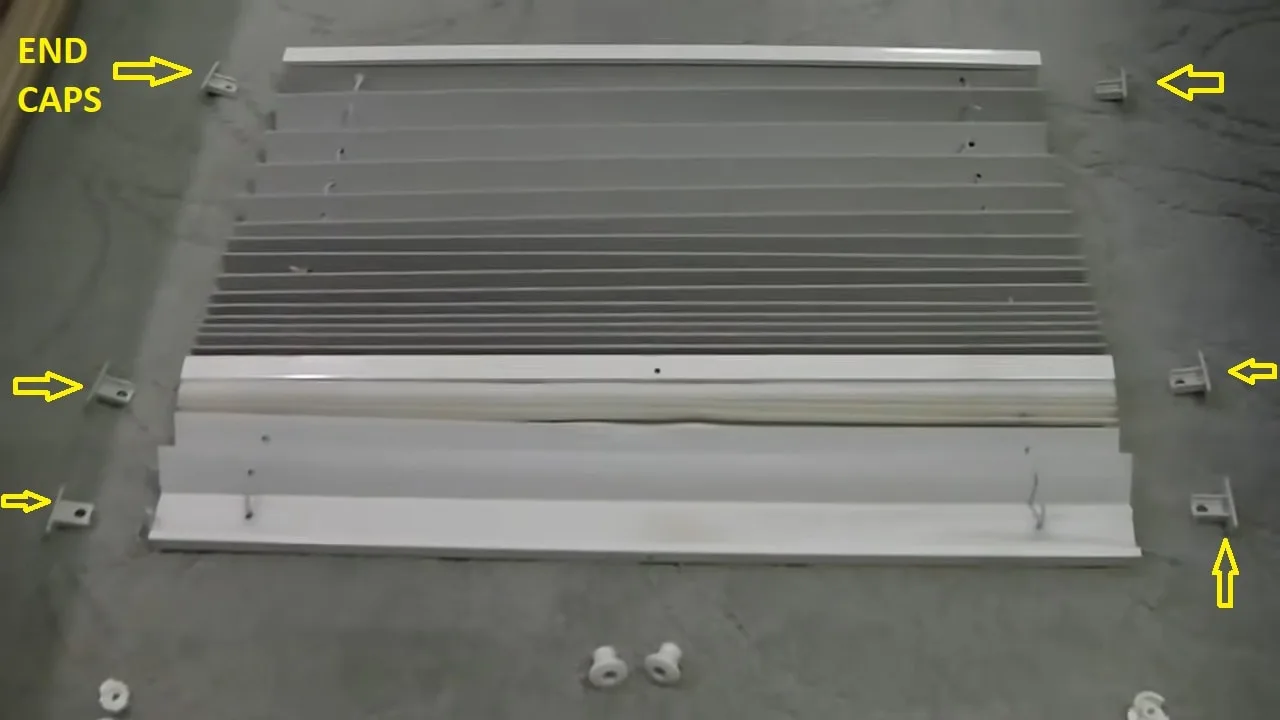
With all six ends caps removed, we can remove the old cord and begin installing the new cord.
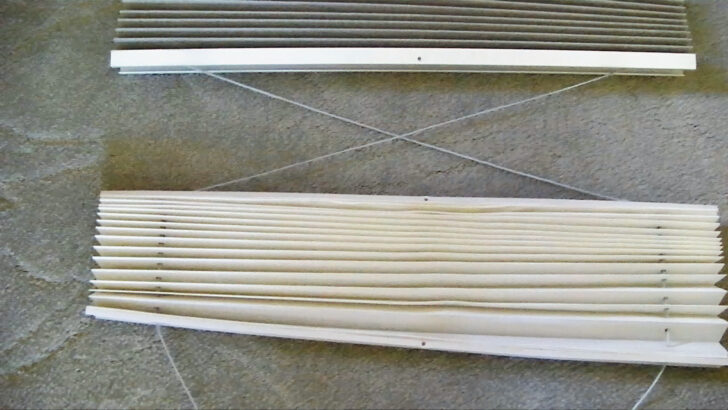
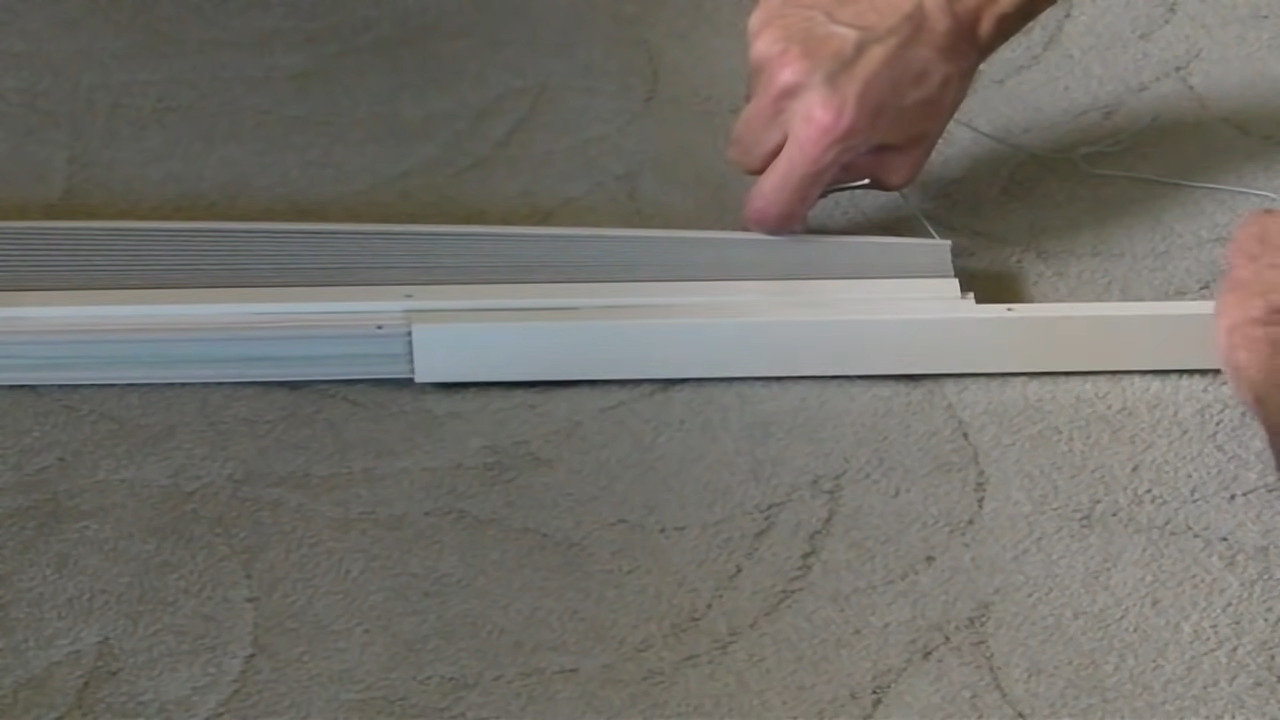
Disassemble the RV pleated shade
Starting at the top, slide the aluminum track off one end of the shade.
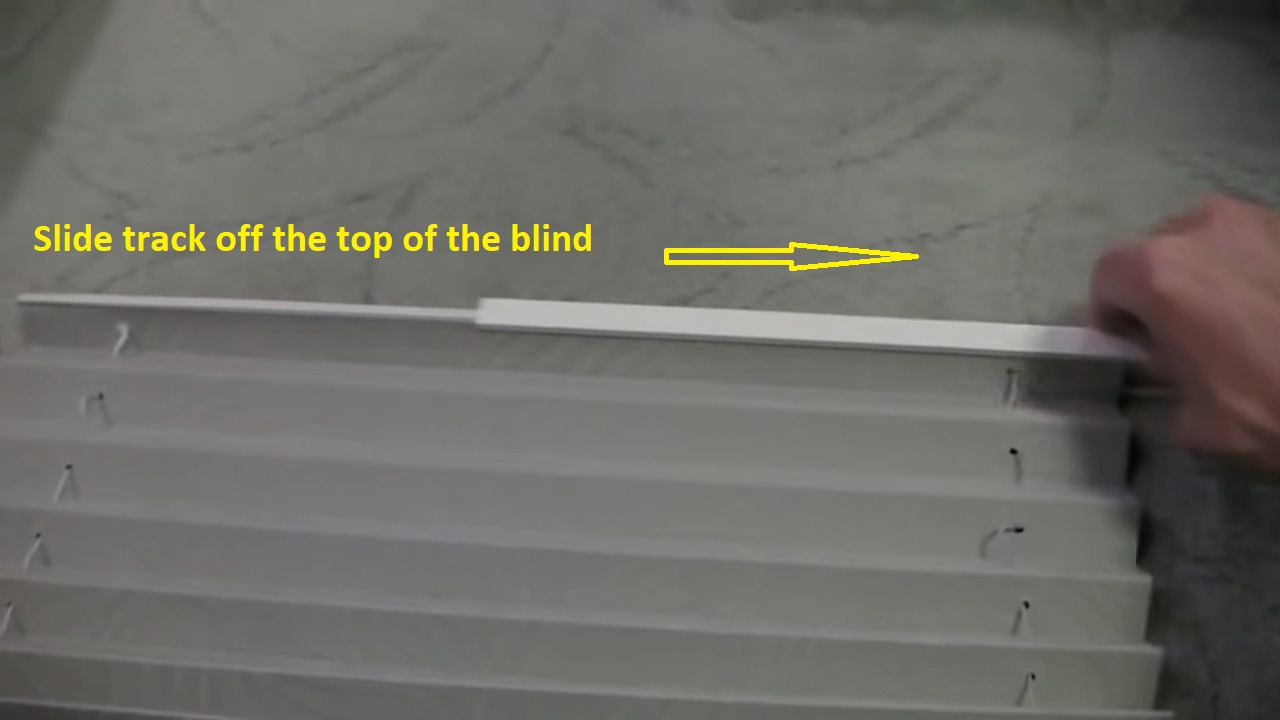

Sliding the top track to the right or left removes it from the top of the shade.
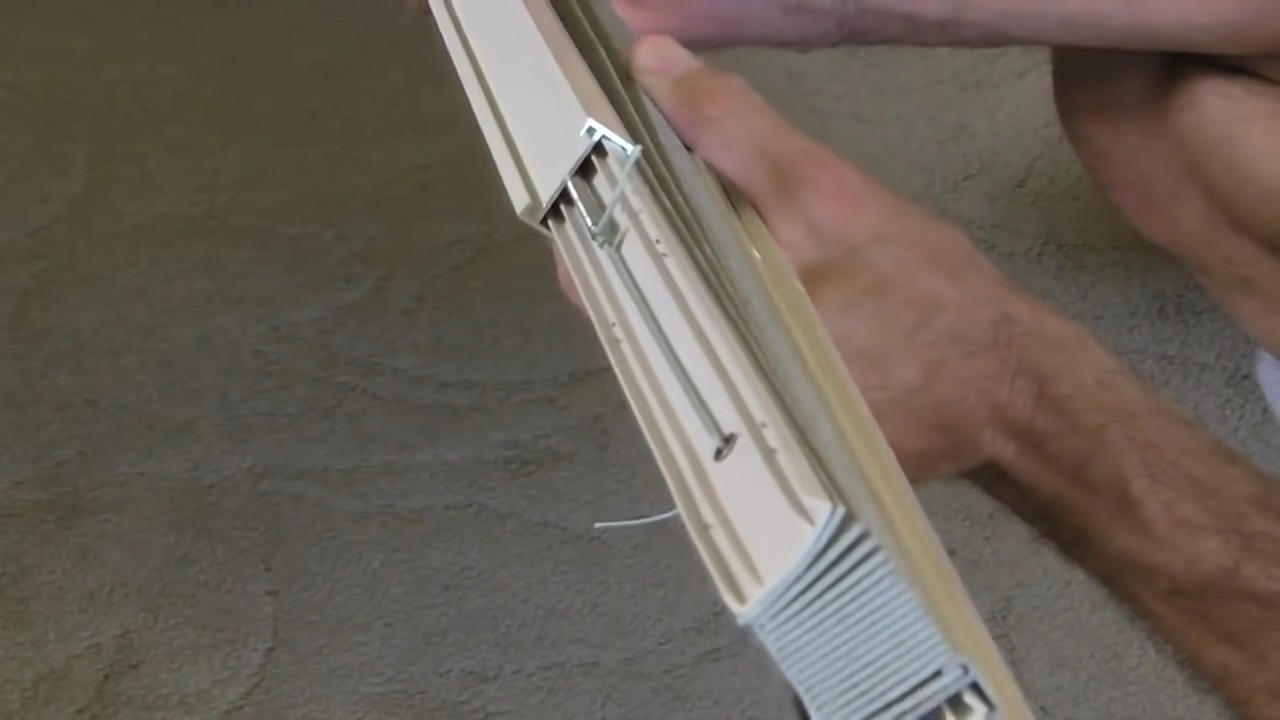
Once the top track is removed, you can see where the cord is connected to a small spring at the top of the shade.
A small spring at the top of the shade holds both cords (or all 3 or 4 on larger shades)
If you watch our video embedded at the end of this post, you’ll notice that at this point we show you how to create a diagram showing the pattern that the cord should follow through the shade. It would look something like this when completed:
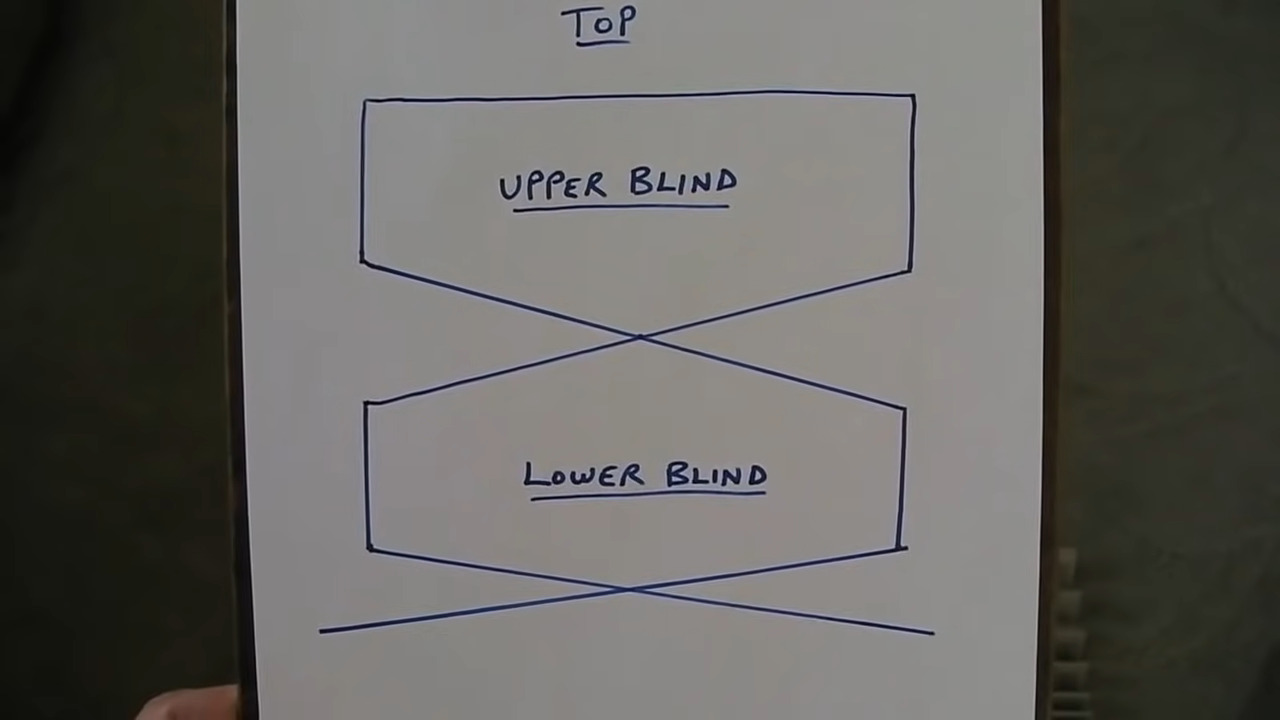
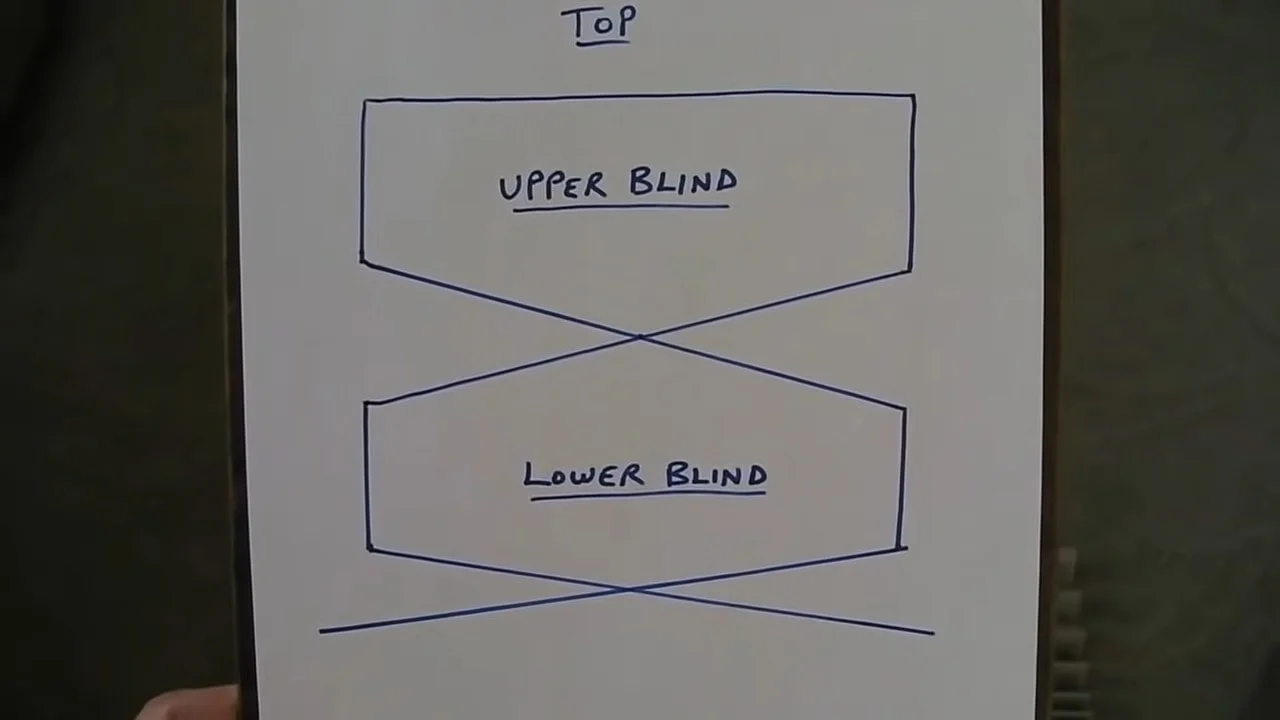
Creating a diagram of how the blind is strung is important prior to removing the cord from the blind. This is our hand-written diagram of a 2-string blind. We’ve created digital versions of the three different stringing patterns, provided for your convenience below.
What this shows you is that the cords connect at the spring at the very top of the blind, and then go down the sides of the upper section of the blind, cross in the middle, go straight down through the lower section of the blind, and cross again at the bottom, going out to the attachment points at each side.
This may seem simple, but it’s important to remember precisely how your blinds are strung BEFORE you dismantle them. If y9ou string them wrong, they won’t work.
We’ve created diagrams for you that are available to download in PDF format for the most common version of 2-string, 3-string, and 4-string RV pleated day/night shades. Simply click on the diagram you need to view or print. The diagrams will show you the exact path that the cord should take as you restring it.
-
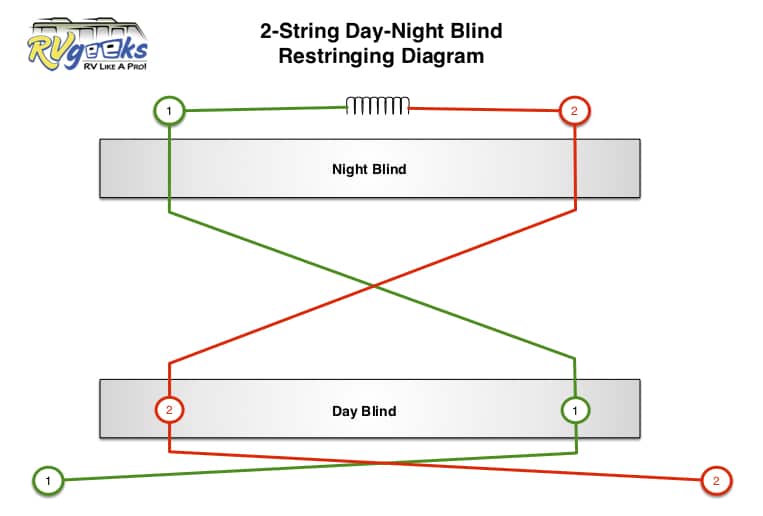
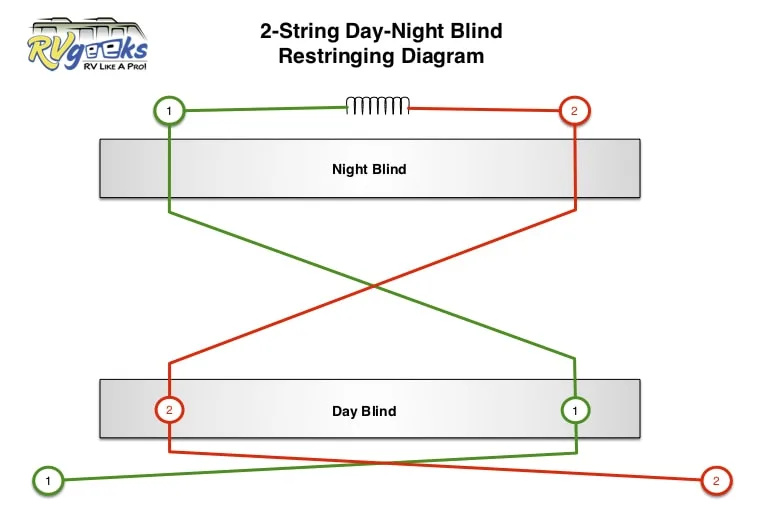
- 2-String Blinds
-
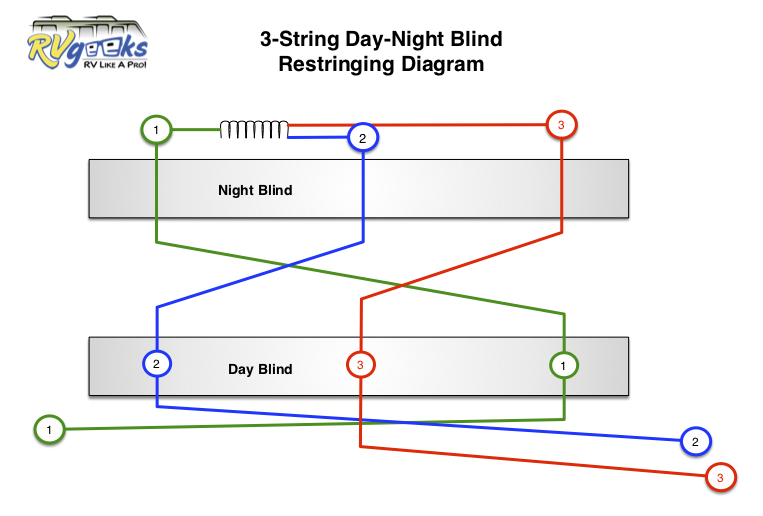

- 3-String Blinds
-
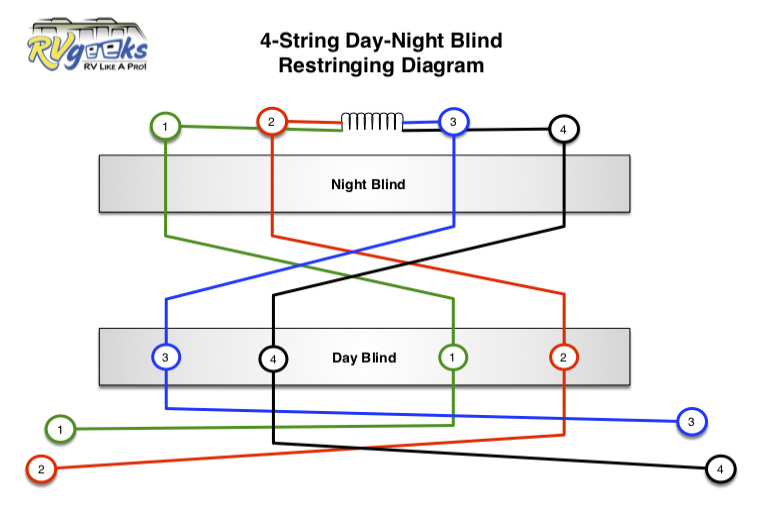
- 4-String Blinds
Or, if you want to download a copy of the diagram(s) you need to restring your RV’s pleated shades, you can use any of the following files (Adobe PDF):
- 2-String RV Pleated Shade Re-Stringing Diagram
- 3- String RV Pleated Shade Re-Stringing Diagram
- 4-String RV Pleated Shade Re-Stringing Diagram
Keep in mind that there are several different ways to string the larger shades (it varies by blind manufacturer), so you need to be sure you know how yours are strung BEFORE you dismantle them. Even though we’ve provided diagrams for you to follow, your best bet is to re-string your blinds using the same pattern they were originally strung with. So make a diagram!
Remove the old cord
Pull the spring and pull the cords out of the top of the shade. You should have sections of cord connected in the middle by the spring, like this (unless the cord breaks, which can happen… or already may have happened before you started):
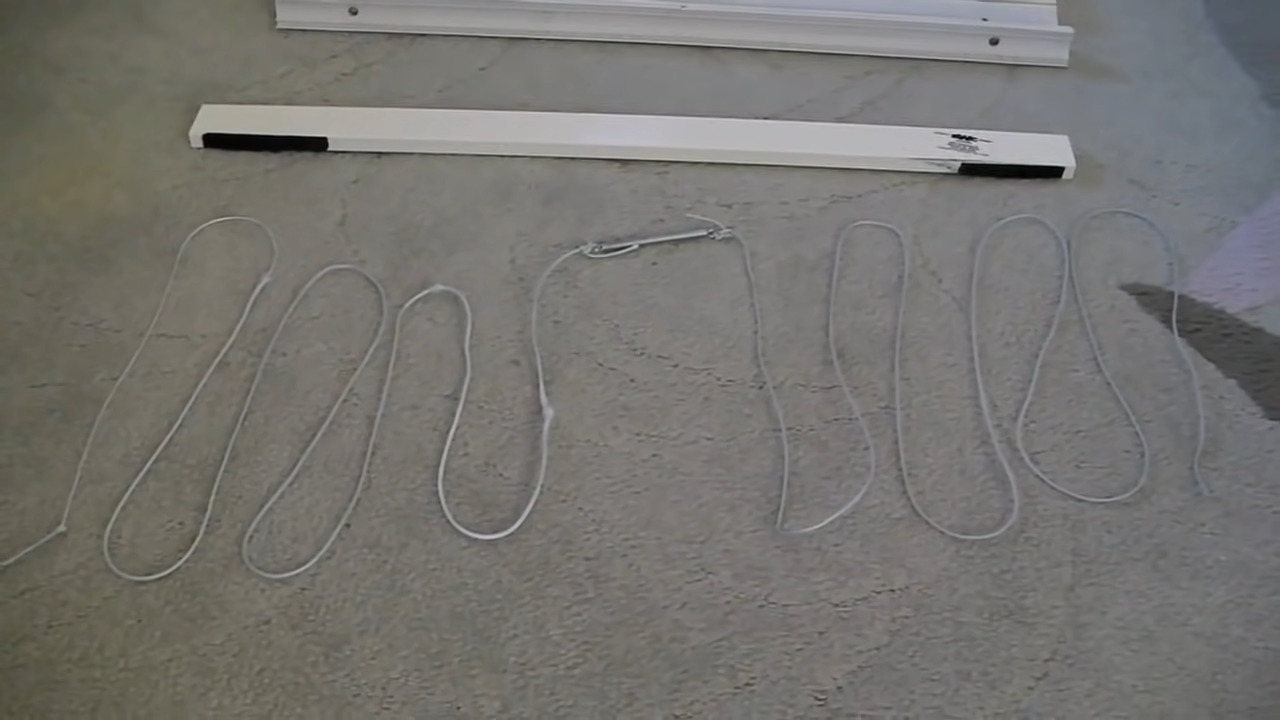

Cords and spring removed from this 2-string pleated shade.
In the photo above you see that only the left section of our shade was worn. We generally restring both sides at the same time once we’ve gone to the trouble of dismantling the blind. Inevitably the other side will fail at some point, and rather than having to repeat this process, we prefer to simply replace all of the cords. It’s not expensive, and it’s all out anyway.
Measure out the new cord
Take the new cord and lay it out beside the old cord so the length will be the same. Add about six inches to the length of the new cord to give you a little extra for tying knots and in case you’re slightly off in your measurement.
You’ll now have new lengths of cord cut approximately six inches longer than the old cord. For these small blinds, your new cords will likely be nearly six feet long. (Note that the larger blinds require a lot more cord. This is why it’s good to have plenty of cord on hand.) We simply keep an entire spool on hand.
Prepare the spring
Next, either cut or untie the old cords from the spring and tie one end of each of the new cords to each side of the spring.
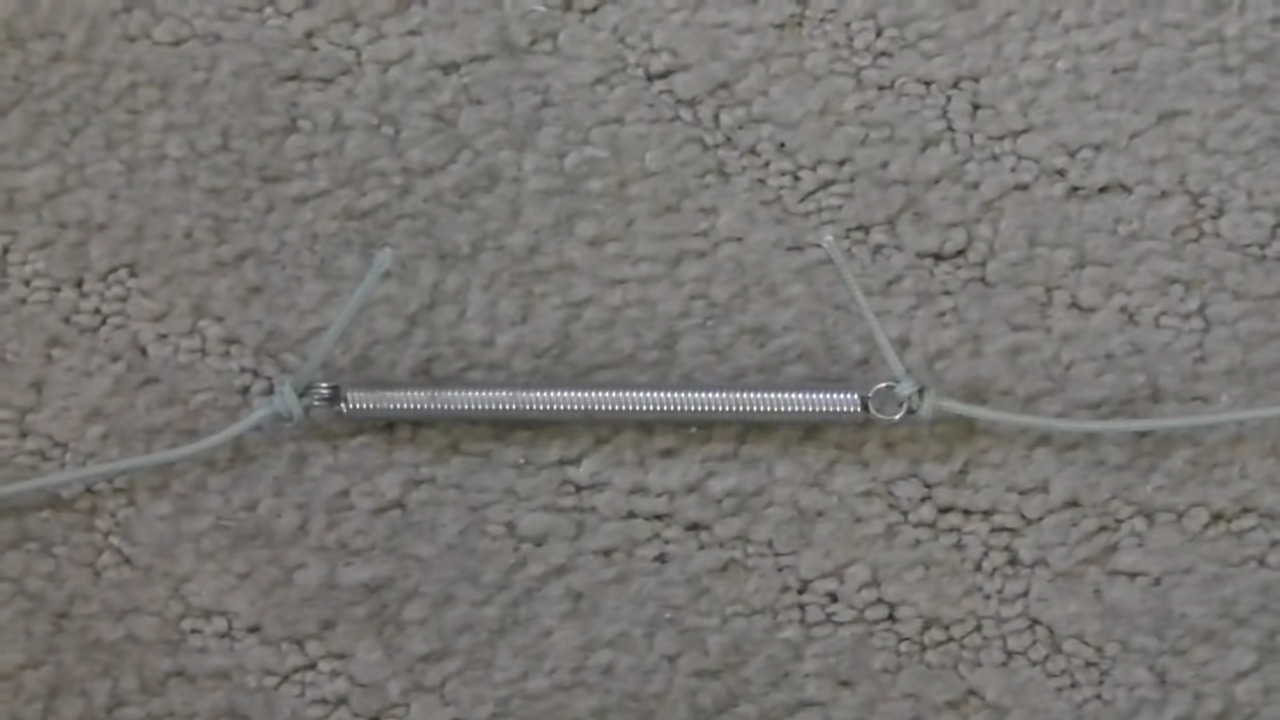
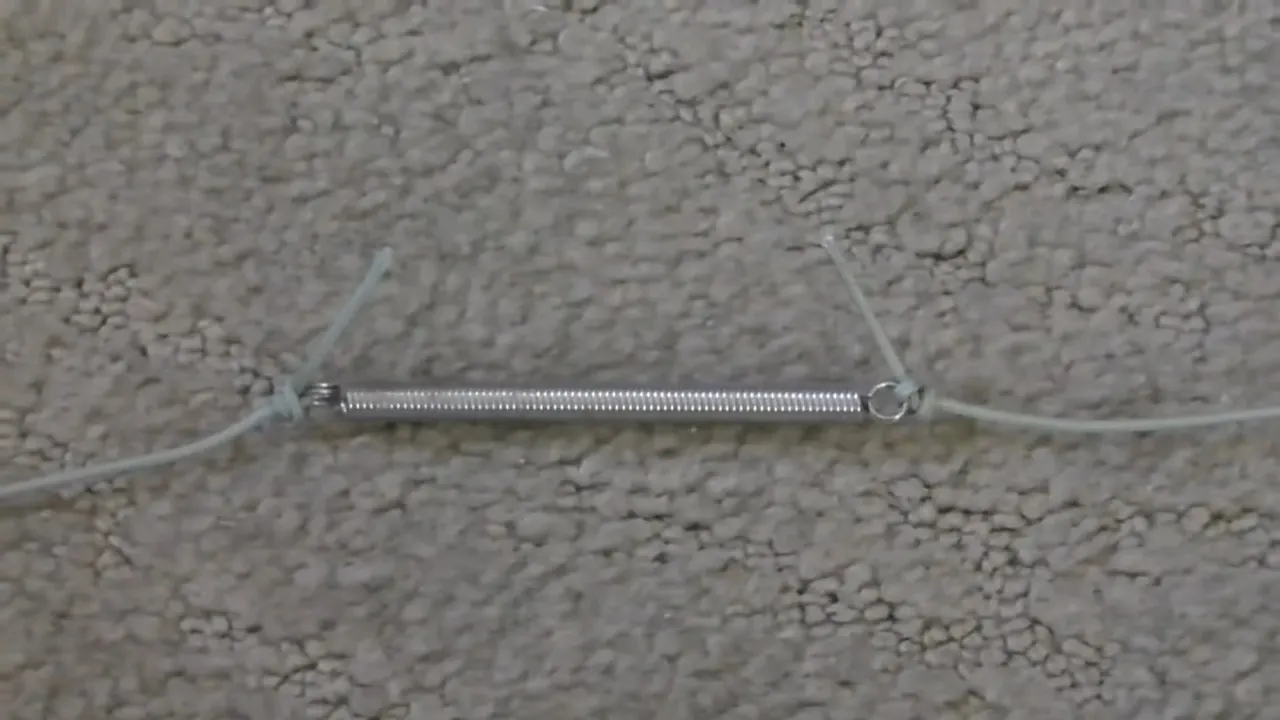
Tying one cord to each end of the spring connects the two cords that will operate your pleated shade. Be sure to tie good knots so they won’t come undone!
Now you’re ready to reinstall the cord into the shade following your diagram.
Re-string the night shade (upper) portion of your RV pleated shade
Compress the pleated night shade in your hand with the spring on top. That’s the upper, room-darkening section.
Here we’re compressing the pleats by holding the top and bottom of the shade as we prepare to feed the new cord through the end of the shade.
With the blind compressed, you should now be able to thread the new cord down through the entire section of shade as you would thread a needle. Do the same with all cords through all holes, following the diagram you made (or the one you downloaded from above).
Threading the cord down through the top and feeding it through the shade brings it all the way through the pleats and out the bottom of the shade.
Re-string the day shade (lower) portion of your blind
Continuing to follow the diagram, cross the cords between the upper and lower sections of the shade. With the day shade compressed, thread each cord through the appropriate hole in the lower section of the shade just as you did in the upper section.
Between sections, cross the cord and then feed the cord through the next section of pleats.
Re-assemble the day & night shade sections
Next we’ll reattach the two sections of the shade by taking the upper and lower sections of the shade in each hand and sliding them alongside each other, being careful to make sure that none of the cords gets pulled back out of their appropriate holes.
Then slide the bottom section into the top section like this:

Here we’re attaching the two sections of the shade.
Pull the cords taut, making sure they lie properly inside the track along the middle rail that’s formed where the bottom of the upper section meets the top of the lower section.
Make sure the cords lie properly inside the track along the bottom of the upper section.
Carefully slide the lower section of the blind into the upper section, pulling the excess cords tight as you go. Now the upper and lower sections should be connected together, with the spring at the top and the cords coming out the bottom.

Now the upper and lower sections will be connected by the spring at the top with the two cords coming out the bottom.
Re-assemble the bottom bar/rail
As noted in the re-stringing diagram, at the very bottom of the blind the cords need to be brought out on the correct side of the blind. Cross the cords left to right and right to left, and then slide the lower track into place holding the cord and the pleats of the blind out of the way as you do.

Here we’re sliding the lower track into place while holding the cord and the pleats of the shade.
You should now have a compressed blind with a spring on top and cords sticking out of each end.
Reassemble the top bar/rail
Slide the upper track into place above the top of the spring, again being sure that the cords and the pleats of the blinds don’t get caught.

Here we’re sliding the upper track into place.
Re-insert the end caps
Reinstall the plastic caps at each end of each bar/rail of the blind. Be sure to thread the cords through the hole in each end cap on the lower section of the blind before re-inserting them.
Reinstalling the plastic end caps.
Re-attach the knobs
Carefully re-install the knobs on the front of the blind.
Using the proper screwdriver, reinstall the knobs on the end of the shade. Wider shades will have two on each section.
Prepare your re-strung RV pleated shade for installation
Make sure your cords are just about the same length coming out of each side. If they’re not, it means that the spring isn’t properly centered at the top of the blind. In this case, you’ll need to shimmy the cord through a little bit at a time to try to get the spring as centered as possible.
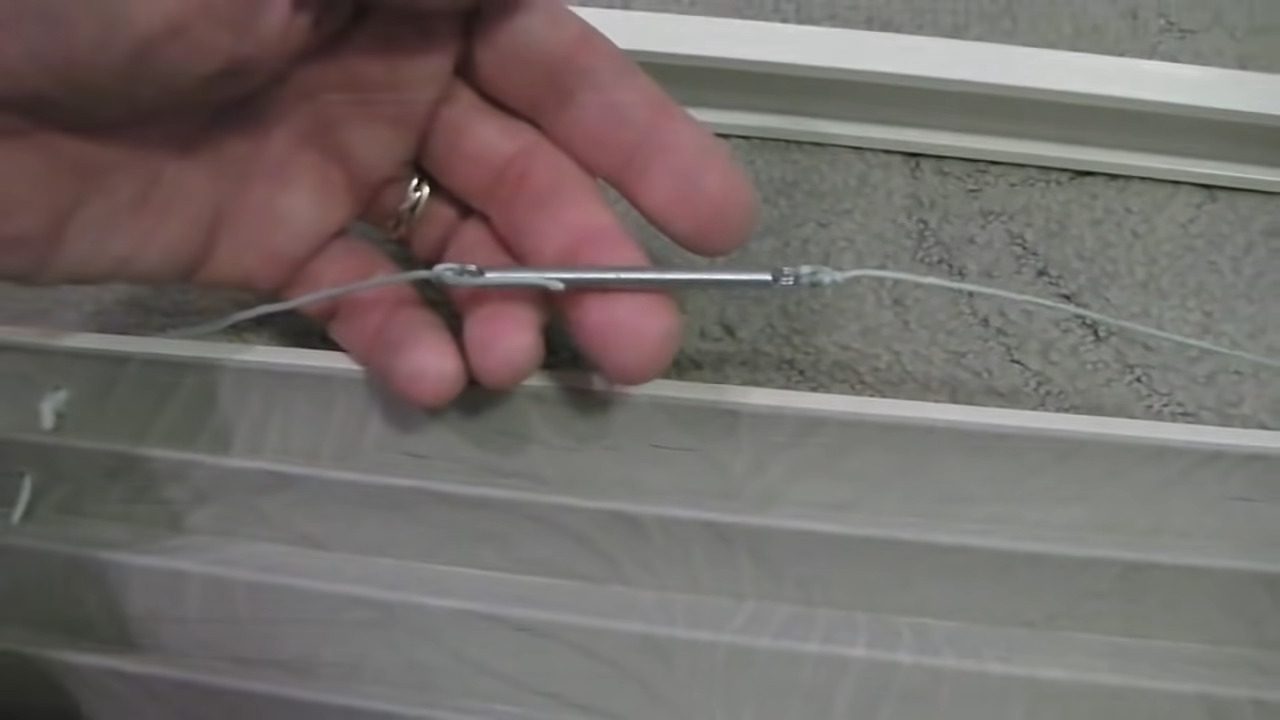
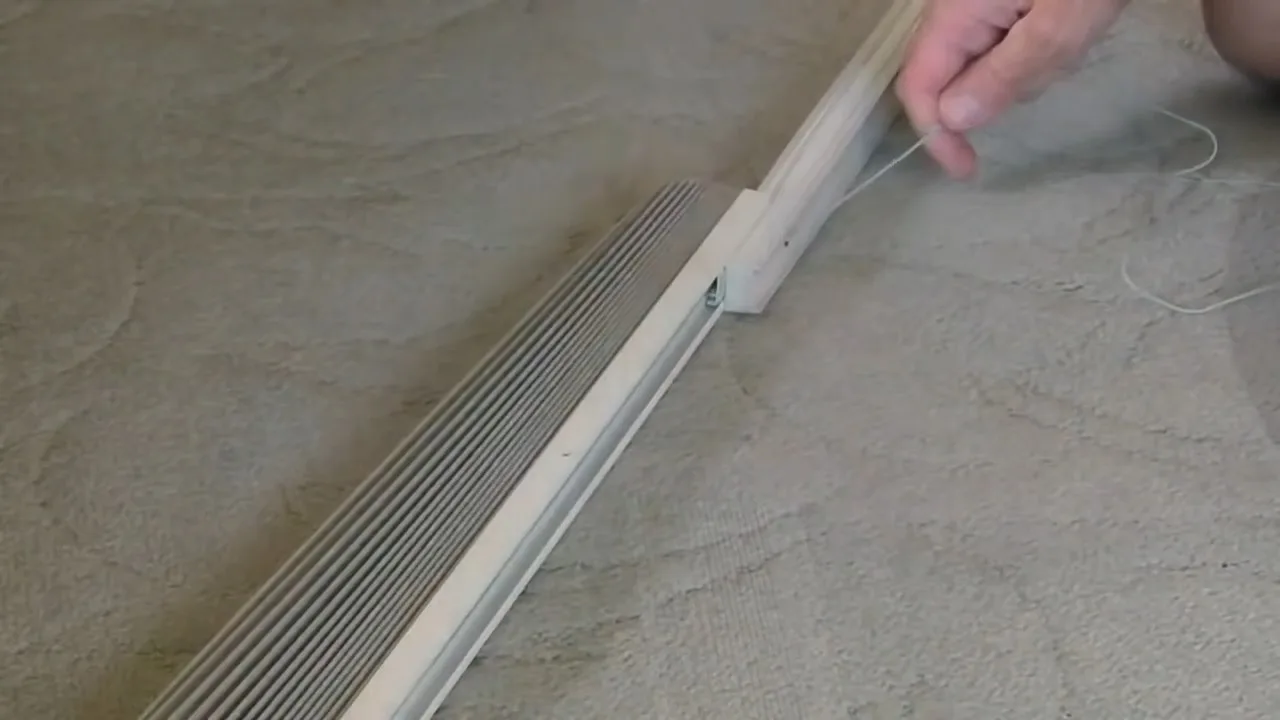
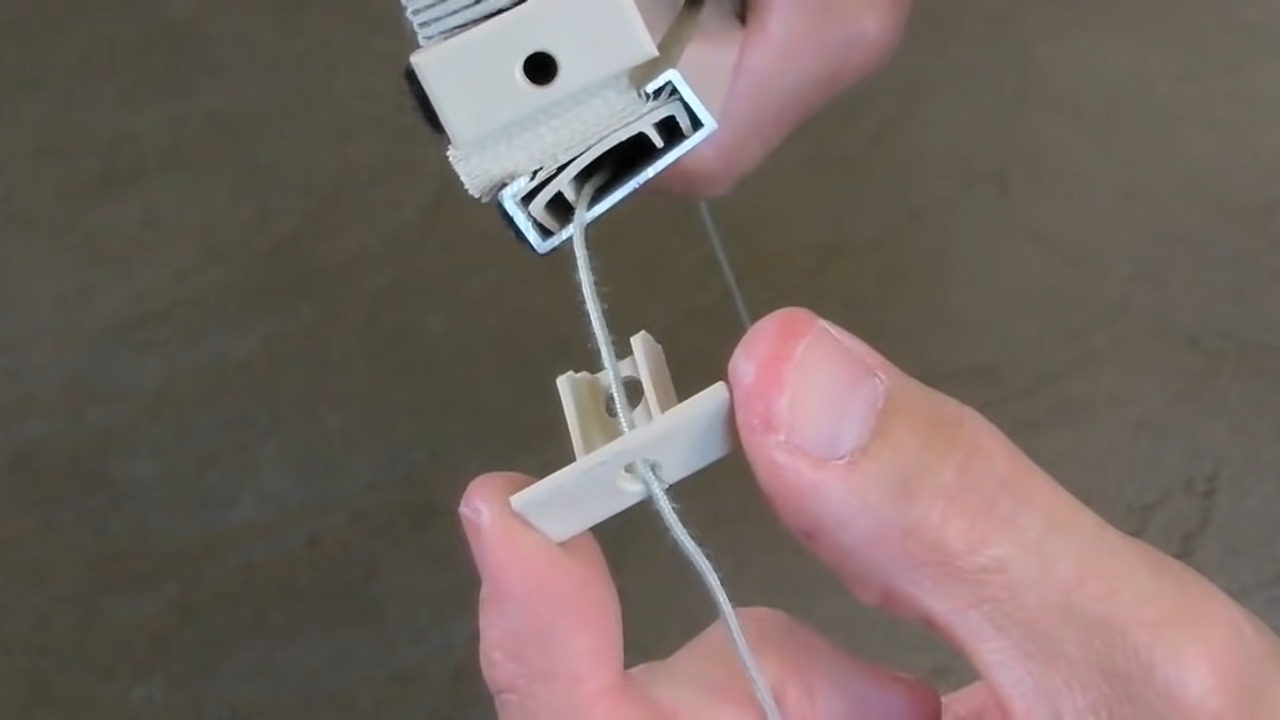
These wall anchors must now be reinstalled at each end of the lower section of the blind.
Re-attach the wall anchors to the new cord(s)
Lay the cord into the track on one side of the anchor.

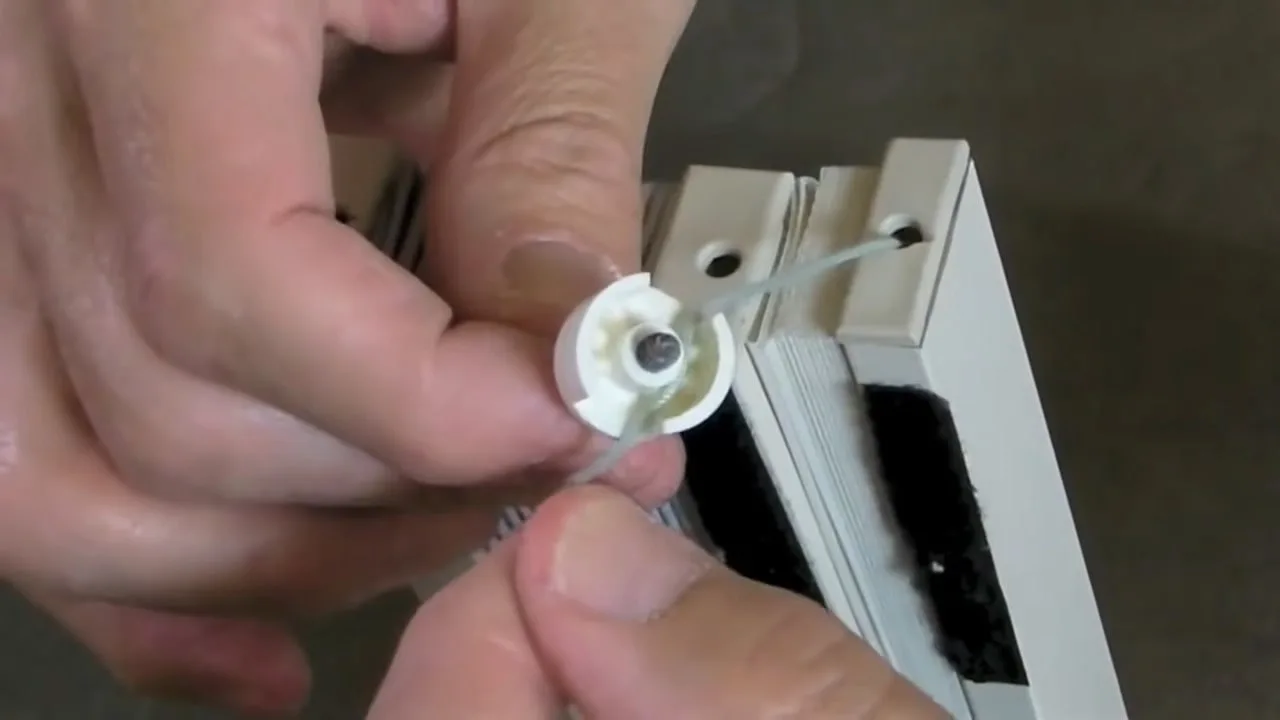
Laying the cord inside the track of the wall anchor. This is what will keep the cord in place and allow the tension to be adjusted if/when necessary.
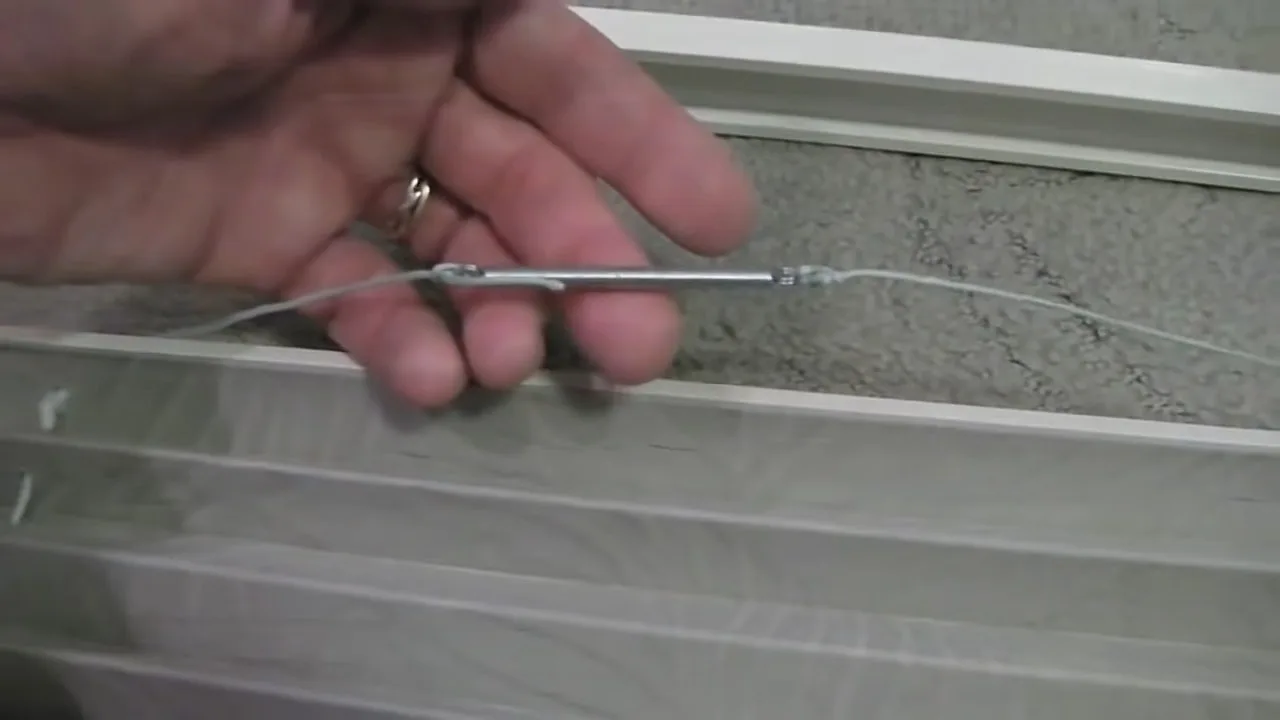
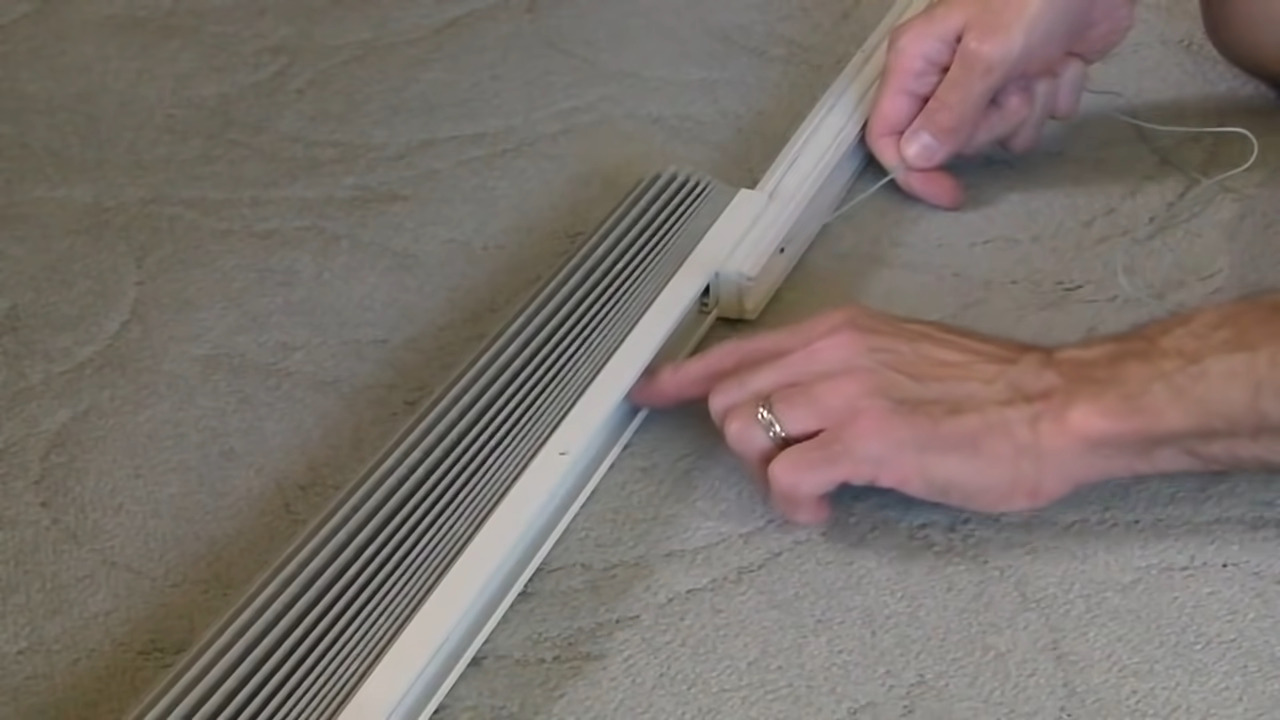
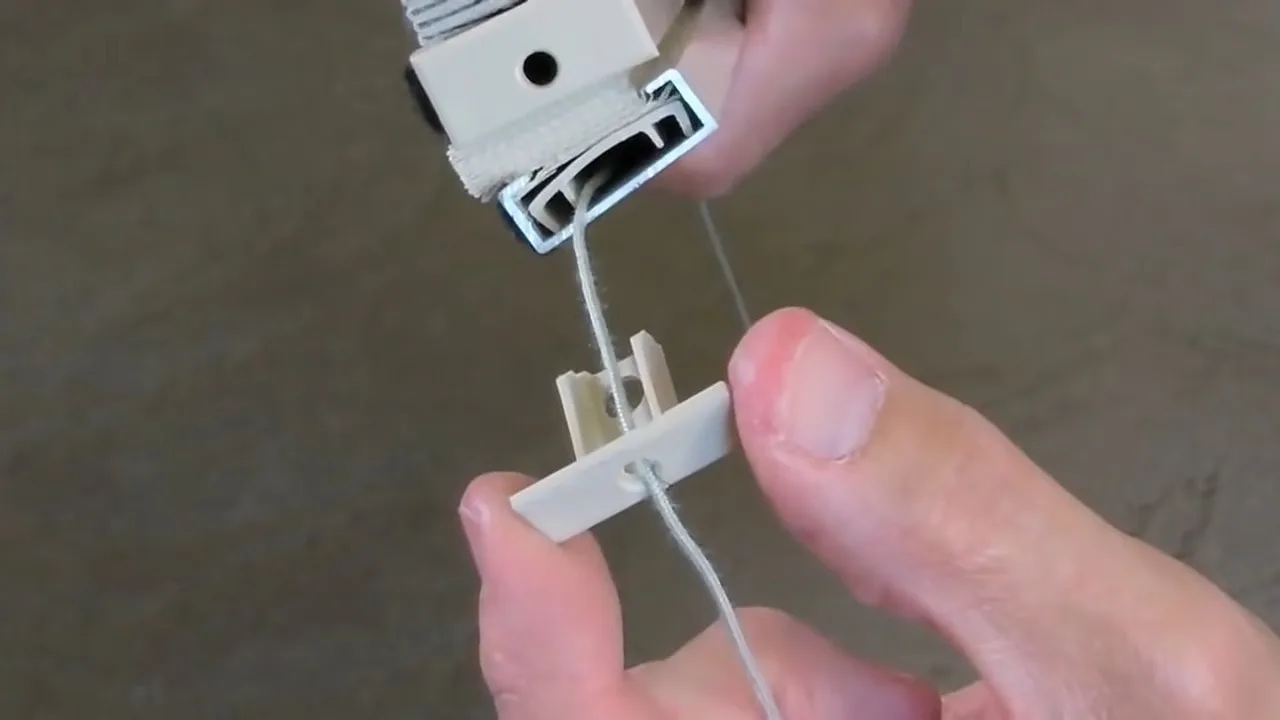
Push the smaller section of the cord anchor back into its other half.
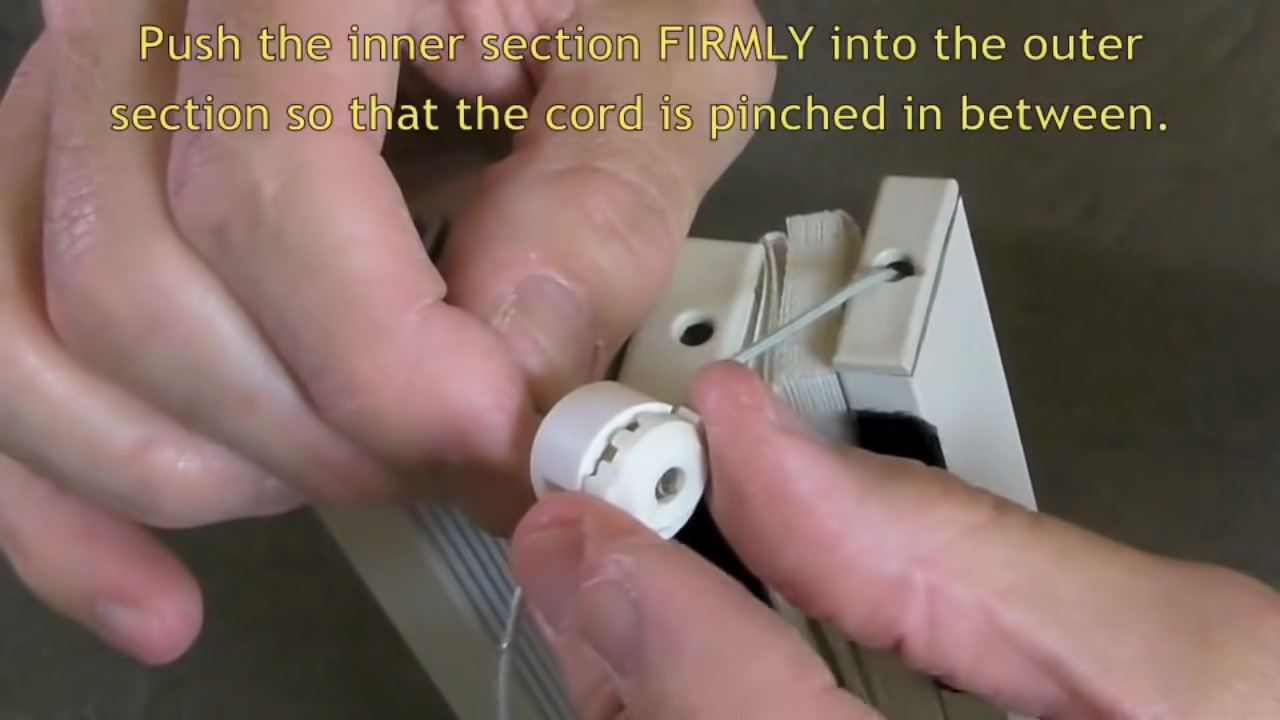

It’s important for the cord to be pinched between the inner and outer sections of the wall anchor.
Slide the re-assembled wall anchor all the way up to the end of the blind so that it’s fairly tight. Do this on both ends. This way, you’ll be preventing the blind from falling open while you’re installing it.

Pull the wall anchor tightly to the edge of the shade.
Mount the blind back into its brackets
Note the two clips that will sit inside the track at the top of the blind. To reinstall the blind, simply tip the blind forward and slightly up, insert the clips into the track, and snap the clip upward at the back. You should hear/feel the blind “click” back into the mounts. If not, double-check to make sure you’ve gotten it clipped back into place properly.
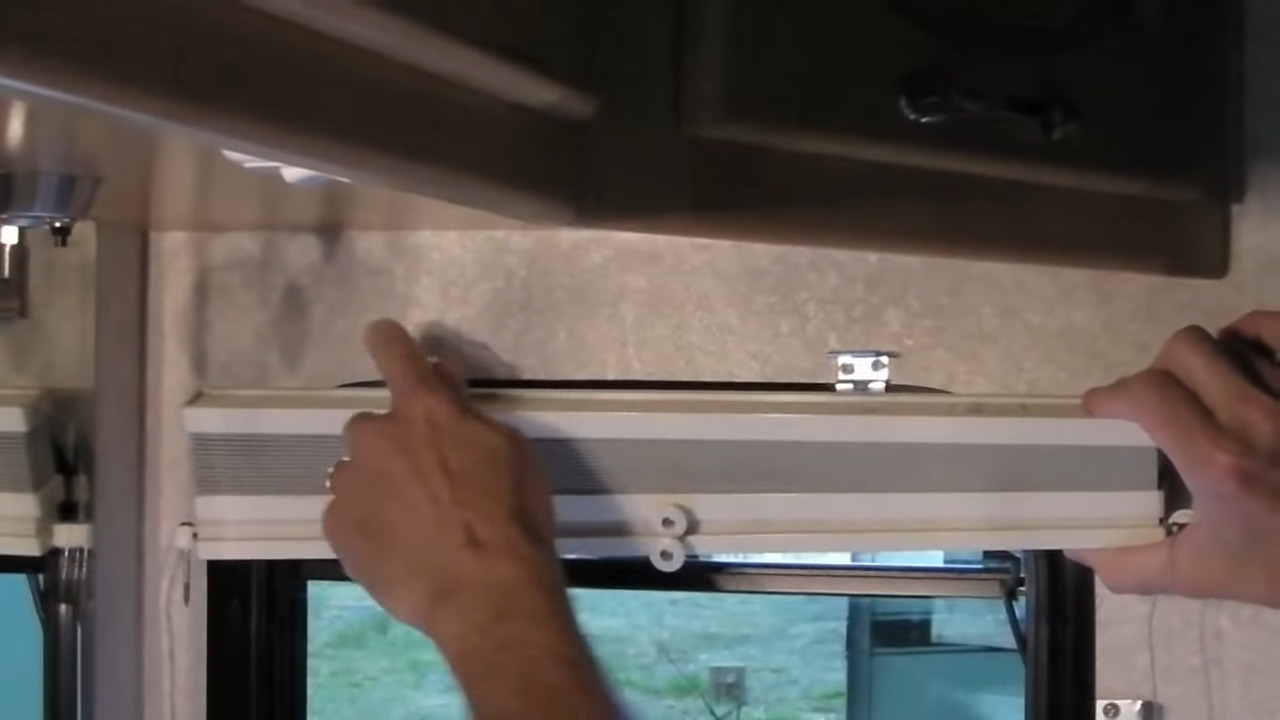

At the top are the two clips which will snap into the top of the shade to hold it in place.
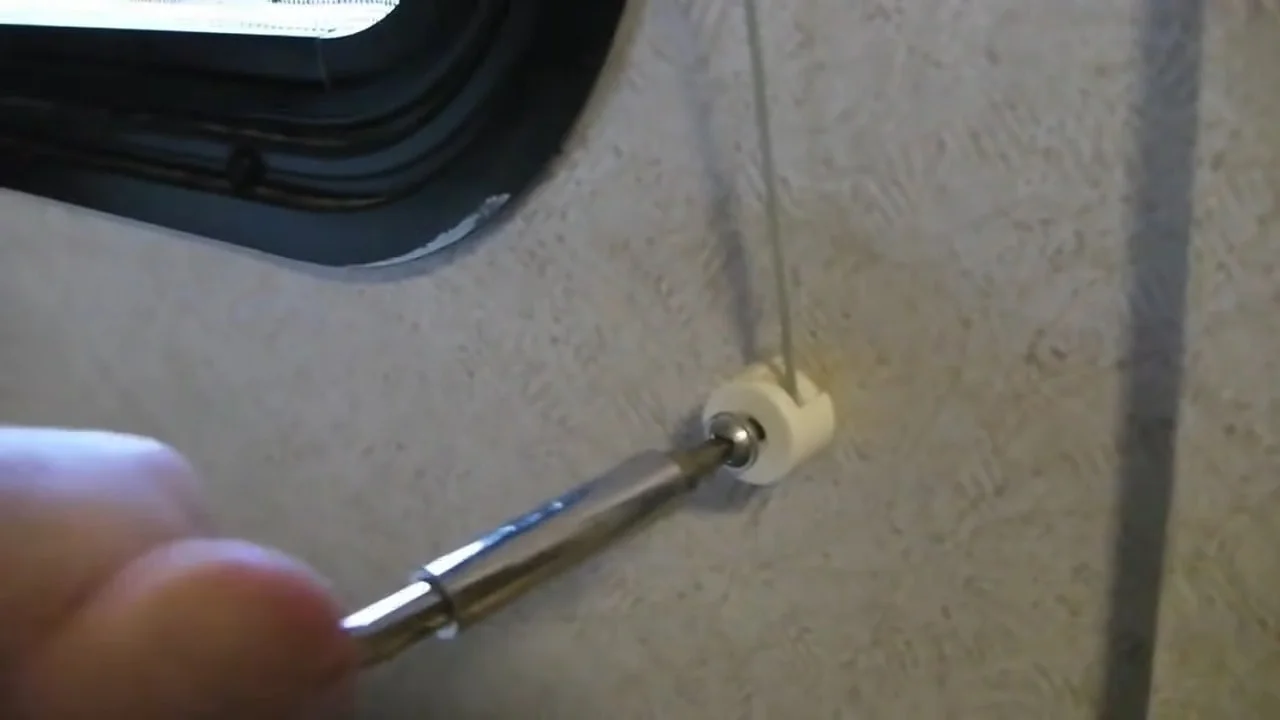
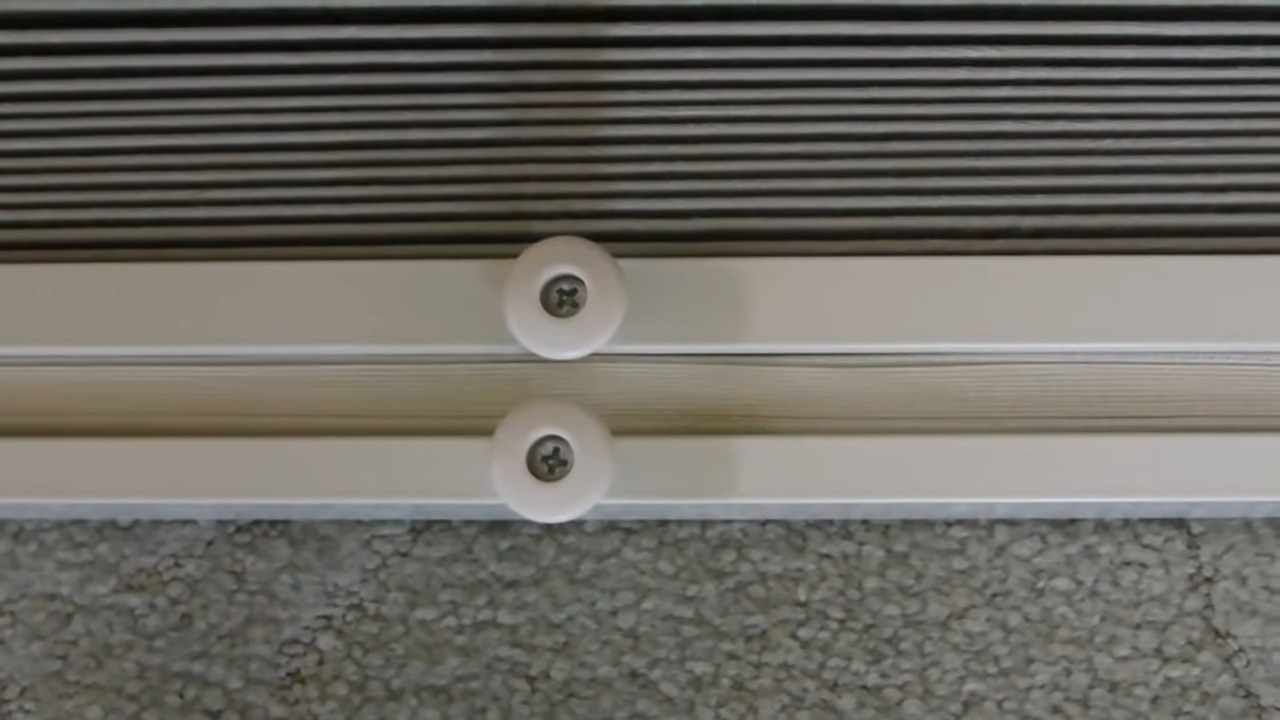
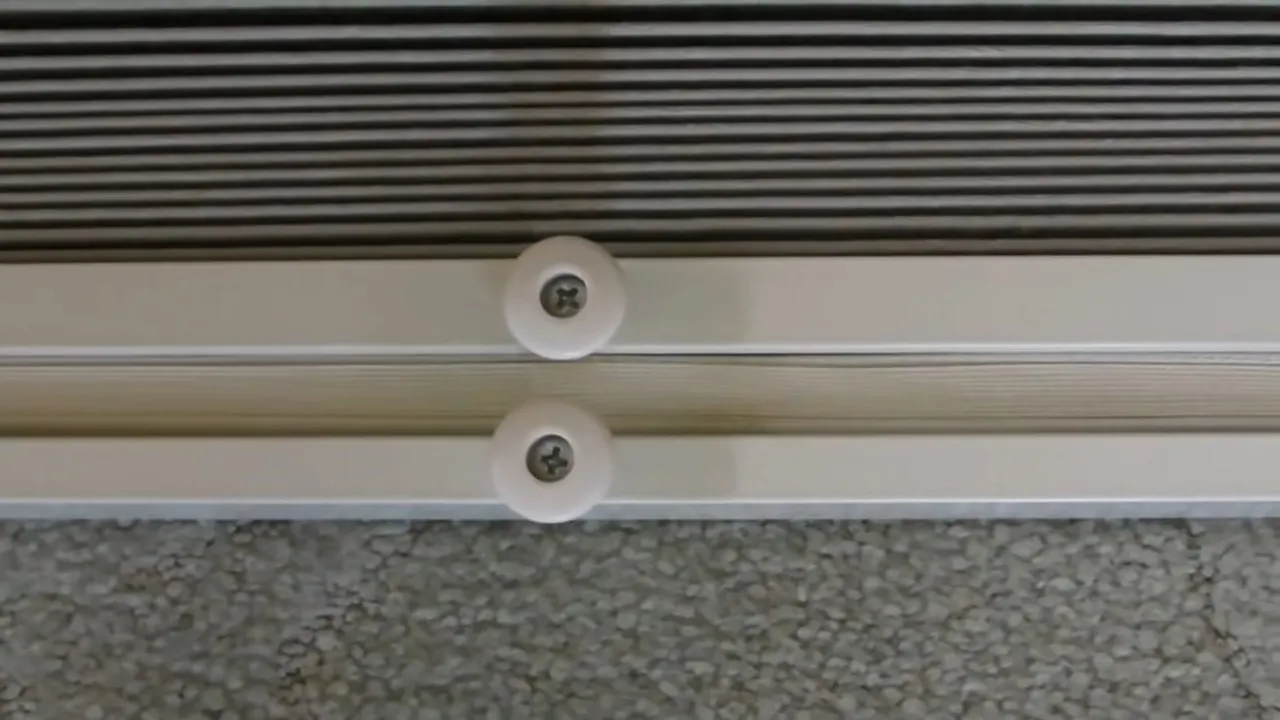
Attach the wall anchors to the wall & adjust the cord
Holding one cord at a time, slide each wall anchor down until it’s in place. Screw it partway in until you’ve connected both sides.
Important note: If your blinds fall down, you need to pull the cord a bit tighter by readjusting the tension of the cord at the anchor. The tighter the cord, the stiffer the pull of the blind will be. Likewise, if the blind is too hard to move, then you need to loosen the tension on the cord. You’ll do this at the wall anchors using your screwdriver. Note, however, that too much tension makes the blinds harder to move and leads to excess cord wear and broken cords. The blind should be just tight enough to stay where you put it, and not tighter.
Once you have the tension just right, fully tighten the anchors at both sides, and cut off the excess cord with a pair of scissors. Make sure the blind is centered over the window. If not, a little tap to the left or right on the side of the header rail should center it horizontally.
Final Step to Restring RV Pleated Shades: Re-install your window treatment
Reinstall any window treatment you may have, and enjoy your completed project and your blinds.
Restringing RV Pleated Shades is Even Easier With Our Video Tutorial!
Here’s our video which you can follow step by step. Be sure to either print or have your diagrams handy (PDFs available above) prior to beginning the project.
Conclusion: How to Restring RV Pleated Shades
Now that you know how to restring RV pleated shades, you’ll be able to do this anytime it’s necessary, AND you’ll be saving yourself a lot of money in labor costs. If you keep a roll of cord on hand, your project will be ready to go whenever you are.
Geek Out with Us Every Week
Join our newsletter to learn about all things RV-related. Every week we offer free tips, tricks, product reviews, and more to our online community of RVers. So, whether this is your first time on the road or you’re a seasoned expert, we’d love for you to geek out with us!
Pau
Saturday 1st of July 2023
Diagram of restringing a 6 cord day/night blind. Haven’t been able to find one on the web
Anne
Monday 19th of September 2022
We have 4 string pleated shades but not day/night. How do you do them?
Andy B.
Monday 20th of May 2019
It seems the video of "How To Re-String a Pleated RV Window Shade" is gone from your website? Please help by sending a link to the video.
Thanks!!
TheRVgeeks
Monday 20th of May 2019
Hi Andy! We just did an update to our website and all of our video links are dead. We're working hard to fix it ASAP, but in the meantimew, here's a direct YouTube link to the video you're looking for: https://youtu.be/398wcJoR8ws Hope it helps!
Jim Preisler
Monday 27th of August 2018
Great video. Just finished successfully restringing one of our blinds in our Fleetwood Excursion.
TheRVgeeks
Monday 27th of August 2018
That's awesome, Jim! Always great to hear we've been helpful. Thanks for taking the time to let us know. ?
James D Iding
Wednesday 27th of June 2018
Hi Peter and John, I would like to thank you both for your very informative video. I just finished helping my brother-in-law restring one of his shades and with your help we were able to do right the first time. I really appreciate your suggestion to make a drawing of how the strings are routed. The shade had three strings so I used three different colored pens to mark the routes. Thank you for all your "Words of wisdom" and great videos. I hope some day we may cross paths and I can then thank you in person.
TheRVgeeks
Wednesday 27th of June 2018
Thanks so much for taking the time to write such a nice note, James! It's always great to hear we've been helpful, and you just made our day. ?