
Most campers love a good “hobo pie” made with an old-fashioned campfire pie iron, sitting around enjoying the company of family and friends. Whether you call them hobo pies, pudgie pies, mountain pies, or campfire pies, today’s post is full of pie-iron recipes for your next camping trip.
And even if you don’t want to carry the weight of an iron or traditional mountain pie maker, we’ll tell you how to make many a camper’s favorite campfire pie, a mountain pie recipe that requires nothing more than a long-handled dowel. Kids and adults alike will love these! They’re easy, fun, versatile, and delicious! Let’s go!
What Is a Pie Iron?
A pie iron is a cooking tool for making anything from toasted sandwiches to French toast to pies… all over an open flame. It typically consists of two hinged metal plates with long handles.
The plates have a cavity into which you place ingredients such as bread, pie crust, or tortillas along with your choice of fillings (cheese, meats, fruit, sweet treats, etc.). When you close the pie iron, a sealed pocket results, and the cooking process can begin.
When you hold your pie iron over a campfire, the contents inside the iron are cooked and, when done right, should result in a nice crispy, toasted exterior.
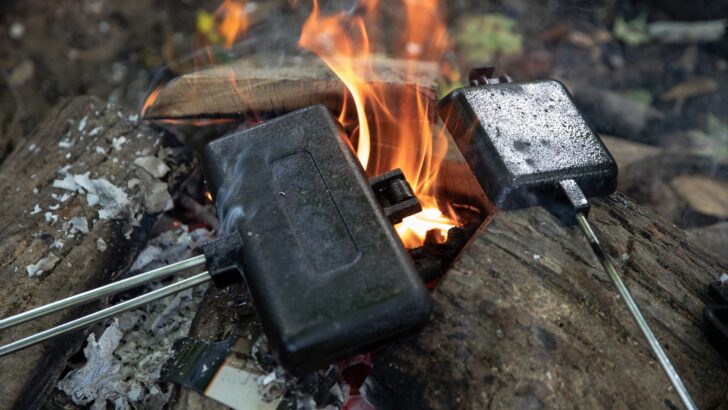
This is a traditional pie iron:
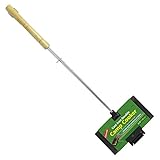
- Cook twice as many of your favorite campfire treats in the double-compartmentalized Camp Cooker
- Pre-seasoned cast iron
Can I Make Campfire Pies Without a Pie Iron?
Yes! Even if you don’t have a pie iron on hand, you can make all kinds of campfire pies (also called mountain pies, hobo pies, pudgie pies, etc.).
A common way to make some delicious campfire “pies” is to use a dowel to form small cylinders of crust into which you place your ingredients. In our recipes below, we’ll include some great ideas for this type of “mountain pie” or “campfire pie.”
Instead of a traditional pie iron, you’ll need a rounded dowel at least 3 feet long and 1 1/4″ to 2″ in diameter. Some travelers prefer to carry dowels because they’re lightweight and easy to handle and store. Just make sure the dowels are made of untreated wood to avoid any issues with the chemicals used to make treated wood. It’s also a good idea to soak them in water overnight before using them to prevent scorching of the wood.
You can pick up dowels for this purpose at almost any hardware store, including the big box stores like Home Depot, Lowe’s, Rona, etc.. Or you can pick up a bunch online and have them ready for your next camping trip. Just make sure they’re untreated hardwood dowel rods, like these from Amazon:

- EVERYTHING YOU WANT IN A DOWEL ROD- Strong? Check! Straight? Check! And uniform in size and color too! Woodworkers, wood crafters, DIYers - this is...
- TURN BLANK WOOD STICKS INTO WORKS OF ART - Whether you're lathe wood turning, DIY home decorating (like curtain rods), or crafting your own household...
Awesome Campfire Pie Recipes
Now, let’s get into some recipes! We’ll begin with the cool dowel trick for making all kinds of pies and treats in little cylindrical crusts. These are sometimes called “pole pies” or “camp tarts”.
IMPORTANT NOTE: Be sure that everyone knows to take their time and to be careful when eating ANY of the recipes below. The contents can get quite hot, and molten cheese or pie filling can easily burn your mouth (or hands or anything else it drips on)!
Pole Pies (aka “Camp Tarts” ← we love that name! 😂 )
All you need to make these great little treats are a dowel of untreated hardwood, a container of crescent rolls, your favorite pie filling, and a spray of whipped cream. You’ll also want to bring a can of cooking spray to help your crust slide off the dowel easily.
- Start by spraying the end of your dowel with cooking spray
- Take the dough for one crescent roll and shape it around the end of the dowel. It should be about 1/4″ thick all around.
- Hold the dowel so that the dough can cook over the open fire (but not so close to the flames that you burn it), turning the dowel slowly to cook all sides of the dough equally.
- When the dough is a nice golden brown all the way around, gently remove it from the end of the dowel (Note: If it’s still sticky or tacky, it’s not done. It should slide off the dowel easily when it’s cooked.)
- Now, fill your pie dough cylinder with your favorite pie filling, followed by a spray of whipped cream on top. You can also sprinkle a little sugar & cinnamon mix on top. This is a great way to make little blueberry, apple, cherry pies, or any fruit pie you enjoy most.
Note that this type of pie can be made with nearly anything:
- You could fill the cylinder with peanut butter, chocolate chips or chocolate sauce, and then top it off with a whipped cream (this one is OUR personal favorite… but we’re suckers for ANYTHING with peanut butter in it, LOL!).
- You could bring premade pudding along on your camping trip and use that to fill your cylindrical crusts with pudding, marshmallows, and chocolate chips, topping it all off with a dose of whipped cream (they call these campfire eclairs). You could even finish it off with some real chocolate jimmies .
- The possibilities are endless for these great little pole pies!
In case you’re having trouble visualizing how to put these pole pies together, here’s a video that’ll show you exactly how it’s done, step-by-step:
View this post on Instagram
Pizza Mountain Pies
Pizza Mountain pies are best made with a traditional pie iron (although you could certainly put pizza ingredients into little pole pie crusts if you want! We’re not judging, honest! 🍕).
The ingredients you’ll need are:
- Pizza dough
- Pizza sauce
- Shredded mozzarella cheese
- Your favorite pizza toppings (prep anything you want in advance to save time when everyone gets hungry!)
- Cooking spray or oil for the pie iron
Once you’ve gotten all of that together, here are the instructions:
- Preheat a clean, well-seasoned pie iron over your campfire or grill.
- Roll out a portion of the pizza dough to fit the size of your pie iron. Make sure the dough is thick enough to hold your pizza fillings.
- Place one piece of rolled-out dough onto the bottom half of the pie iron.
- Spoon a layer of pizza sauce onto the dough, leaving some space around the edges (needed to seal the contents inside the dough, like a hot pocket).
- Add your desired pizza toppings and a generous amount of shredded mozzarella cheese (again, leaving uncovered dough around the edges).
- Place another piece of rolled-out dough on top and press the edges to seal the pie.
- Close the pie iron and hold it over the campfire or grill, rotating the pie iron occasionally to ensure even cooking.
- Cook until the crust is golden brown and the cheese is melted. Cooking times vary, so keep a close eye on the pie as it cooks, being very careful not to burn yourself when handling the pie iron.
- Open the pie iron and transfer your pizza mountain pie to a plate.
Pigs In a Blanket
Pigs In a Blanket are a favorite of many campers and are very easy to make.
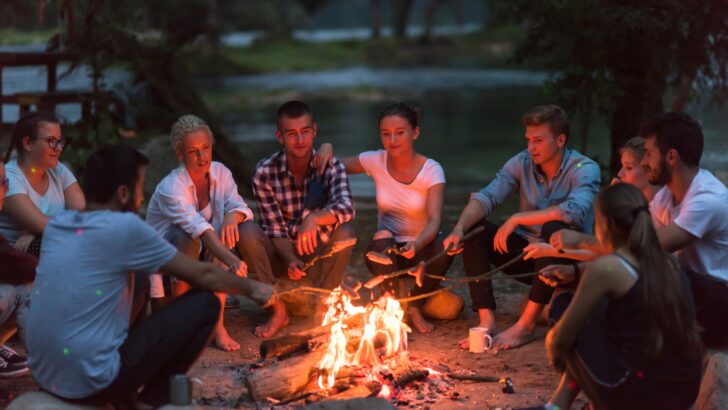
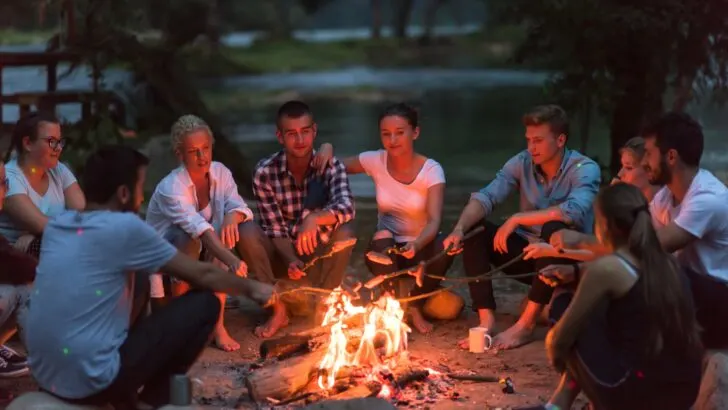
Whether you’re cooking pigs in a blanket, plain hot dogs, marshmallows, or a fancy campfire pie, cooking around the campfire with friends is a wonderful experience.
There are a couple of different ways to cook them, but either way, this is all you’ll need:
- A tube of refrigerated crescent rolls
- Hot dogs
- Desired condiments
- Spray cooking oil
You can make these using a pie iron if you wish (you may want to slice the hot dogs up so they fit inside the dough when placed in the pie iron), though they may be easier to make using a skewer, long stick, or camping/grilling fork.
- Pull apart your crescent rolls and wrap them around your hotdogs. Try to cover as much of the hotdog as possible. Pull the ends tightly together to seal them.
- Set into an oiled pie iron or onto the end of a stick. Note that when using a stick, you must be careful not to let the dough melt off at first. You can do this by gently rotating the stick as you hold it over the fire.
- Cook your pigs in a blanket slowly over an open campfire. When they’re no longer sticky or tacky and are a nice golden brown all the way around, they’re done!
Traditional Grilled Cheese Sandwich
This is one of the easiest and simplest “campfire pies” to make. All you need are a couple of pieces of white bread and your favorite cheese. You’ll also want some butter or spray oil (spraying your pie iron with cooking spray is generally the easiest way to go, but for grilled cheese sandwiches, some people prefer to butter the slices of bread… and we can’t blame ’em, one bit!)
- Preheat your pie iron.
- Butter your pieces of bread or spray the inside cavity of your pie iron with cooking oil if you prefer.
- Lay one piece of bread onto one side of your pie iron, then place your cheese on the bread and your second slice of bread on top of the cheese.
- Hold your pie iron over the fire, rotating it regularly to make sure the bread is toasted on both sides and the cheese melts nicely.
Campfire Quesadilla
The Campfire Quesadilla is another excellent “campfire pie” that’s easy to make. Ideally, you’ll want to use your pie iron for this recipe.
Here’s what you’ll need:
- Flour tortillas
- Cooked, shredded chicken (pre-cooked at home or canned)
- Shredded cheese (cheddar, Monterey Jack, or your favorite)
- Sliced onions
- Salsa and sour cream for dipping (optional, but makes these so much better!)
Now it’s time to get cookin’:
- Preheat your pie iron over the campfire or your camping grill.
- Place a flour tortilla on one side of the pie iron.
- Add a layer of shredded chicken to the tortilla.
- Sprinkle a generous amount of shredded cheese over the chicken.
- Add sliced green onions on top of the cheese (and/or other toppings you prefer).
- Place another tortilla on top, creating a quesadilla sandwich.
- Close the pie iron and latch it shut.
- Cook the quesadilla over the campfire or grill, turning occasionally, until the tortillas are crispy and the cheese is melted (usually 4-5 minutes, but cooking time will vary by how hot your campfire is).
- Carefully open the pie iron and check if the quesadilla is cooked to your liking.
- Remove from the pie iron and let it cool before slicing into wedges.
- Serve with salsa and sour cream for dipping, if desired.
Get Your Pie Iron Ready, The Crowd’s Hungry!
So whether you’re using a traditional camping pie iron or a thick untreated hardwood dowel (or if you prefer to use a skewer or a grilling fork), many fun recipes can be made over a campfire.
For more great camping recipes, see our post on one-pot camping meals!
And if you’re looking for songs and games to enjoy around the campfire, see our posts on campfire songs and campfire games. And once you’re done with all the campfire fun, you may want to learn how to get the smoke smell out of your clothes!
Free RVing Tips, Tricks, Reviews & Giveaways
As 20-year full-timers, we share everything we’ve learned about RVing over the years. Join our online community to receive a wealth of great RVing knowledge delivered daily to your inbox.
Whether you’re a new RVer or a seasoned full-timer, you’ll love the wide range of RVing topics we cover. Don’t miss a single article or any of our famous Giveaways. Subscribe to our newsletter today!
Randy Slayton
Monday 19th of February 2024
Bread seems to have gotten smaller. Tried to make some and the bread would not even cover the iron that I have had for years. Back in the day you would have excess hanging over that you would whomp against a tree to cut it off.