
Caulking is an important maintenance task for all homes, including RVs. A good caulking job seals gaps and prevents leaks, keeping living spaces comfortable and well-protected and leak-fee. But achieving a smooth, professional finish can be a challenge, especially for beginners. In this post, we’re offering some smooth caulking tips to make the job easier to do right the first time, and every time.
-
1)
Smooth Caulking Tips for Professional Results
- 1.1) Choose the Right Caulk
- 1.2) Prepare the Surface
- 1.3) Tape Both Sides of the Area Being Caulked
- 1.4) Choose a Quality Caulk Gun
- 1.5) Cut the Nozzle at the Proper Angle
- 1.6) Apply Even Pressure
- 1.7) Smooth the Caulk
- 1.8) Clean Up Excess Caulk
- 1.9) Allow Ample Drying Time
- 1.10) Perform Regular Inspections
- 2) The Caulk Ice Cube Hack: Yay or Nay?
- 3) Free RVing Tips, Tricks, Reviews & Giveaways
Smooth Caulking Tips for Professional Results
Note that the tips we’re covering today are primarily for use with silicone or latex caulks used in showers and tubs, or around sinks. These techniques aren’t needed for Dicor sealant around RV roof penetrations since it self-levels. (For more on this, see our post on maintaining Dicor RV roof sealant.)
Some of these tips may not apply to certain other products either. For example, Pro Flex is often used to seal around windows and roof seams. But ProFlex recommends using a soap solution (a few drops of dish soap in water in a spray bottle) instead.
The following tips are sure to be helpful in achieving pro results when caulking many areas of your home or RV.
Choose the Right Caulk
The first step to a successful caulking job is selecting the right caulk for your specific needs. Various types of caulk, such as silicone, acrylic, and latex, are available, each designed for specific applications.
The choice of caulk may vary depending on the surface you’re working on, so read labels carefully to ensure compatibility.
In an RV, where flexibility is crucial due to vibrations and movement, a flexible and durable caulk that can withstand the rigors of the road and the weather is best. But even in an RV, there are certain types of caulk for specific jobs. You’ll also want to buy caulk in the correct packaging — tubes that fit into caulk guns for larger jobs and squeeze tubes for smaller touch-ups.
For more on choosing the right caulk, see our post RV Caulk: Why Choosing the Right One for the Job is Important. These are mostly caulks for exterior jobs. For caulking bathrooms and kitchens, we prefer high-quality, mold-resistant, long-lasting brands:

- 100% Waterproof: This 100% silicone formula offers ultimate protection against water damage, providing a reliable seal in areas prone to consistent...
- Strong and Flexible: Stays permanently flexible with a high-performing, durable seal
Prepare the Surface
Just like with painting, proper surface preparation is one of the most important smooth caulking tips. For both homes and RVs, a clean, dry surface is important to ensure the caulk adheres properly. Thoroughly clean the area to be caulked, removing any dirt, dust, or old caulk.
There are commercial products available, and many professionals recommend using denatured alcohol in a spray bottle for the same effect. (Note that while isopropyl (rubbing) alcohol may work, it’s not the same as denatured alcohol.)

- Package Dimensions: 18 L x 21 H x 18 W (inches)
- Package Weight : 3.01 pounds
- CAULK REMOVAL MADE EASY: Lift Off Caulk Remover uses a patented, water-based formula that is biodegradable to safely remove sealants, expansion foams,...
- FAST AND SIMPLE TO USE: This caulk remover is fast acting requiring a simple spray, wait, scrape and wipe clean process to remove sealants, foams and...
No products found.
- Produces A Hot, Clean, Odorless And Smokeless Flame
- Ideal For Marine Stoves And Other Alcohol-Burning Appliances
You may also find a caulk remover/applicator tool helpful.
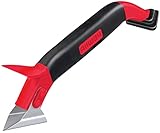
- Multifunction 3-in-1 caulk tool with comfortable soft-grip
- Use the steel blade to quickly remove old, dried caulk
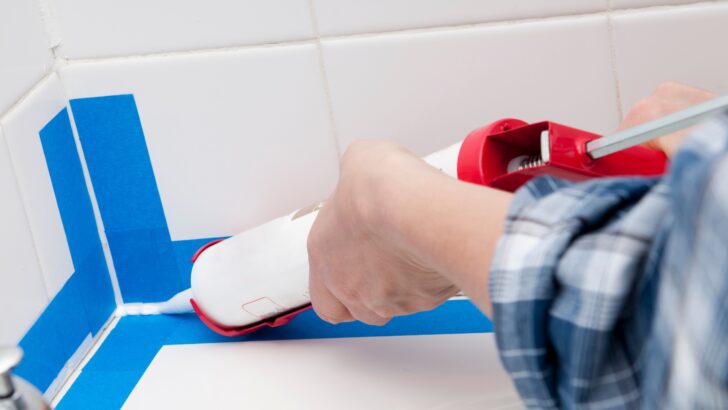
Tape Both Sides of the Area Being Caulked
Taping takes some extra time, but it allows you to create the most perfect caulking job possible. Using painter’s tape, a novice can create as perfect a line of caulk as the most seasoned professional.
Tape both sides of the area to provide a clean, straight edge. It’s important to use quality painter’s tape. Frog tape works very well, providing a clean edge and easy removal.

- Advanced PaintBlock Technology: FROGTAPE Multi-Surface Painter's Tape is equipped with innovative PaintBlock Technology, which forms a micro-barrier...
- Versatile Application: This painter's tape is designed for use on multiple surfaces, including painted walls, trim, woodwork, glass, metal, and more.
PRO TIP: Be sure to remove the tape immediately after the caulk is applied and smoothed, before it begins to skin over. That will prevent it from pulling up your nice smooth edge as you remove it.
Choose a Quality Caulk Gun
Not all caulk guns are created equal. Investing in high-quality tools can make a world of difference on the job.
The caulk gun below is the one we use ourselves, and we LOVE it! It’s more expensive than the super-cheap models out there, but well worth the cost as the performance is far better. The caulk application is more comfortable and more controlled, resulting in a neater finish.
For RVs, it can be important that your caulking gun is easy to handle and can provide a steady flow of caulk in tight spaces.
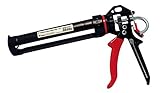
- 26:1 THRUST RATIO: 950 pounds of force easily extrudes the thickest of materials
- COMFORTABLE GRIP: Ergonomic rubber trigger and push release
Cut the Nozzle at the Proper Angle
Before you apply the caulk, use a utility knife or razor blade to cut the tip of the nozzle at a 45-degree angle. Note that the size of the hole you cut will determine the width of the bead coming from the caulking tube. A smaller hole is suitable for fine work, while a larger hole is better for broader gaps.
Apply Even Pressure
As you begin caulking, maintain even, light pressure on the trigger of the caulking gun. This provides a consistent flow of caulk and helps to prevent gaps and lumps in the bead.
Take your time. To ensure a professional look, it’s important to use steady hands and consistent light pressure. This can be especially challenging in an RV with limited space, so work slowly and deliberately.
Here are some great silicone caulking tips:
Smooth the Caulk
Pay close attention to these tips and tricks for smoothing out caulking because they can make the difference between a shoddy-looking job and one with a nice finish.
After applying the caulk, use a wet finger to smooth it out. You can also use a caulk tool. Simply wet your finger or smoothing tool slightly with water or denatured alcohol and smooth the bead to create a clean, smooth finish.
Note that spraying the area may work better in some cases because it helps prevent the excess caulk you tool/smooth off from sticking to the surrounding area, making clean-up easier. However, if you’re using tape (which we always do!), this tends to be much less of an issue.
Again, be sure to remove the tape right away after smoothing the caulk, before it starts to skin over!
PRO TIP: Wear disposable nitrile gloves while applying the caulk. Then, you can use a gloved finger to smooth the caulk and remove the tape, all without making a mess of your hands, or the bathroom.

- 【High Quality Material】PROMEDIX P Excellent quality Nitrile gloves! They're stretchy as well! Disposable gloves are very enduring and...
- 【ENDURING AND COMFORTABLE】3mil nitrile,Black gloves has been upgraded to 4 mil,suitable thickness,gloves have good thin and flexible, give me...
Clean Up Excess Caulk
As soon as you’re finished smoothing the caulk and removing the tape, wipe up any excess caulk with a paper towel. We keep a roll of paper towels handy during the entire caulking process. We don’t use cloth rags with caulk because any fabric that gets caulk on it will need to be thrown out.
Once silicone caulk gets onto any porous material, it’s very hard to remove. So you might as well just use paper towels and not worry about it. (For the same reason, we always wear old work clothes for caulking.)
Allow Ample Drying Time
Caulk needs time to cure and set properly. Read the caulk label for specific drying times, and be patient before getting the area wet. Rushing the drying process can result in a less durable seal.
If you’re working in an RV, consider your travel schedule and plan your caulking projects accordingly so the caulk will have adequate time to cure thoroughly before you start driving your rig.
Perform Regular Inspections
For both sticks-and-bricks homes and RVs, regularly inspecting caulked areas is critical. Over time, caulk can deteriorate, crack, or peel, leading to potential leaks or damage. Regular maintenance will ensure that your caulked areas remain in top condition.
We offer more information about the importance of inspecting RV caulking in our post on Dicor RV roof sealant.Regular maintenance and inspections will also help you catch and address any issues before they become major problems.
See tips on how to get smooth caulk joints in this YouTube video:
The Caulk Ice Cube Hack: Yay or Nay?
There’s an “ice cube hack” floating around the Internet that some people swear by. The way it works is that after you’ve filled your seam with caulk and used a smoothing tool or your finger to distribute the caulk evenly, you slide a small ice cube along the caulk line. The cold surface of the ice is supposed to clear out any lumps or ridges in the caulk, offering a flawless finish.
We’ve read about the hack, but we’ve never used it ourselves. However, we’ve also read that many people who’ve tried it say it doesn’t work well at all. We don’t recommend it and think the techniques in this post will offer better results.
Free RVing Tips, Tricks, Reviews & Giveaways
As 20-year full-timers, we share everything we’ve learned about RVing over the years. Join our online community to receive a wealth of great RVing knowledge delivered daily to your inbox.
Whether you’re a new RVer or a seasoned full-timer, you’ll love the wide range of RVing topics we cover. Don’t miss a single article or any of our famous Giveaways. Subscribe to our newsletter today!
Anker
Saturday 11th of November 2023
You guys are amazing! Great advice that always seems to come at the time I need it!
TheRVgeeks
Saturday 11th of November 2023
Well thanks so much< Anker! It's always great to hear we've been helpful.