
When you drive an RV, a backup camera is a great asset. RVs are long and it’s tough to see what’s behind you with just your mirrors (or a cranked neck). But not all RVs are easily wired for backup cameras. That’s why today we’re taking a look at the wireless backup camera for RV use!
- 1) Why Would I Want a Wireless Backup Camera for My RV?
- 2) Pros and Cons of a Wireless Backup Camera for RV Use
- 3) Features to Consider in a Wireless Backup Camera for RV Use
-
4)
How to Install a Wireless Backup Camera for RVs
- 4.1) What You’ll Need
- 4.2) What You’ll Do
- 4.3) Mount Your Monitor
- 4.4) Plug In the Monitor
- 4.5) Drill or Access a Hole in the Rear of the RV
- 4.6) Remove the Bulb and Socket of a Backup Light
- 4.7) Attach the Camera’s Power Cable
- 4.8) Replace the Socket and Bulb
- 4.9) Turn On Your Monitor
- 4.10) Test the Connection and Calibrate the System
- 5) Wireless Backup Cameras For RV Use
- 6) Do You Use a Wireless Backup Camera for Your RV?
Why Would I Want a Wireless Backup Camera for My RV?
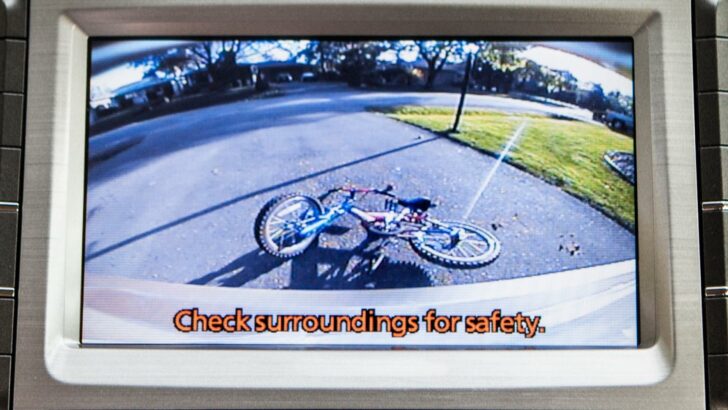
We all understand the benefits of having a backup camera of some kind on an RV. It’s not easy to see everything that’s behind us when we’re backing up a motorhome or any other type of RV. It’s challenging, and sometimes simply impossible to see some objects, especially those that are low to the ground.
An RV backup camera helps to eliminate blind spots and makes backing up your RV safer.
But, why might you want to go wireless?
Easy Installation
Wireless backup cameras can be very easy to install. And a wireless backup camera for RV use in particular means no running wires the long distance between the back of the RV and the front.
You Have a Travel Trailer
Some RVs make installing a wired backup camera especially difficult. This would be true of a travel trailer, for example. In this case, your RV is separated from your truck/towing vehicle. This makes installing a wired backup camera more complicated because the camera and monitor will be in separate locations.
The same may be true if your RV is built on a box truck or if you’ve got a toy hauler or any type of RV that makes wiring RV backup camera systems challenging.
You Don’t Want to (or Can’t) Run Wires
Many RVers simply want to avoid running wires in order to set up a backup camera.
For these travelers, a digital wireless backup camera for RV use is exactly the ticket they’re seeking.
Pros and Cons of a Wireless Backup Camera for RV Use
There are advantages and disadvantages of wireless (as opposed to wired) backup cameras. Let’s take a quick look at the pros and cons.
Advantages of a Wireless Backup Camera for RV Use
- Easy to install
- No need to run wires through long vehicles or between two vehicles
- No need to purchase additional lengths of wire to run long distances
Disadvantages of a Wireless Backup Camera for RV Use
- Require their own power source as they’re not wired to the monitor
- Generally don’t offer as crisp and bright a picture as wired cameras (digital wireless systems are better than analog systems in this regard)
- Possible interference causing a poor wireless signal between camera and monitor (again, digital systems are better than analog in this regard)
Features to Consider in a Wireless Backup Camera for RV Use
There are a number of features you may want to consider if you decide to purchase a wireless RV backup system.
Separate Monitor
There are wireless backup camera systems that use your cell phone as the monitor. These systems can be inexpensive but may be inconvenient to use. Others use your rear view mirror as a viewing monitor.
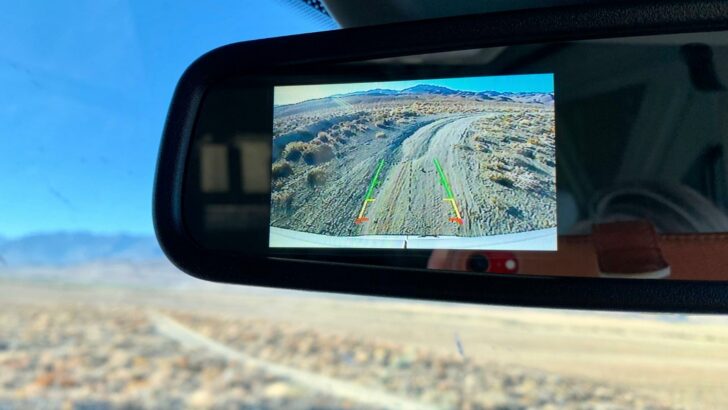

Some wireless backup cameras use the rearview mirror as the image monitor.
If you want a separate monitor to watch as you’re backing, be sure that is a feature of the system you choose.
Night Vision
If you find yourself getting to campsites or back to your home after dark on occasion, you may want to be sure that your backup camera includes night vision.
Many backup cameras offer a very distorted picture at night unless they offer the feature of night vision.
Wide Viewing Angle
The more you can see, the safer you’ll be as you’re backing up your RV.
You want to be able to see a distance of at least the width of your rig. This way, anything in the vicinity of the back of your RV will be visible on your monitor as you’re backing up.
Single Camera for Backup or Additional Dash Cam
Some people simply want a backup camera and that’s it. Others want a combination backup camera and dash cam that monitors what happens in front of the RV.
This is a personal choice, but be sure to look for a system with both cameras if that’s your desire.
Strong Signal Between Camera and Monitor
Check information and reviews regarding the strength of the signal between the camera and monitor of any system you’re considering. If the signal isn’t sufficient to regularly cover the distance between the back of your rig and the monitor on your dash, it won’t be helpful to you.
We strongly recommend reading reviews based on actual user experiences as you research this important feature of a wireless backup camera for RV use.
Ability to Record Video
Do you intend to use your system for both backup assistance and security? If so, you may want your system to have the ability to record video. This is especially true of any system that includes a dash cam.
Also, note the manner in which the video is stored. For example, some systems store video on an SD card which is not only replaceable but also very easy to use.
How to Install a Wireless Backup Camera for RVs
While there may be some variations in the process of installing a wireless backup camera for different RVs (read the instructions that come with whatever unit you buy), we’ll give you the general steps here so that you have an understanding of what’s involved.
What You’ll Need
- Drill with screw bits
- Isopropyl alcohol
- Clean rag
- Sealant (like ProFlex Clear RV Sealant)

- Flash Point: 93.0 Degrees_Celsius
- Excellent Adhesion To Many Surfaces, Even When Damp
What You’ll Do
Mount Your Monitor
Mount your system’s monitor in a location that is convenient and easy to see from your position in the driver’s seat.
Plug In the Monitor
Plug your monitor into a nearby 12V socket.
Drill or Access a Hole in the Rear of the RV
Either drill a hole in the back of the RV where the rear view camera will be located or plan to use a license plate hole.
Remove the Bulb and Socket of a Backup Light
Remove one of your RV’s backup light bulbs as well as its socket.
Attach the Camera’s Power Cable
Attach the power cable of the camera to the colored backup light circuit.
Replace the Socket and Bulb
Put the socket and bulb back into place just as they were prior to removal.
Turn On Your Monitor
Press the power button on your monitor to turn it on.
Test the Connection and Calibrate the System
Start your RV. Test the connection between the camera and monitor.
You may need to test this multiple times and adjust the camera settings as necessary to achieve the best picture quality.
You may also need to adjust the camera itself slightly to give you the best line of sight possible.
Wireless Backup Cameras For RV Use
Let’s take a look at a few of the more popular wireless backup cameras for RVs. We encourage you to read as many user reviews as possible. Pay special attention to the reviews from users who have an RV that is similar to yours (different equipment and construction materials can affect the stability of the signal between the camera and monitor).
Haloview MC7108 Wireless RV Backup Camera System
This system has a 7″ LCD digital monitor and a built-in recorder for real-time recording with audio and video playback. It offers a 120° viewing angle and its wireless line-of-sight range is up to 984 feet.
The system can support up to four wireless camera inputs, though this kit comes with just one 720p HD camera and one monitor. It also includes a sun shield and necessary installation items.
The Haloview MC7108 offers night vision, split mode, auto-scan mode, and single-display mode along with five different viewing options. It has the highest IP rating for waterproof status (IP69K).

- 7" LCD digital monitor, Built-in recorder. Real time recording, video playback
- 10-32V wide voltage input, Support 4 wireless camera input,120° wide viewing angle, Wireless Line of Sight Range Up to 984 feet (This kit include 1...
Furrion Vision S 4.3 Inch Wireless RV Backup System
The Furrion Vision S offers a high resolution (720p x 480p) camera with infrared night vision as well as wide viewing angle (120°) and the ability to live-stream.
This particular kit comes with a 4.3″ anti-glare monitor with touchscreen, but the system is also available with 5″ or 7″ monitors. It comes with one rear Sharkfin camera and a Furrion mount for the windshield.
2.4GHz wireless allows for long-range signal strength. It has a 42-foot range in motion and an extended range of up to 492 feet in open spaces. The night vision range is up to 16 feet.
The Furrion system has a microphone and a motion detection feature that will detect movement behind your RV that automatically “wakes” the display.
The rear camera also has a microphone with audio and rear-assist marker lines for safe backing assistance.

- Easy & Quick Installation: Vision S Sharkfin Camera is an easy plug and play for pre-prepped RVs, eliminating extensive drilling requirements. Easy...
- Durable and intelligent camera system: Includes a High Resolution (720x480) IP65 waterproof camera with infrared night vision, live streaming,...
DoHonest V23 RV Wireless Backup Camera
This system comes with TWO 1080p HD cameras with infrared night vision and BlueTooth as well as a 7″ monitor. It has 4-way video input (channels 1 through 4) and is capable of a single image, dual (split screen) image or quad (4-screen) images.
The strong wireless signal is capable of reaching up to 500 feet in open areas and 320 feet in motion.
The adapter is compatible with Furrion pre-wired RVs. It has very high waterproof protection (IP69) and is capable of withstanding temperatures from -4℉ to 149℉ without lens damage or fogging.
The DoHonest V23 is advertised as being suitable for all types of RVs including motorhomes, travel trailers, and fifth wheels.

- ★【Easy Installation】This rv backup camera wireless is a great alternative to that high dollar system furrion. V23 wireless backup camera comes...
- ★【4 Channels RV Camera System with Recording】The 4-channel feature allows you to add extra trailer cameras to the front/rear/inside at any time...
Do You Use a Wireless Backup Camera for Your RV?
If you use or have used a wireless backup camera for your RV we’d love to hear about your experience. Tell us which system you’ve used and how well it worked.
We’d especially like to know whether you’ve had to deal with any wireless interference, the features you most appreciate, and how well the camera and monitor serve to give an accurate picture to the driver.
Be sure to include information about your particular RV setup.
Geek Out with Us Every Week
Join our newsletter to learn about all things RV-related. Every week we offer free tips, tricks, product reviews, and more to our online community of RVers. So, whether this is your first time on the road or you’re a seasoned expert, we’d love for you to geek out with us!
Jim Wilson
Friday 16th of September 2022
My Forde F250 has a large in-dash video screen for the trucks back up cam. How might I connect an RV Backup cam to my existing screen system?
Tony Strungis
Sunday 11th of September 2022
Well, well a back-up camera article. I have had a built-in wired cameras in my 2021 Coachmen Sportscoach with service replacing the darn thing and to this day can't figure out why it doesn't come on when I put the trans in reverse "NO SIGNAL". Someone told me that the cameras are "ON" all the time. It is the multiplex that choses your view. In other words, the activation of the R and L turn signal and reverse light throw the signal to the monitor. My work-around? When I back up, I go to "CAMERAS" on the menu and select REAR.
TheRVgeeks
Monday 12th of September 2022
Thanks for sharing your experience, Tony!