
- We recently wrote a post answering the question, “How much RV antifreeze do I need to winterize my RV plumbing?” We noted that the answer depends not only on the size of your RV but also on whether you choose to blow out your RV water lines vs using antifreeze. (Even when blowing the lines out, some antifreeze is required.)
If you decide to go the antifreeze-only route, today we’re providing step-by-step instructions on how to winterize your RV with antifreeze, no air compressor needed.
RVs need to be winterized because water expands when it freezes, which can cause RV pipes and plumbing fittings to burst. RV antifreeze is designed to protect an RV’s plumbing system from damage when the temperature drops below the freezing point of water (32℉ / 0℃).
So, let’s talk about how to winterize your RV with antifreeze.
- 1) What Kind of Antifreeze Do I Need to Winterize My RV?
-
2)
How to Winterize an RV Using Antifreeze
- 2.1) Empty Your Wastewater Holding Tanks
- 2.2) Open All Low-Point Drains
- 2.3) Drain Your RV Hot Water Tank
- 2.4) Put Your RV Water Heater Into Bypass Mode
- 2.5) Add RV Antifreeze to the Plumbing System
- 2.6) Turn On Your RV Water Pump
- 2.7) Run All Faucets One at a Time
- 2.8) Run Your RV Shower
- 2.9) Flush the Toilet
- 2.10) Washing Machine and/or Dishwasher
- 2.11) Pour Antifreeze Into the Shower Drain
- 2.12) Winterize Your City Water Inlet
- 3) Free RVing Tips, Tricks, Reviews & Giveaways
What Kind of Antifreeze Do I Need to Winterize My RV?
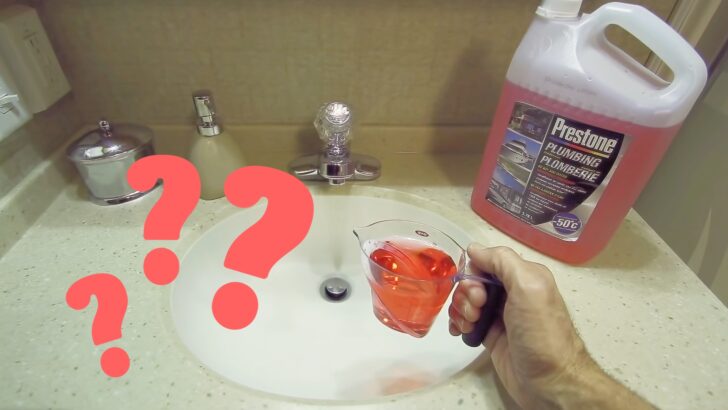
You may know that RV antifreeze is not the same thing as automotive/engine antifreeze. The two are completely different products designed for different purposes. The biggest difference with RV winterizing antifreeze (as compared to engine antifreeze) is that it’s non-toxic to humans as long as it’s used properly. (For lots more information about that, see our post “Is RV Antifreeze Toxic?“)
RV plumbing antifreeze is a bright pink liquid with a much lower freeze point than water. To prevent pipes from freezing, and potentially bursting, RV antifreeze is pumped into the plumbing system to replace the water.
While all RV antifreeze for pipes is intended to protect your RV’s plumbing system, it’s not all the same. Some are ethanol-based, some are propylene glycol-based, and, although it’s far less common, there is some RV antifreeze that is a blend of both ethanol and propylene glycol.
The best and safest option is propylene glycol-based antifreeze. Not only is it safe for all aspects of an RV plumbing system, but unlike ethanol, propylene glycol antifreeze is non-flammable. Propylene glycol also acts as a lubricant for faucets and toilet seals and leaves behind less of a taste in your freshwater plumbing. Propylene glycol antifreeze is also used as marine antifreeze for the winterization of the water systems in boats. Some offer burst protection down to -50°F.

How to Winterize an RV Using Antifreeze
The first thing to note is that your RV holding tanks (fresh, black, and grey water) can be left empty, or nearly empty, to keep them from freezing. Any small amount of water at the bottom of the large tanks has plenty of room to freeze and expand during cold weather without causing damage.
The pressurized plumbing lines are the most important part of the system to winterize. It’s important to protect your RV’s PEX water lines and fittings, and the the water pump. It’s also a good idea to protect the sink & shower drains, and the P-traps from freezing.
For winterizing using only RV antifreeze (as opposed to blowing out your water lines) you’ll likely need at least 2-4 gallons of antifreeze. However, depending on the size of your rig and how the plumbing is configured you may need as much as 6-12 gallons. (More on this in a minute.)
Empty Your Wastewater Holding Tanks
Empty your waste water holding tanks at a dump station or full hook-up campsite. If you have a black tank flush, be sure to use it before storing your rig for the winter.
Open All Low-Point Drains
The process of winterizing an RV using only antifreeze begins with allowing gravity to start draining the plumbing. Open any low-point drains for the plumbing system and freshwater tank, and completely drain all the clean water out onto the ground.
Drain Your RV Hot Water Tank
Next, you’ll need to empty your water heater tank. This is also a great time to flush and clean it as well, and to also replace the anode rod if you have a Suburban water heater.
Here’s how to empty and flush a typical tank-style RV water heater:
NOTE: For on-demand water heaters, be sure to follow the manufacturer’s instructions for winterizing. Some can just be drained, others may require you to protect them with antifreeze.
Put Your RV Water Heater Into Bypass Mode
If your RV has a water heater bypass system installed, now’s the time to bypass the water heater by turning the bypass valve(s). This will allow you to essentially cut off the water heater from the rest of the RV’s plumbing system as you continue winterizing your rig.
An RV water heater bypass generally consists of one, two, or three valves near the water heater. Turning the valve(s) 90 degrees bypasses the flow of water around (instead of through) the water heater. The valves are often hidden in a cabinet, or in the basement, very close to the water heater.
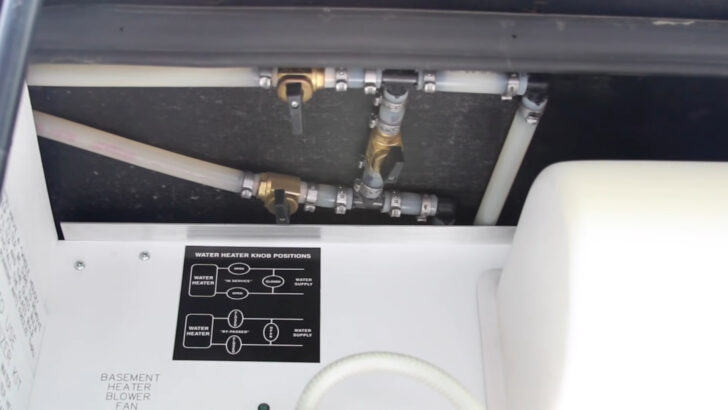

This shows the three water heater bypass valves on our Newmar Mountain Aire. Turning these valves 90 degrees will block the water supply to and from the water heater, effectively cutting it off from the RV’s plumbing system. (In this photo, the valves are set to bypass mode, blocking any flow of water to the heater, which is to the left.)
Bypassing the water heater allows you to pump antifreeze through the RV’s plumbing system without adding any to the water heater. RV water heaters only need to be drained, not filled with antifreeze. (The small amount of water left at the bottom of the tank can freeze without causing harm because there’s plenty of space in the tank for it to expand, similar to the RV’s holding tanks.)
However, not every RV has the ability to bypass the water heater, (though RV owners can install aftermarket bypass kits). The good news is that the most likely RVs to come without a water heater bypass are also the smallest models. That means less plumbing overall and a smaller water heater.
If your RV doesn’t have a water heater bypass installed, you’ll have no choice but to add RV antifreeze to the hot water tank during the winterizing process. This not only uses more antifreeze but also requires an especially good rinse-out in the spring (which is easy to do). Other than that, it’s not harmful for anti-freeze to get into the heater. Either way, be sure to drain the water heater tank first.
Add RV Antifreeze to the Plumbing System
Now let’s talk about how to get RV antifreeze into plumbing lines.
We don’t like getting antifreeze into the freshwater tank because it can be a real pain to flush it all out in the spring. If you want to know how to get antifreeze into RV lines and the rest plumbing system without getting it into the fresh water tank — it does require that your RV be equipped with a winterizing kit. If your RV didn’t come with one, it can usually be installed later.
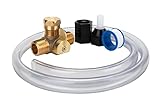
- Use the RV water pump to fill the RV pipes with antifreeze.Fit Type: Universal Fit
- Comes complete with brass valve, siphon hose, Teflon tape and pump adapters (pump not included)
If you have a winterizing kit, flip the valves to the “winterize” position and add your antifreeze now.
If no winterizing kit is available, pour antifreeze into the inlet of your (mostly empty) freshwater tank. The amount you’ll use depends on the size of your RV and its plumbing system.
Once antifreeze is fed into the winterizing kit (or in the freshwater tank), you’ll need to distribute that RV antifreeze throughout the plumbing system, (with the exception of hot water tanks with bypass valves as noted above).
Turn On Your RV Water Pump
Turn on your water pump to begin the process of distributing the antifreeze throughout your plumbing system. A rig equipped with a winterizing kit will draw antifreeze directly from the gallon anti-freeze containers through a hose and into the plumbing system.
A rig without a winterizing kit will draw the antifreeze into the pipes from the freshwater tank that’s been drained of water and had antifreeze added instead.
Run All Faucets One at a Time
Next, open each faucet throughout the RV, one at a time. Some rigs have one sink, some have two, and still others have several. This is why the amount of RV antifreeze you need partly depends on the size of the RV you have. Doing this draws the antifreeze into the water lines.
We suggest opening each faucet on “cold” until you see the pink antifreeze come out. Then switch to “hot” and run water until you see pink again. This makes sure that both hot and cold lines are protected from freezing. Once both the hot and cold sides of a particular faucet are winterized, move on to the next sink/faucet and repeat.
When the liquid running into your sinks is all pink, you know you’ve protected your water lines. Note that even those of us who blow our water lines out with compressed air need to pour some antifreeze directly into each sink drain to protect the P-trap drains. If you’re using only antifreeze (no compressed air), you should be fine without adding additional antifreeze into the drain, since you just ran it into the sink through both the hot and cold lines.
Run Your RV Shower
Next, you’ll want to run your shower until the pink RV antifreeze is flowing from the showerhead. Again, be sure to run up both the hot and cold sides of the plumbing system. Don’t forget your outside shower if you have one – both hot and cold water lines.
Flush the Toilet
Flush the toilet, drawing pink antifreeze through the water supply line and into the toilet bowl. Flush again, allowing some antifreeze to flow into the black tank. Pump (or pour) some additional antifreeze into the toilet without flushing, leaving some in the bottom of the bowl for the winter. Remember, you don’t need to fill the black tank to protect it, but you do want to protect the toilet valve from freezing temperatures.
Washing Machine and/or Dishwasher
If your rig is equipped with an onboard dishwasher, or a washing machine (or even “washer prep”), be sure to winterize them as well. For a dishwasher, follow the manufacturer’s winterizing instructions.
For a washing machine — with the water pump on (drawing antifreeze from either a gallon container of antifreeze via the winterizing kit, or from antifreeze in the freshwater tank) run it on the shortest rinse & spin cycle. That will protect both the plumbing and the pump inside the machine. Also, be sure to check your owner’s manual for any winterizing requirements specific to your make & model.
Pour Antifreeze Into the Shower Drain
Next, pour about a cup of RV antifreeze directly into the shower drain. As with the sink drains, this protects the P-trap from freezing and cracking. NOTE: If you’ve run a fair amount of pink liquid through the showerhead in step 8, above, you may already have plenty of antifreeze in the P trap, so no more may be needed.
Winterize Your City Water Inlet
Finally, you’ll want to protect your city water inlet from freezing. That’s the connection where water flows into your RV’s pressurized plumbing system. Start by turning off the water pump. Then, open a faucet anywhere in the RV to relieve the pressure from the rig’s plumbing system.
Go to the city water connection on the outside of your rig, and remove the little round screen that’s (usually) right inside the opening. That will reveal the check valve that prevents water from shooting out the opening when the water pump is in use.
You can then stick your little finger into the middle of your city water inlet to depress the spring in the check valve. This will release excess water out of the opening, which should quickly be followed by antifreeze. Be sure that pink antifreeze is coming from it so you’ll know it’s protected from freezing.
Although the amount of RV antifreeze needed to winterize an RV can vary considerably, the most important thing is to make sure the entire plumbing system of your RV is adequately protected from freezing in cold temperatures.
For an alternative way to winterize an RV, see our post on how to winterize an RV with an air compressor that’ll blow out the lines with compressed air rather than filling them with antifreeze.
If you’d like to see a visual guide to winterizing with antifreeze, check out the following video:
If you’d like to see the alternative to using antifreeze, check out our video showing how to winterize an RV with an air compressor:
Free RVing Tips, Tricks, Reviews & Giveaways
As 20-year full-timers, we share everything we’ve learned about RVing over the years. Join our online community to receive a wealth of great RVing knowledge delivered daily to your inbox.
Whether you’re a new RVer or a seasoned full-timer, you’ll love the wide range of RVing topics we cover. Don’t miss a single article or any of our famous Giveaways. Subscribe to our newsletter today!
Rex L
Monday 27th of November 2023
We sometimes make unplanned travel to colder climates. Can RV antifreeze be used to keep holding tanks from freezing on a temporary basis?
TheRVgeeks
Tuesday 28th of November 2023
Hi Rex. The issue with short trips to cold weather isn't that the TANKS will freeze, it's more of an issue for the plumbing that runs through your RV's basement & walls. In those locations, they can be exposed to colder temperatures and you risk them freezing. Unless your tanks are 100% full while in freezing temps, you won't have an issue with them (black & gray tanks generate some of their own heat with decomposing matter... and the sloshing while driving keeps things from freezing, too... just the way moving bodies of water like streams & rivers don't freeze).
But the plumbing (which is smaller and can be more exposed) can be more of an issue. People we know of who travel through regions of freezing (and below) temperatures on their way to warmer climates often leave their plumbing systems completely winterized (and use facilities at their overnight stops to take showers, etc) until they reach temps that stay above freezing.
So it depends how long you'll be in freezing temps. Driving through for the day and not planning to stop? No issue. Going to spend days at a time traveling through, and spending the night in, freezing or sub-freezing temps? You'll need to be sure you're using precautions (or running your furnace with the basement vent open to ensure heat reaches the plumbing).
Mark L
Saturday 25th of November 2023
Great article on winterizing RVs. You correctly note at the beginning of your article that propylene glycol-based antifreeze is the type of antifreeze that should be used. Then you offer an ethyl-alcohol based antifreeze (Prestone) as an acceptable product, which is incorrect. The ONLY potable-water safe antifreeze that should be used is one that contains only virgin propylene glycol (and no alcohol), which is typically sold in marine stores or online. Any RV/marine antifreeze that contains alcohol (label typically state the antifreeze contains alcohol and that the product is FLAMMABLE) should not be used. The alcohol attacks rubber and plastic parts of the water system exposed to the alcohol over the winter months. The alcohol evaporates from P-traps, toilet bowls, and other places where it is exposed to the atmosphere, leaving those places unprotected. Alcohol-based antifreeze will often leave an unpleasant taste in the water system that it intends to protect. The alcohol is also highly FLAMMABLE! Antifreeze that contains only virgin propylene glycol is more expensive than the alcohol-based antifreeze products, and that’s why the alcohol-based products so widely available at retail stores.
TheRVgeeks
Saturday 25th of November 2023
Hi Mark! Thanks very much for your comment. As you mentioned, we did indeed stress the importance of using only propylene glycol antifreeze, then included two links, one to the correct type, and one to the incorrect type. We normally include relevant Amazon links when drafting articles, and the alcohol-based antifreeze placeholder should have been replaced with the correct one, not included with it. We've deleted that second link. Thanks for catching that oversight, and for adding additional details about why this is so important.