
But how does RV plumbing work? How do you get running water in a house on wheels and, probably just as important, how do you get HOT running water?
In today’s post, we’re taking the mystery out of RV plumbing. We’ll identify and explain all the important parts, show you some plumbing-related videos, and tell you how it all works.
Understanding your RV plumbing system is important. So come along with us as we explore and explain the system that brings running water, hot showers, and flush toilets to the road!
Running hot and cold water in a motorhome parked in the middle of the forest or the desert is pretty impressive! Today we’re taking a look at how it all works.
How Does RV Plumbing Work?
When you’re connected to a city water outlet, RV plumbing works similarly to standard home or apartment plumbing, except for where the water enters the RV and where it exits. Of course when you’re not hooked up, where does the water pressure come from?
When you use the water or flush the toilet in a sticks-and-bricks house, you don’t really have to think much about how the water gets into the house or where it goes, but the same isn’t true in an RV. When you live or travel in an RV, you need to tend to the water supply, and you’re also responsible for all of the wastewater.
Most RVs have a freshwater system that works in one of two ways.
The first option is by using the onboard water supply. Most rigs have a freshwater tank that’s used to store a finite amount of water for use on-demand, and when that tank is low or empty, you need to replenish the water supply. The fresh water storage tank allows you to have a supply of running water no matter where you’re parked.
How does the water get from the fresh water storage tank to the faucets, showers, and toilet when you’re off the grid? A 12V pump does the trick. (More on that later.)
The second option for most RV plumbing systems is to connect to a “city water” supply such as those at a campground or RV park. You’ll connect one end of a drinking-water-safe hose to the city water supply at your campsite and the other end to fresh water inlet connection on your RV.
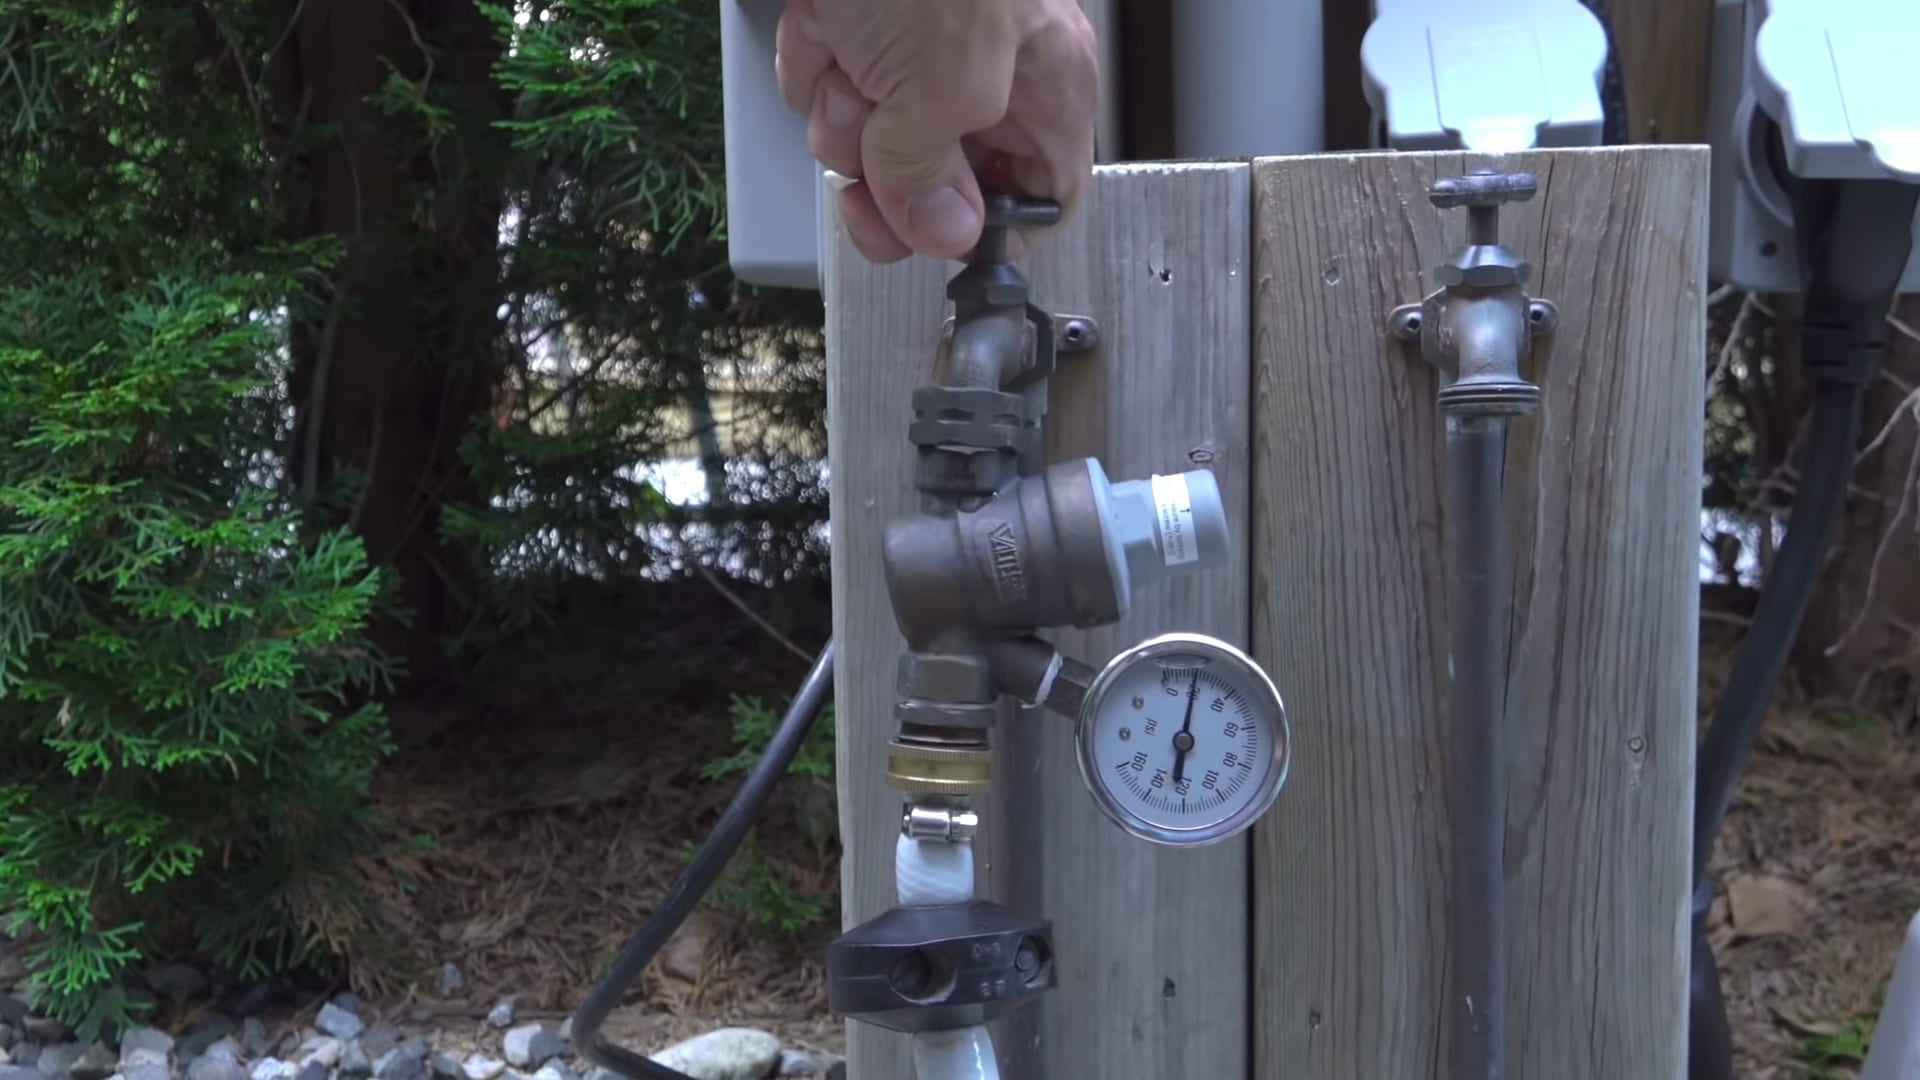
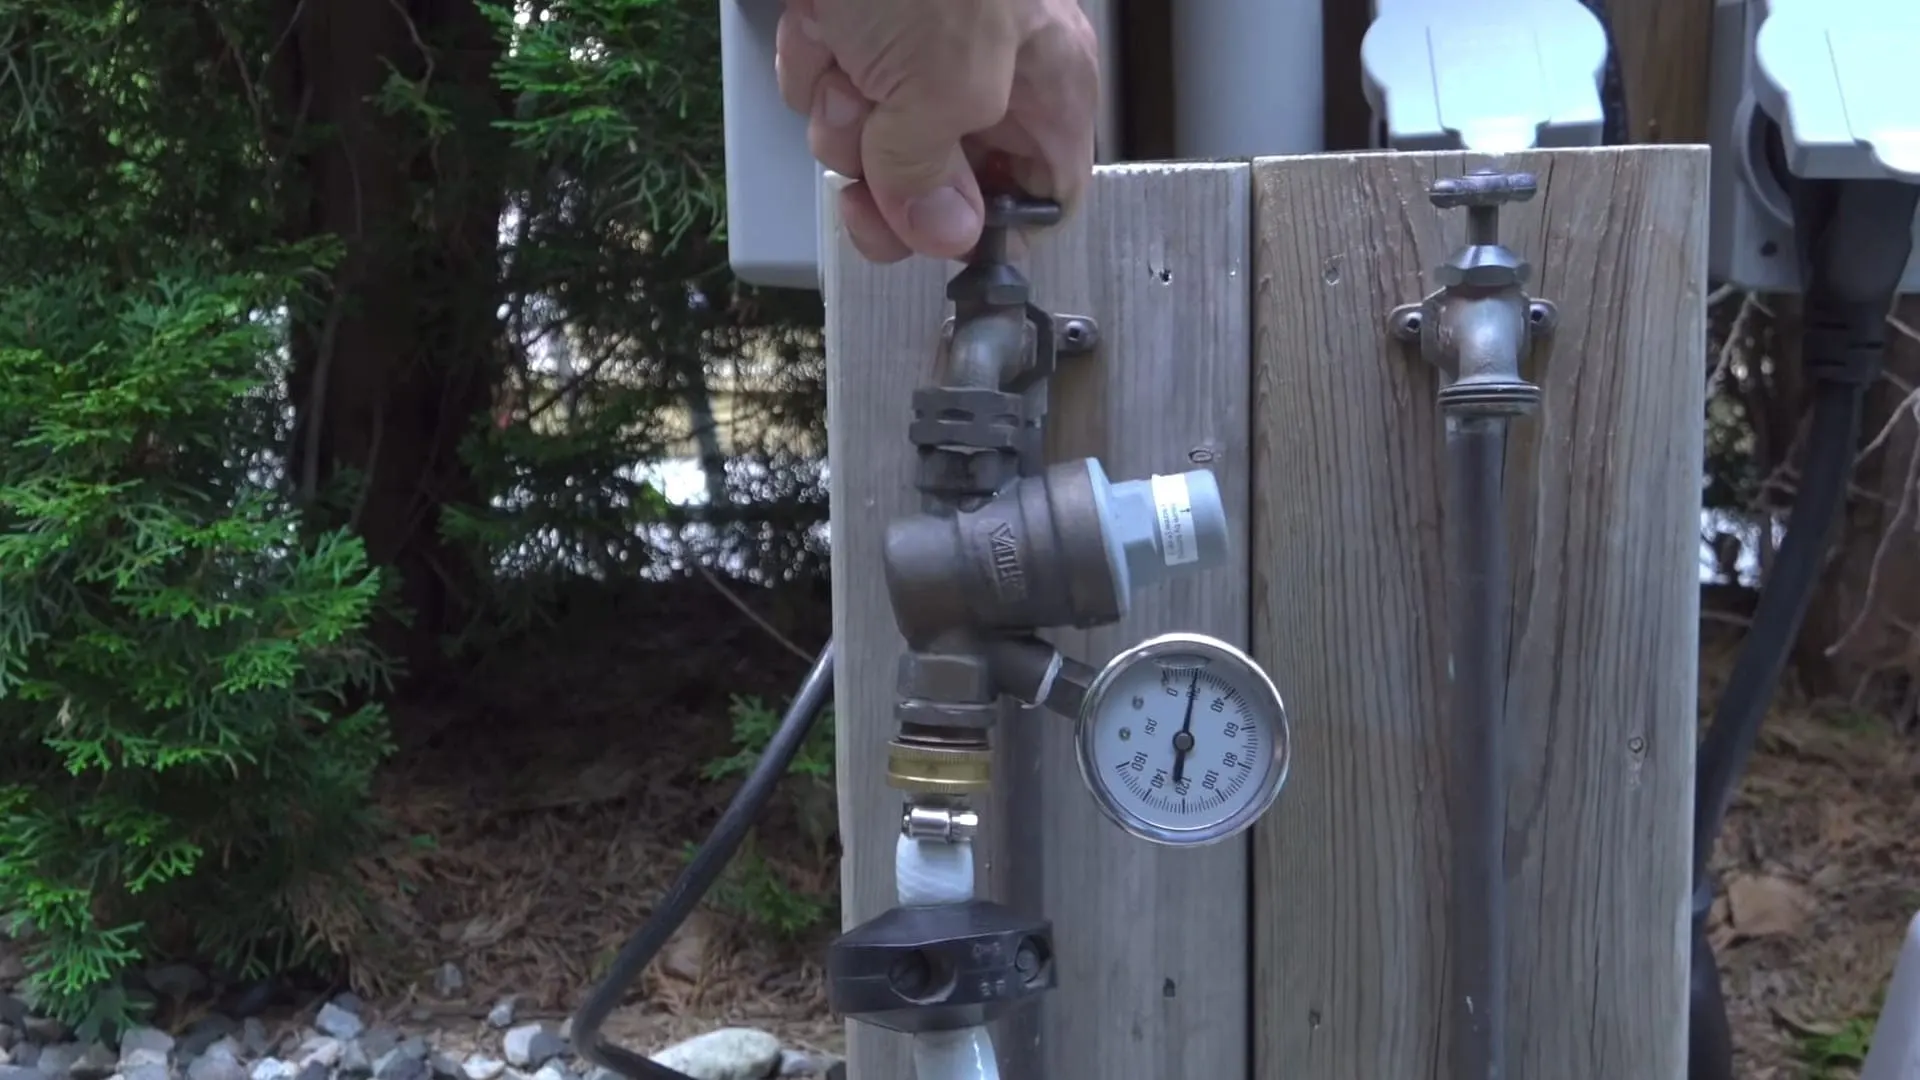
Here we’ve connected our RV hose to a city water connection at an RV park. We’re also using our favorite water pressure regulator to control the water pressure coming into our RV’s plumbing system.
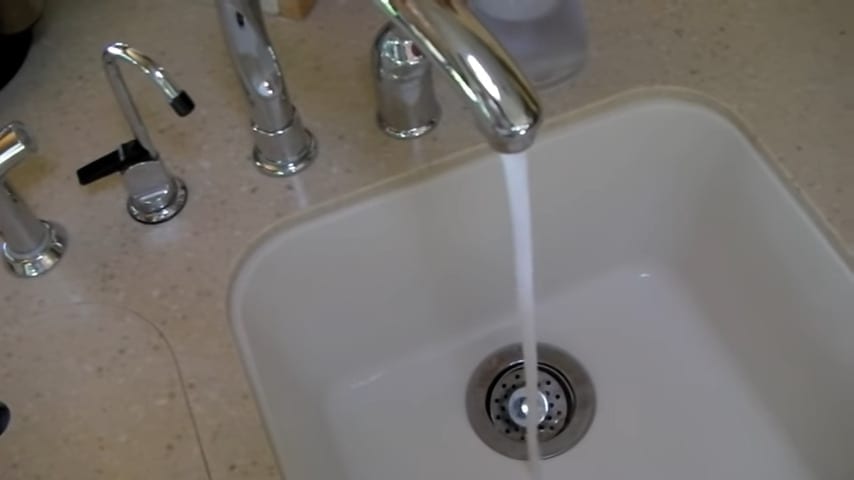
Once you turn on the valve on the spigot, water will pressurize your RV’s plumbing system, providing you with water on demand, but this time it will be entering your RV directly from the city water supply. It’s fed by the pressure in the park’s plumbing system, exactly the same as the water in a sticks & bricks house.
So, where does the water go once you’ve run it at a faucet, shower, or toilet? Well, your RV is equipped with wastewater storage tanks. So, water from your RV sinks and indoor shower will drain into the gray tank. Once there, it’s called “gray water,” and it needs to be disposed of eventually.


Most RVs have holding tanks that store gray and black water until it’s ready to be released into a sewer.
In most RVs, the toilet drains into a separate storage tank known as the “black tank” and is held there until you dispose of it by connecting one end of a sewer hose to the sewer outlet on your rig and the other end to the sewer inlet at the campsite or dump station.
Once you’re connected to a sewer inlet at a campsite or dump station, you can pull a lever to release the contents of your black tank into the sewer and then pull a separate lever to release the contents of your gray tank into the sewer (the gray water rinses out the black water.)
How About Hot Water? Does My RV Plumbing Provide That?
A water heater is also part of the RV plumbing system in most RVs. 6-gallon and 10-gallon RV water heaters are most common, but some are as small as 4 gallons, or as large as 16 gallons. The most common RV water heaters are made by either Atwood or Suburban.
The water is heated either by propane, electricity (or a combination thereof) or by heat from the engine in some cases so that you can arrive at your next campsite with a tank full of hot water. Generally, there’s a water heater switch inside the RV (or two… one for propane and one for electric).
You’ll need to turn the switch on and then allow a bit of time for the water to be heated to temperature (ours 12-gallon Suburban unit heats a tank from cold to fully hot in about 15-20 minutes when heating on propane… and about 45-60 minutes when using 120V AC power from a shore connection, depending on the temperature of the water in the tank).
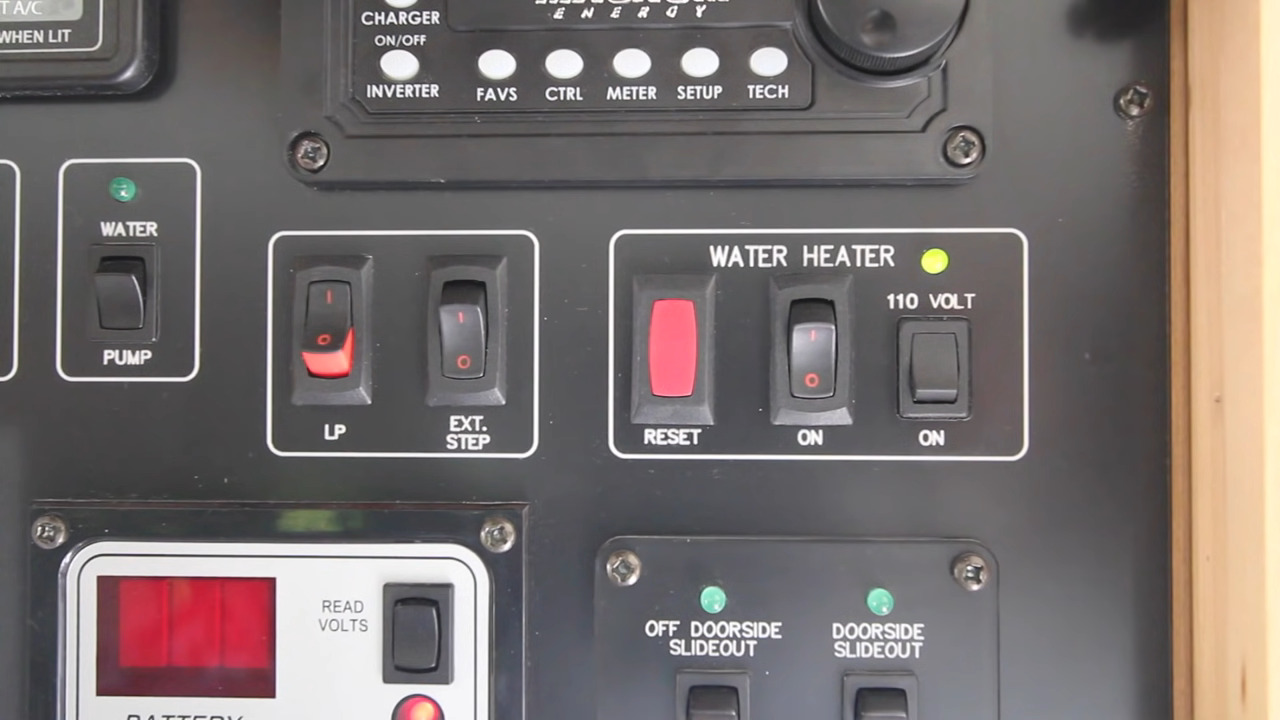
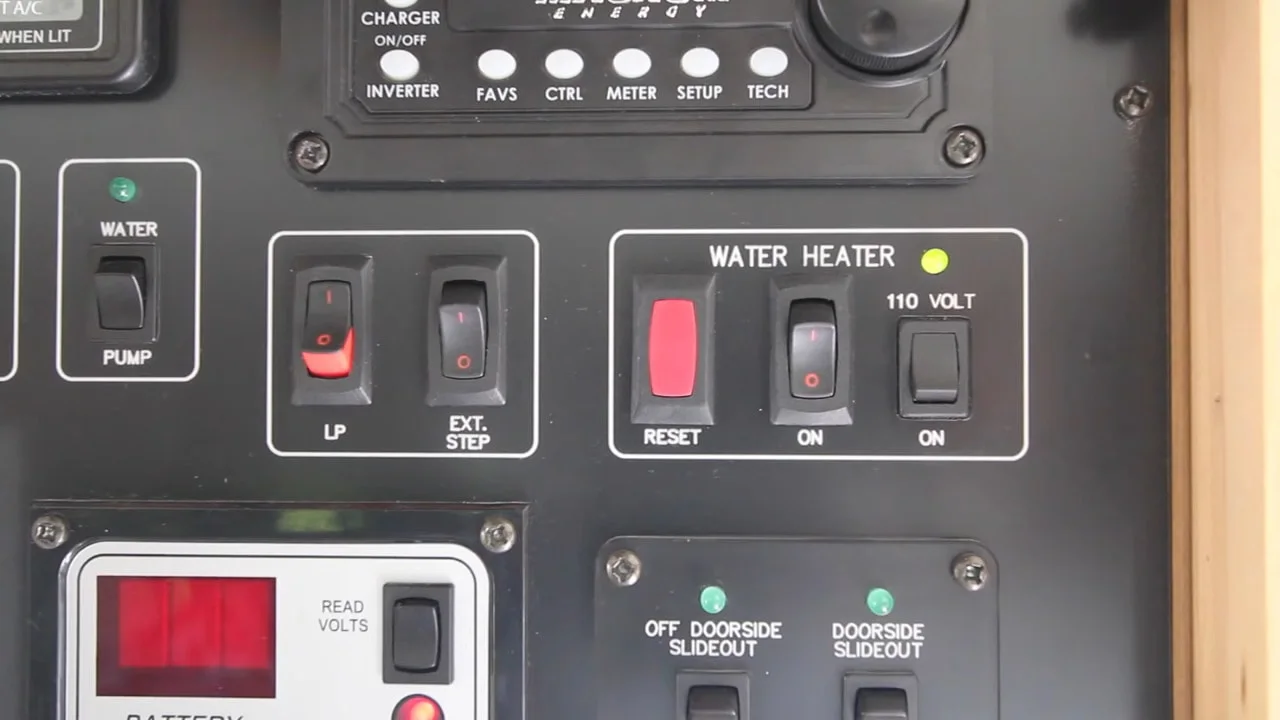
In most RVs, there’s a switch (or two) on a display panel that turns on the water heater.
And finally, there are tankless, on-demand water heaters that don’t use a storage tank at all. Instead, they use a heat exchanger, which allows for a continuous supply of on-demand hot water.
Tankless water heaters are the newest entrants into the RV market and aren’t as common yet, so we won’t cover these in more detail here, but some RVers choose to replace their standard water heater with a tankless unit.
Let’s take a look at some of the parts required to make an RV plumbing system work.
Important Parts of Your RV Plumbing System
Several parts come together to make an RV plumbing system work to deliver water for your comfort, convenience, and cleanliness. We’ll add a few of our videos to these descriptions to provide further information.
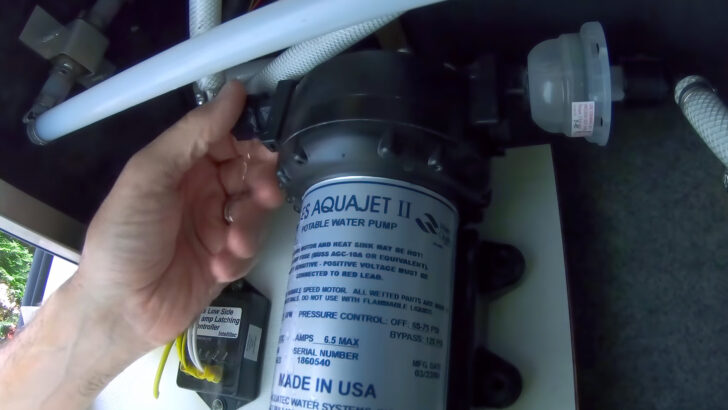
Water Pump
As we noted above, the water delivery from your freshwater tank to your faucets, showers, and toilets relies on a 12-volt water pump. The pump is turned on with a switch, which will trigger the pump to pressurize the RVs plumbing system. But the pump will only run again when you call for water by turning on a faucet or flushing the toilet. The pump then draws water from your tank through your RV plumbing system, delivering it to the faucet you turned on or into the toilet you flushed.
The water coming out of your freshwater tank is cold, of course, so one plumbing line runs that supply of cold water directly to the cold sides of your kitchen and bathroom faucets and your showers (some RVs have an inside shower and an outside shower). Another line runs a supply of water into the water heater’s tank to be heated before it’s drawn to the hot water outlets of your sinks and shower(s).
Water pumps do have a lifespan and sometimes need to be replaced. But, unfortunately, they can also be damaged by cold (below freezing) if an RV isn’t properly winterized (and so can your entire RV plumbing system).
This post explains how to know if your water pump needs to be replaced and offers five of the best water pumps to choose from when shopping for a replacement.
The following post and video include our step-by-step guide to replacing an RV water pump.
Water Heater
Again, your RV most likely has either an Atwood or a Suburban water heater. While you could have a different type, most RVs have water heaters made from these two manufacturers.
Your RV water heater uses a heating element to heat the water in the unit. If you have a Suburban water heater, the tank is made from enameled steel, so you’ll also have an anode rod that extends into your water heater. The anode rod exists to reduce corrosion inside the tank. The anode, usually made of magnesium, is designed to be a sacrificial rod so that the corrosion will eat away at the rod instead of the tank itself.
Atwood brand water heaters use an aluminum tank, which is resistant to corrosion from the minerals in the water. So there isn’t an anode rod to be monitored or replaced in an Atwood heater.
You can buy replacement Suburban RV Water Heater Anode Rods on Amazon.
We inspect and usually replace our anode rod every year. For a little more than $20, they provide cheap insurance to extend the life of your water heater significantly (which is a whole lot cheaper than the cost of replacing the water heater!).
If you plan on storing your RV for a fairly significant period of time, you’ll want to drain the water heater before storing the rig.
If you’re not planning to use it during the winter, you’ll also want to drain the tank when you winterize your RV’s plumbing system. Water left in an RV water heater can freeze and permanently damage the unit, which will then need to be replaced. But don’t worry about draining it completely… the drain hole is usually not all the way at the bottom, which means some water will be left behind. That’s fine… because there’s plenty of room for the water to expand as it freezes. So it won’t do any damage.
Many RVs have a valve that allows you to bypass the water heater when you winterize the plumbing system. However, it’s important to remember to open the bypass valve back up when you de-winterize in the spring and allow fresh water to fill the empty tank again… because heating an empty water heater can cause irreparable damage to the heating element.
If you have a 120V AC-powered water heater, you can leave the main power switch (mounted on the water heater itself) on for the duration of your camping trip and use the inside switch to turn the water heater on/off. But you’ll want to remember to turn that outside switch off again when the RV is stored, and the water heater is drained. That way, you won’t need to worry about accidentally turning the water heater on when it’s empty, which, again, will damage the heating element.
Here’s a hot tip for you: If your hot water is coming out lukewarm at your shower or faucets and your RV has an outside shower, run out and make sure that the hot and cold faucets of your outside shower are both OFF. If you leave them on (turning the water flow off only at the showerhead itself), the hot and cold water can (and likely will) mix, preventing the fully heated water from reaching your faucets and shower inside. (Don’t ask us how we know.)
For instructions on how to use a flush wand to clean your water heater, and to watch us inspect the inside of our water heater using a borescope (and finding a surprise), have a look at this video:
Fixtures
RV plumbing fixtures are very similar to house plumbing fixtures. You’ve got various faucets, showerheads and accessories, sink and drain covers, and fittings to connect fixtures to pipes.
If you have to (or want to) replace any plumbing fixtures in your RV, simply measure, when necessary, to make sure you’re buying the appropriately sized replacement fixture (for faucets, you want to check the distance between the hot & cold valves… bathroom sink fixtures are typically 4-inches on center, while kitchen faucets are often 8-inch). You may also need to buy adapters to convert the size/style of attachments used in your RV to the type used for household faucets. When in doubt, ask in the plumbing section of a big box hardware store… we’re sure they’ll be able to help you.
TIP: take a couple of photos of the connections on your existing RV faucet before going to the hardware/plumbing store to buy your new one… so you can come home with the correct adapters (if needed). OR, if you can, remove the old faucet from the RV and bring it with you to the store, so they can see what connections you have, and you can be 100% certain to get the right adapters.
When replacing your showerhead, particularly if you’re avid boondockers like we are, consider opting for a low-flow showerhead with a pause feature. They’re very helpful in saving water, which lets you boondock for longer.
The showerhead that we use is this one:

- INTENSELY POWERFUL. Immerse yourself in the steady, intensely powerful full body spray with forceful streams of water to satisfy all of your showering...
- 2 CONVENIENT SPRAY OPTIONS. Shower head spray options include full body spray and pause
Toilet Plumbing/Black Water Tank
For many new RVers, toilet plumbing and the black water tank are two of the most intimidating features of an RV. That’s understandable for sure, but the system is really pretty simple.
Most RV toilets are plumbed to take in water for flushing from the freshwater system and then empty directly into a tank (most often installed directly below the toilet) referred to as the “black tank” or the “wastewater tank.”
That tank is later emptied into the sewer inlet at a full hookup campsite or a dump station located at a campground, RV park, truck stop, rest area, etc. The tank is emptied using a sewer hose: attach one end to the RV and the other to the sewer inlet. Once you pull the black tank valve, the tank’s contents flow through the sewer hose and down into the drain.
Simply stated, you use and flush the toilet as you normally would (try to avoid using excessive amounts of toilet paper, though), and the waste empties into the black water holding tank. Later, it’s released into a sewer through your sewer hose.
We’ll share with you some of our favorite products that make the entire process of sewer dumping go smoothly. (Sorry – no pun intended.)
In our “5 Best Sewer Hoses for Mess-Free Tank Dumping” post, we run through the features to look for in a sewer hose… and, of course, provide a list of the five best ones to choose from.
NOTE: We left out of that listing the sewer hose we’ve been using for the past 20 years. But that’s because we have a situation with the way our hose gets stored in a dedicated compartment installed in the side of our RV… it prevents us from using the higher-end hoses that often have their connection ends permanently built-in. That doesn’t work for our storage slot, so we use a simple Camco 20′ Heavy-Duty Sewer hose.
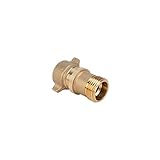
There’s also an elbow with a 4-in-1 adapter that allows you to secure your sewer hose to just about any campsite sewer hookup or dump station:
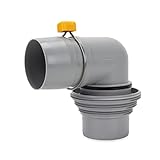
- Connects RV sewer hose to dump station
- Patented spin-lock rings for effortless hose connection
This clear sewer hose adapter allows you to see when the water is running clear, indicating that your black tank is “clean” and dumping has been successfully accomplished:
- Clear RV Sewer Hose Adapter: See-through hose adapter allows you to see when your RV sewer system is clean
- Compatibility: Fits 3-inch diameter RV sewer hoses
And these are the most important element of every sewer dumping event!

- PROTECTIVE PVC COATING: Liquid and chemical resistant gloves. Effective against adhesives, detergents, and diluted bases and acids. Gauntlet cuff...
- EXTRA DURABLE: Resistant to cuts, abrasions, punctures and heat; stays flexible even at lower temperatures
Many people wonder about odors that might plague the RV from the toilet. It isn’t usually a problem unless you have a venting issue or your tank is not properly cleaned. One way to manage or eliminate potential odors is to use a product like Happy Campers. We’ve been using it for years, and as the name implies, we’re happy campers:

- Powerful Odor Control: Say goodbye to unpleasant odors with our powerful formula that neutralizes and eliminates foul smells, leaving your RV smelling...
- Effective Waste Digestion: Happy Campers breaks down waste and toilet paper quickly and efficiently, preventing clogs and ensuring smooth tank...
And finally, this product is helpful to the tank cleaning process if your RV doesn’t have a built-in black tank flush system. It attaches to your hose, you insert it down the open toilet valve, and it helps to flush waste from the sides of the black tank. Which can be important for keeping the tank sensors clean and the tank free from waste build-up:
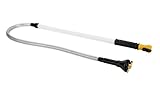
- POWERFUL ROTARY CLEANING ACTION: Enjoy superior cleaning power with this RV tank cleaner. Its powerful rotary cleaning action shifts even the toughest...
- FLEXIBLE REACH: The black tank rinser has a 34" flexible section that is perfect for hard-to-reach RV tanks. Get into those offset basement tanks with...
We hope all of this helps to take some of the mystery and intimidation out of the toilet/black water system of your RV’s plumbing system. Once you’ve dumped and cleaned once or twice, you’ll become more comfortable with the process. Pleasant? Ummm…no. Manageable? Absolutely! You’ve got this.
Gray Water Tank
In most RVs, the gray water tank of the RV plumbing system is the tank into which the water from the sinks and shower drain. We say “most” RVs because there are a few exceptions.
For example, the discontinued but still very much on-the-road Winnebago Rialta has a plumbing system in which the shower drains into the black tank (Yikes! Don’t let your black tank overflow while you’re showering!). And in some other RVs, the sink located in the same room as the toilet MAY drain into the black tank instead of the gray, providing additional water to keep the right ratio of solids-to-liquid in the black tank (and, probably, as a cost-saving measure for them when running the plumbing).
But in most RV’s, everything other than the toilet drains into the gray tank.
Generally, you’ll empty your gray tank when you dump your black tank. However, best practice demands that you empty the black tank first (by opening the black tank’s gate valve). Once the black tank is empty, you’ll close the black valve and open your gray tank’s gate valve to empty the gray tank… which will also flush your sewer hose with gray water.
In our post “What is an RV Gray Water Tank?” we answer all your questions about RV gray tanks.
And in this post on gray tank sensor cleaning, we show you how to keep your gray tank sufficiently clean while also keeping your gray tank sensor clean and working properly.
If you’re wondering whether you should keep your gray tank’s gate valve open or closed when you’re connected to a sewer inlet at a campground, check out this post, and we’ll answer that question and more.
SO what happens when you need a really deep tank cleaning?! You can look in on the colonoscopy performed on our holding tanks in this video:
Water Pressure Regulator
Many people ask if they really need a water pressure regulator. The answer is a resounding YES if you ever connect your RV to a city water system.
Our post Does my RV Need a Water Pressure Regulator explains the importance of this item in detail, but suffice it to say that your RV plumbing system is not created to endure the kind of pressure city water systems can send out (most RV manufacturers recommend never exceeding between 40-50 psi). If excess water pressure enters your RV’s plumbing system, it can cause tremendous (and expensive) damage.
A water pressure regulator is cheap, and there’s no excuse not to carry (and USE) one. If you don’t have one, get one today. This one is lead-free, cheap, light and easy to carry, and perfectly sufficient to do the job:
- PROTECTS RV/MARINE PLUMBING: Keep your RV/marine plumbing safe with this brass Camco water pressure regulator. Safeguard against high-pressure city...
- AUTOMATIC PIPE BURST PROTECTION: Ensure your pipes are safe using the built-in PSI Guard, preset at 40-50 PSI for automatic burst protection. (Maximum...
If you want to spend a little more money, you can spring for the one we use, which is adjustable and includes a built-in gauge:
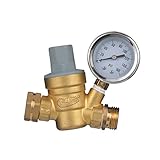
- WATER REGULATOR: Versatile water regulator is compatible with standard campers, RV's, trailers, and more
- IDEAL PRESSURE: Regulates water pressure to your preference with pressure gauge
Get the plain one, get the fancy one, but get a water pressure regulator if you don’t have one.
Can You Replace Your RV Plumbing Fixtures?
You can absolutely replace your RV plumbing fixtures. You can even replace your RV plumbing fixtures with home plumbing fixtures in many cases.
For example, many people like to replace their RV kitchen faucet with one that has a higher arc to it, allowing more room under the faucet for washing pots and pans, etc.
Let’s face it, RV manufacturers don’t have a great reputation for choosing the highest-quality components (they do want to keep the purchase prices reasonable), so sometimes RV plumbing fixtures break over time and distance traveled. Luckily, they’re not difficult to replace whenever necessary… or just for aesthetic reasons.
Our post on replacing an RV faucet will give you all the information you need for that DIY project, plus our video to follow step by step.
How Can You Access Your RV Plumbing?
The answer depends on your RV, of course, but most RV’s offer some level of access to their plumbing. Some plumbing may be accessible from outside the RV in a bay, and some may be accessible on the inside (under sinks, for example). We’ve seen some Class B RVs with plumbing that’s accessible under the benches of the kitchen booth dinette or even under the beds.
But the bottom line is that you can usually access your RV’s plumbing system. Check your RV owner’s manual for details related to your particular RV (some offer plumbing diagrams that will give you an idea of where to look).
And if you’d like some tips on diagnosing and repairing plumbing leaks, check us out in this video:
Need to fix a dripping shower? No problem!
Conclusion
We know that this was a long post, but it’s an important one. The plumbing system in an RV is essential to your comfort and your ability to live in your rig for days, weeks, years, or even decades like us. It’s also more simple to work with than you might imagine.
We hope this post provides information that takes the mystery out of your RV plumbing system and that it may be helpful to keep it handy as a reference.
Geek Out with Us Every Week
Join our newsletter to learn about all things RV-related. Every week we offer free tips, tricks, product reviews, and more to our online community of RVers. So, whether this is your first time on the road or you’re a seasoned expert, we’d love for you to geek out with us!
Kathy
Thursday 23rd of February 2023
When I turn on my faucet a small amount of water comes out but then it stops! It is hooked up to city water. What is the problem?
TheRVgeeks
Thursday 23rd of February 2023
Sorry to hear that, Kathy. It could be a couple of things, but the most likely (and easiest to check) is if the aerator built into the faucet is clogged. Aerators usually screw right out (if it's stuck, try using a piece of no-skid or other rubbery material to improve your grip). We'd bet you'll find a lot of crud blocking it. Try turning the faucet on briefly while it's out and see if there's good flow. If so... that's your problem.
While you have the aerator out, we'd also suggest that you soak it in white vinegar for a couple of hours to help remove any mineral scale that's clogging it up.
Let us know if that works for you!
Danny padilla
Tuesday 13th of December 2022
Thank you.
Rose
Wednesday 28th of September 2022
Hi, I am new to the RV life and just flushed my grey and black water tanks yesterday. I’m having trouble finding a link for how your rv dumping tubes are supposed to be setup and have capped the end of a short 2’ tube leading to the tanks instead of having an open ended 20’ tube dangling out of the hole in the floor of the compartment. Today there seems to be a slight odor and I am wondering if it is due to capping the tube leading to the tanks. Any advice would be much appreciated. RV lessons should be mandatory lol
Rose
Thursday 29th of September 2022
@TheRVgeeks, thanks for the reply! I’ll check out the link. What I did was replace all the old dump tubes with a new 2’ tube to save room and mess in the small compartment. In doing this, I put a cap on the end of the 2’ tube that is attached to the tanks. I am thinking maybe that pushes gasses back into the tanks and may have limited their ventilation process? Are you supposed to leave the tanks plumbing uncapped for ventilation or does it matter at all?
(When I need to dump the tanks I just connect a longer tube and my flush attachment to the short 2’ tube.)
I may be overthinking it. I was just chasing down the odor. I put a bit of dish soap down the kitchen sink and ran water also. So I am not sure if that fixed the odor or if uncapping the exit tube did it. Haha! Rv life is fun!
TheRVgeeks
Wednesday 28th of September 2022
Hi Rose! Welcome to the wonderful world of RVing (and the less-than-wonderful part of it that involves holding tanks, waste, and dumping! LOL!)). Not sure we understand your description of using a short 2’ tube… but it doesn’t SOUND like that would be the source of a new odor (although undoing it and waiting a while could be the tell).
We’ve covered a number of topic relating to fresh & waste water management, odors, and other things… so it may be best to take a look at that section of our website as a start: https://www.thervgeeks.com/?_category=water-and-sewer-maintenance
Hope that helps get you started!
Carol Robinson
Wednesday 29th of June 2022
Loosing water out of fresh water tank!
TheRVgeeks
Friday 1st of July 2022
Uh oh, Carol. Have you been able to locate WHERE on the tank you're losing water from? Could be a fitting that's come loose somewhere.