
We’ve always been pretty obsessive about keeping our motorhome neat and tidy, and we’ve also posted on various aspects of RV AC maintenance. But how do you clean RV air ducts to keep your rig’s air quality clean and healthy? That’s what we’re covering in today’s post.
To be clear, we’re not talking about just cleaning out the air conditioning vents. We’re talking about the ducts and the ductwork that distribute the air throughout the RV. Routine cleaning of RV air conditioning ducts helps maintain a comfortable, healthy living space and ensures optimal air quality in your rig.
This is an RV maintenance task that you’ll want to tackle at least once a year. More frequent cleaning may be needed if you notice a decline in the air quality in your rig or in your A/C system’s performance. Cleaning your RV air ducts can help those with allergies by removing dust, pollen, and other allergens. It can also prevent health issues by removing or minimizing any mold and mildew in your air ducts.
-
1)
How Do You Clean RV Air Ducts?
- 1.1) Gather Required Materials
- 1.2) Turn Off the RV’s Power
- 1.3) Access the Air Conditioning Ducts
- 1.4) Seal Off Duct Openings
- 1.5) Remove and Clean Air Filters
- 1.6) Vacuum the Ducts
- 1.7) Use a Plumber’s Snake for Thorough Cleaning
- 1.8) Wipe Down Duct Surfaces
- 1.9) Clean Vent Covers and Registers
- 1.10) Reassemble and Restore Power
- 2) Free RVing Tips, Tricks, Reviews & Giveaways
How Do You Clean RV Air Ducts?
Before we list the steps for how to clean air ducts in an RV, a couple of notes:
First, be aware that there may be two different sets of ducts in your RV. One set in the ceiling for the air conditioning (which can also supply heat if the A/C unit includes a heat pump or has a heat strip installed). Another set of ducts, usually on the floor, supply hot air from the furnace. If your rig has two sets of ducts, you want to make sure to clean both.
A second cautionary note: Unlike a sticks-and-bricks house that has galvanized steel and/or aluminum ducts, RV ducts are often made of closed-cell foam and/or insulated plastic tubing which is more flexible for the manufacturer to route through the framework, walls, and floors of the rig. So, if you choose to use a plumbing snake, you need to be careful not to push it too hard because you could end up puncturing your ductwork.
Here are the steps for how to clean the air ducts in an RV:
Gather Required Materials
To clean your RV’s air ducts, you’ll likely need most or all of the following items (depending on your RV’s A/C configuration):
- Screwdriver
- Flashlight
- Vacuum cleaner with a hose attachment
- Non-toxic cleaning solution (a mix of vinegar & water works well)
- Replacement air filters (if needed)
- Mask and safety glasses
- Disposable nitrile gloves
- Painter’s tape
- Microfiber cloths
- Plumber’s snake/auger

- Advanced PaintBlock Technology: FROGTAPE Multi-Surface Painter's Tape is equipped with innovative PaintBlock Technology, which forms a micro-barrier...
- Versatile Application: This painter's tape is designed for use on multiple surfaces, including painted walls, trim, woodwork, glass, metal, and more.

- Plush, super-soft microfiber cloths, ideal for cleaning tasks in the home, garage, office, and more
- Constructed with 110,000 fibers per square inch, allowing you to clean with or without chemicals or detergents

- ★[25-Ft of Heavy-Duty Steel Cable]: Flexible spring is free to extend to 25ft, can easily solve deep pipe blockage problems. It requires no...
- ★[Easy Operation and Storage] The flexible spring can be bent more than 90 degrees without breaking or kinking, which enables you to remove the sink...
Turn Off the RV’s Power
Before starting the cleaning process, turn off the thermostat and shut down your air conditioning system. Disconnect the RV from any external power sources and turn off the RV’s power to avoid any accidental start-up of the ventilation system.
Access the Air Conditioning Ducts
Identify and access all of the ductwork throughout your RV. In many rigs, the ducts are accessible through the ceiling vents or by removing the interior paneling near the air conditioning unit. Again, your RV may have two sets of ducts. Use a screwdriver to carefully remove any panels blocking access to the ducts. If the panels are dusty, wipe them down with your vinegar & water solution or rinse them off.
Use this opportunity to carefully inspect all ducts and seals using a flashlight.
Seal Off Duct Openings
To prevent dust, mold, and any dislodged debris from spreading throughout the RV, seal off all duct openings (except one*) using painter’s tape. This will create a barrier to ensure that debris is captured during the cleaning process. Unlike duct tape, painter’s/Frog tape can be removed easily, won’t leave a gummy residue, and can either be used alone or with some plastic/cling wrap. Just as long as the openings are covered.
* The “one” duct you won’t be covering with tape should be the main “chill grill” under the roof A/C unit. That’s where you’ll need access to begin cleaning. If you have fully-ducted A/C, like we do, then choose one duct as your starting point and block off all the others. As long as you cover all ducts except the one you’re cleaning from, you’ll minimize the amount of loose debris that gets into the RV.
Remove and Clean Air Filters
If your RV air conditioning system has filters, remove them and clean or replace them as needed. Cleanable filters can be rinsed with water and left to air dry as you continue your duct-cleaning project. Disposable filters should be replaced with new ones.

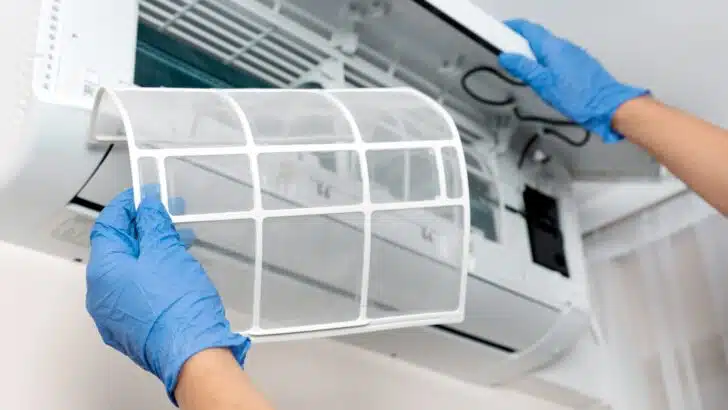
Remove and clean reusable AC filters or replace disposable ones.
Vacuum the Ducts
Using a vacuum cleaner with a hose attachment, carefully vacuum the interior of the air ducts. Pay close attention to corners and bends where dust tends to accumulate. A soft-bristle brush attachment can be used if your vacuum has one of the appropriate size.
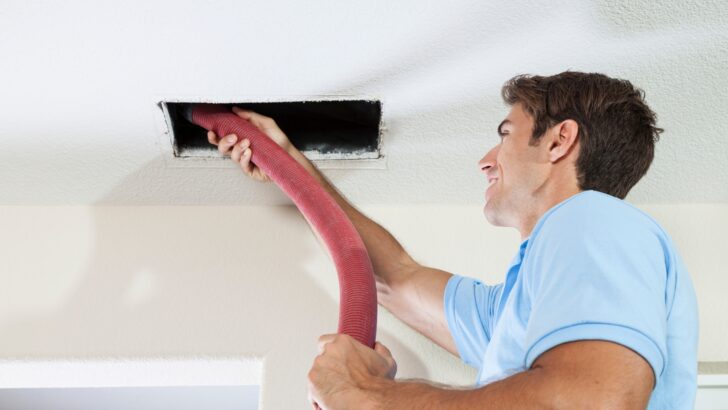

Carefully vacuum all ducts to remove dust and debris.
Use a Plumber’s Snake for Thorough Cleaning
To dislodge any stubborn debris, you may need to use the plumber’s snake. Wrap a rag around the end/tip of the snake and secure the rag in place using some painter’s tape. (It helps to lightly spray some of your vinegar & water solution onto the rag.) Gently feed the snake through the ducting system until you reach the other end. Again, be careful not to damage the ducts by being too aggressive.
Check the rag when you retract the snake, as it may need to be cleaned or replaced before being used for the next duct. That will also give you an idea of how dusty/dirty the ducts are. If the rag comes out filthy, clean/rinse it off and go back in for another pass.
Wipe Down Duct Surfaces
Dampen a microfiber cloth with your vinegar & water solution (or your choice of another non-toxic cleaner) and wipe down the interior surfaces of the air ducts as far as you can reach. This helps to remove any remaining dust, dirt, and debris, promoting a healthier air quality throughout your RV.


Spray some of your vinegar and water solution (or whatever cleaning solution you decide to use) on a microfiber cloth and thoroughly wipe down the vents.
Clean Vent Covers and Registers
Remove and clean the vent covers and registers separately. Soak them in warm, soapy water, and scrub gently with a soft brush if needed. Allow them to air dry completely before reinstalling.
Reassemble and Restore Power
Once you’ve completed the cleaning process, remove the tape and/or plastic wrap from the openings. Then, re-install any panels or components that were removed. Turn the power back on and be sure to test the air conditioning system to ensure that it’s working properly.
Regular cleaning of your RV air conditioning ducts helps maintain a healthy and comfortable living environment in your RV. To further improve cooling in a ducted RV A/C system, see our post on Kool RV.
Whether your RV has ducted A/C or not, you almost certainly have roof vents, often equipped with fans, which can accumulate a lot of dust. To see how we thoroughly clean our Fantastic fans, check out our video showing how we do it:
Free RVing Tips, Tricks, Reviews & Giveaways
As 20-year full-timers, we share everything we’ve learned about RVing over the years. Join our online community to receive a wealth of great RVing knowledge delivered daily to your inbox.
Whether you’re a new RVer or a seasoned full-timer, you’ll love the wide range of RVing topics we cover. Don’t miss a single article or any of our famous Giveaways. Subscribe to our newsletter today!
John
Sunday 3rd of December 2023
Where do I buy the red overalls in the main picture? Those are awesome!
John
Monday 4th of December 2023
Never mind. Found about 200 stock photos with the same guy doing hvac work all over the internet. Still cool overalls!